I'm rebuilding my dashboard and for the frist time trying to use dashboard links.
I would like to create a master dashboards with links to different rooms.
However the challenge hereby is that I would like my dashboard-link tiles to change color (say from grey to yellow or blue) whenever a device (e.g a light) is switched on "within" those tiles.
So that from the master dashboard I can easily see if there's still something switched on and in what room.
It's not possible right now but you can cheat by making the link dashboard transparent and out it on top of another template. Then use RM or Smart lighting to tie them together.
Or hopefully a CSS guru will chime in.
Ok so if I get this right: I put a virtual switch tile underneath the dashboardlink-tile and have it turn yellow whenever a device in that room is turned on.
But: this would make the tile turn yellow by just accessing the dashboard-link. Eventhough I might not turn on a device, right?!
The virtual device will be yellow as long as any device in the rule is ON regardless of you turn it on. Other automation turning it on will also make it yellow.
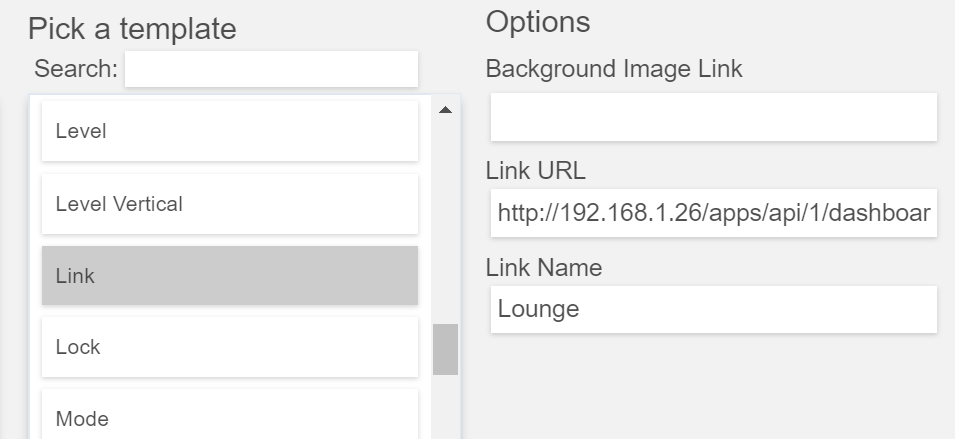
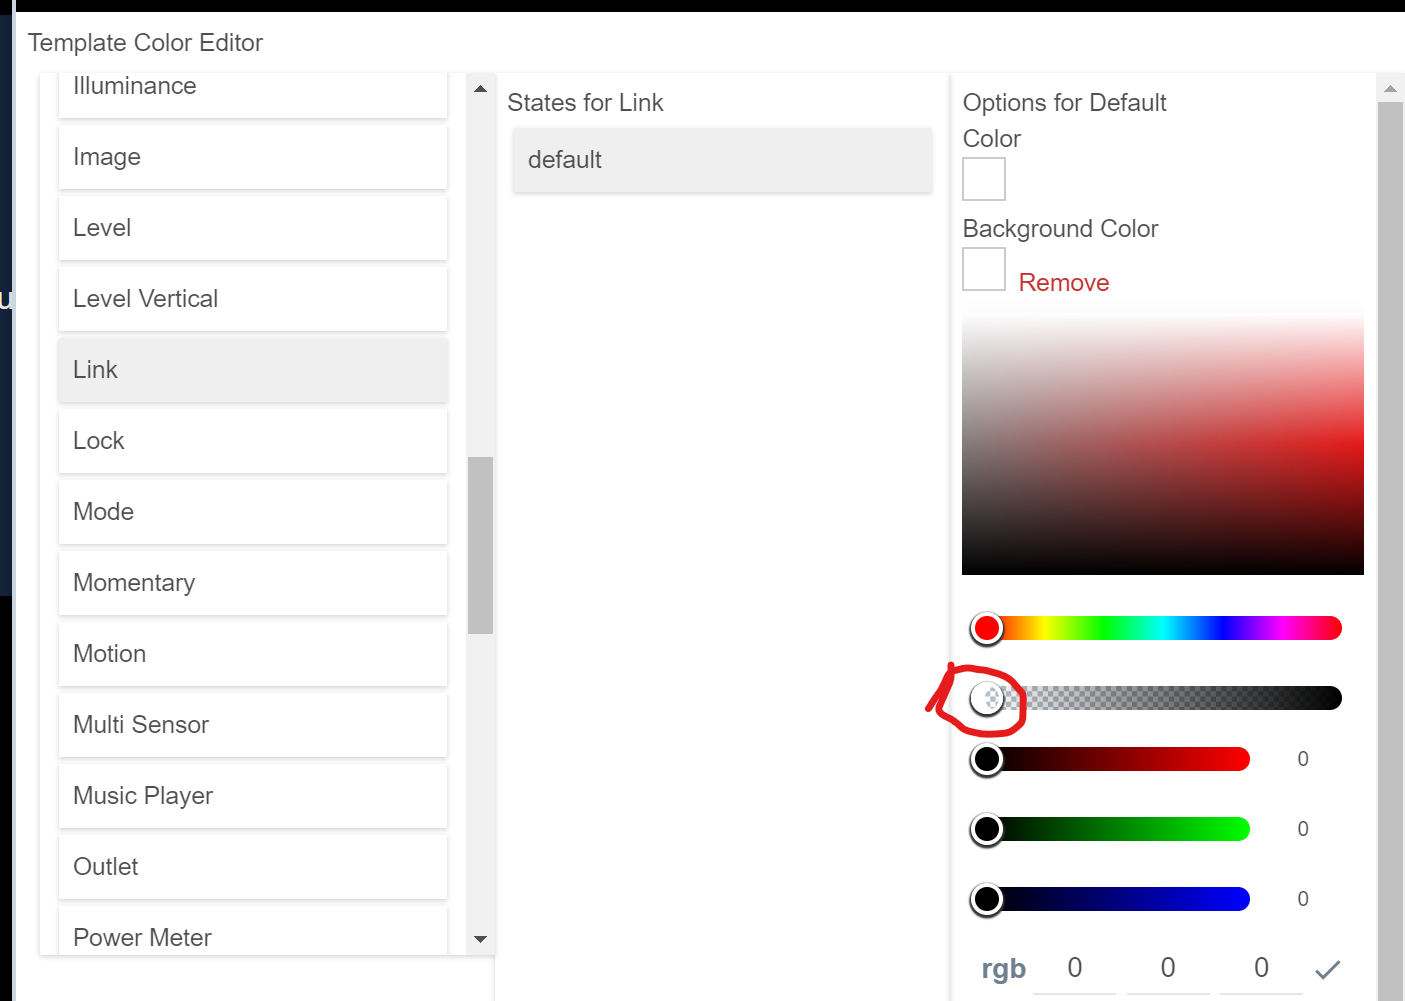
I'm sorry. I'm stuck again. How do I make the dashboard-link tile transparent? And how can I make all the text dissappear so that it doesn't overlay with the text of the tile underneath?
(this was the best way I found to make it meaningful, Dashboard links still displayed the name)
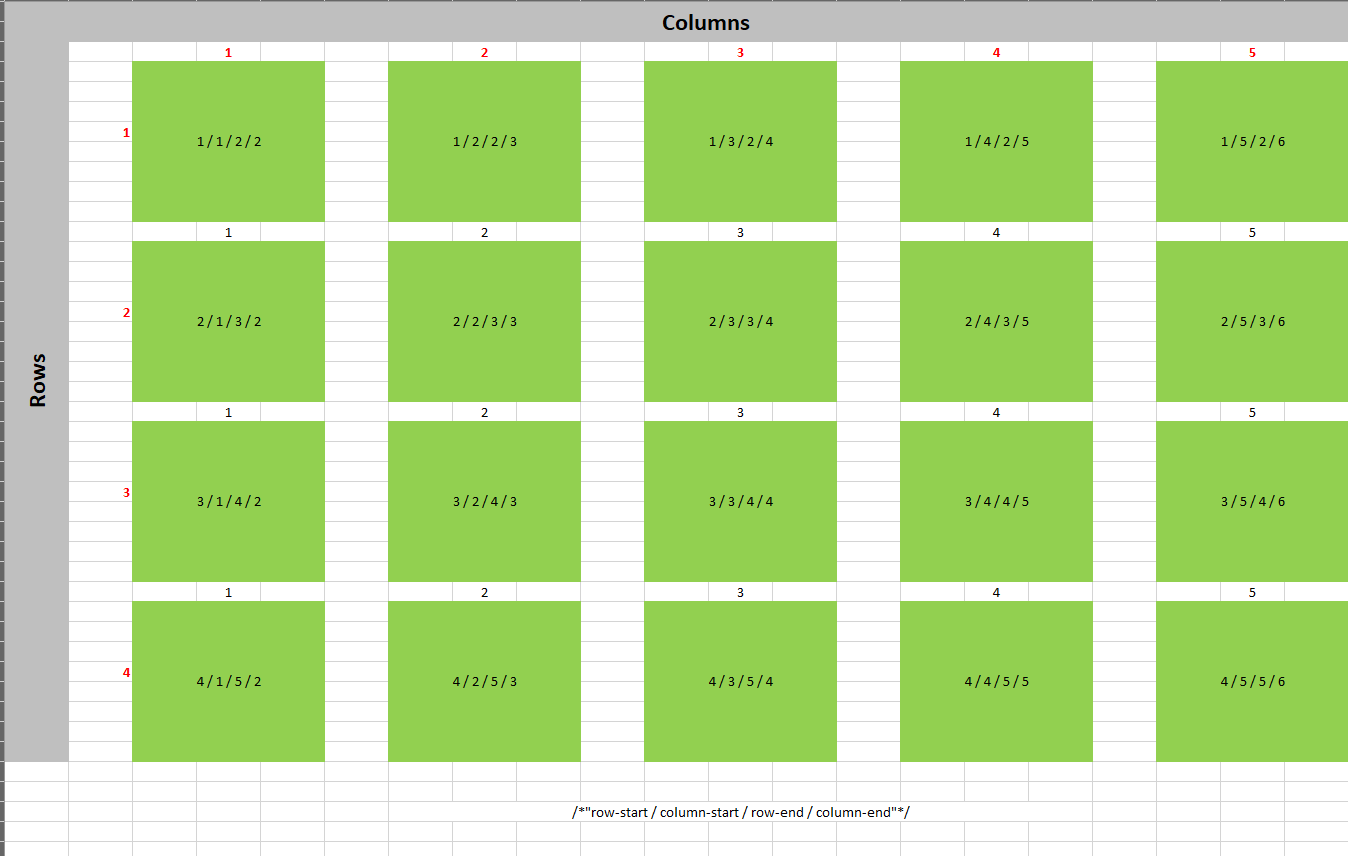
Edit the CSS, through Advanced->CSS and add this for each virtual switch you added (change the coordinates accordingly) This example is Tile 1 is row-start= 1, column start= 1 and has a width and hight of 2. So row end =3, and column end = 3.
Many thanks for this detailed answer! I'm very close to successfully following your tutorial. However I can't remove the device name at the bottom of the tile.
I really don't know anything about coding so I might be doing something wrong....I just copied your code into the empy css field, replaced lounge with the name of my virtual switch and changed the coordinates.
After that when I click save the name of the device is still there though.
Try making the first tile 2 width and 2 height, and make sure its at the top left hand side.
The name on the tile is coming from the "Link" name provided in the overlaid tile.
Ok. So if I do this with the first tile it really works. However the moment i put the tile in row 3 and change the code to 3/1/3/3 it doesn't work anymore.
The section of the numbers relate to the postion start and end of the tile.
It took me a while to get my head around it too. But take a look at below, hopefully this helps.
You adjust the location to suit, or add the section
I too had some trouble wrapping my head around this. Especially with the 2nd set for different size tiles and then I kept moving them. So add Row + Height and Column + Width for the end tile position. Sadly, this was not so obvious for me at first as I'm sure it was for most.
That's crazy I was looking for the same feature as I too have a switch to tell ME if all doors are closed.
I again am looking for deep nesting of dashboard links.
Also it would be nice to change it's template use.
For example in individual dashboards to make a switch a dashboard link .
And just as dAnderson requested a per tile config
 I'm liking your idea on this though