This will add the Libraries code only. You must also manually install the Apps code and Drivers code. Following that, you must install the User App. Adding the code to the hub just makes it available for install, it does not install the App.
If you are finding all of this too complicated, or having too many steps, then I will once again strongly encourage you to watch the video and learn the steps needed to install the community built Hubitat Package Manager. It is a completely safe app to install and it will help you easilly search for community built applications and drivers, including installing, removing, updating and expanding their capabilities. Very worthwhile to add it to your hub. You will wonder why you didn't do it sooner.
If you are struggling with the steps to install Hubitat Package Manager, please reach out in the Hubitat Packager Manager thread. There are fantastic community members here, who will be very willing to help you.
That's exactly what I'd expect if you did what your screen cap is showing. You're trying to install something ending in "git" and bundles don't use that.
I am going to ask here, just because this is my last hope, but I am basically certain I know the answer.
I have 2 window rolling shutters with 3 buttons, Up, Down, Stop. After repeated failed attempts to clone them in the original app, I have noticed that:
The frequency is correct
It reads the button code
It doesn't work
I decided to go through hubitat, because debugging, and 2 things struck me:
a) the code is HUGE. Is this normal? 300-600 bytes. I assume 600 is a 2-sender.
b) Every time I learn the code, it's different. I assumed some errors, but stacking it, it seems that certain bytes shift up every press, some shift down and there is a section where it does a bunch of zeroes and then what looks like a CRC/ECC of sorts.
This looks to me like a code hopping remote. Just to confirm, I am boned, right? Either I use the original remote or I wire the motor directly.
Sorry you’re having a rough go of it. I saw this with my ceiling fan when I first set it up. Some longer codes worked, while shorter did not. And the reverse was true with other buttons. Results were always slightly different, yet oddly two codes that were not identical could work equally well.
It took a bit of experimenting and confirming codes many times to find the results that were consistent with all the control I wanted from Hubitat.
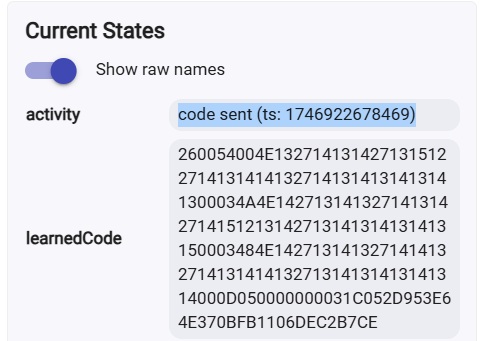
I successfully install the driver but i just have the temperature see the picture, I don't know what I did wrong
When I test the IR code and the RF code it works
The temp you are seeing is from the sensor on the cord of the RM 4 Pro. Its the only input you will see. All other functions are output to control your devices only, with no status feedback of any kind. That’s how IR and RF control works. You’re getting everything you can get from this type of control.
The README file for this app provides the basic information for capturing codes. The you can use Rule Machine or Button Controller to send codes as desired.
tomw shows an example of how that Send action is set up in Rule Machine up in post #171.
Great driver and app, @tomw. Thanks! I was able to teach it multiple remotes successfully, but I am having issues with the Smartwings RF remote and have a couple of questions.
For background, holding the remote button down during sweep always results in timeout. But if I hit the button quickly I can get it to detect the frequency. Dr. Google says the frequency should be 433.92Mhz but it is always detected in the 433.8* range. When I try to teach it a button, it always times out. The RM4 Pro is 8 feet away with clear line of sight.
Is the difference in frequency detected significant? If so, is there a way to set it manually with a debugging code or other hidden dev parameter?
If 433.8* is close enough, any tips on what might prevent button press detection? Any known issues with Smartwings remotes? I thought it might be able to detect the frequency with the button-mash method but failing on the codes because the freq is not quite right.
I, I'm new in Hubitat and my English is very bad, I really do not know what to do after learn my code, what data to enter in Name* (STRING) and Reps (NUMBER). I want to have a button in ActionTiles to control the On/Off of my amplifier, an other one for my Air conditioner and one for my RF RGB lights.
I don't use ActionTiles, but I'm guessing you can use virtual buttons and virtual switches with it.
In that case, you'll need to use Rule Machine to set what those virtual buttons or switches do.
In an earlier post, I linked to post #171 in this thread - that shows an example of how to set up a basic 'push' action in Rule Machine.
Post #50 (and #51 right after it) discuss how to set up sequences -- this feature can be useful depending on the complexity of the command you are transmitting.
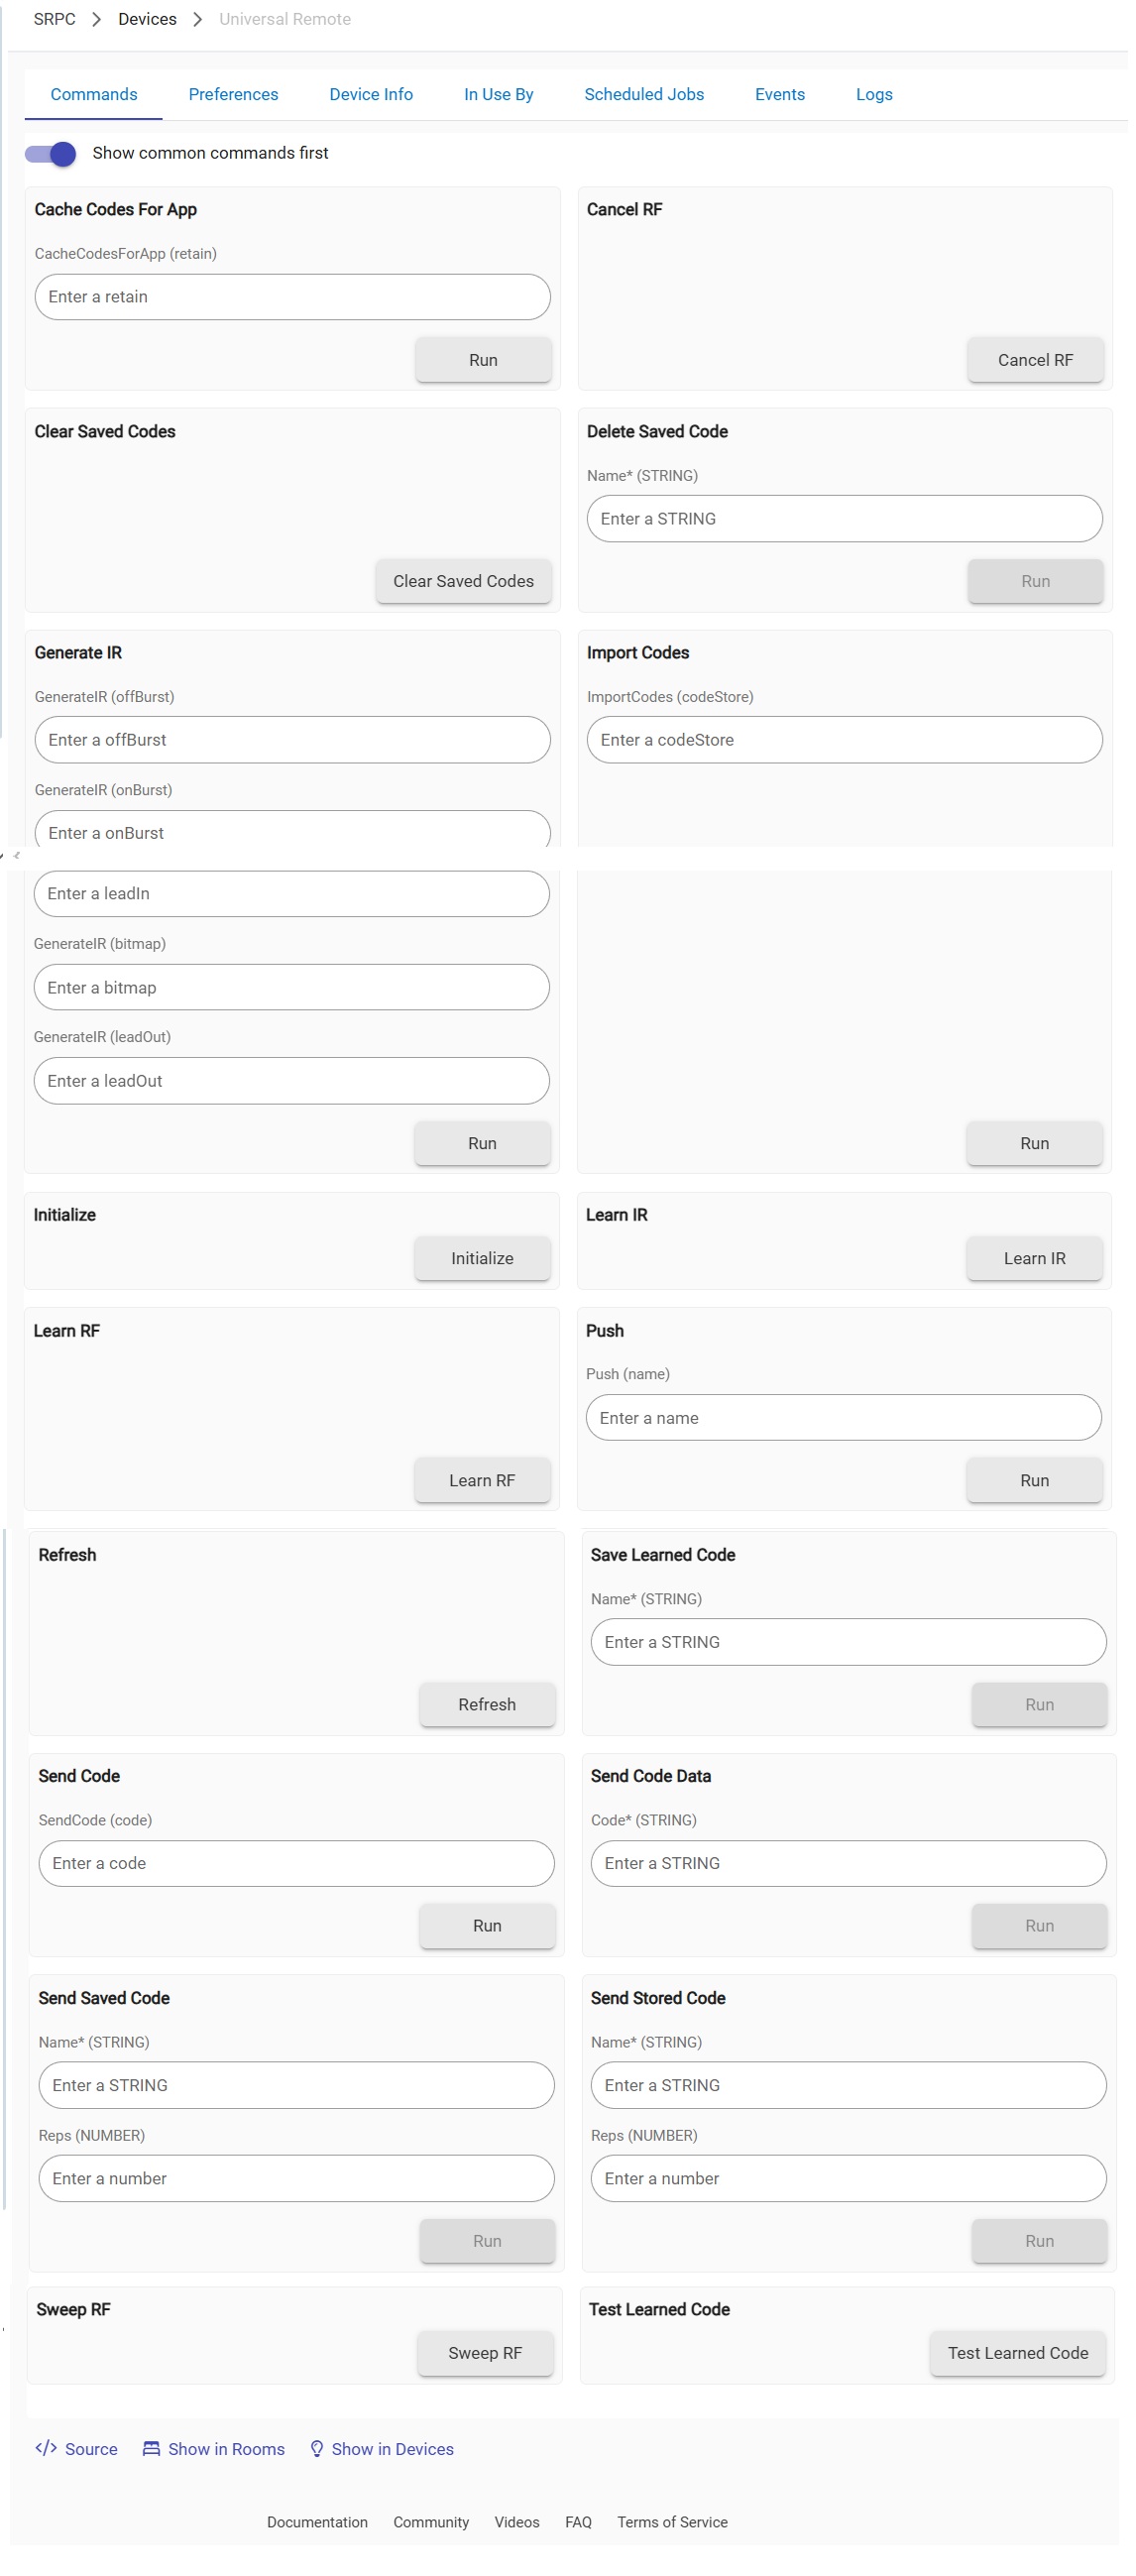
Your screenshot above shows the Commands tab of your Broadlink Device page.
The command options there are really just used for testing and verification - that's not where you manage day-to-day control from. Day-to-day control involves pressing a switch or button (real or virtual) to make the command, and that needs to be set up in Rule Machine.
Creating these setups is admittedly not easy if you aren't already pretty familiar with Rule Machine -- unfortunately, there's no way to simplify it any further.
Hey @tdotrob and @tomw - I'm having this same issue. I can get a sweep on my Eve Blind remote but can't pair a button. Can it be set manually? Is there some trick to getting it to pair? I paired a different RF device - a remote light - just fine, but the blinds aren't working.
I have the exact same setup and am having the exact same challenges. I get the sweep to work, and the few times I got an RF capture, they didn't work. Now I can't even get the RF to be captured okay. My sweep frequency is 433.54 Mhz which is aligned with the advertised 433 Mhz frequency. The code captured was super long - more than 100 characters. Not surprised they don't work. Any tips?
[EDIT] I have two of these BroadLink RF devices - one in my office and one in the bedroom. I tried pairing the remote to the one in my office that works with other RF things and it paired perfectly on the first try. So something is different about them that is making pairing not work on the other one. Maybe power supply? Firmware? I'll check... anyone else have this experience?
[EDIT 2]But.. when I tried using the paired code on the Office one, it didn't work. I'm giving up.
I have dumped all my remote codes and aligned the bytes, slowly removing the commands from the code and reached the undeniable conclusion that the remotes are code hopping, high security remotes. I can see how it works, but mathing out the next code requires time I don't want to spend.
The shutters were expensive, but I didn't expect car level security.
On the bright side, if I can't crack them, nobody else can.
I probably could, but, even if I did, if one of the remotes went bad I'd have to start over.
At this point, I have 3 options
a) Operate on the shutters and directly apply voltage where needed (relays). This would work, but would kill remote use because no way I could make automation and remotes work with a 220V motor. If the Hubitat decides "down" while I press "up", smoke will be produced. Also, more wires and putting holes in windows for command wiring.
b) Operate the remotes and embed the electronics into an emitter. Use the zigbee switches or DMX or any switch, really, and an optocoupler to emulate button presses on the remote. This has the downside of not having remotes any more. Also, the remotes are gorgeous, a scifi design where the plastic flexes as the buttons are pressed, otherwise they look like solid blocks with symbols on them.
c) Give up and understand that reliable, remote operated shutters are sometimes enough and I don't have to ruin everything for no reason. The remotes are intentionally made to be hard to impossible to replicate. Why are you like this?
My Hubitat is a C5, for BroadLink device I follow the instruction on how to learn my code but I don't know where and what code to copy to saveLearnedCode, What I have to add in Name*(STRING) and Reps(NUMBER), I'm confuse
Please help
If you follow the steps in the readme file (available in Tom's Github site, which is linked in the first post), then after you use saveLearnedCode, you will give your code a name and save it -- for example, the two code names I use for my fans are "Power" and "Flip".
In the post above, my Rule Machine example linked there uses my "Power" code.