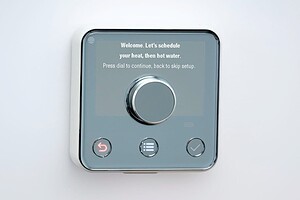
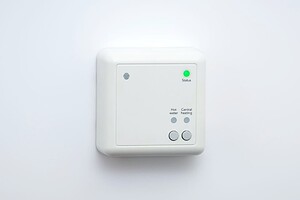
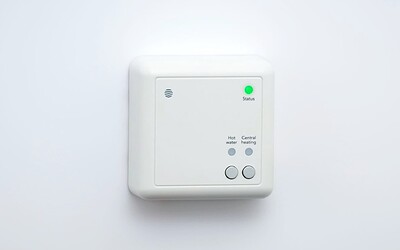
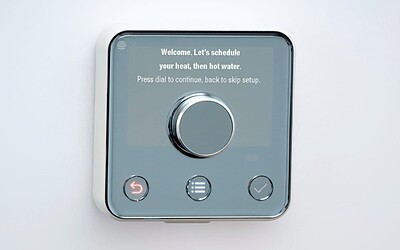
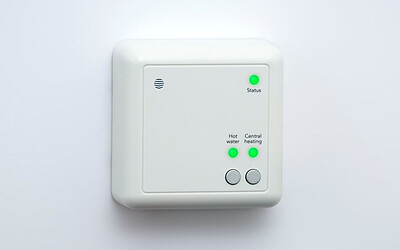
After British Gas bought AlertMe back in the day, they created a spin-off company called Hive and brought out this Thermostat and Receiver combo.
They call it Hive Active Heating and it works very well. The Thermostat is wireless and handles heating and hot water scheduling. It talks to the Receiver, wired to the boiler, which is the brains of the operation.
The system is very popular here in the UK and it's nicely implemented. Though remote control and their app rely upon your internet connection and the Hive hub, local control is truly local and the system can operate without any hub at all, with the Thermostat and Receiver able to communicate directly with one another.
This was my last remaining Hive component and I wanted to retire that system from daily use, so I decided to bring the system to Hubitat.
Please read all of these instructions before taking the plunge, particularly the Things To Know section. Importantly, this has been tested with the Hubitat hub powered off and independent control works as expected. Hubitat is not required to keep your heating operational.
Installation
Search for the keyword "Hive" on Hubitat Package Manager and you should see "Hive Drivers from BirdsLikeWires". Requires HPM v1.8.7 or later. Or install manually from the links below.
- BirdsLikeWires Library Bundle - Bundle URL: ZIP
- Hive Receiver Driver - Import URL: RAW
- Hive Receiver Heating Driver - Import URL: RAW
- Hive Thermostat Driver - Import URL: RAW
All three components are required and the Library is installed through Developer Tools > Bundles > Import ZIP, though HPM is the easier way to go.
Pairing
Follow these steps and make sure Hubitat is in pairing mode when you put the batteries back into your thermostat, otherwise it will only peer with the receiver and won't pair with Hubitat. This will still work perfectly fine, you'll just not see the battery level of the thermostat in Hubitat.
Hot Water is not currently supported in the driver.
If you have the SLR2 Receiver pictured your hot water will still work perfectly through the Thermostat, but no information or controls will currently be shown in Hubitat.
Be sure the date and time are correct on Hubitat.
This is used to set the date and time on the heating system. You may wish to use an NTP Client on your Hubitat hub to keep things accurate.
-
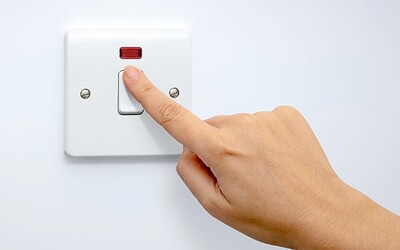
Switch off your boiler. This should also power off your Receiver.
-
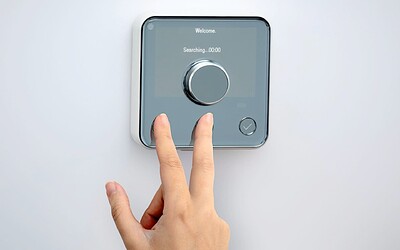
Press and hold down the back arrow (left button) and the menu (middle button) on the Thermostat. Keep them held down until the Thermostat shows "Searching..." on the display.
-
Remove a battery from the Thermostat. You only need to remove one to power the unit off.
-
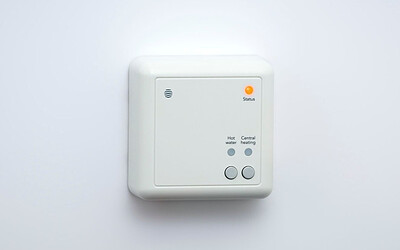
Switch the boiler back on. The Receiver's status light will flash either pink or amber.
Wait until it turns solid green.
-
Put your Hubitat hub into pairing mode:
Devices > Add Device > Zigbee > Start Zigbee Pairing
Make sure the hub stays in pairing mode throughout the rest of the process. If the 90 second counter ends, click Start Zigbee Pairing again before continuing. -
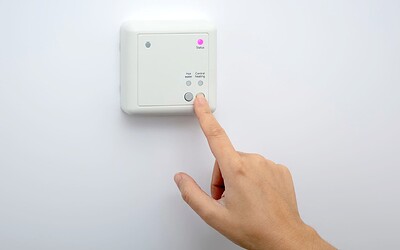
Press and hold the Central Heating button on the Receiver until the status light is flashing pink.
-
Release the Central Heating button on the Receiver, then press and hold it again until the status light is double-flashing amber.
After a few seconds the Receiver will pair with Hubitat and the status indicator will change to a single-flashing amber. The Receiver is now waiting for the Thermostat. -
Check that Hubitat is still in pairing mode. If you only have a few seconds remaining, choose Stop Zigbee Pairing and then click Start Zigbee Pairing to begin a new countdown.
-
Put the battery back into the Thermostat. It should display "Searching..." once again. After a few seconds the Thermostat will peer to the Receiver and pair with Hubitat.
Once you see "Welcome" on the Thermostat screen the process is complete. Set up your schedules using the guided tour on the Thermostat.
-
The status indicator on the Receiver should now be green.
Name and save your devices on Hubitat.
When viewing Hubitat's Devices list you will see a "child driver" against the entry for your Receiver with the type Hive Receiver Heating. It is this device which contains the controls and states for your heating and is the one to use for creating rules and automations.
Commands
The most common commands are as follows:
- Auto - sets the system to run the programmed schedule
- Emergency Heat - sets boost mode for 30 minutes
- Heat - sets the system to manual mode
- Off - turns the system 'off', though it's really in frost protect mode
- Set Heating Setpoint - sets the target temperature
Cool and Set Cooling Setpoint mirror the actions of Heat and Set Heating Setpoint but generate a warning in the log that this is a heat-only system.
The Fan controls do nothing except generate a warning in the log that there are no controllable fans.
Things To Know
-
Hot Water
If you have a traditional heating system with tanked hot water and you're using Receiver Model SLR2 (pictured in the instructions) there's currently no control or visibility of the hot water element within Hubitat. It will work perfectly fine, it just doesn't show in Hubitat.
This is, so far as I can tell, a Hubitat issue to do with binding to multiple endpoints on the same device. I do plan on creating a second child driver for hot water which simply polls for updates, but that's more resource intensive (and less responsive) than just having the thing report in when something changes. -
Scheduling
Programming the schedule in the Receiver is only done through the physical Thermostat. There is no recreation of the nice browser-based editor from the Hive website.
Shown as Auto mode in Hubitat this schedule runs completely independently of your Hubitat system and is The Right Way To Do Things. The fewer devices in the chain, the fewer things there are to go wrong.
If you wish, you can have Hubitat run your schedule using the built-in Thermostat Scheduler app. Simply place your system into manual mode using the Heat command, then program your schedule in Hubitat. Be aware that you are now reliant on the operation of your Hubitat hub for your schedule to run.
Implementing schedule programming of the Receiver in Hubitat is entirely possible, but it's likely more effort than it's worth. Somebody would need to sniff the schedule format from the Zigbee transmissions, recreate them in the driver and create a useable interface for folks to create their schedules, all of which can already be done on the Thermostat, which you already have. If somebody sees this as a challenge, please have at it!
-
Retiring Your Hive Hub
Make sure you're not paying any ongoing subscriptions that you won't be using! If you're not using any other devices with it, unplug the Hive hub and keep it in your drawer of Interesting Things.
Don't delete your Thermostat and Receiver devices in the Hive app. Leave them in case you ever want to switch back or in the (very unlikely) event that there's a firmware update you desperately require. Switching back is very easy - repeat the pairing steps above, but with your Hive hub in pairing mode instead of Hubitat.
Conclusion
After four months of stability testing I finally took the plunge in August 2023, retired my Hive Hub and switched to this driver full time. Which is why I've had to get development tidied up!
But still, please don't blame me when your family complain that the system didn't come on in winter. ![]()
