[Tutorial] Building a dashboard with CSS

Posting pictures of my dashboard on the Hubitat facebook page, resulted in a lot of questions how I had build my dash.
So this post is kind of a "tutorial / how I did it" post.
There are allot of ways you can customize, and this is just one of them. There are probably better ways of doing things than how I did them, so feel free to comment or correct me.
This two was a learning curve for me, as I had not used CSS before I got my Hubitat.
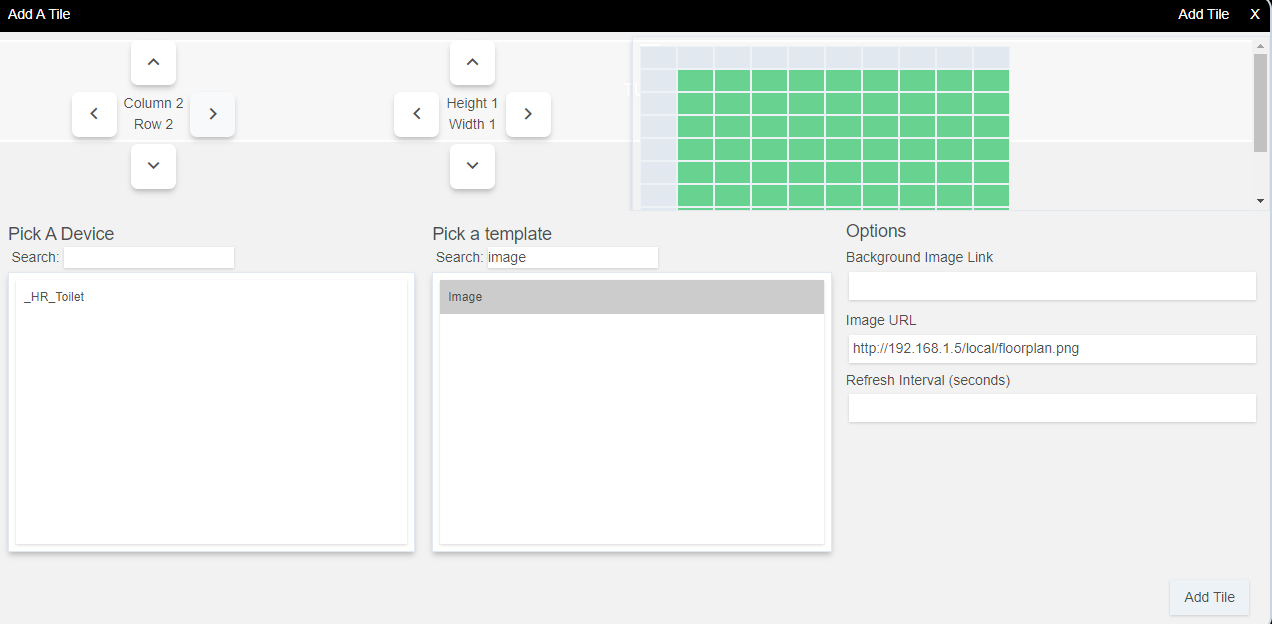
This example shows in steps how to build the dashboard framework, based on my Samsung TAB A10.
So this dashboard will fit that device the best.

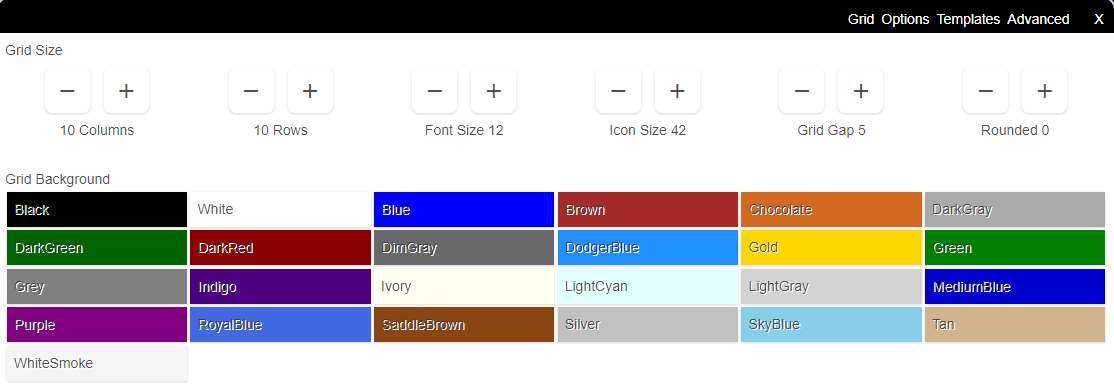
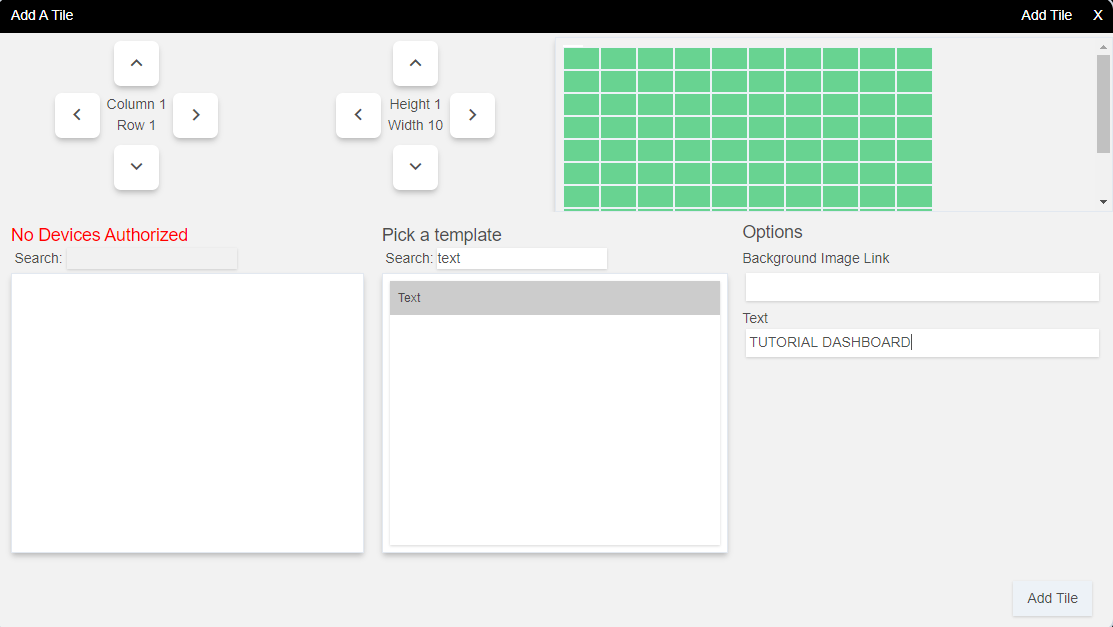
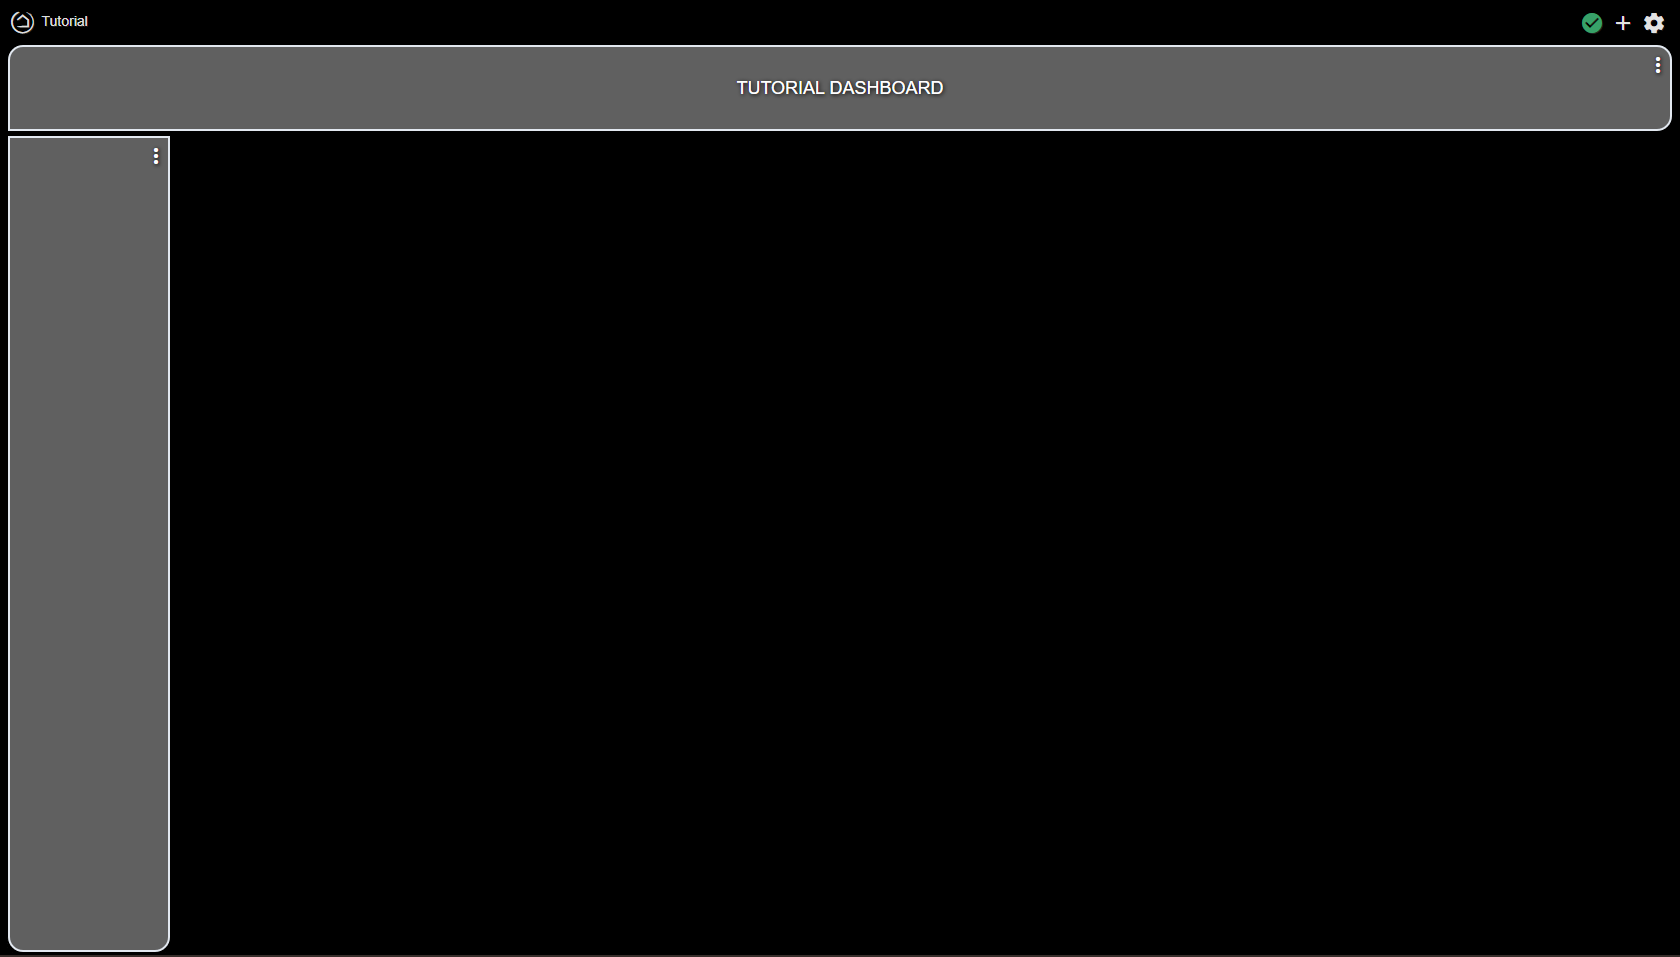
  • Start by defining a basic dashboard made up of 10x10 tiles:

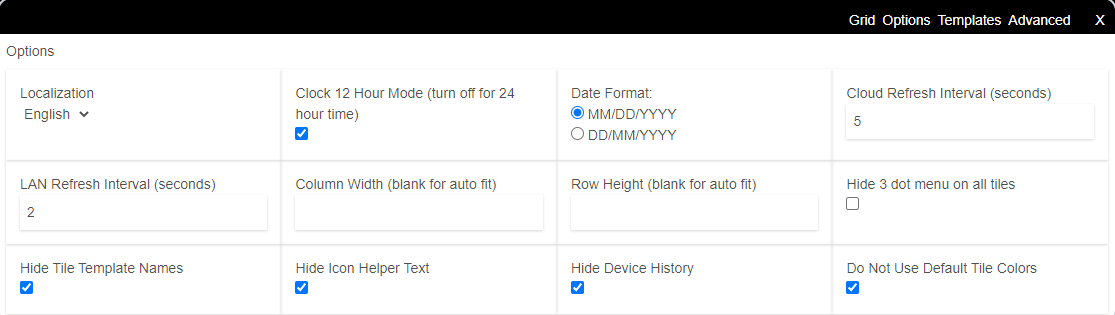
  • In the options, we remove the tile sizes:

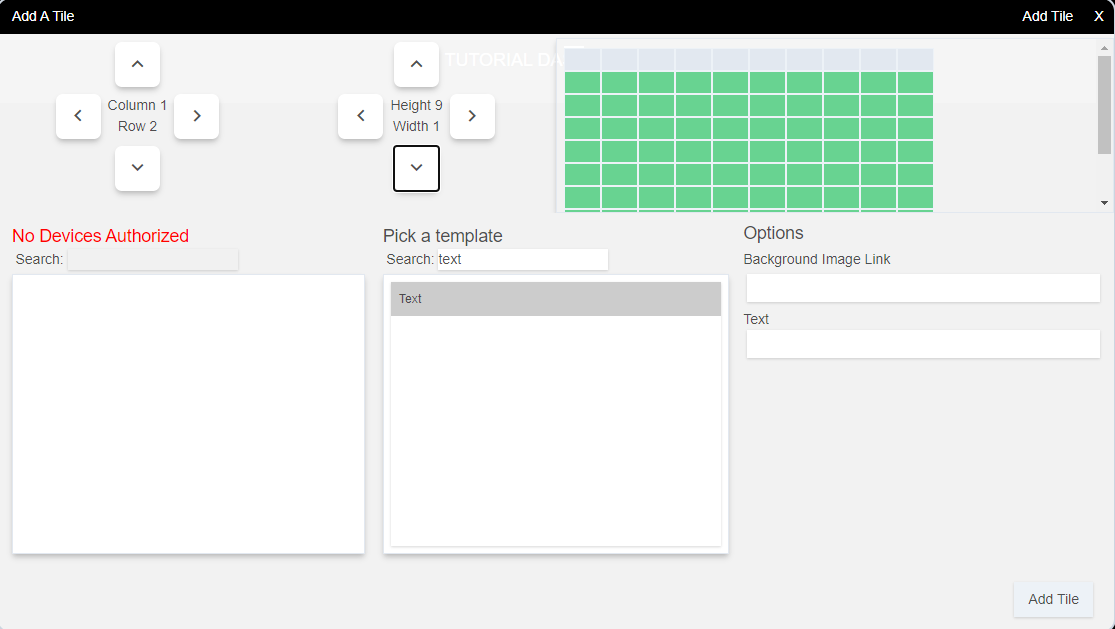
  • Next we define our top bar that we will use to display the dashboard name:

  • A "menu" bar on the right is made the same way:


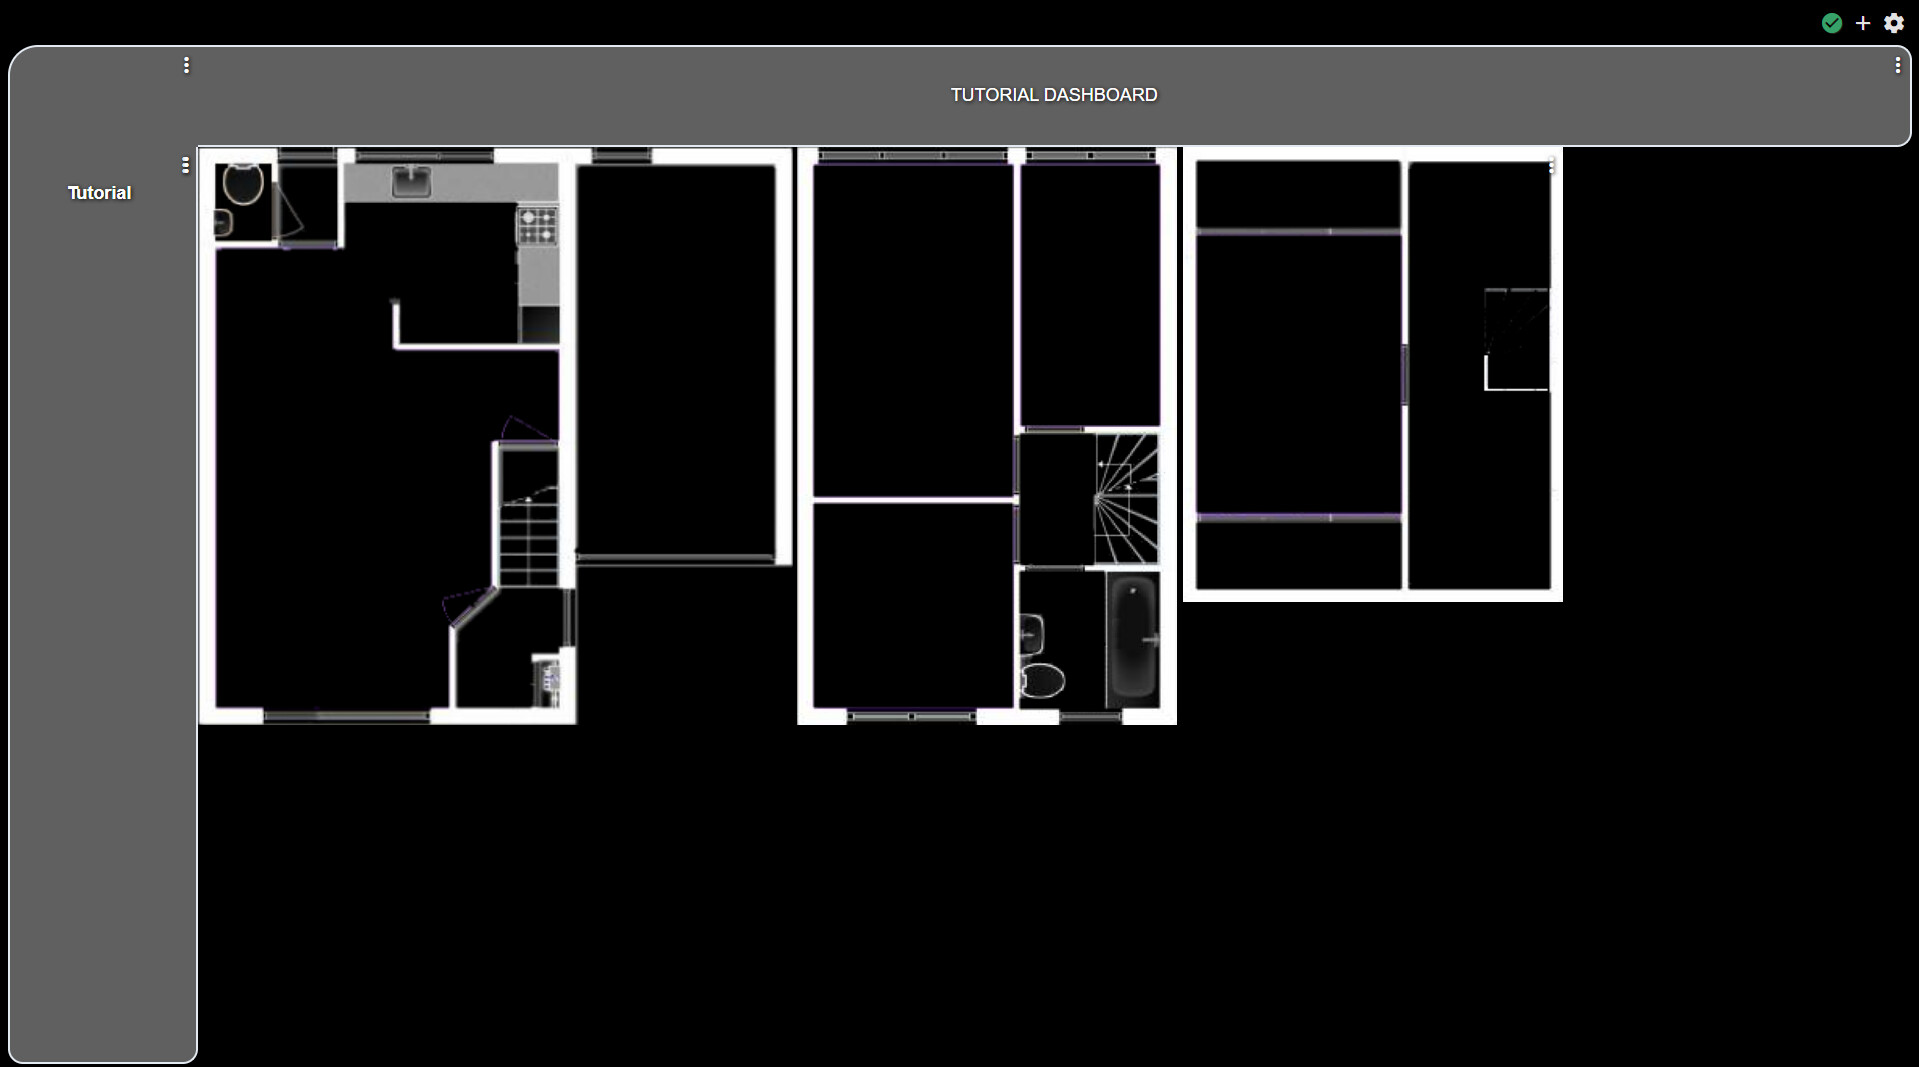
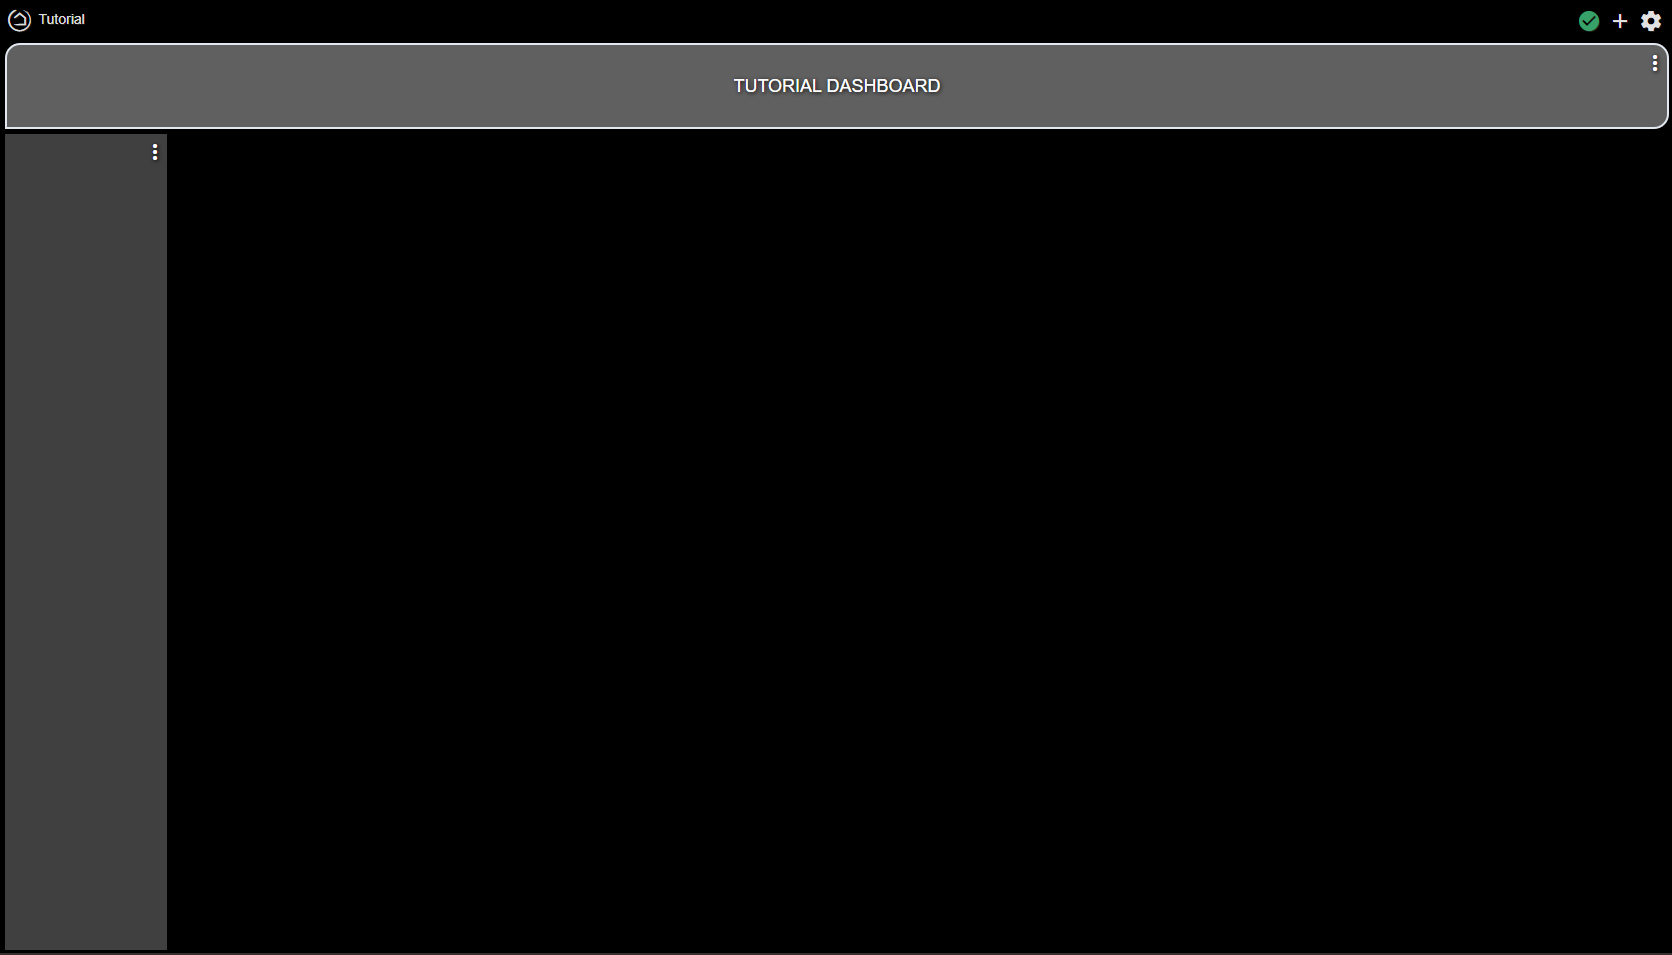
    Our dashboard will look like this now:

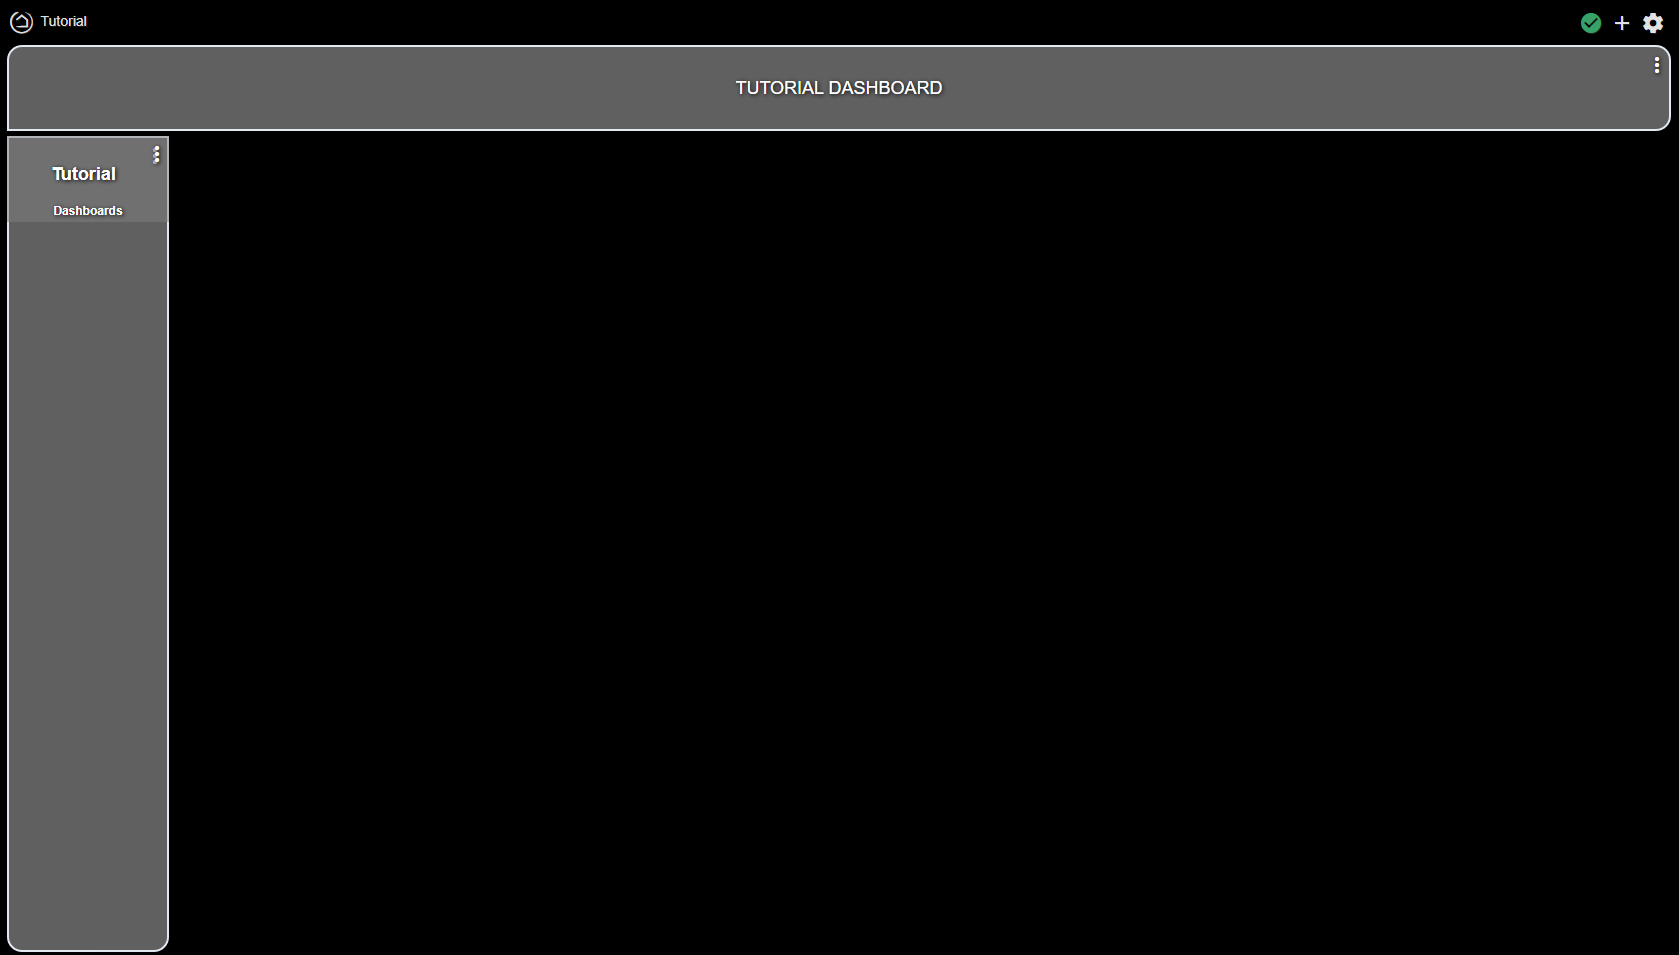
    Ik like a little roundness on those bars, so we define them with CSS.

  • First we note the tile number of the top tile by editing this tile:
    image

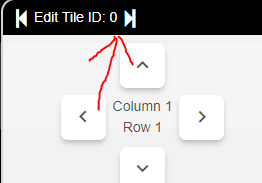
  • Next we open the dashboard's advanced properties, and select the CSS tab:


    I like to create comments for myself, so I can find stuf back when there is allot of code, so I use comment "brackets" before I define something. In this case /* Dashboard Name */ defines nothing, but purely creates a reminder for myself that the code interpreter will not read.

  • Next we define our to dashboard name tile:
    image

test analyze this line.
#tile-0 is the tile number I will be customizing.
border-width: 2px defines that I want a white border around my tile of two pixels.
border-radius: 15px 15px 15px 0px defines that I want my top left, top right and bottom right corner to have a radius of fifteen pixels.
!important defines that this definition overrules any code that was defined before.
background-color: #606060 defines that I want my tile to have a background color in gray.

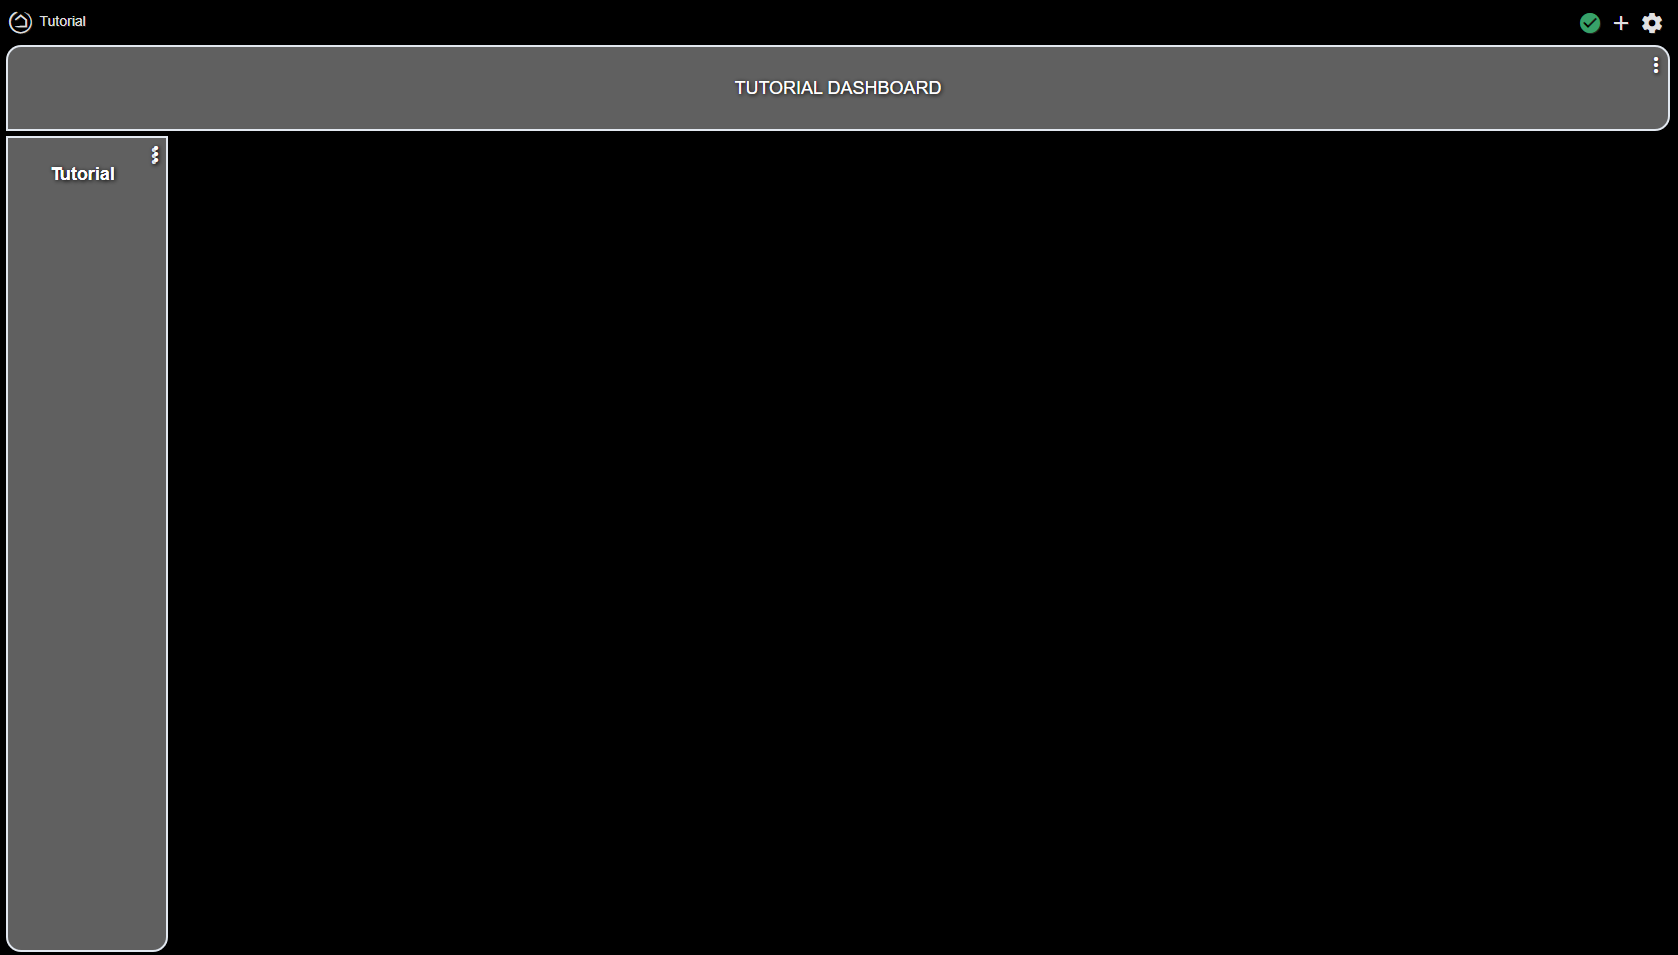
So our dashboard should look like this now:

  • we do the same for the left menu bar:
    image

So our dashboard will look like this:

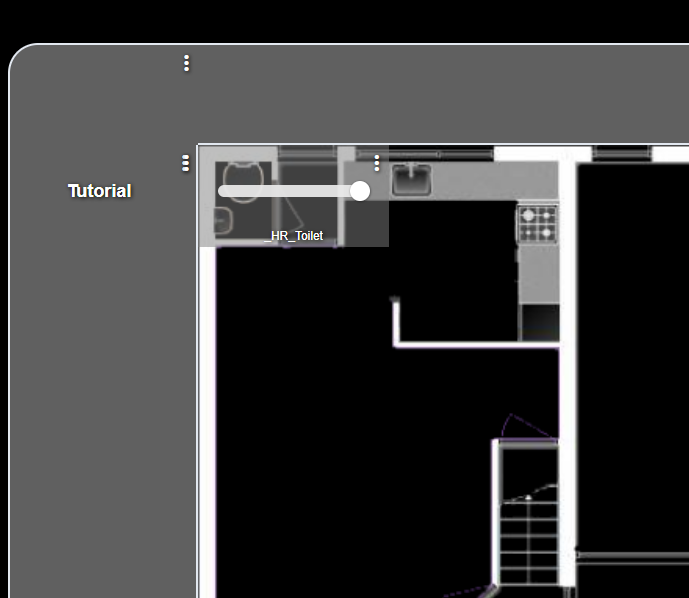
Now we want to create dashboard links to our "other dashboards".

  • We "overlay" a menu item over the left menu bar:
    #tile-2 {font-weight: 700; font-style: normal; font-size: 1.5vw}
    Our dashboard now looks like this:

Hmm, two things we do not want in this case: The tile name, and the tile "color".

  • The file name we can get rid of with this code:
    #tile-2 .tile-title {visibility: hidden; white-space: nowrap !important; overflow: unset;}
  • the tile background we can make transparent with this code:
    #tile-2 {background-color: transparent}

Ahh, that looks better:

Out total CSS code should look like this now:
#tile-0 {border-width: 2px; border-radius: 15px 15px 15px 0px !important; background-color: #606060 !important} #tile-1 {border-width: 2px; border-radius: 0px 0px 15px 15px !important; background-color: #606060 !important} #tile-2 {font-weight: 700; font-style: normal; font-size: 1.5vw} #tile-2 .tile-title {visibility: hidden; white-space: nowrap !important; overflow: unset;} #tile-2 {background-color: transparent}

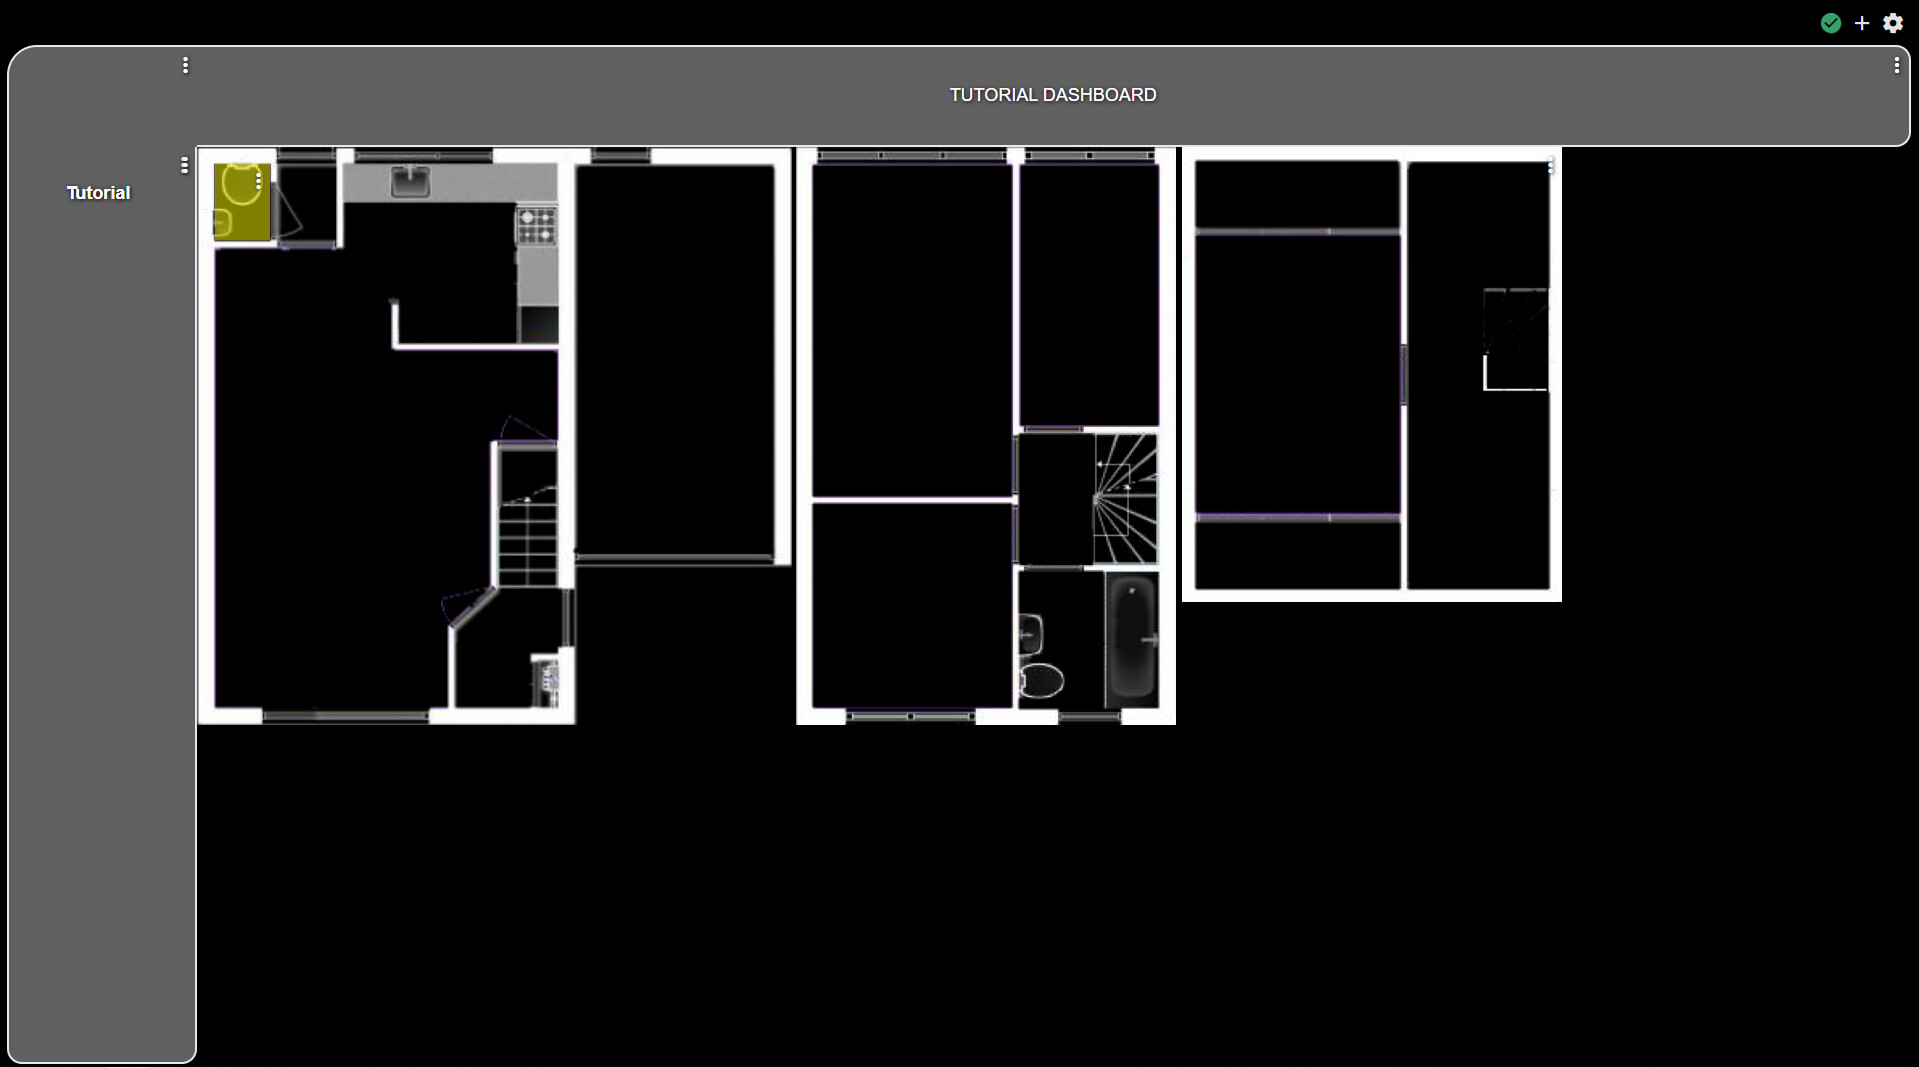
This way we can shape a dashboard, place links where we want them.

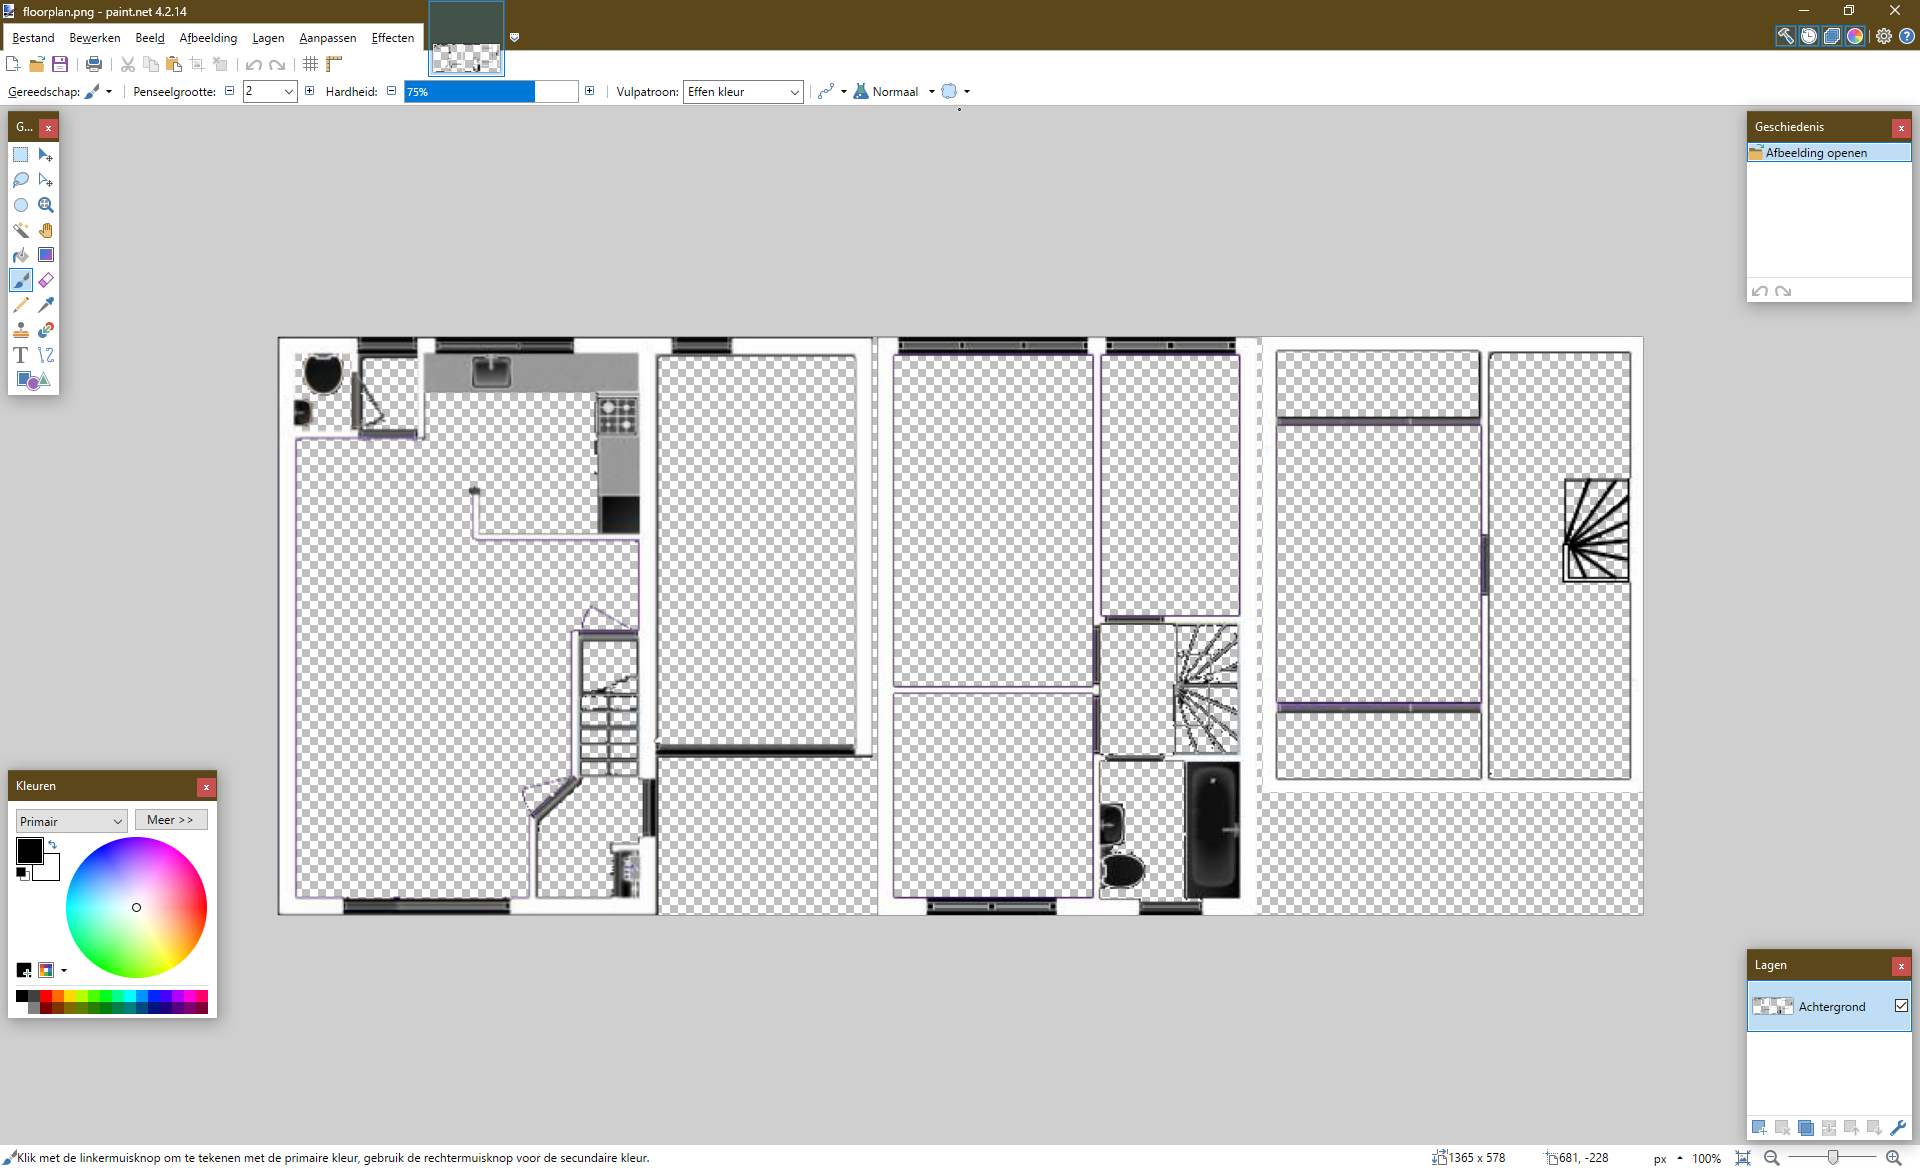
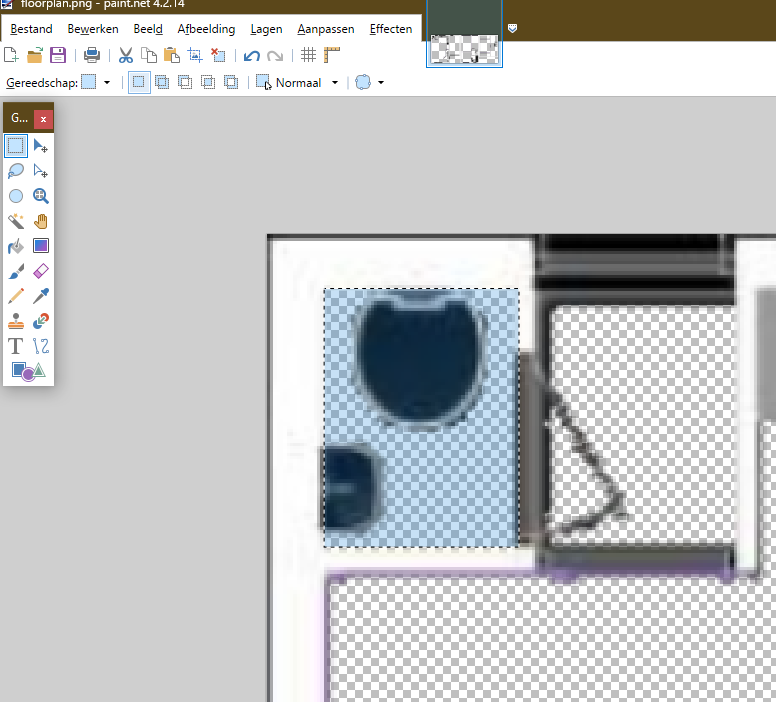
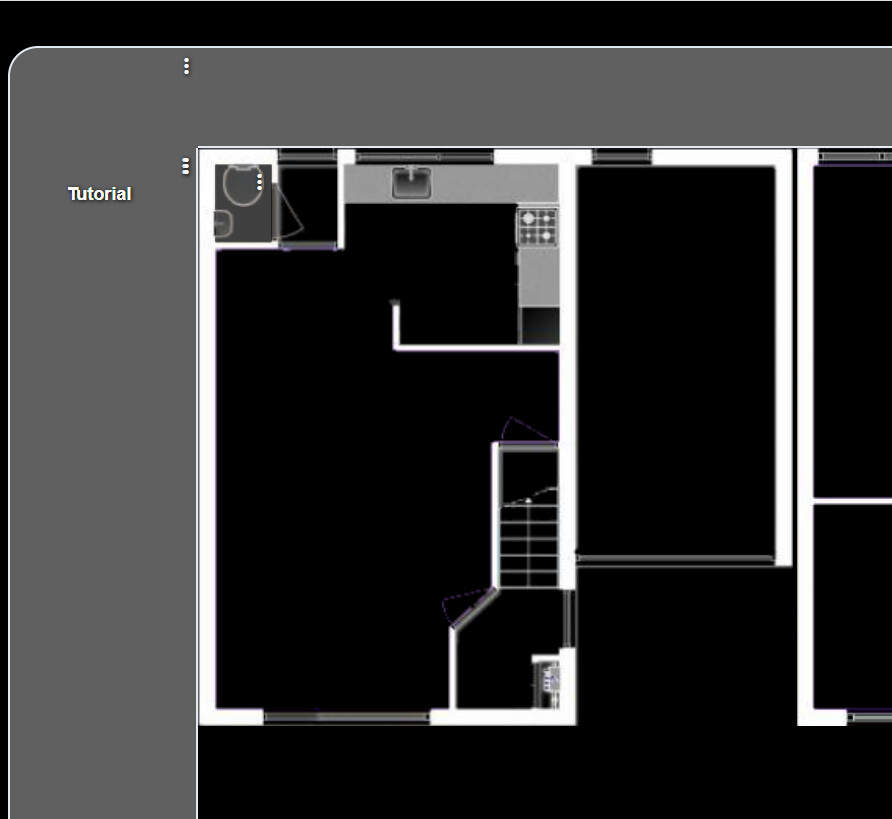
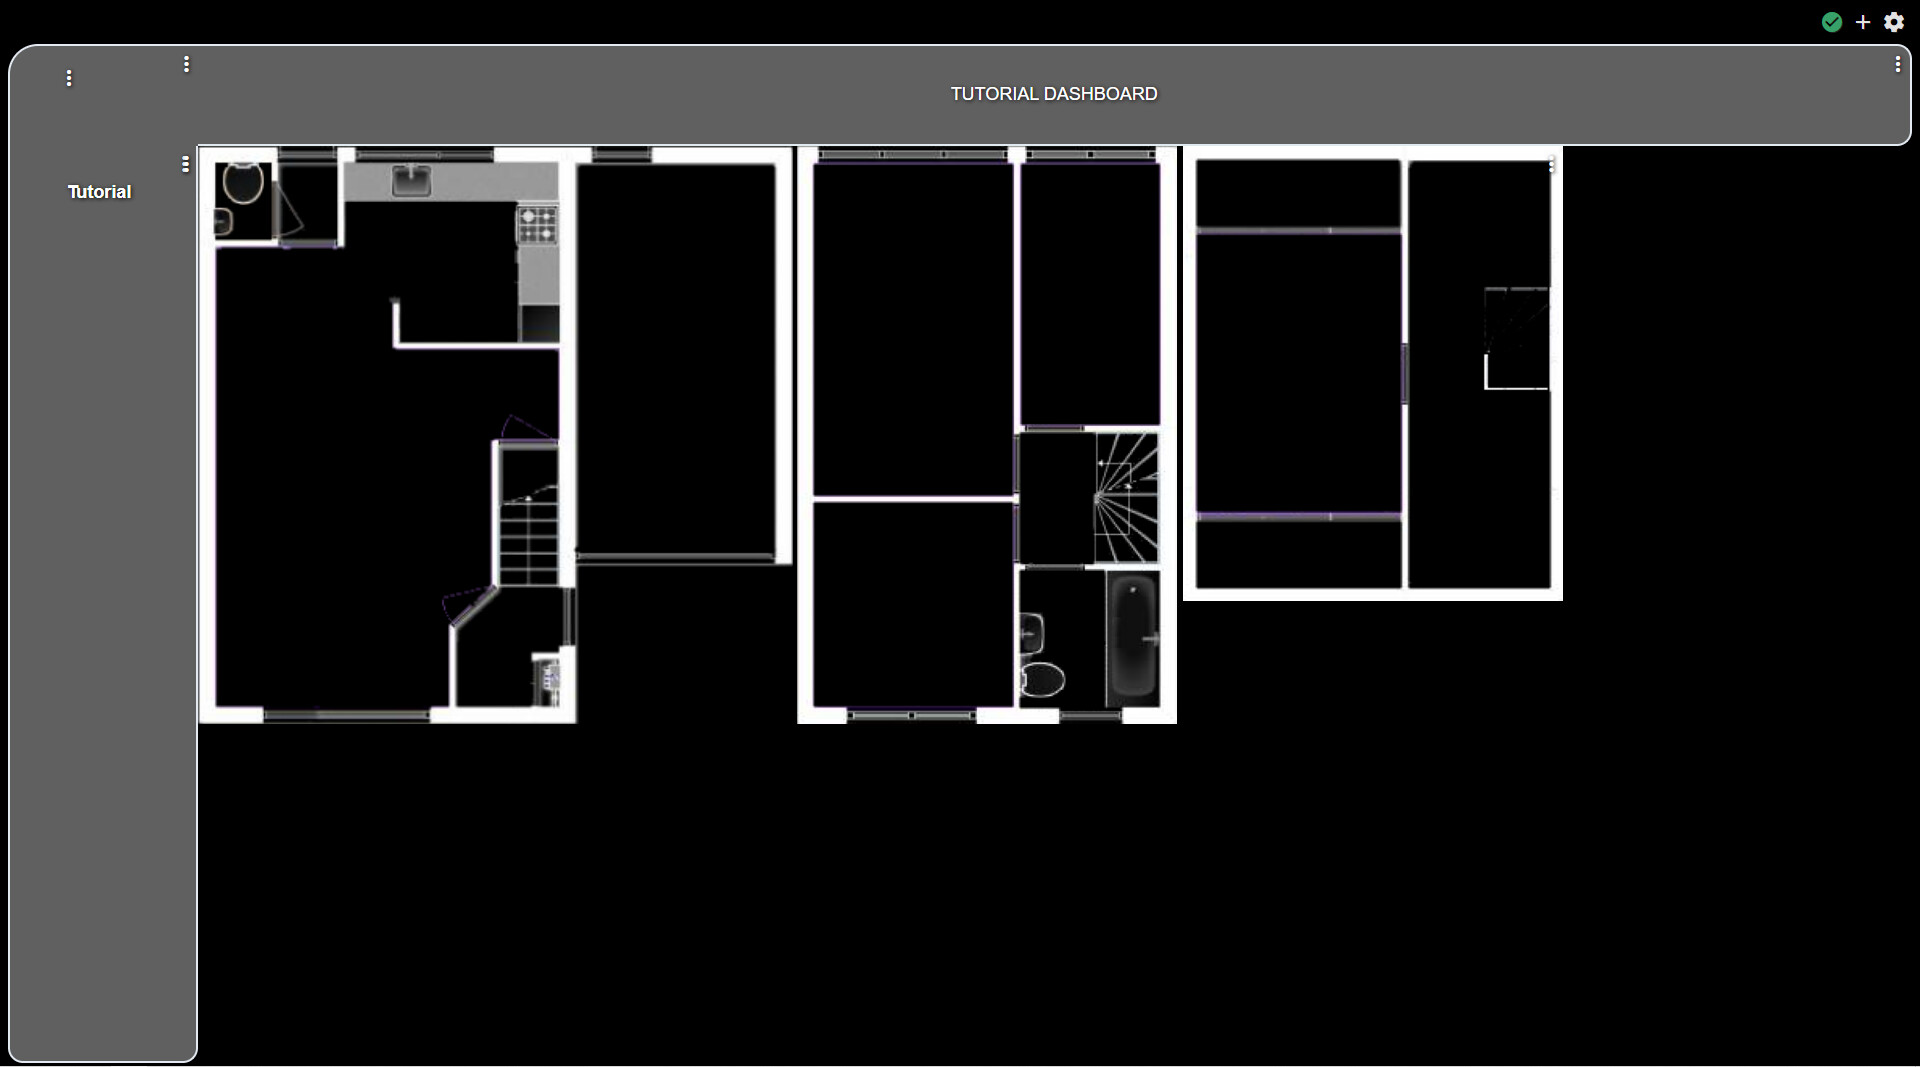
Next post I wil explain how I made the "floorplan" lighting content in my dashboard.
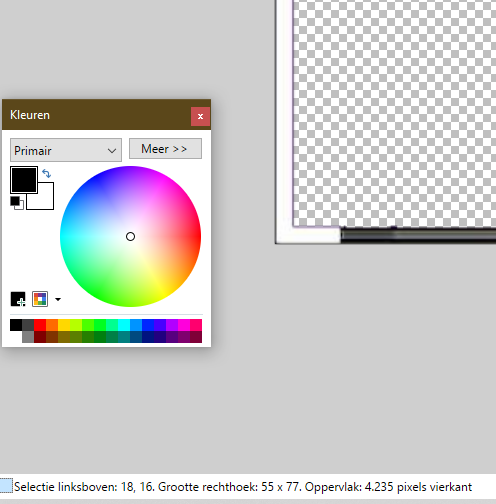
Teaser:

Stay tuned

16 Likes
  • Next step: we will set some general CSS code definitions we will need later on:
    /* Misc settings */
    .material-icons.he-bulb_off {display: none}
    .material-icons.he-bulb_on {display: none}
    .vue-slider.vue-slider-ltr {display: none}
    .dashName.flex.pr-2 {display: none}
    .material-icons.he-logo-mark {display: none;}
    .tile-title {visibility: hidden; white-space: nowrap !important; overflow: unset;}

The first two definitions are to hide the light bulb icons, both in on- and off state.
The second two definitions hide the default dashboard name, and the Hubitat logo in the upper left corner.

Our code should now look like this:

Next we will need a floorplan. Best would be a SVG file, but a PNG with a transparent background wil do also.
In my case, i used a old building plan, and sized it so it fitted nicely on my tablet.

TIP: open your floorplan in paint.net. It is freeware, and has some nice things we could use later on in this tutorial.

  • Save the floorplan, and import it into your hubitat's file system:
    (settings -> filesystem)
  • insert a image tile containing your floorplan, and place it in position 2-2:

    *resize the tile to match the uploaded floorplan. In my case 1365x578. We do this by defining the tile size of the newly placed tile:
    #tile-4 {position: absolute; left: 0px; top: 0px; width: 1365px; height: 578px; background-color: transparent}

Our dashboard should now look like this:

Now we are ready to place the first licht. In this example, we shall set the light in the toilet, left upper corner in my example.

The result will look like this:

Hmm, that is not wat we want. We want the tile to match the room size it is in.
We do this by "mesuring" the room in paint.net.
We use the select tool, and draw a box over the room we want to have our time based on:


If we look at the left down-corner of paint.net, we see the exact coördinates we selected:

Start point 18x16 and the size of the selection: 55x77
We translate these values to our CSS of that particular tile:
#tile-5 {position: absolute; left: 18px; top: 16px; width: 55px; height: 77px; }

Now it looks much better:

Place all your lights this way.
When you are done, we can define our light colors for the dashboard.

We do this not in the CSS portion of the settings, but in the layout tab.
We enter:
{
"template": "bulb",
"bgColor": "rgba(255,255,0,0.5)",
"iconColor": "",
"customIcon": "",
"state": "on"
},
{
"template": "bulb",
"bgColor": "rgba(0,0,0,0)",
"iconColor": "",
"customIcon": "",
"state": "off"
}

Having the light on wil look like this:

Having the light off wil look like this:

When we are all done with the dashboard, we "lock" the dashboard, and those pesky "three dots" dissapear, and we are left with a nice dashboard.
When you "click" the room you want the lights to turn on, the floorplan-room turns yellow, and the light turns on.

You can do this not only with lights, but also with motion detectors.

Have fun tweaking your dashboards, and any questions, just ask!

9 Likes

Great post. Following your steps and waiting for the next step :slight_smile:

3 Likes

Thanks for this, real insight and something I'm going to have a lot of fun with.

1 Like

@fanmanrules where did you find the parameters from. i.e. .he-bulb_off?

It's obvious you have considerable front end knowledge but what if for example I wanted to control a switch instead? Is there a list anywhere?

I got the parameters from trail and error. I have no "considerable front end knowledge" like you state.
Best way to get names of dividers and elements, is to use stylebot.

Wow, you've spent a lot of time on this. It's a shame these things are not better documented.

I think I spent about five hours in this.
Now its just re-using existing elements.

Are you aware of the browser's developer console? You can edit css on the fly and see what effect it has before updating the css in the HE dashboard. It's implemented in all major browsers and while there are slight differences in appearance, they all have more or less the same features. F12 opens it.

I am indeed aware of the developer mode, but I like stylebot better.

Maybe not the right place but...
Is there a way to use a website as a dashboard background?
How can I space text in a text tile.
Want " Hi Low " NOT "Hi Low"
Thanks

Better ask this in the CSS thread.

Just found this post. One question on your virtual device _HR_Toilet. What settings did you use to setup the device itself?
Also, I attempted to load my floor plan using the URL file:///C:/Desktop...etc. However the image link did not yield the display of the floor plan. Does it need to be done as a http:// link instead?
Thanks for the great tutorial
Glenn...

The device is an import from HUE.
An image can only be http (https prefered) if you want to access the file from your browser.
Example in the screenshot from second post.

Thanks for the confirmation. It appears that I really need to setup a webserver to serve up image files for HE. I was hoping that I could use some of my existing systems such as my NAS to serve the image files but it appears not to be the case.
Change in my design architecture coming up.

Why?!

As stated in my second post, just use the files function from Hubitat.

Right on!! Got it to work. Thanks for the help.
Glenn...

1 Like

Hi, super post but, I'm stuck, upload .png to Hubitat and then is not showing in Dashboard...what could be wrong?

thx,
Nick

Think your browser may be blocking the content.
In your browser, you can set page properties > allow insecure content.