This step by step guide will show you how to obtain the authentication token used by the Sonoff EWeLink app, which can then be used with a single pole Sonoff module to control it via HomeKit by way of Homebridge which uses Node.js
The purpose of this post is to help developers understand this method for controlling Sonoff modules, which does not require a firmware modification to the device. The goal is to use this as a starting point for development of a stand-alone Node module and Hubitat driver to allow control of the iFan02 and other Sonoff modules by simply following these steps to obtain the SSL cert from the ITEAD EWelink app, rather than forcing a flash of the device firmware. iFan02 in particular seems to be difficult and somewhat dangerous to flash, since it must be connect to mains power during the procedure.
If you're a talented developer, a tinkerer or keen on helping in anyway possible, please consider contributing to this effort. I'm not a developer myself, but I have two iFan02 modules and I'm willing to test or provide whatever information I can in order to help with such a project.
Here's the github repo for the homebridge-ewelink plug-in for a description of what this does and does not do.
Obtaining the EWeLink authentication token
In order for the existing Homebridge plugin or a stand-alone Node module to communicate with the EWeLink web socket, it is necessary to obtain the authentication token from the EWeLink app. The method described below is done via iOS because the existing plugin is for Homebridge, which is all about HomeKit for iOS. It's probably possible for Android to be used in development of a stand-alone Node.js module, but I have no knowledge of how to install a certificate in Android so the EWeLink app will trust the proxy for the "Charles" application to capture the authentication token. Therefor the instructions below refer only to the method of capture via iOS.
- Install the EWeLink app on your iOS (or possibly Android) device
-
Ensure your Sonoff devices are registered and working with the native app. Keep the app logged into your account.
-
Download and install Charles - Web Proxy Debugging Application on your computer.
-
Start Charles. The application will run in trial mode for 30 days, with timed delays and a 30 minute timeout as an added and unnecessary annoyance.
-
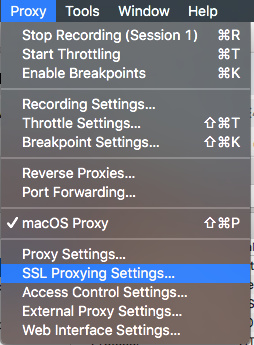
From the Proxy menu, choose SSL Proxy Settings...
-
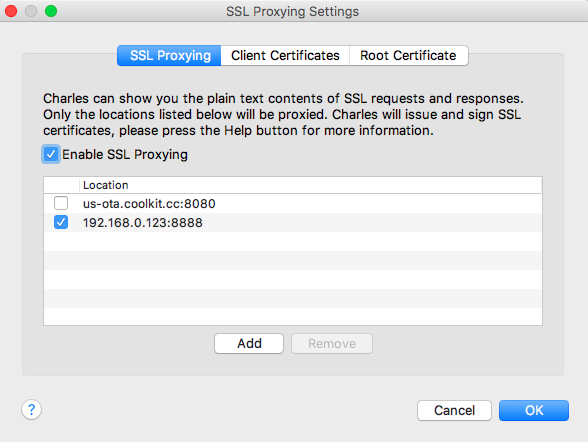
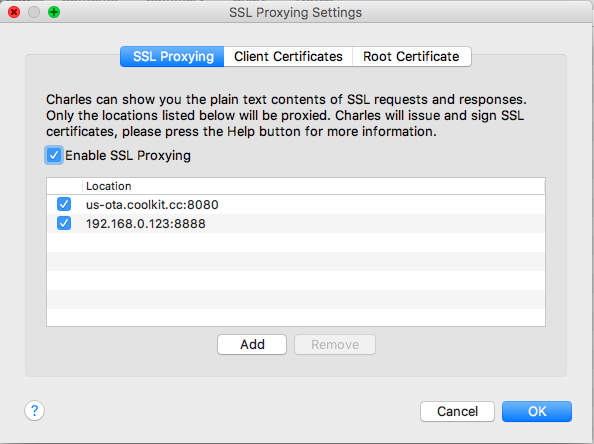
Enter the following two locations into the SSL Proxy Settings
a) us-ota.coolkit.cc or eu-ota.coolkit.cc if you are located in Europe. Use 8080 for the port number, but for now, after adding the location, you must then uncheck the box next to it so it remains disabled for now.
b) Your computer's IP address. Use 8888 for the port number
EXAMPLE
Note: I have no knowledge of how to accomplish these next steps on an Android device or if it's even possible.
-
Tap Settings > WiFi and tap the "i" to the right of the WiFi network that both your phone and computer are connected to.
-
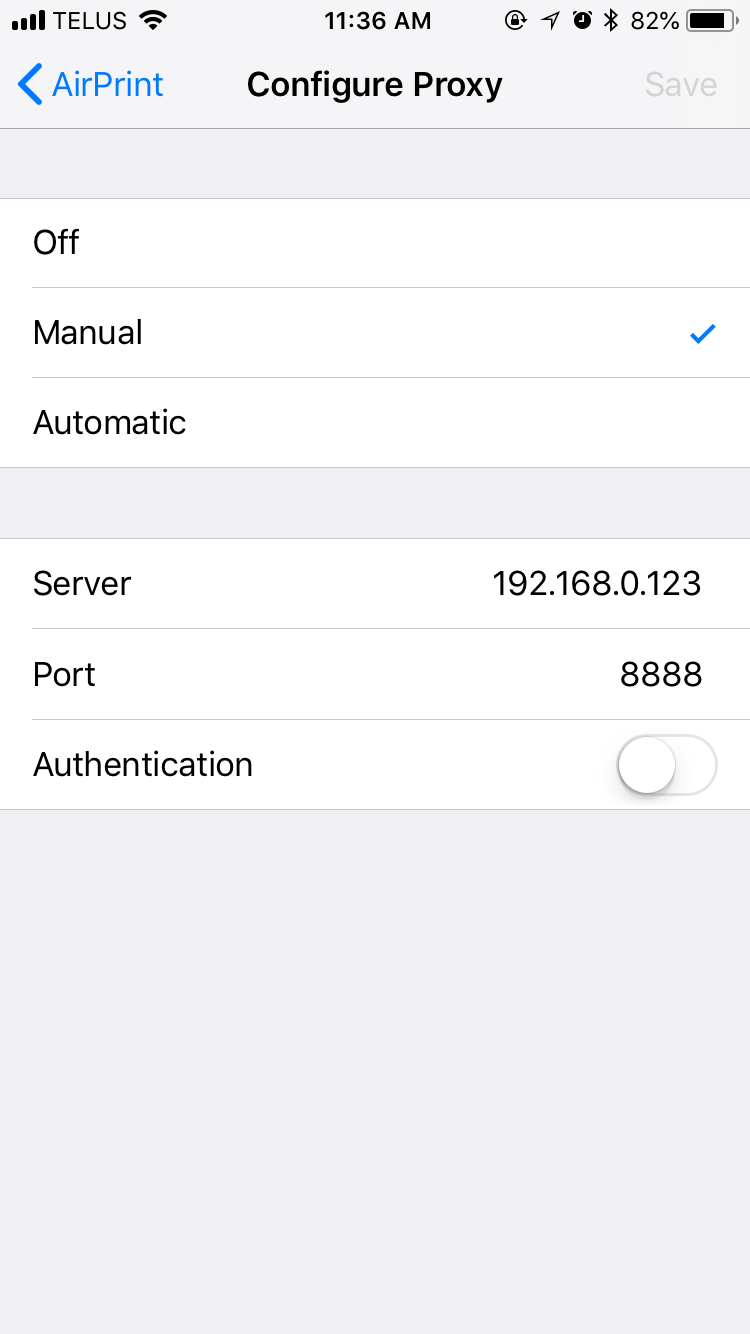
Scroll to the bottom and tap Configure Proxy
-
Tap Manual and enter your computer's IP for the Server and 8888 for the port number.
-
Tap Save
-
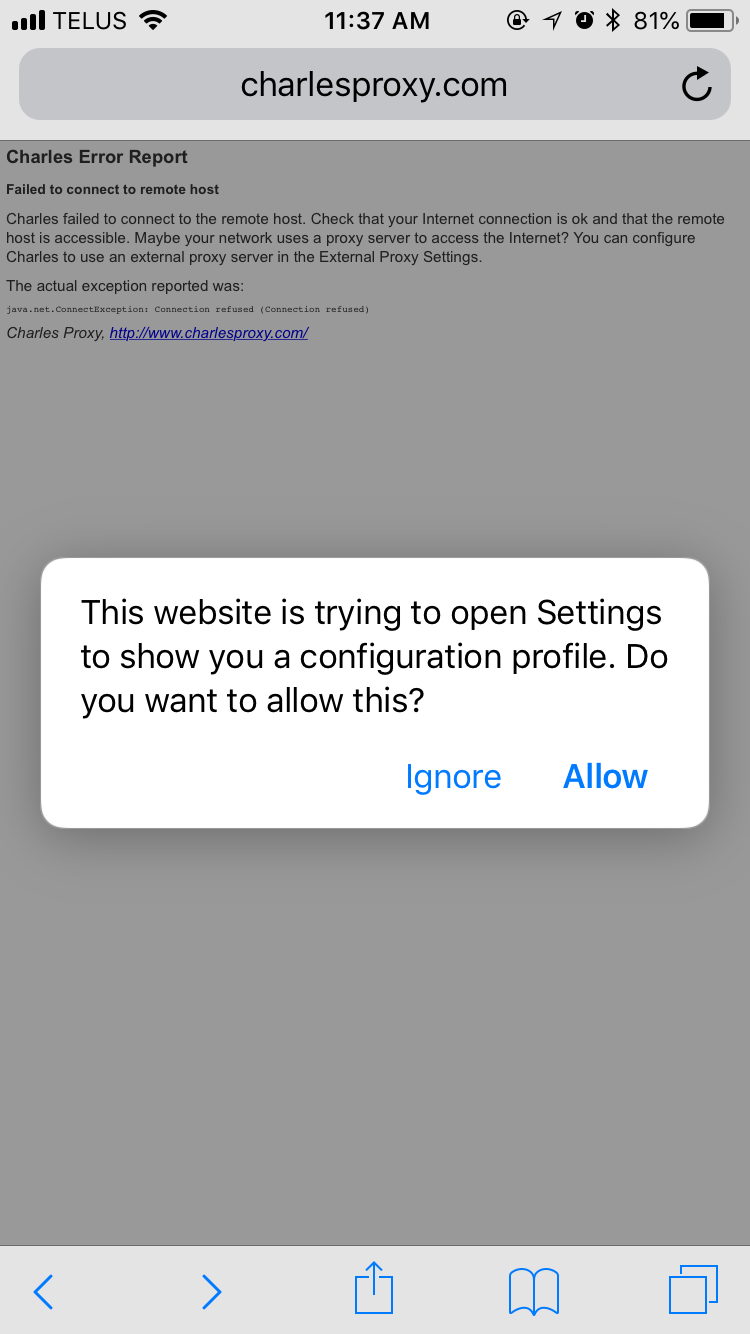
On your iOS device, open a browser and enter https://chls.pro/ssl in the address bar, but first ensure Charles is still running on your computer and is in the foreground. Demo mode times out after 30 minutes.
-
You will be prompted to allow the website to open Settings. Tap Allow
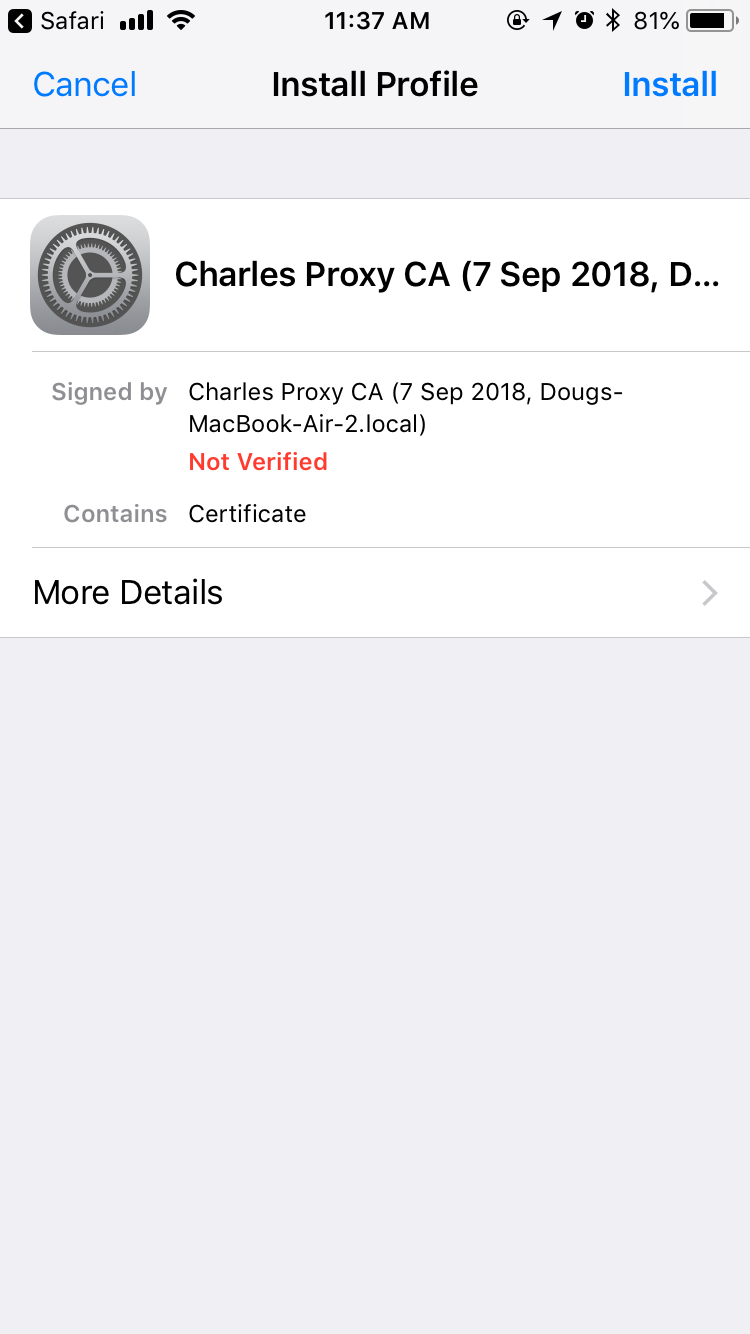
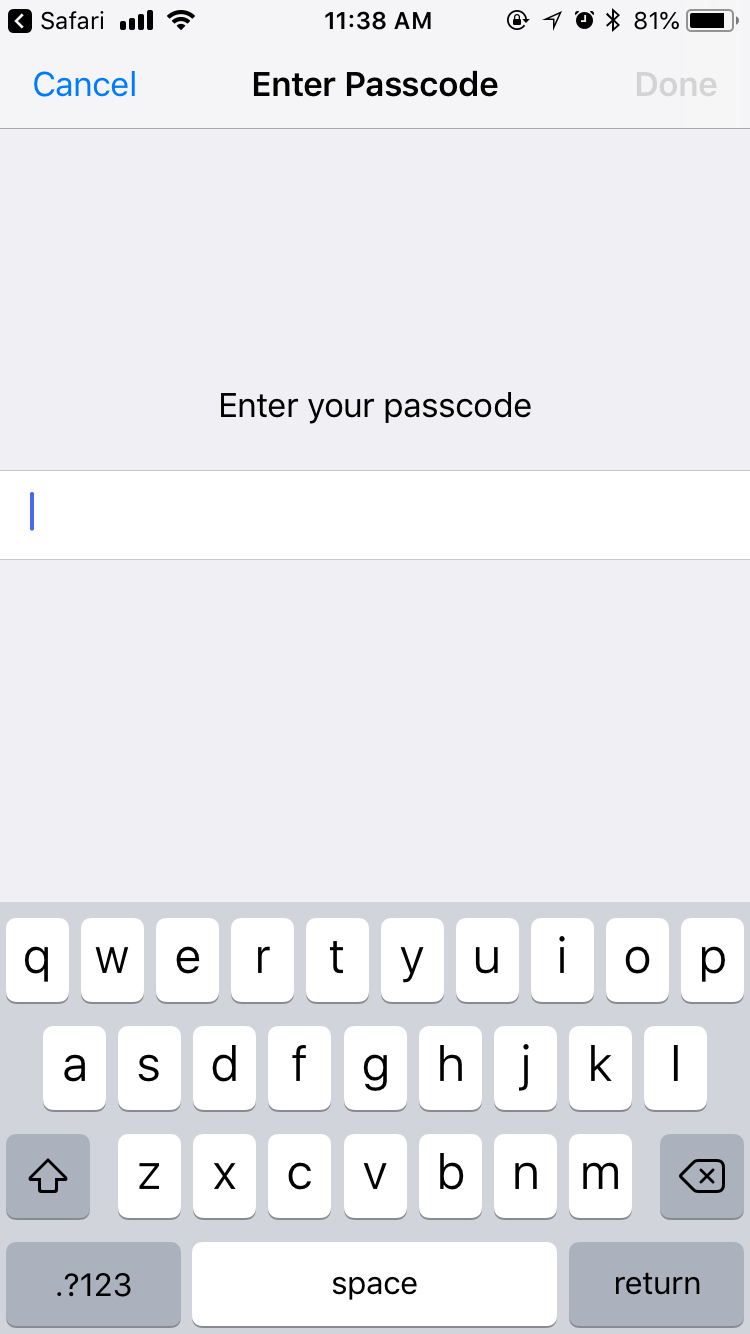
- Install Profile will open. Tap Install and enter your phone's passcode when prompted
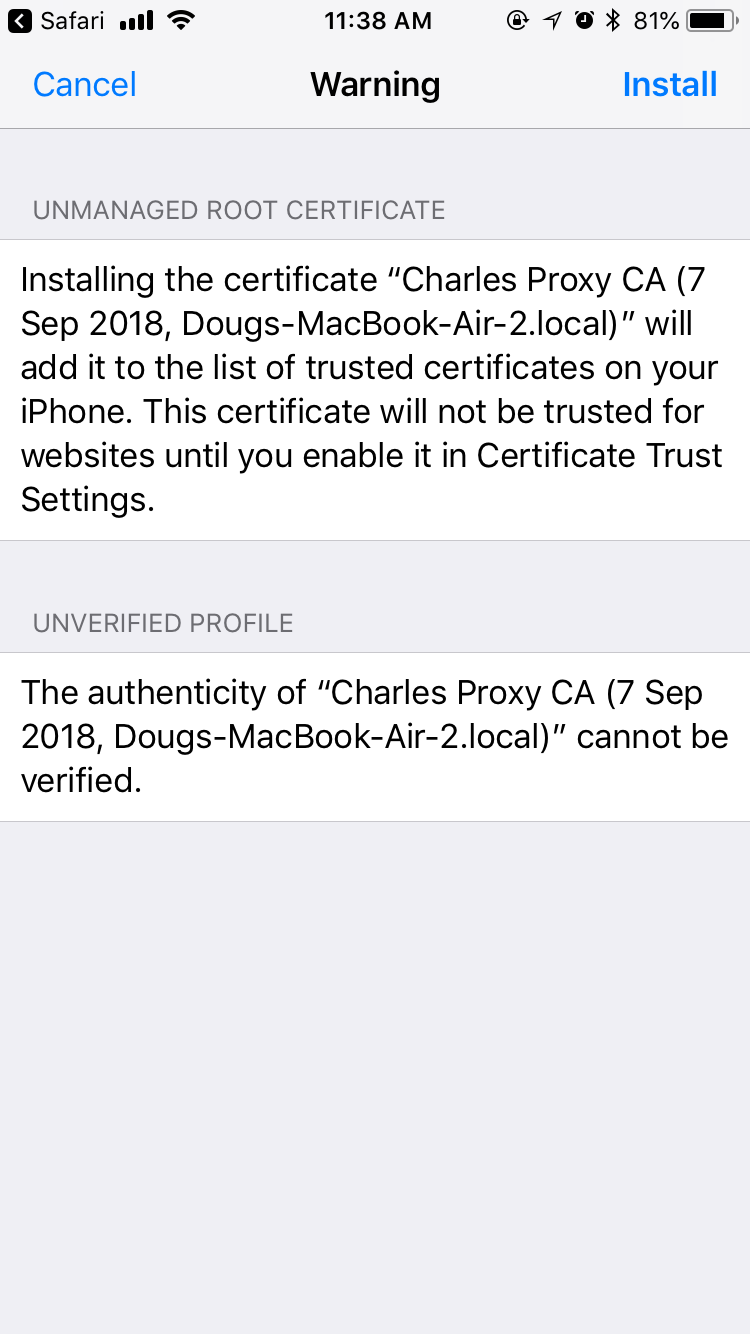
- A warning message will be shown. Tap Install again
- Tap Install again
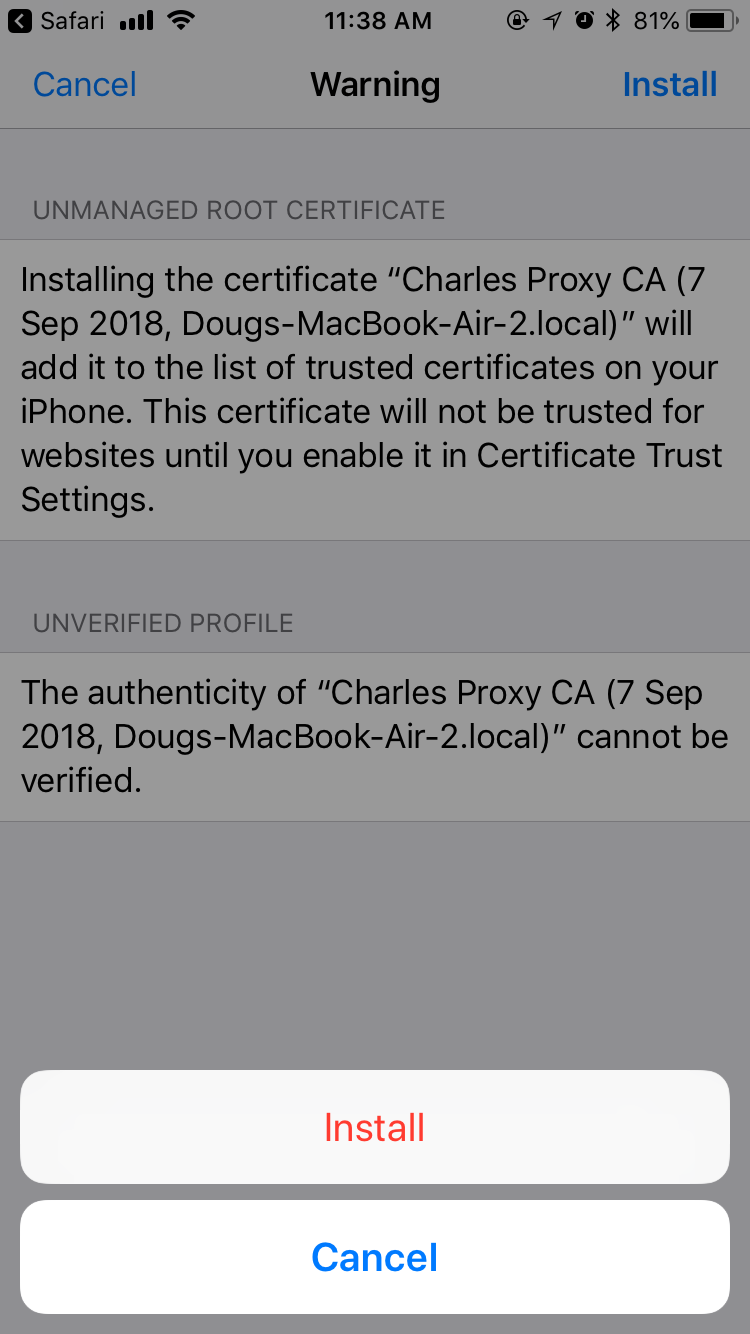
- Tap Done

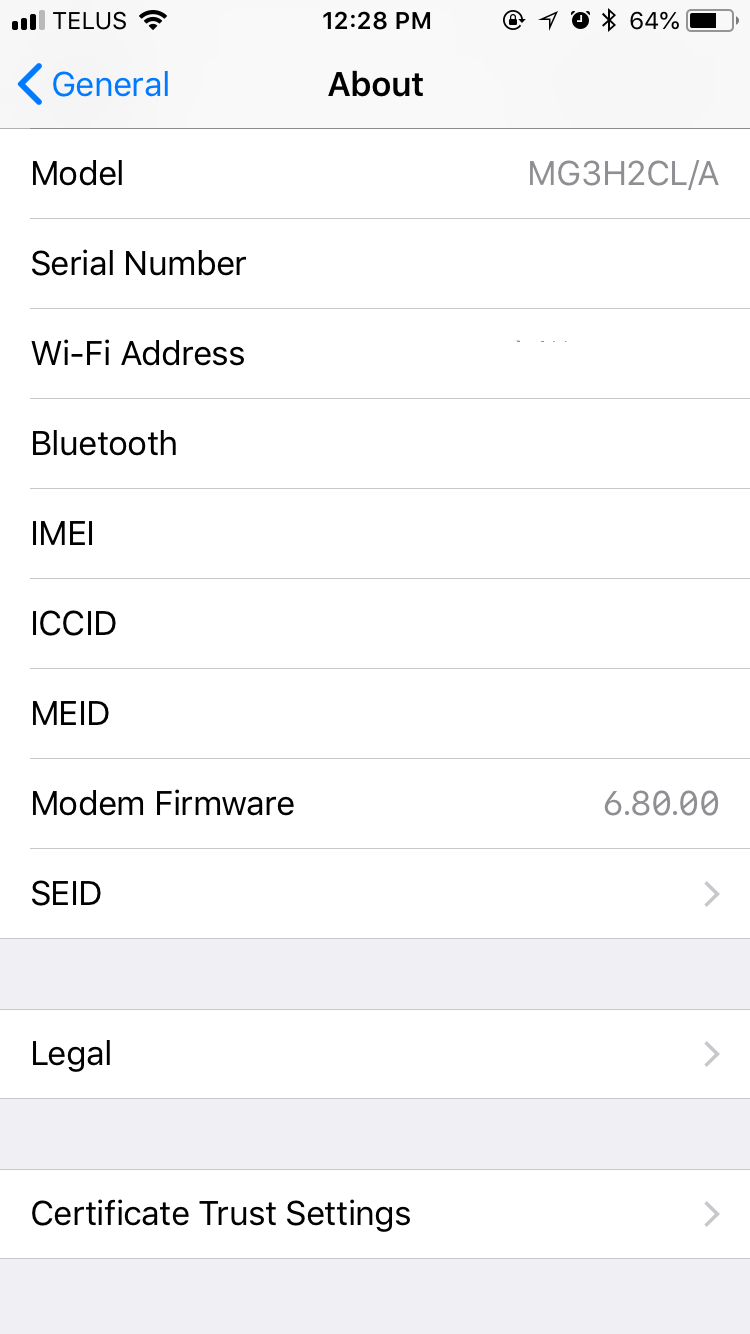
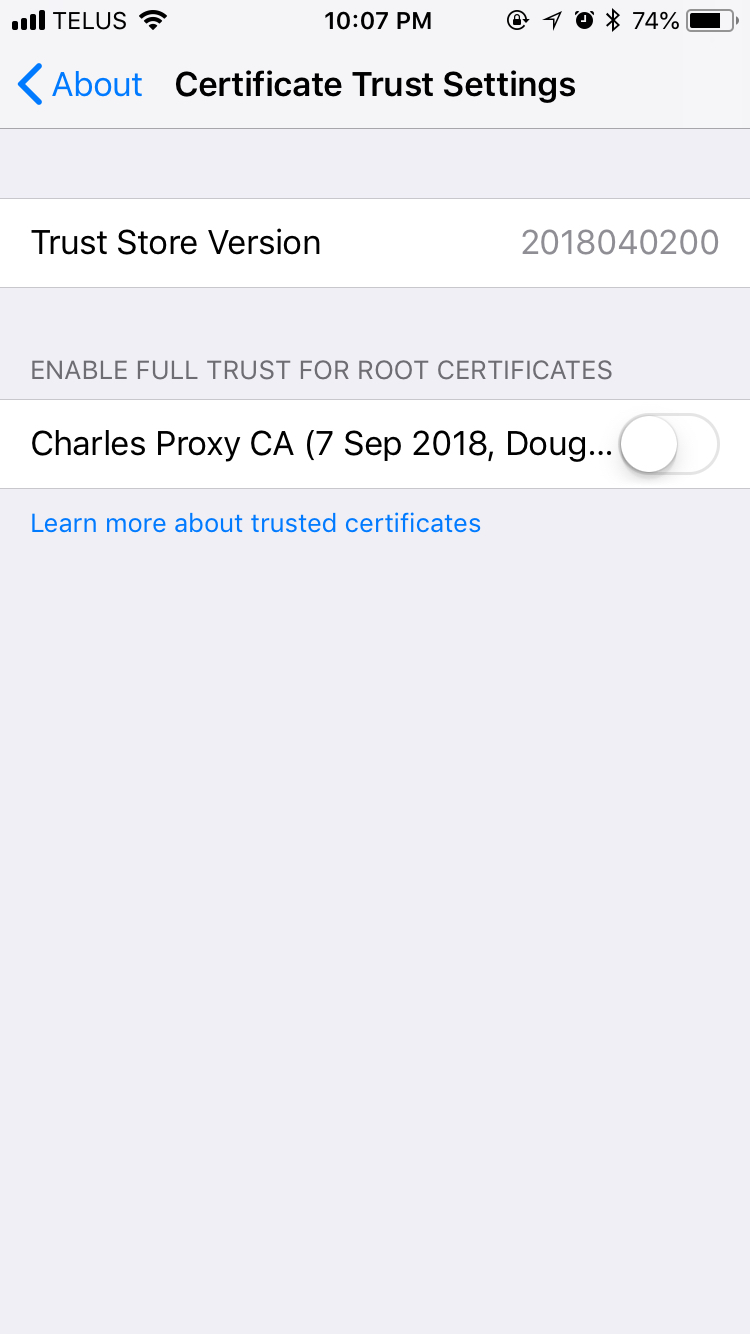
- Tap General > About and then scroll to the bottom and tap Certificate Trust Settings
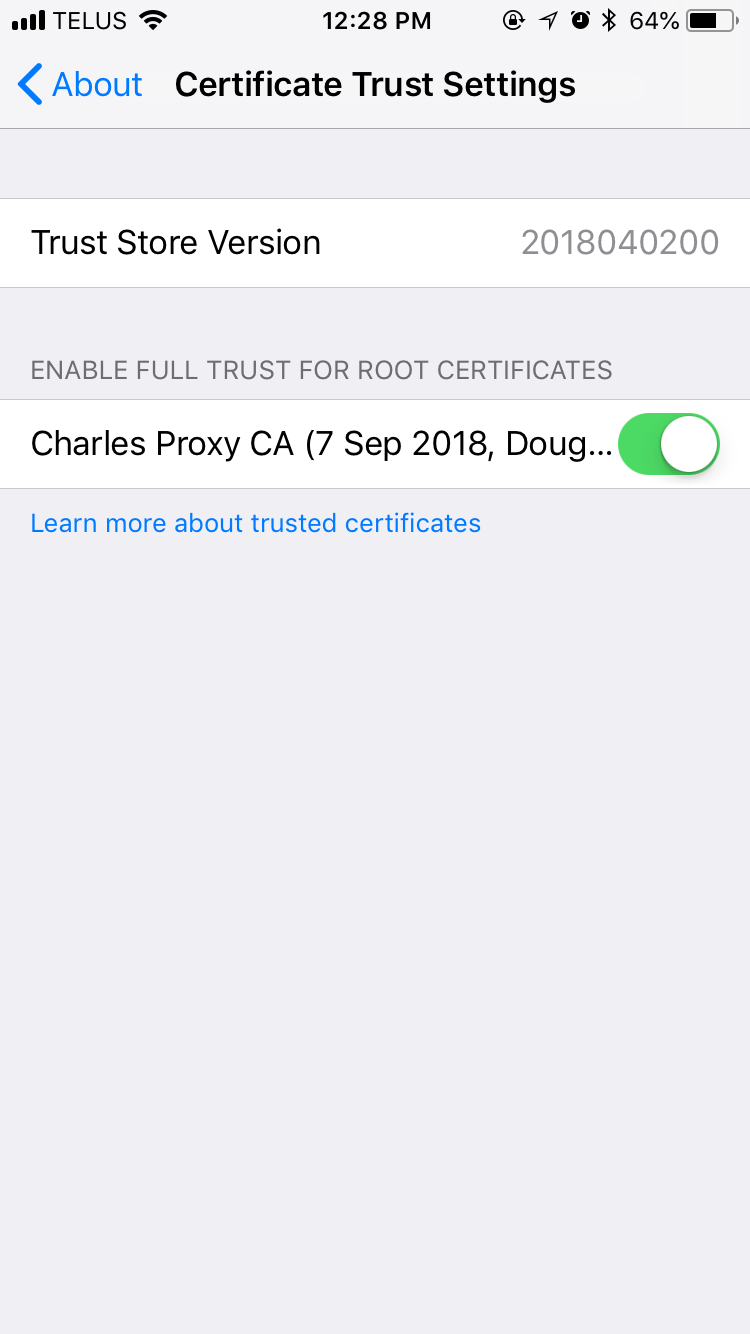
- Enable full trust for the root certificate you just installed.
-
If the EWeLink application is running, be sure to exit it.
-
On your computer, again go to the Proxy menu, choose SSL Proxy Settings... and check to box to enable us-ota.coolkit.cc:8080 or eu-ota.coolkit.cc:8080 respective of your geographic location and the click OK
-
Launch the EWeLink application on your iOS device and on you computer, you should see https://us-ota.coolkit.cc:8080 or https://eu-ota.coolkit.cc:8080 respectively, appear in the column on the left of the Charles application.
Note: If this is the first time you have used the application, you may be presented with a dialogue box asking you to allow the incoming data. -
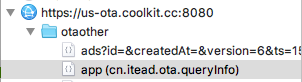
Click on either https://us-ota.coolkit.cc:8080 or https://eu-ota.coolkit.cc:8080 (depending on your location)
-
Expand the otaother directory and then click on app (cn.itead.ota.queryinfo)
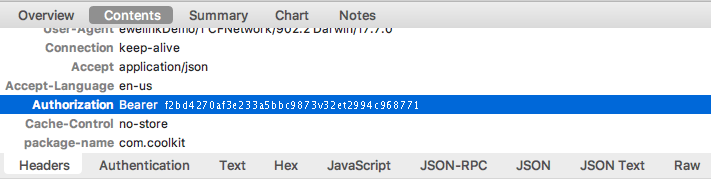
- Select Contents at the top of the preview window and scroll down until you see Authorization
-
The alpha numeric value that follows the word Bearer is the authentication token used to securely communicate with the web socket.
EXAMPLE
f2bd4270af3e233a5bbc9873v32et2994c968771 -
The correct web socket value for use with the node module is us-pconnect3.coolkit.cc for the United States and Canada, and is eu-pconnect3.coolkit.cc for Europe
-
Disable full trust for the Charles Proxy root certificate, but leave the Profile installed in case you need to repeat the process. The authentication token will always need to be captured again if you log out of the EweLink app.
 you’re the only person that’s cared about this in a year after posting! I only have two iFan02 controllers, but I decided not to use them In my fans due to their poor build quality. They instead became controller updates for my Halloween props

