SmartThings Presence Sensor Battery Percentage

I guess that is the reason. I did not do anything like that on my 4 AA enclosure
Any idea what exactly I need to do in terms of modifying the metal contacts? I can't find such info anywhere

I'll try to take pictures when next I get into my car (hopefully I remember because I usually have a lot on my mind when I get to my vehicle). Essentilly you just ensure a complete pathway from the positive to the negative side so you have a complete circuit.

I actually found an old post where I shared a picture.

I did something similar. The housing I bought has similar enough metal stampings that I could just remove two and take one with the wire and move it down two positions. I now have two 'spare' metal battery contact stampings on my desk. :smiley: Two AA are enough.

1 Like

Yup..same here

For what it's worth, I did something very similar with a few Ecolink Contact sensors that are being used with the internal contacts, not a magnet. I popped the internal PCB from it's clips, de-soldered the long wire/spring for the negative side of the battery and wired in a 2AA battery holder. Then I cut down the plastic housing to support the much shorter assembly and Hot glued that into a waterproof case. Hot glued the battery holder too. :slight_smile:

Pushed the PCB back into it's clips in the plastic housing and inserted the pair of AA and it's working great.

Much more complicated was using the "spare" plastic, the 'discard' - to be hot glued to the waterproof case lid to press the Tamper button. Lots of trial and error to get it exactly the right length and positioned to work around that Antenna wire conveniently placed above the tamper switch.

To the OP, unfortunately you may have supplied 6V to a device that only takes 3V, so it may be fried. At least the voltage sensor may be fried even if the rest of it appears to be working.

I'm not sure I understand what you just did. The black and red are soldered somewhere? Beside the place where they are attached?
All I did is solder the loose ends to the presence sensor
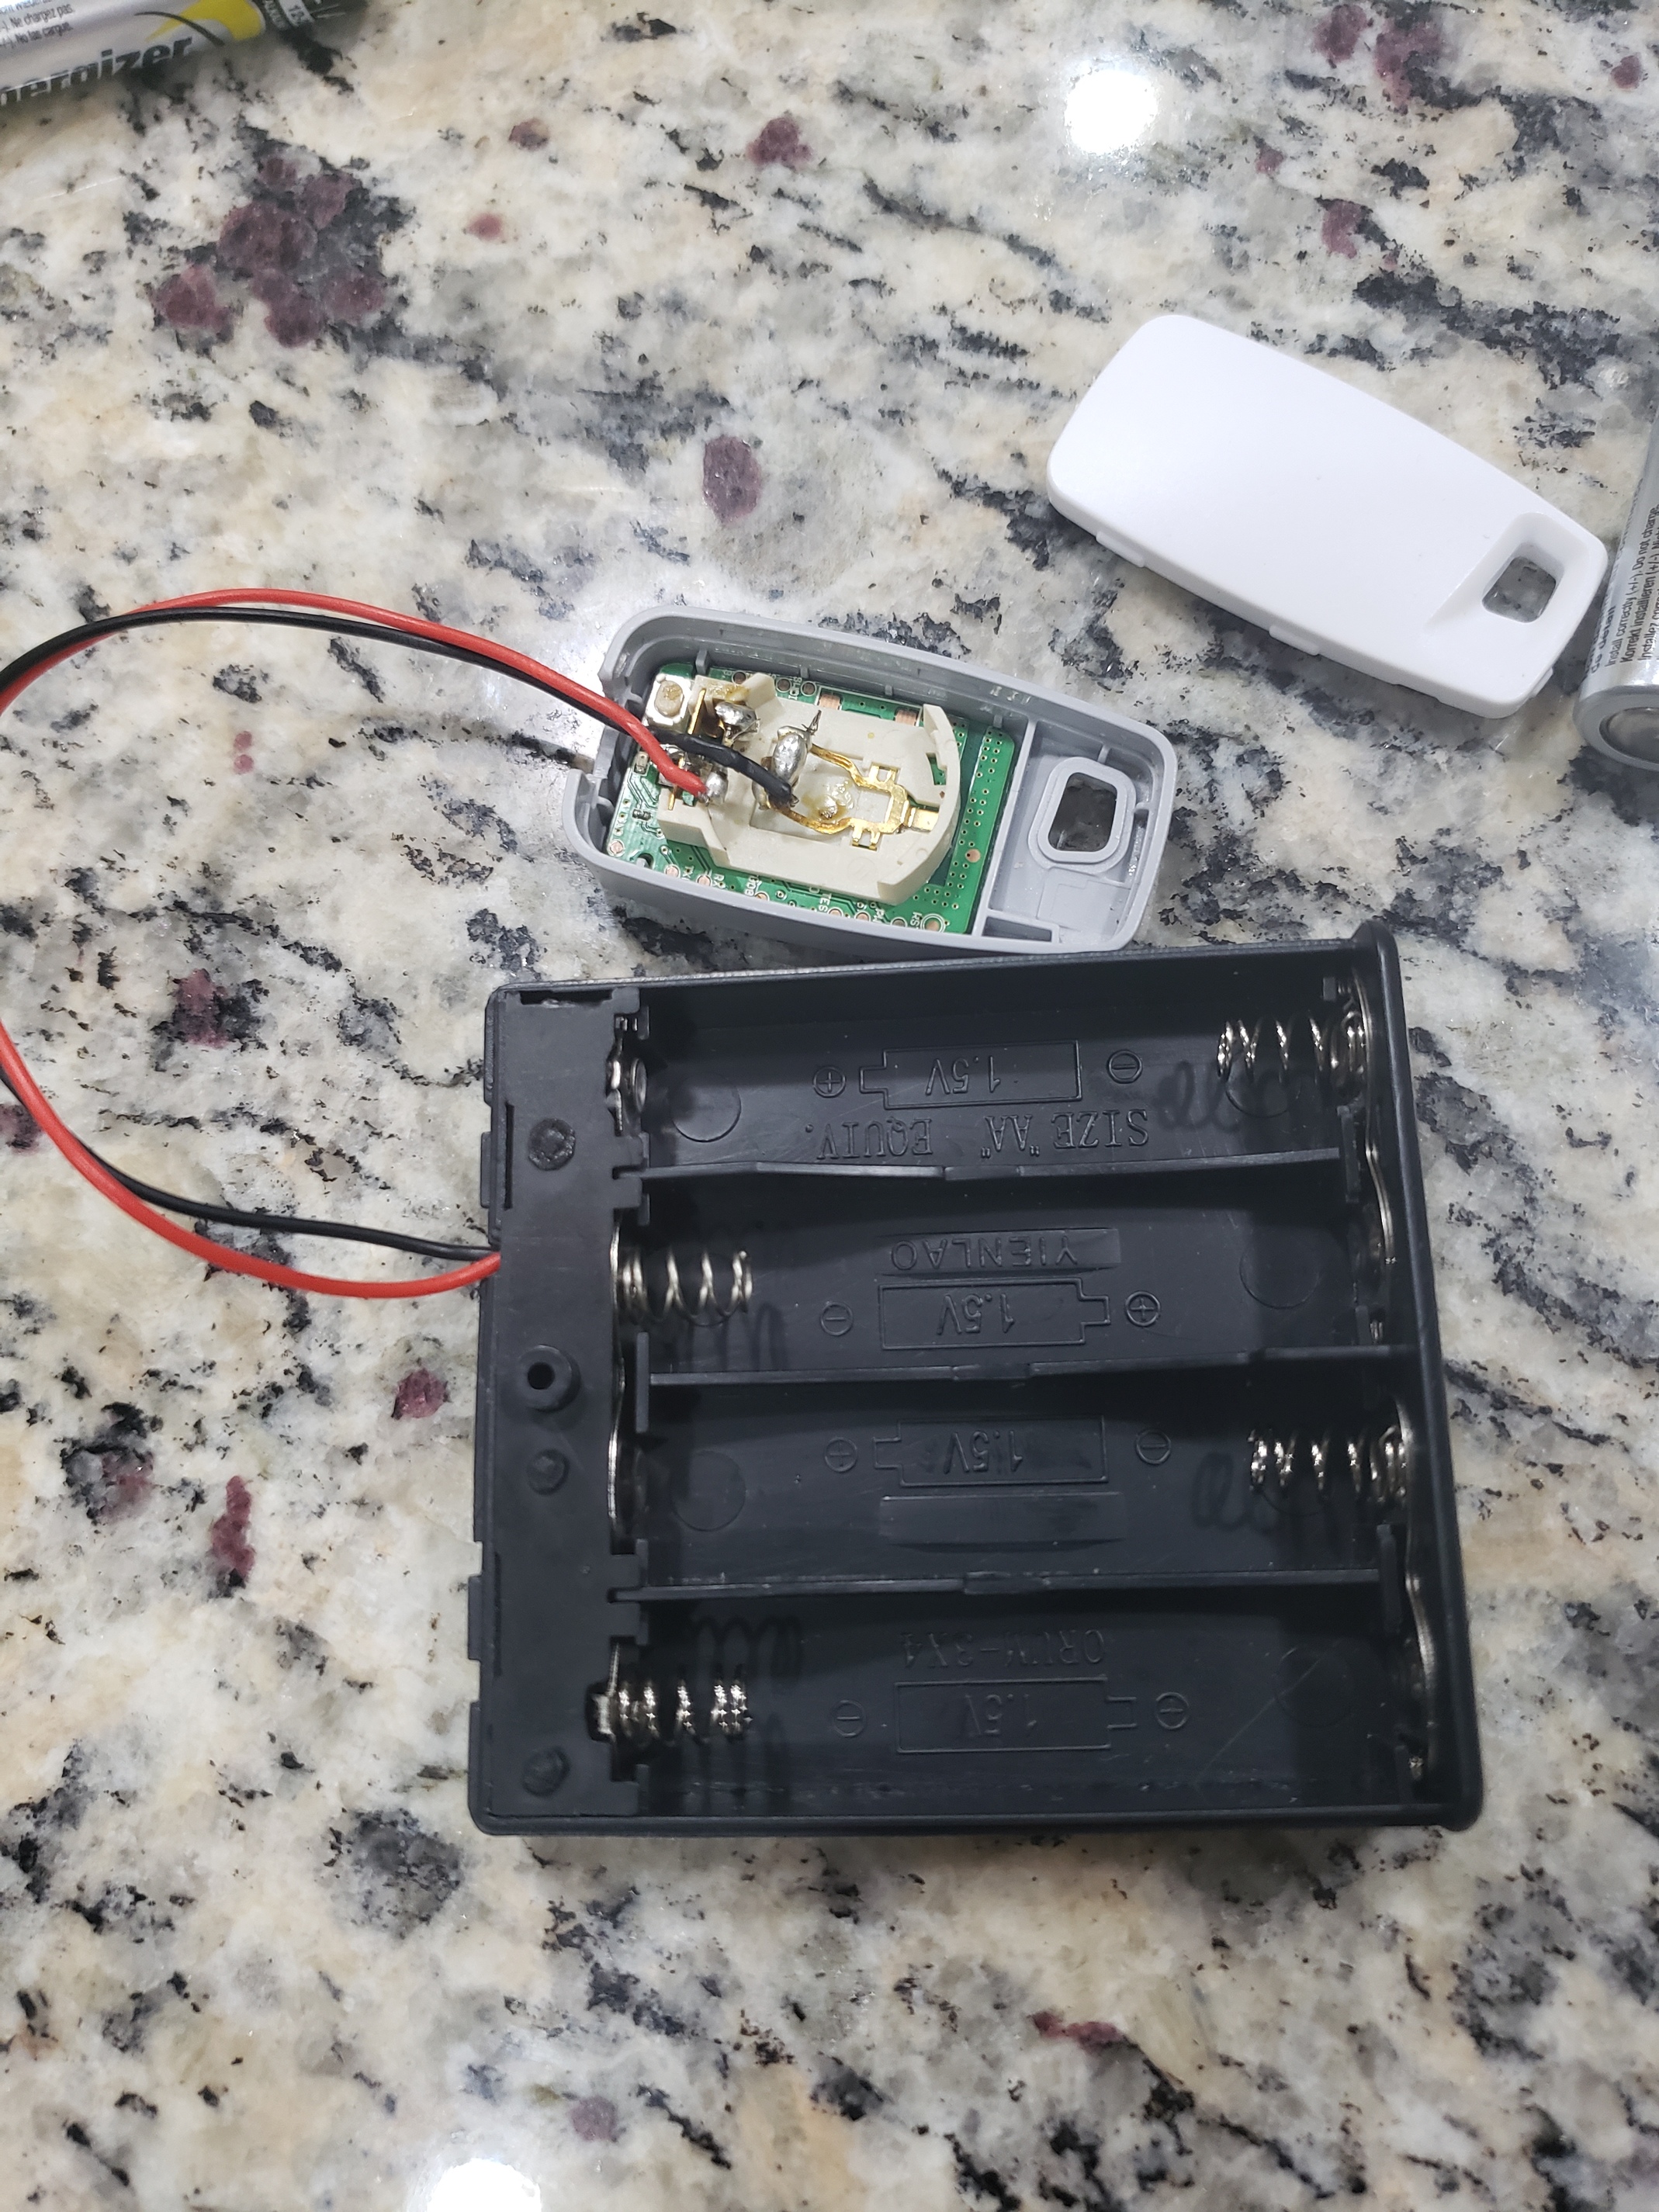
Here is what I have

that piece of plastic with the screw hole in it?? It can be removed. There's two posts that are sticking through that have been Melted to hold it down. I used my finger nails to peel up the melted part and then smooth it off. That 'lid' then comes off.

Then the Red wire is going to the switch, leave it alone. The back wire is attached to that end piece of metal. the top left one in your pic. Just pry it straight up and out.. same with the 'dual' metal next to it. Then slide the single black wire piece back into the 2nd slot from the bottom.

All that's left is clean up :smiley:

You can pry the dual metal piece that is at the top Right in your pic. the bottom two battery slots is all you need. So I just took cutters and snipped out a bit of the divider between battery slots 3 & 4 to make room for the sensor to fit, flat. Used 3M Command strip to 'glue' the sensor into the bottom. I popped the PCB out of the SmartThings plastic and just Command strip'd it directly to the bottom. If neatness counts, put that lid piece back on and use your soldering iron to melt the posts again.

So luckily I have another enclosure that I planned to use for my wife's car. Just waiting for the sensor to go on super sale again (got mine for 5 bucks used). I figured I would prep the enclosure for the sensor and take pictures for you so here we go.

First here's a picture of my enclosure with the lid off. On my version, I have a screw on the piece of plastic that need to be removed.

I removed the screw and pryed the small piece of plastic off. I wasn't careful enough and it split down the middle. Doesn't really matter in the end for me.

Next you remove the battery contacts in the middle.

Next remove the contact attached to the red wire and move over to new location.

I used a needle nose pliers and rocked the plastic separator until it broke away. Takes a little patience but very easy.

That's pretty much it. Reattach the small black cover. Connect the red and black wires to the appropriate contacts on the sensor. Install batteries, and presto changeo. I don't have the sensor to install so I included the old pic from my previous install. For me, the case fit perfectly snug in the compartment and did not move around so I left it as is. It does not move around at all with the case closed.

2 Likes

I have the battery mod done for my son's school backpack but another option If you do not need it to show presence just arrival departure useful to open/close the garage doors on arrival/departure and to also make sure garage doors are open if the car is running.
Just cut an old usb cable and wire the black and red wire to the arrival sensor and plug it into the cars usb port.

1 Like

Good pics Stephan

I must have gotten the cheap knockoff. No screws for me. But everything else was the same. The one I got is in my wife's car and the one thing I'll mention is that when I put it out of sight in her car, sliding it along turned off the switch. :frowning: I had to go back and get it out, turn it on and slide it away again, with care. :smiley:

Can't thank you guys enough
Stephan's pix were very helpful
I just did it for my 2 presence sensors, hubitat shows correct numbers now with battery of 100% and bv 28
Now I need a good rule to use in my car and my wife's car

by the way...

bv == battery voltage in tenths of a volt...

28 = 2.8 volts

I would say it's not going to work at much below a bv of 16. The AA's should last a very long time. If not, time to find a case for those easy to hide C cells :smiley:

Nice suggestion !

Thanks
Surprised cars or garage door openers don't have this feature built in as a safety feature.

incase the command start is accidently triggered on the car or one of the kids gets out in the garage and manages to start the car.
Keeps them safe from carbon monoxide posioning.
I also have a bedroom right above the garage.
So if a car was running all night it could seep into the bedroom it shouldn't but lots of things happen that shouldn't.

1 Like

Just wanted to say thanks to everybody for the great idea and everyone else for the pictures that made me believe this was easy enough for me to do.

I just rigged one up and it seems to work great!!

1 Like

Just wanted to post that I did the battery hack on two ST Presence sensors about a month ago. I was having very little success with the app and other presence methods. Since putting these in mine and wife's vehicles we have had 100% presence success (knock on wood) We have turned off the phone location and use way less phone battery now which is a also plus.

1 Like

I'm no electronics guru and was wondering if adding the two AA batteries increases the range of the device? Because of the layout of my house the range is close to 40' but the signal has to go though the metal skin of the car, a metal garage door, garage cabinets loaded with stuff, an exterior wall, another exterior wall and finally an interior wall to reach the hub.

I suppose I could test it using a contact sensor but they seen to have limited range.

Iā€™m not an electronics guru either, but I can say with some confidence that the answer is no.

2 AA batteries does nothing more than extend the useful life of the device in between battery changes.