Thanks .. I will look into it..
@jared.zimmerman & @Angus_M
Holy cow. Those are super professional looking. Super jealous.
Angus, How do you get the tinycam tiles to be circles?
1 Like
A lot of messing around with CSS  but eventually it's very easy to achieve...
		.roundImage {
		border-radius: 50%;
		border:solid 1px black;
		}
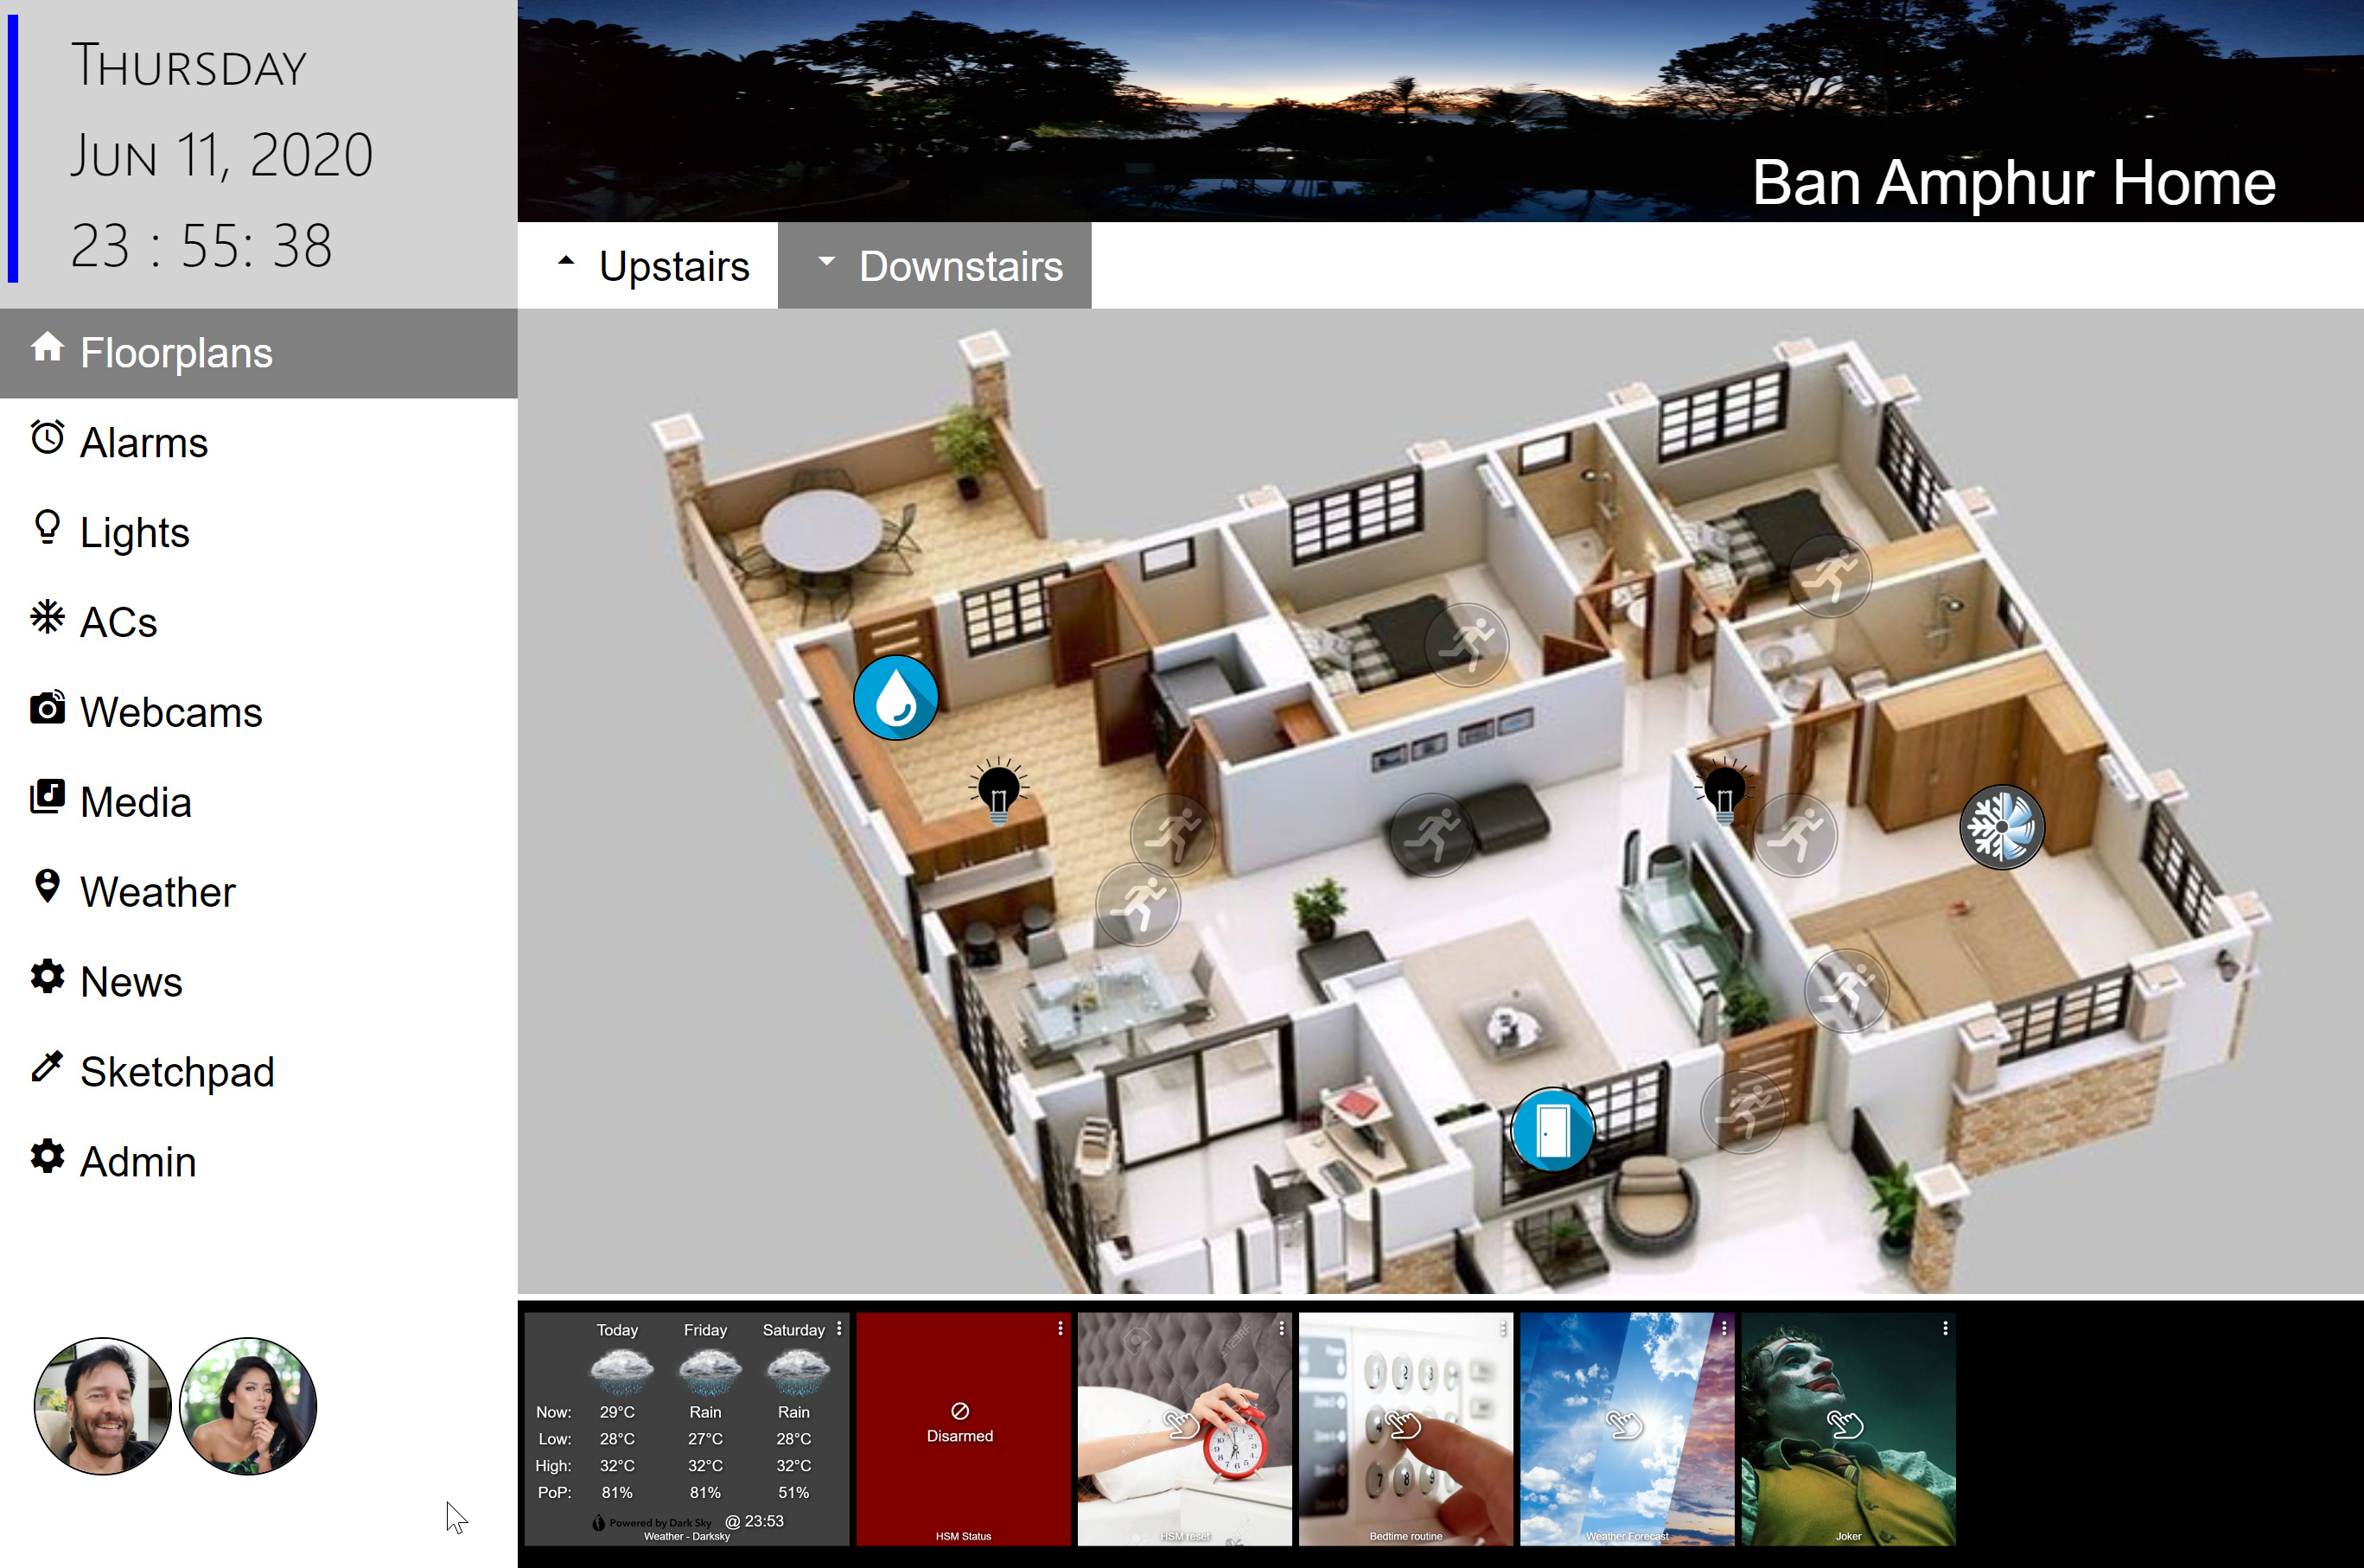
I will probably post the whole story at some point but too busy right now. There is a stack of CSS and Javascript to control all this but none of it is rocket science (I"m not a coder, just a self taught keen amateur ha ha ha). It's moved on a bit since then with modes driving the header image to the page and I'm working on popups to control ACs and lights (at the moment a single click toggles them on/off, but I'm trying now to add panels to control them completely, eg. for ACs: fan, temp for lights: colour, level etc). It's become a big html/javascript coding project. A lot of fun but a way to go yet.
I've also added pages for music control, Netflix, YouTube etc. The idea is to put this on large touchscreens in the kitchen and in our landing space upstairs and use as kinda media/control centres for the house. Also will include "info about the property" and "contact owner by webcam" etc (because we are going to rent this place eventually (Airbnb) and we make the HA a big part of what we offer).
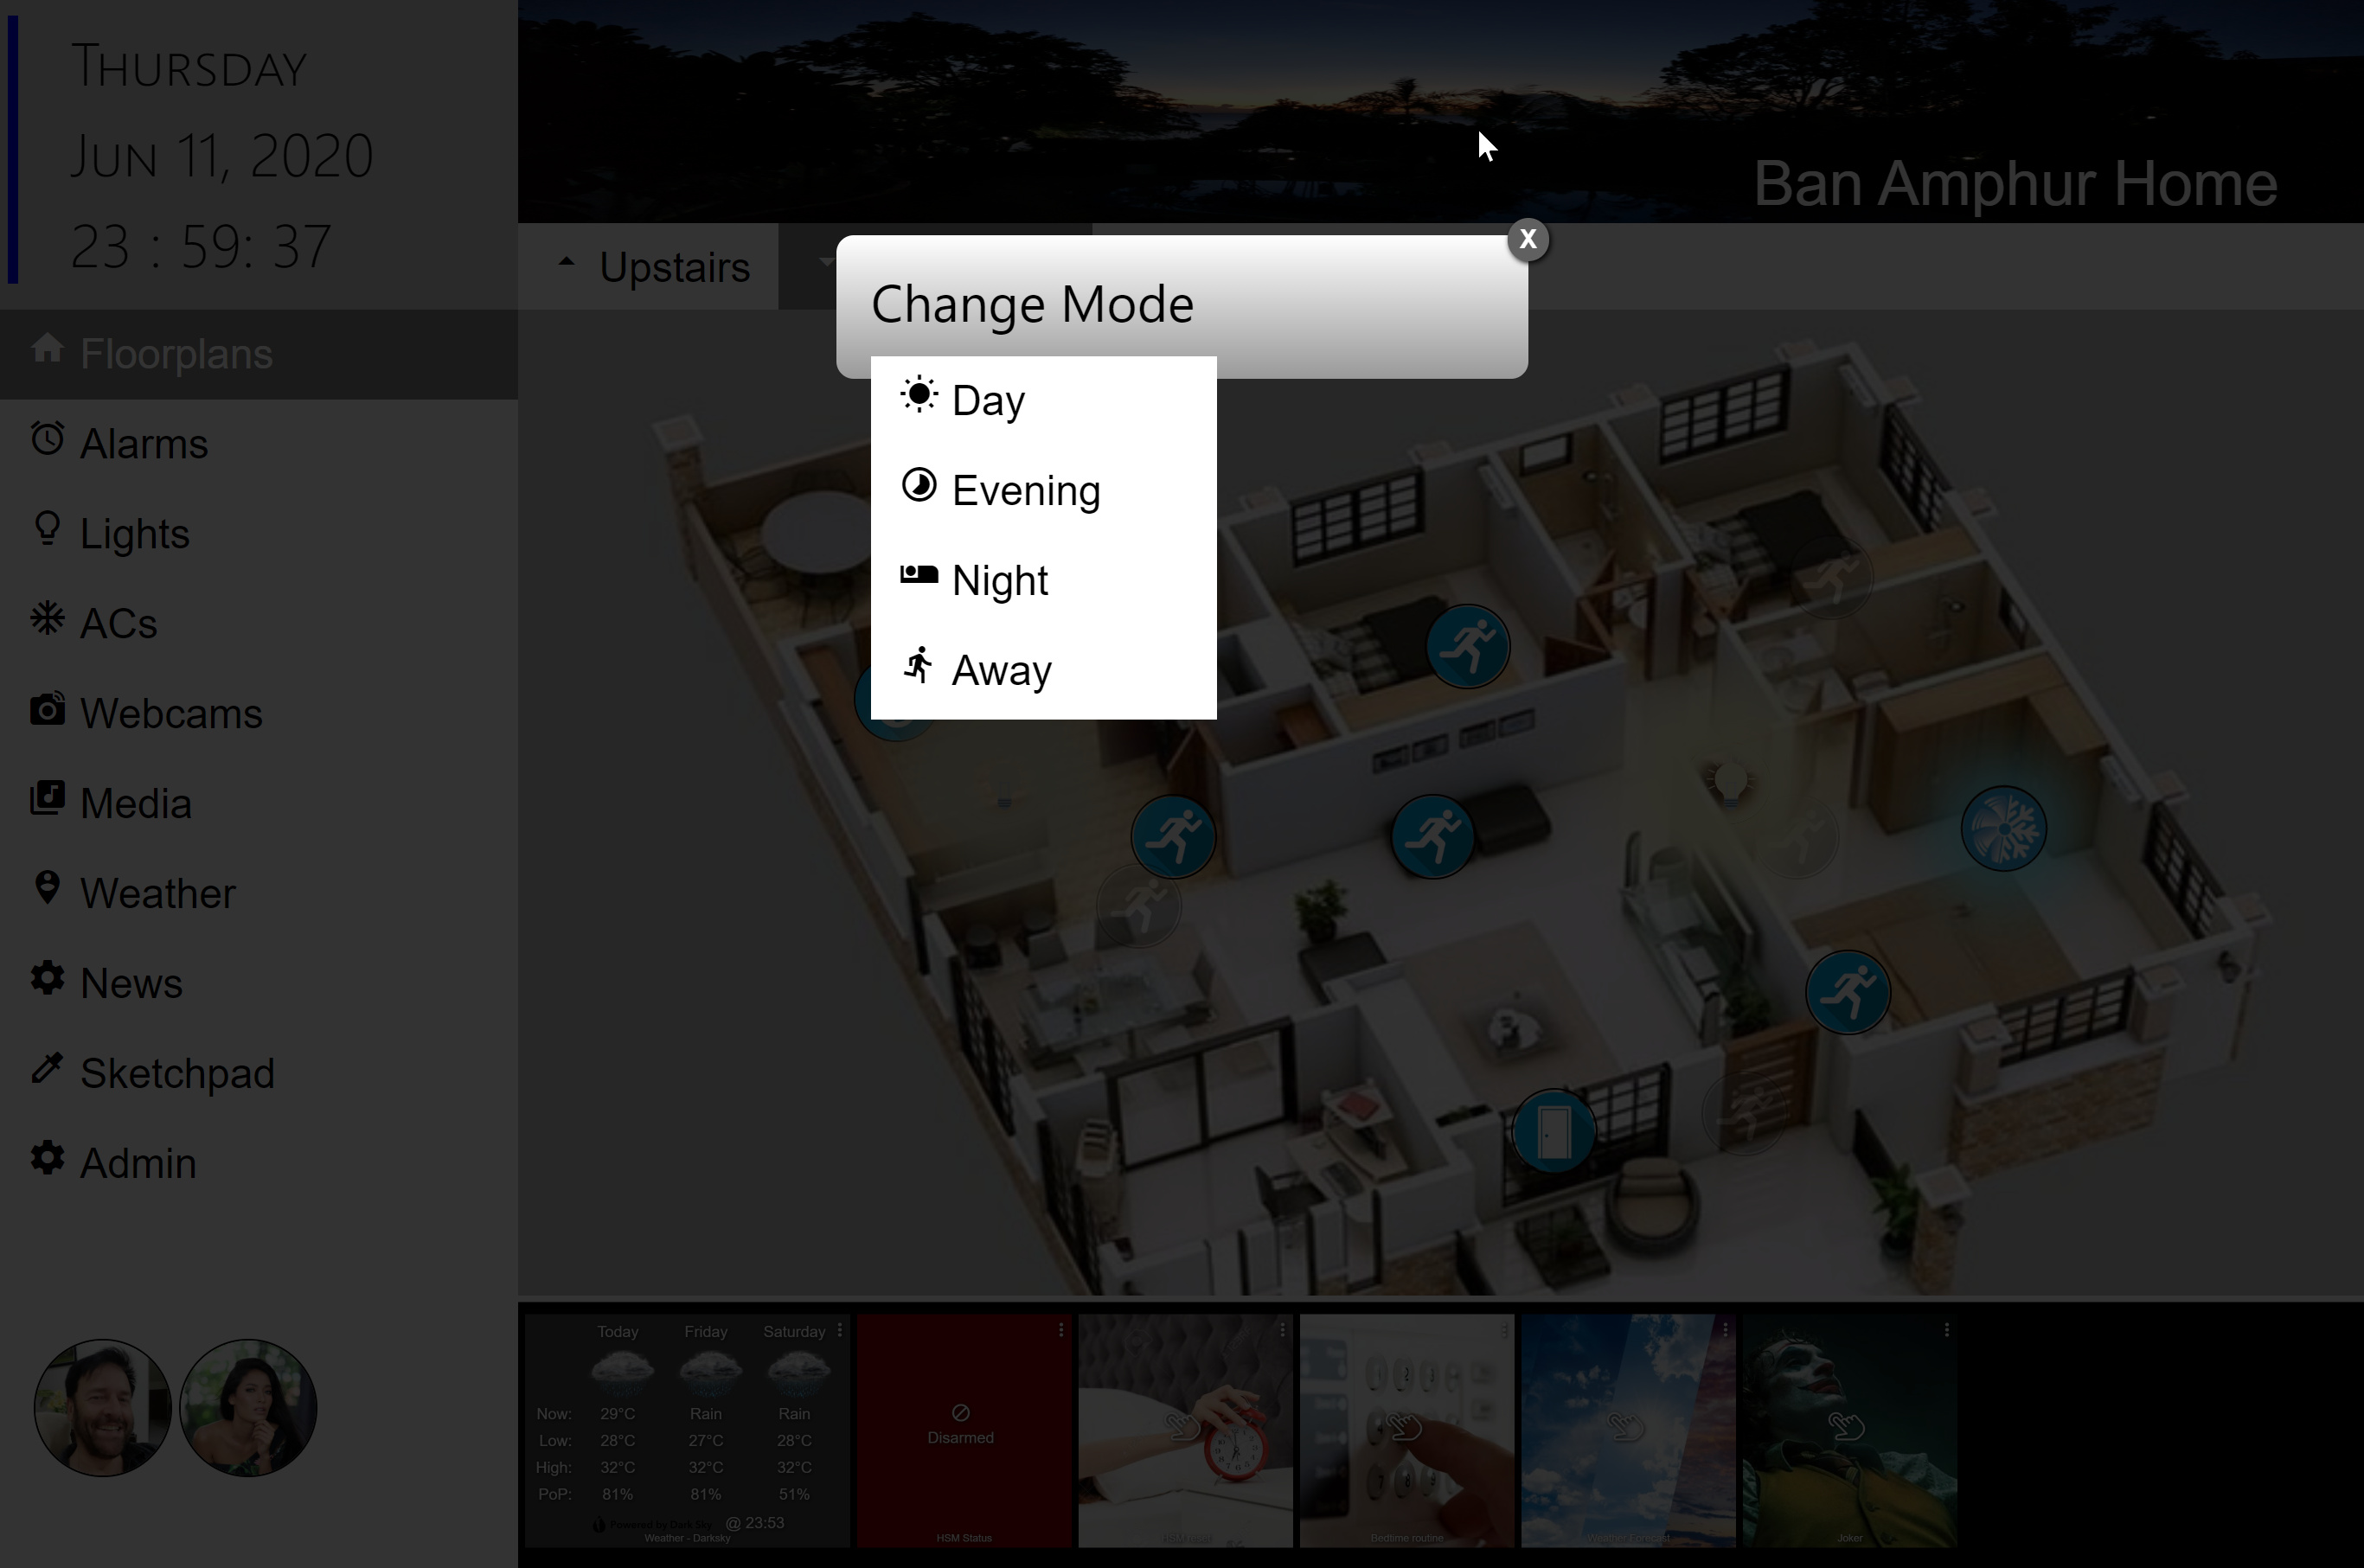
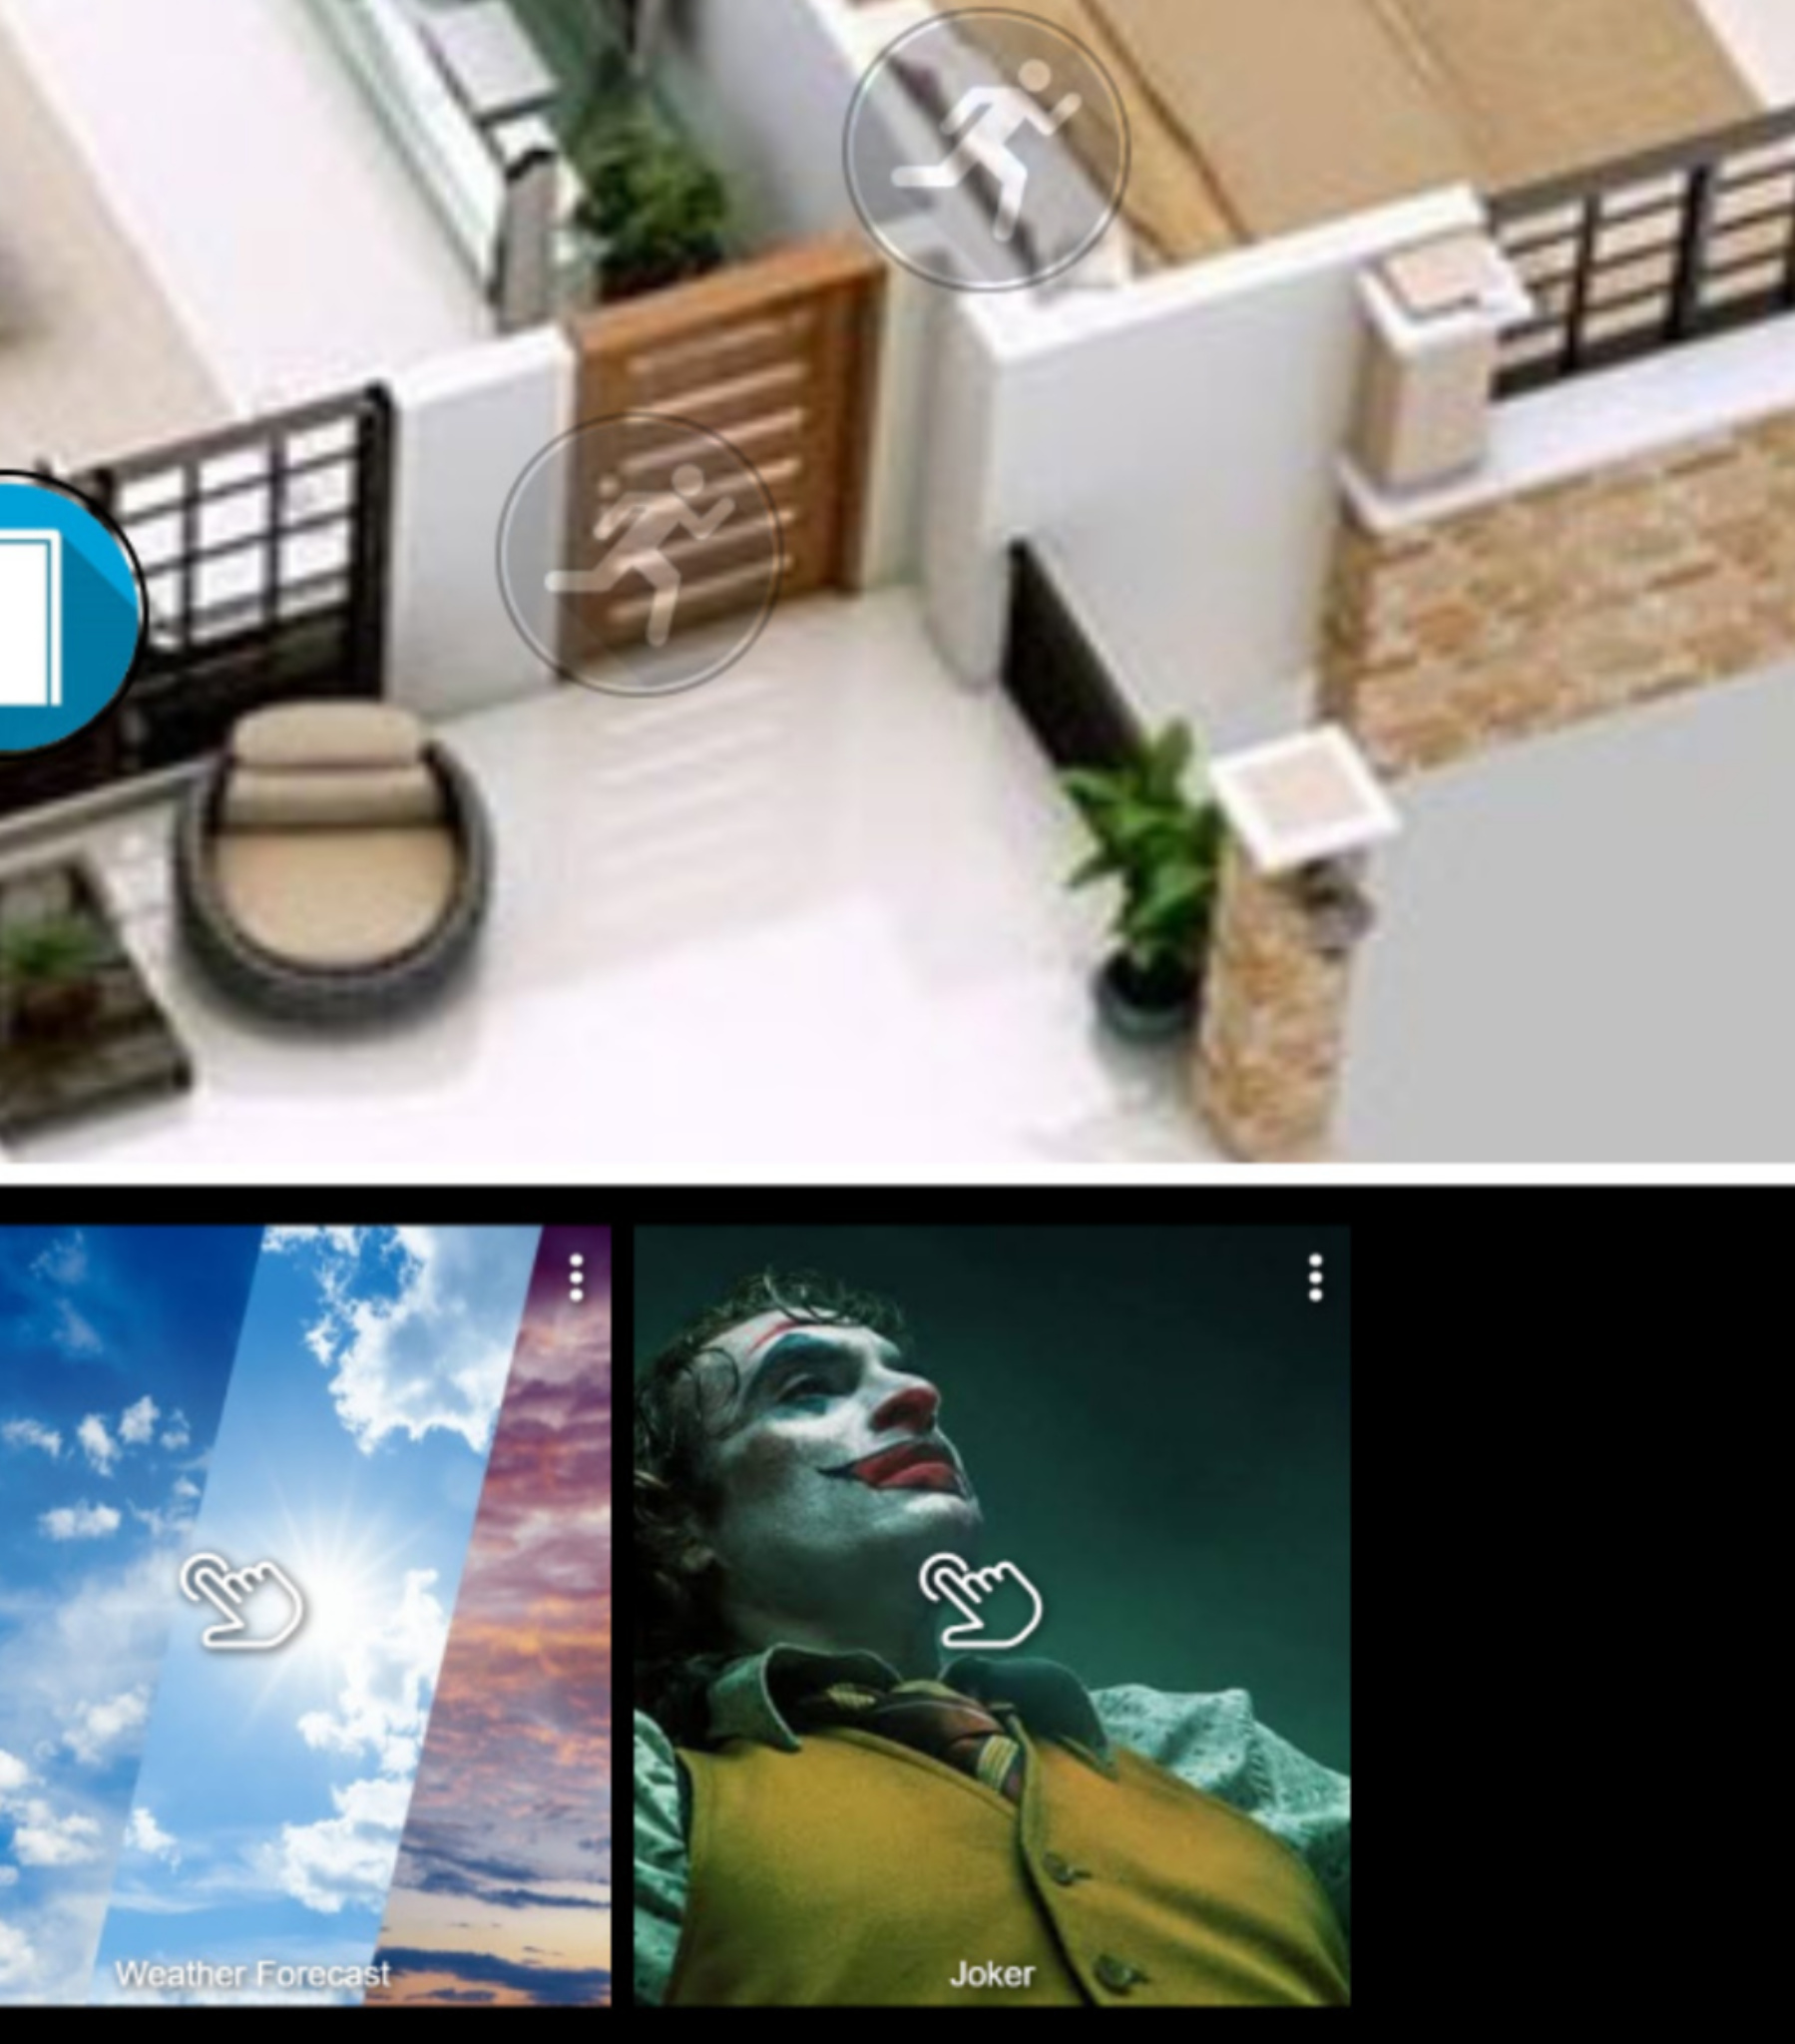
I've also added some settings options for show/hide webcams (mine are just battery operated Arlos at the moment, so I cant leave them on all the time because the batteries drain - I need to rig up 5v supplies to them), black/white themes (the screen shot below is the new white theme). The pages automatically jump back to the floorplans after a while too and you can select whether you want upstairs or downstairs as the default view (so that I can run the same system on either screen). This runs on a Pi 3b linked to the HE of course using Maker API and the eventsocket.
And here it is with an example pop-up (this one to manage the modes if you want to change them by clicking on the banner image, after which it will send the selected Mode to the hub and the image at the top will change based on the eventsocket response from the hub). So i have different pano images for day/evening/night. Notice also some lights and AC fan images are on (eg. AC fan is blue, and rotates, and the lights are yellow or white depending on level/temp) and motion sensors activated (the little blue man is running) behind the popup in this screen shot.
WIll post when it's in a reasonable state and most of the functionality is there. Probably a few weeks yet. Just wish I could spend more time on it and had more skill/knowledge about what I'm doing to be honest, but I'm busy with my day job too. Anyway, quite proud of the result so far it's getting there....
nb. the floor plans are not my property, they are just placeholders taken from the web for now as I await my 3D floorplans as part of my renovation project on this property.
6 Likes
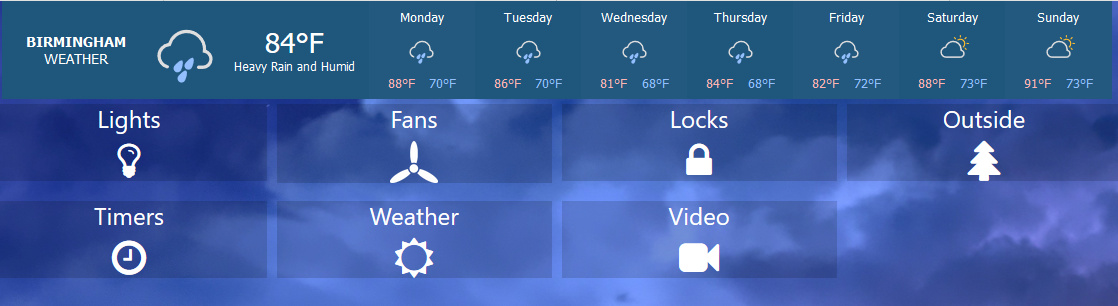
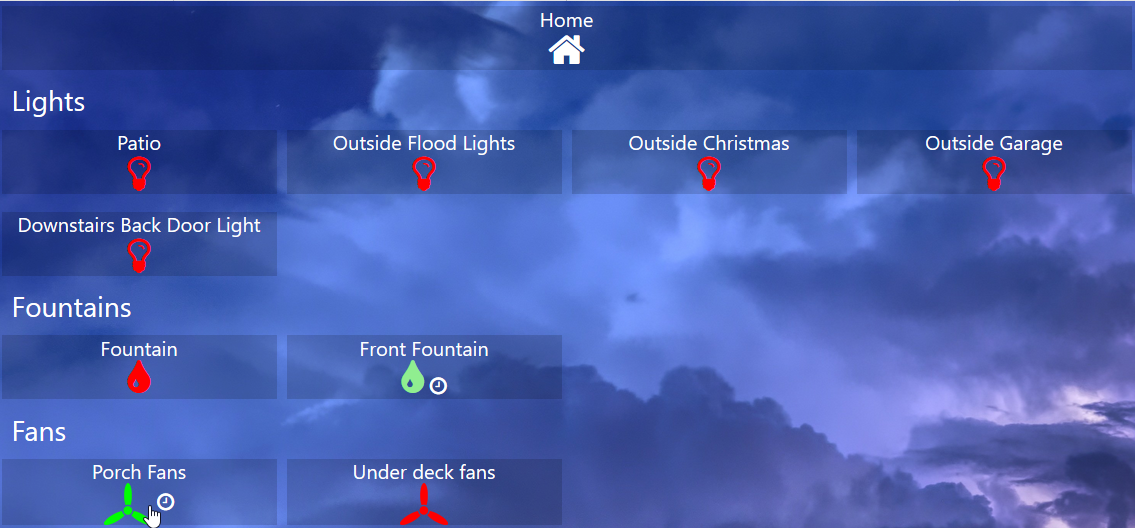
That's useful if you live me (Yorkshire) in UK ![]()
It's a button to provide a random "cheer me up" joke to 2 Google Mini's  the one next to it does a spoken weather forecast.
1 Like
4 Likes
Love your graphics. So nice & clear.
I'm definitely learning from your great work!
I've now integrated the great new Withings app and linked my 2 sleep pad devices to images of us in bed (well, actually random people off the interweb ha ha ha)...
We get in bed, the AC goes on, and light goes out.
Such fun 
5 Likes
Some of you will need to be admitted! This is out of control!! LOL
3 Likes
@thomas.c.howard What is the tile you have at the bottom middle that i think is showing device activity?? Could you share?
Thanks!
That is a Hubigraph Timeline. It shows triggers/motion/threshold for devices over time
I have been using the hubitat for over a year now and love it. Got it to replace Wink which was having issues and am glad I did with their recent shift to subscription based pricing.
I recently added a raspberry pi to our home network to run pihole and decided that I also wanted to play around with a Hubitat dashboard from the raspberry pi and I have included a video below of the it in action.
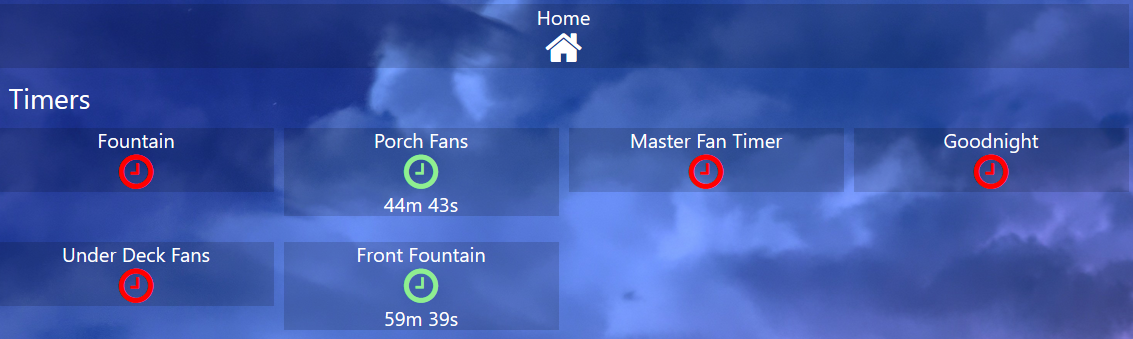
I have a few rules that have delay shutoffs and am always curious how much time is left on them and you will see towards the end of the video linked below that a page is dedicated to tracking all of the timer countdowns.


Love your thoughts and input.
2 Likes
are you saying you have the dashboards running on the PI?
Yes. Using maker api to send updates to pi and pi web server running.
Thanks...somehow I missed that on your initial post. Thanks so much for this. I use grafana and influx on my media server so this is right in line with that! Just got my hubitat last week so still trying to find all the cool apps that are there to use.
Last question. I see you have customized the tile in your dash. I saw the "light" customization that hubigraph has and am assuming you wrote some CSS to style the tile. Would you mind sharing so I can work on it a bit. I'm not on a computer that has a CSS inspector at the moment and can't quite seem to find the classes to write some CSS. Was hoping you could potentially shortcut my effort.
Again thanks so much
Tony
I'm curious how you did the "room states." I'm looking to do something similar. In smartthings, I just had a virtual switch that would turn on and off dependent on a rule if anything was "on" in that room or floor. I can do the same here pretty easily but liked your text tiles. Those are nice in that they don't turn on or off, but just inform.
I'm still very new to hubitat and am trying to learn the ins and outs so apologies if this is easily done, just haven't seen this yet.
Thanks in advance
Tony
1 Like
Hey,
I use @Cobra's Status switch, which allows you to add text to each status, on or off. As its also a switch, you can also use on/off too.
So the wide buttons are the status text of the switches, and the small switch on the right are the switches themselves. I'm using webcore and variables for the rooms, adding switches to be controlled etc.
If any of the listed devices (per room) stay on for longer than 2 seconds, then it updates the status of that room, and turns the "Status" switch on.
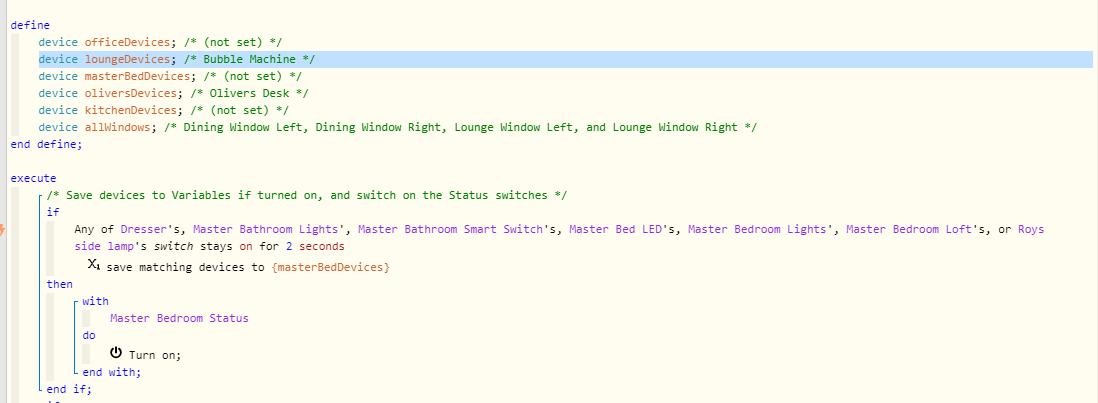
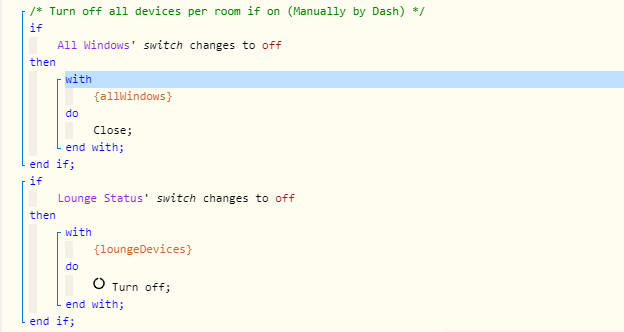
In the same piston, I have the switch for turning all devices off.
Hope I've explained well enough, if not feel free to PM me 
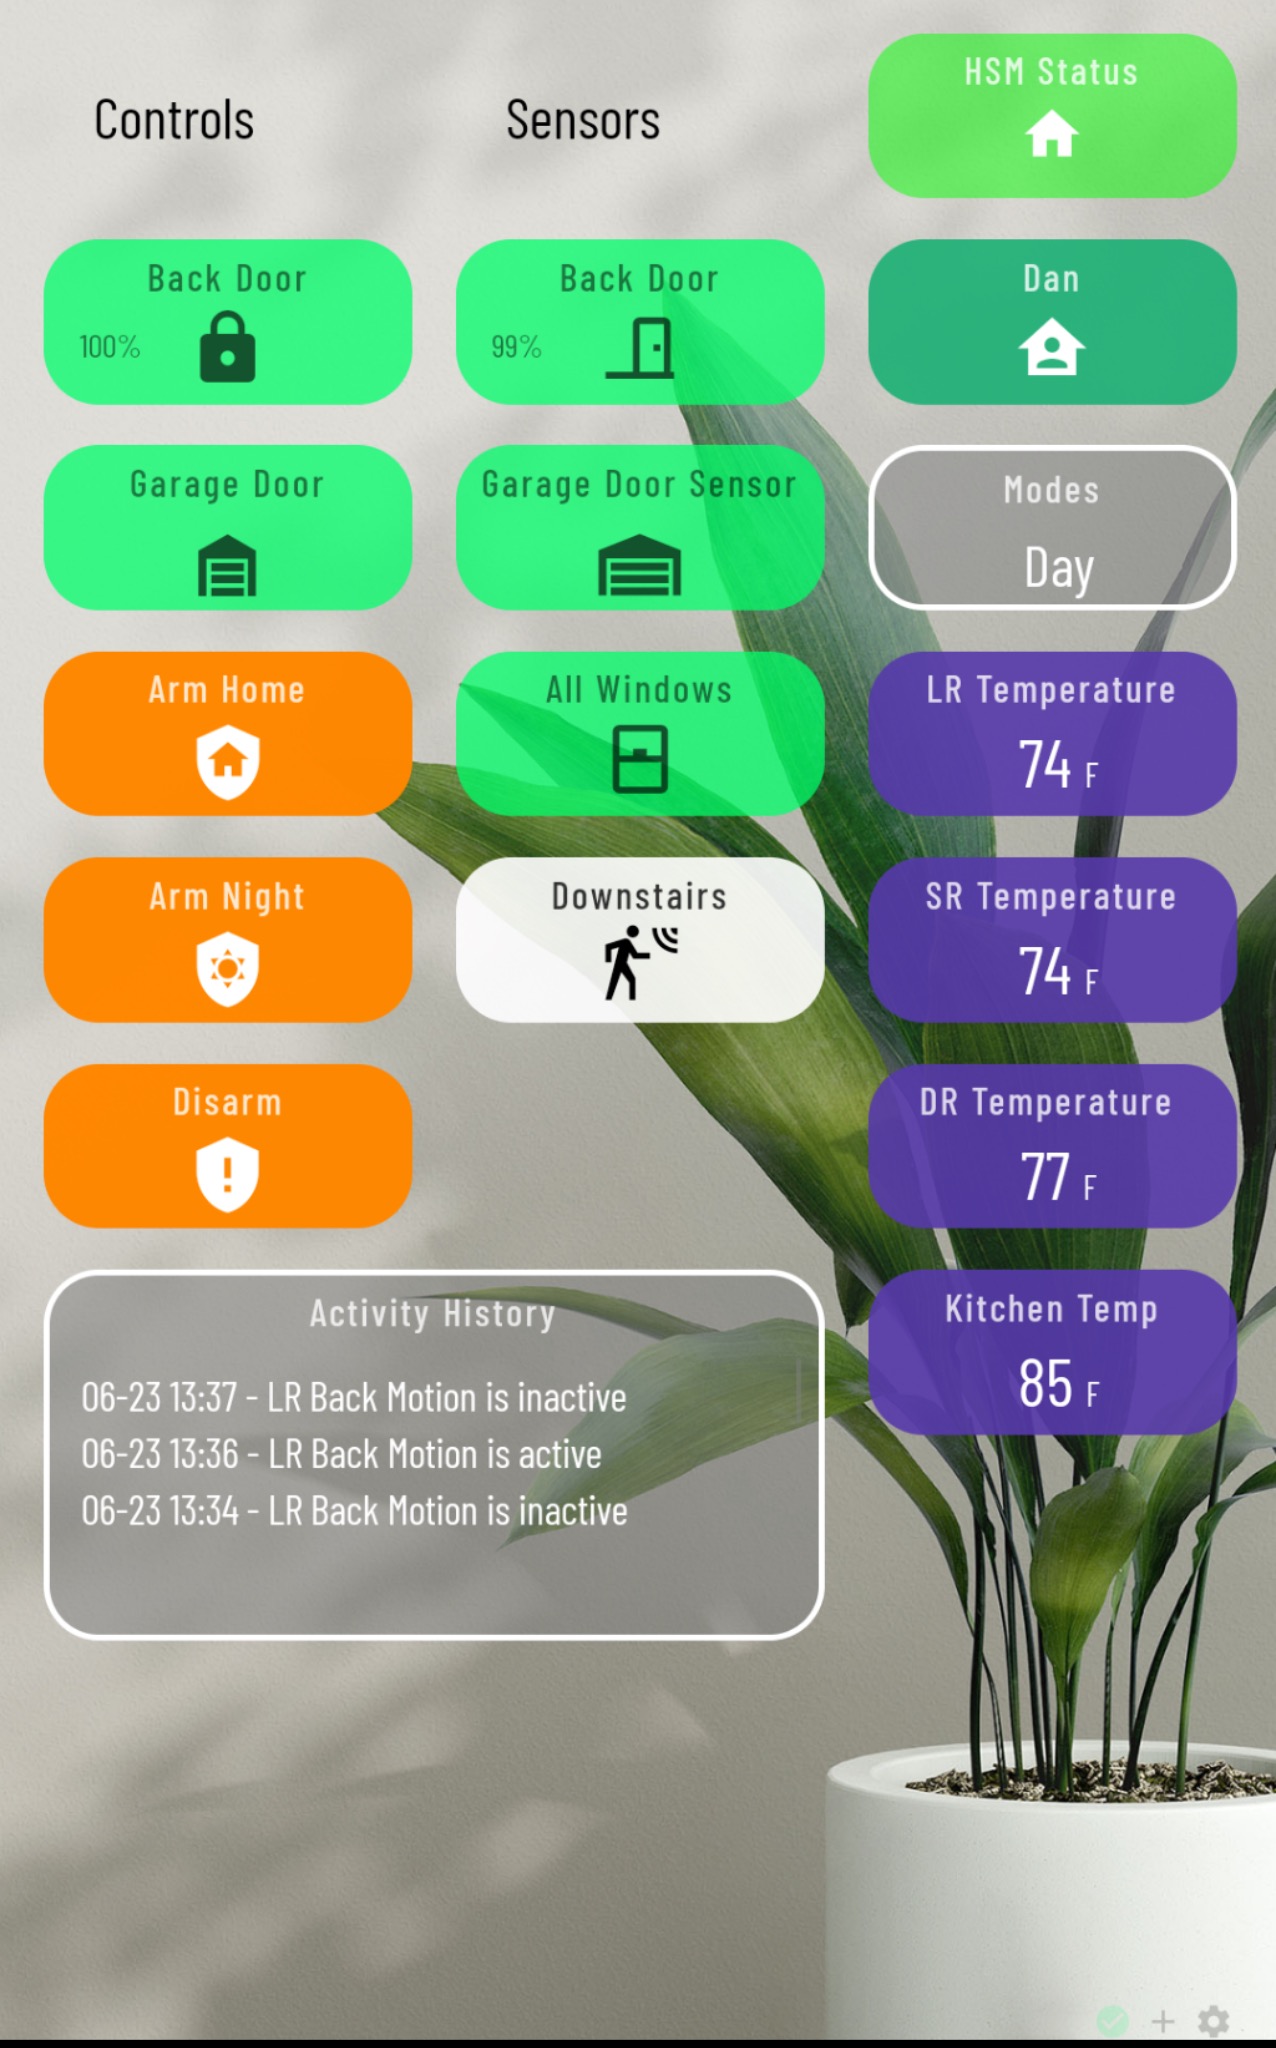
Here’s my current dashboard that I’m using on my phone. The three columns fit great and still have some room at the bottom as I decide what else to add.
6 Likes
Looks great but you gotta change those garage door icons to be the same. @spelcheck will cru when he see that one 
4 Likes
@Royski Nope...got it perfectly...well versed with webcore! Thanks so much for pointing me in the right direction.
Appreciate it.
Tony
2 Likes

