i have basic hubitat exp but newbie for custom apps (I use package mgr)
Q1: can i have both basic and full version?
even though i got basic with HPM (driver is there), i can't seem to load it as an user app
Q2: can keypad connect with Nyckelharpa (instead of HSM?)
Q3: i am not familiar with iFrame for dashboard (how the enter URL?). any references to figure this out?
Q1: can i have both basic and full version? >>> yes
virtualBasicKeypad is not an app, its a single device driver only. on your devices page, add a virtual app and choose this driver when creating it. While it works great for just hsm, it has limitations compared to the full version.
Q2: can keypad connect with Nyckelharpa (instead of HSM?) >>> yes
Q3: i am not familiar with iFrame for dashboard (how the enter URL?). any references to figure this out?
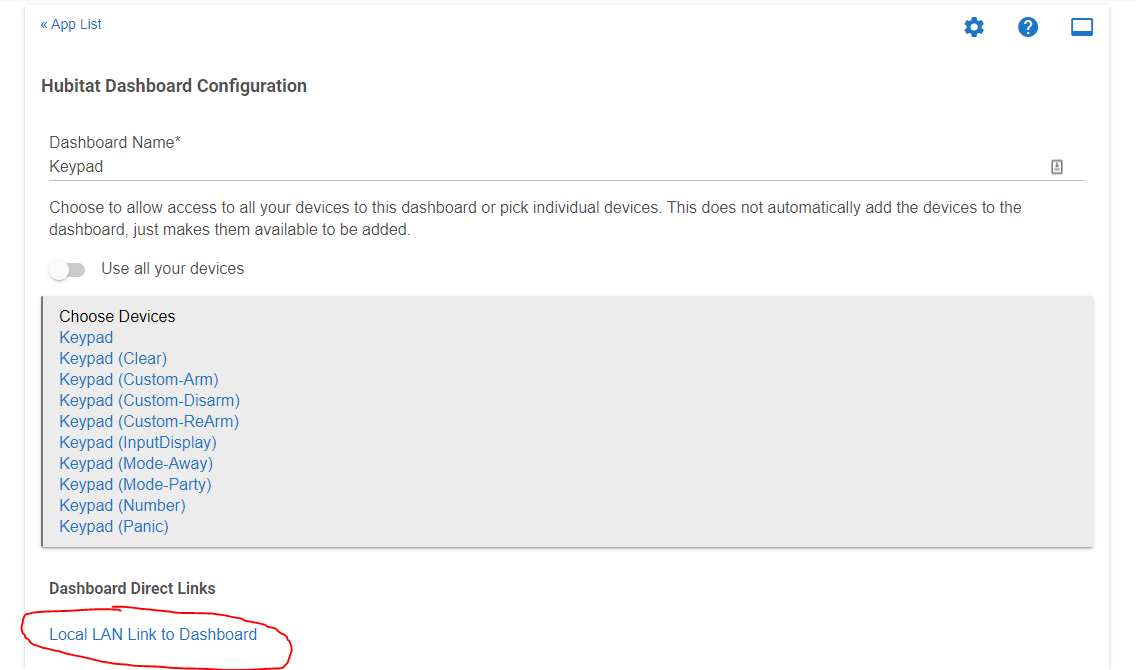
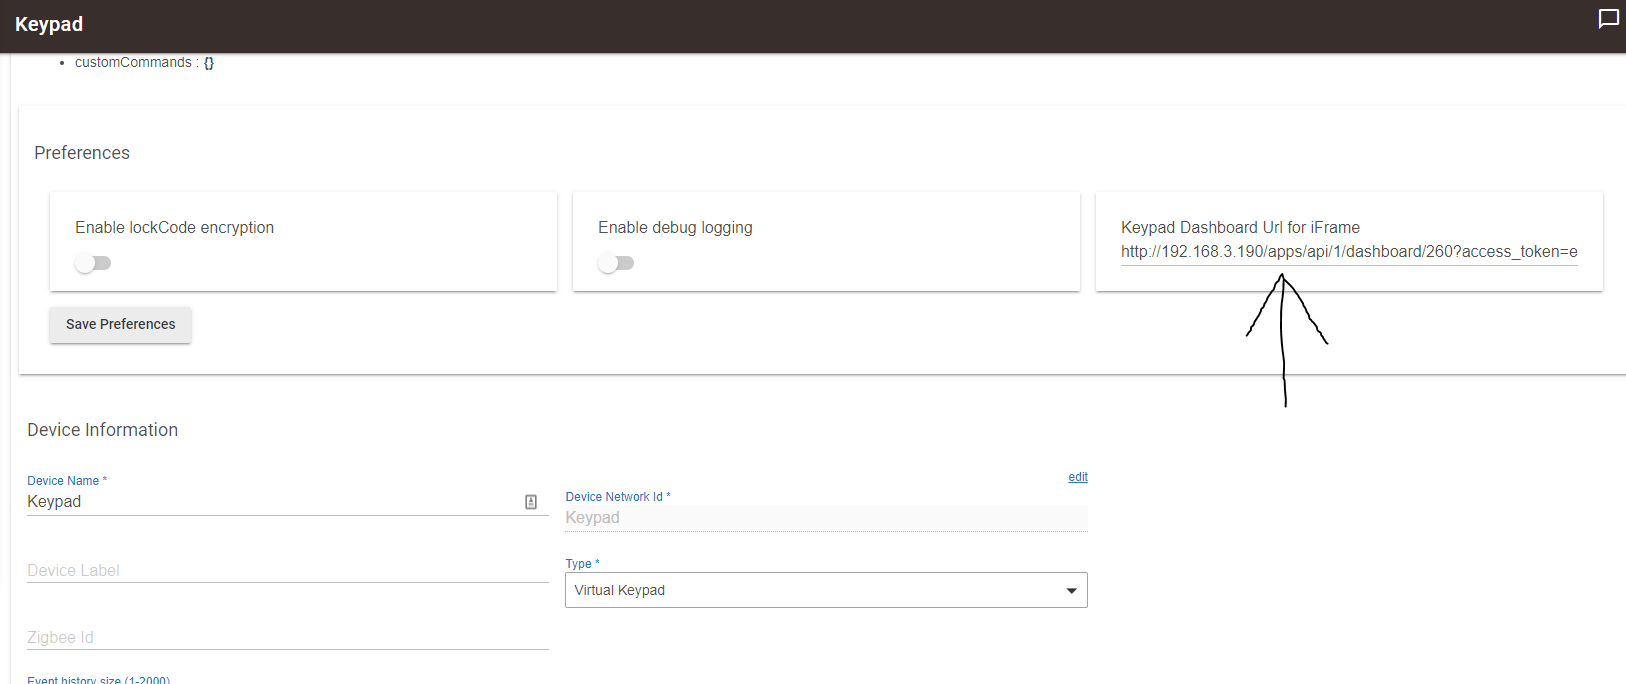
get the direct url for your keypad dashboard from the dashboard configuration page:
thx for detailed outline. i now have HSM setup, a basic keypad and Nyckelharpa with the intent of using user codes (Ny) on the keypad to set the HSM modes. However, i can't figure out how the links between these three entities work (Ny->keypad?, keypad->HSM?).
Any elaboration on my Q2 would be appreciated.
We might need to direct the Nyckelharpa questions to @arnb who released it. I worked with him to create the Virtual Basic Keypad and ensure it works for his use case, but I do not currently use Nyckelharpa, so cannot help too much with specific config questions. ArnB has a pretty thorough readme to configure Nyckelharpa that may help here:
I think you would setup Nyckelharpa to your specific needs and how it interacts with HSM. That should allow you to use the Keypad to change HSM, which will trigger Nyckelharpa to modify the functionality of HSM as you have it configured.
If you need more help, try the Nyckelharpa release thread, or let us know here what your intended use is and where you are getting stuck in the setup. It will most likely help others who are trying to do the same thing.
The Virtual Keypad operates on its own setting HSM's arming state, or the HE system's mode that may change the HSM arming state.
Do not add the Virtual Keypad as a keypad to HSM or Nyckelharpa. This is how mine is setup and it works well.
Nyckelharpa subscribes to HSM arming state changes, handling any HSM arming trigger source, including those from the Virtual Keypad, then processes any Open monitored devices.
When arming with the Virtual Keypad, I prefer using HSM arming states rather than modes. That is how a real keypad operates. The issue: when setting HSM via mode and arming fails, the mode remains set, but HSM arming does not follow. If you are Ok with that, then sure, use modes.
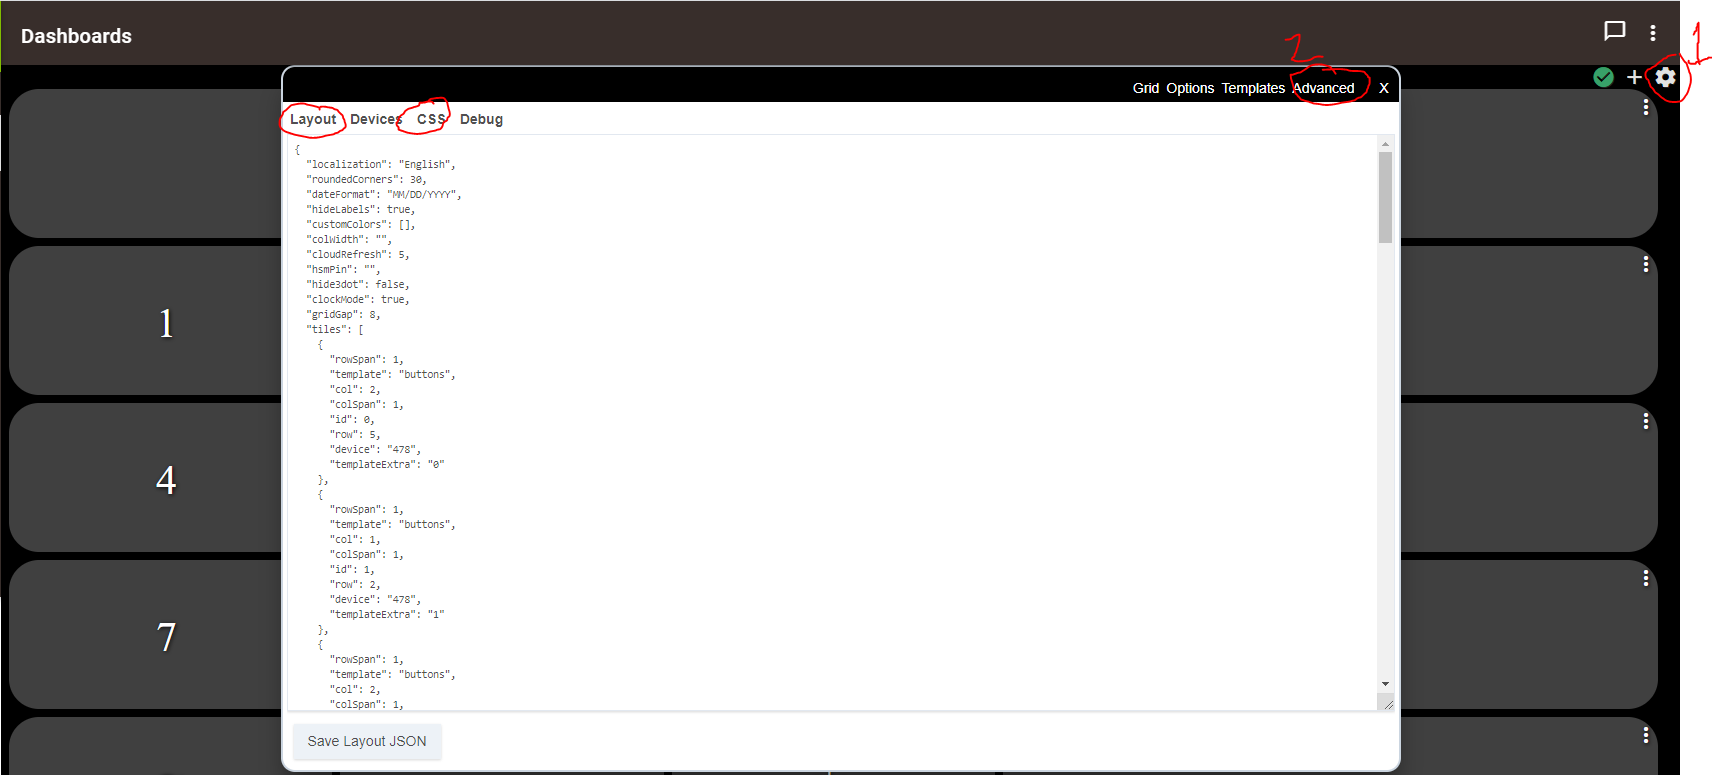
on the dashboard, click the gear icon. then select advanced. paste the JSON in the "Layouts" section replacing whatever is in there, then save it, and paste the CSS in the CSS section.
@chavezluisplus,
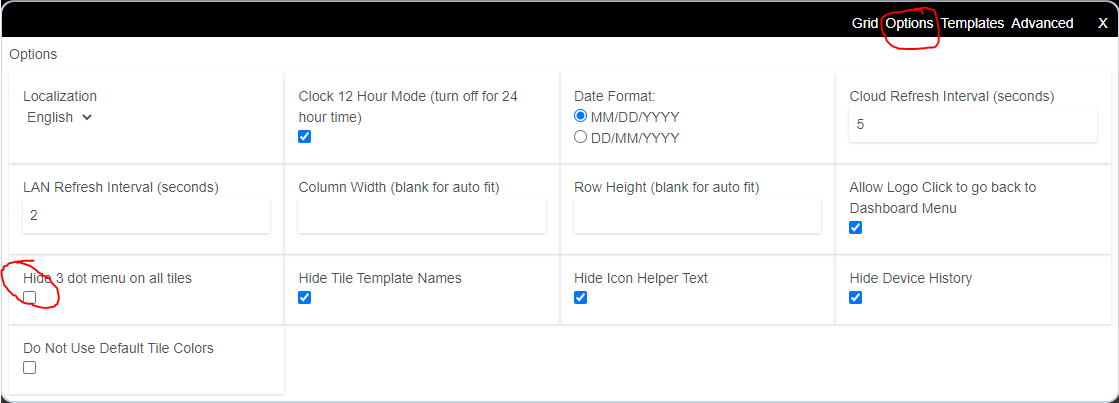
in the dashboard gear popup, click the 'Options' then make sure it is unchecked to "Hide 3 dot menu" (i have updated the first post JSON to make this unchecked by default)
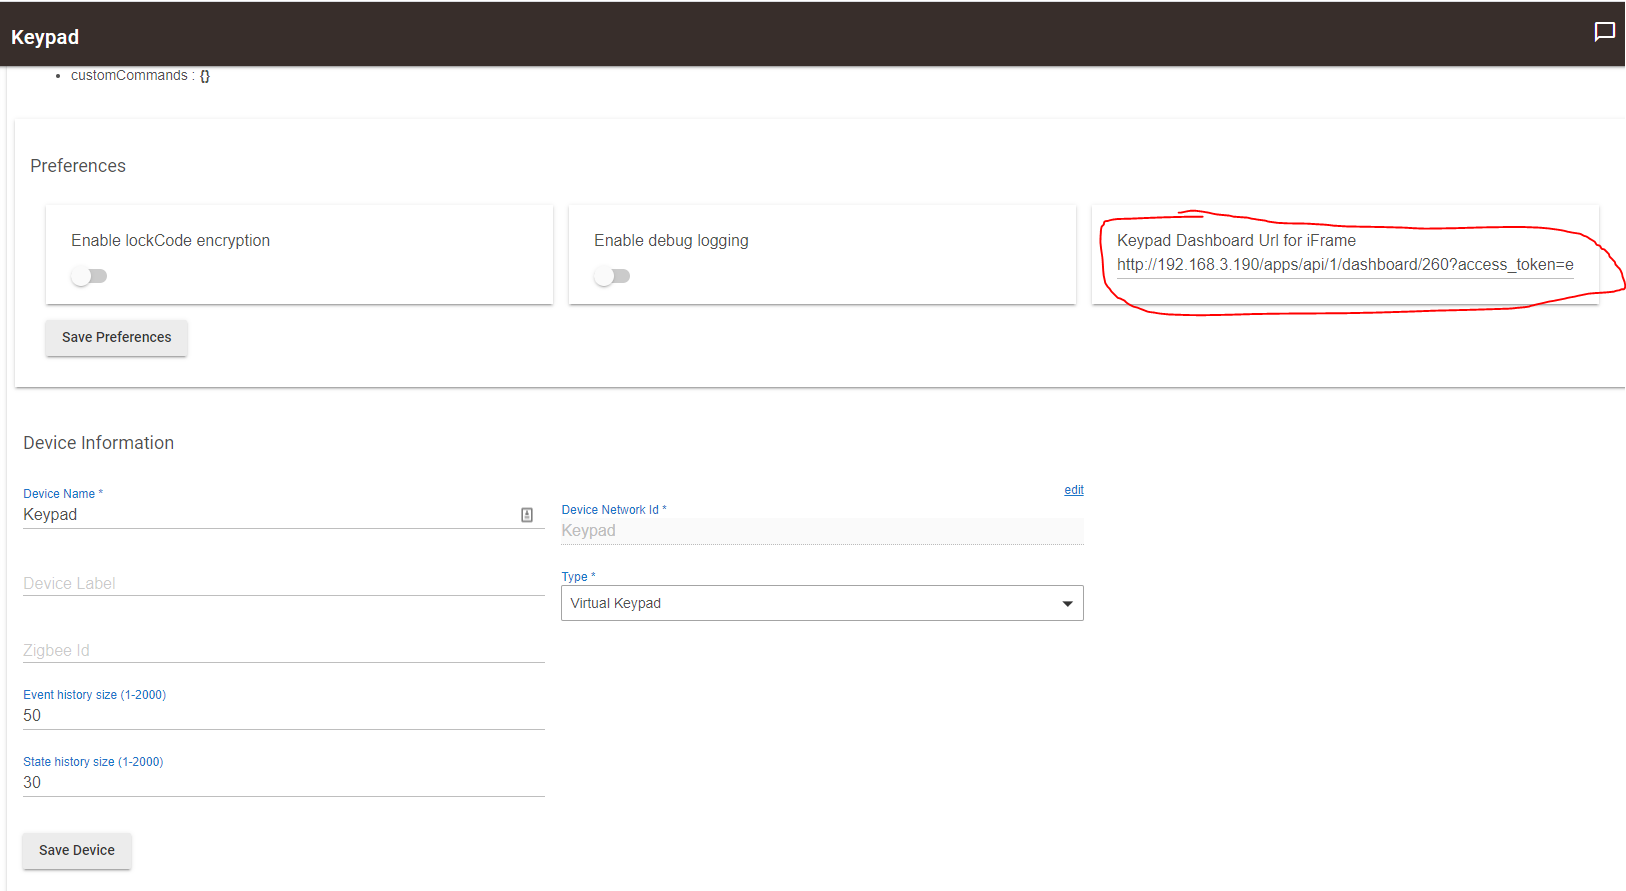
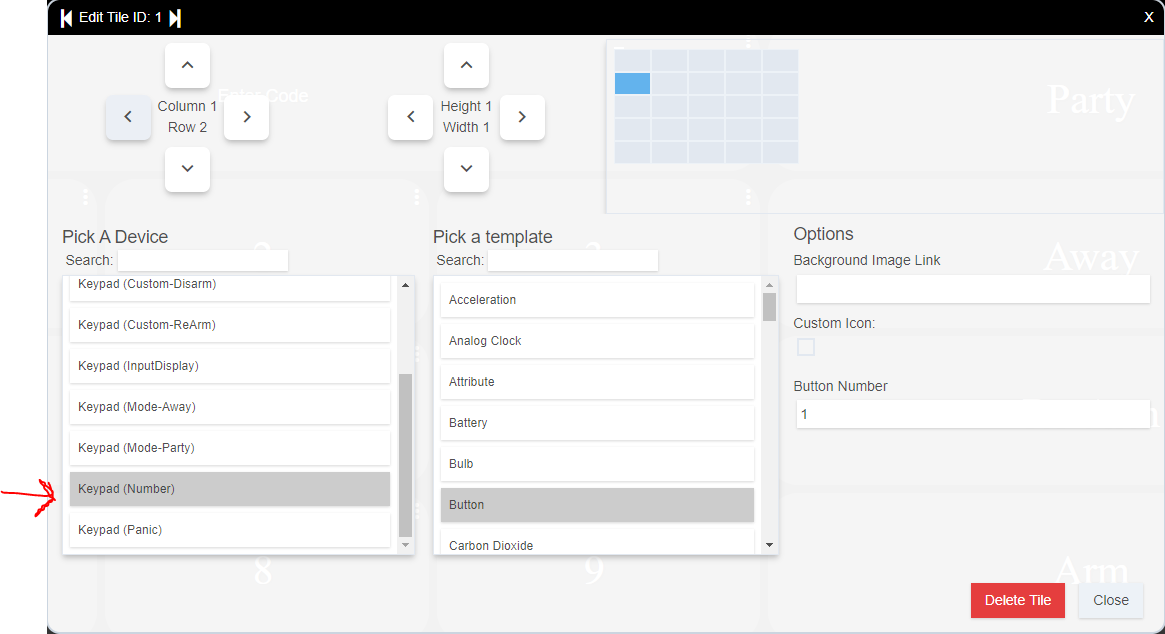
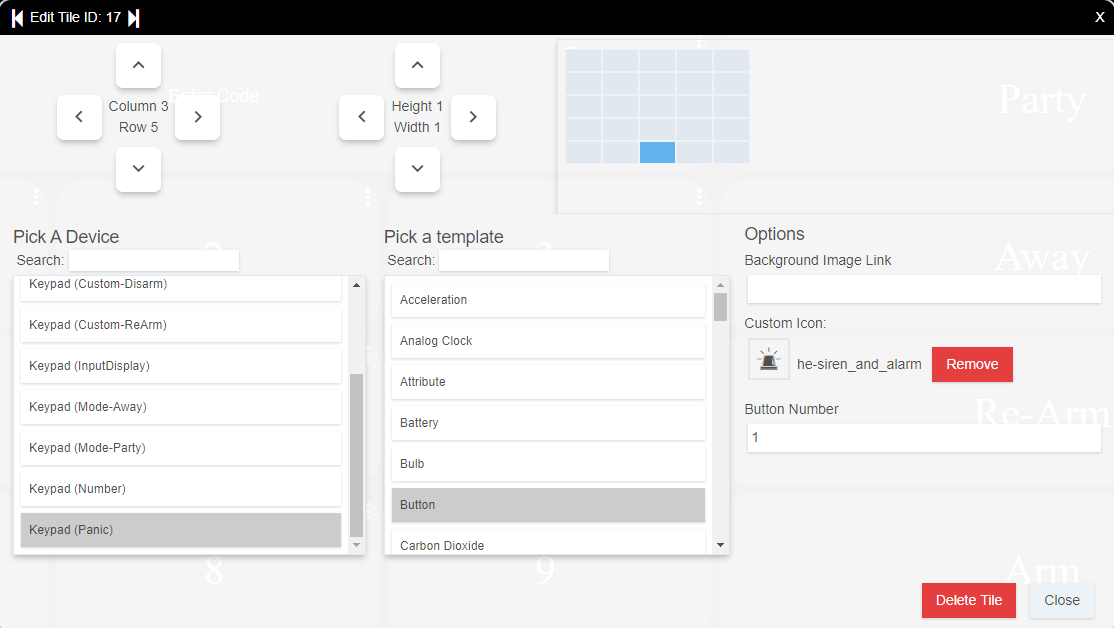
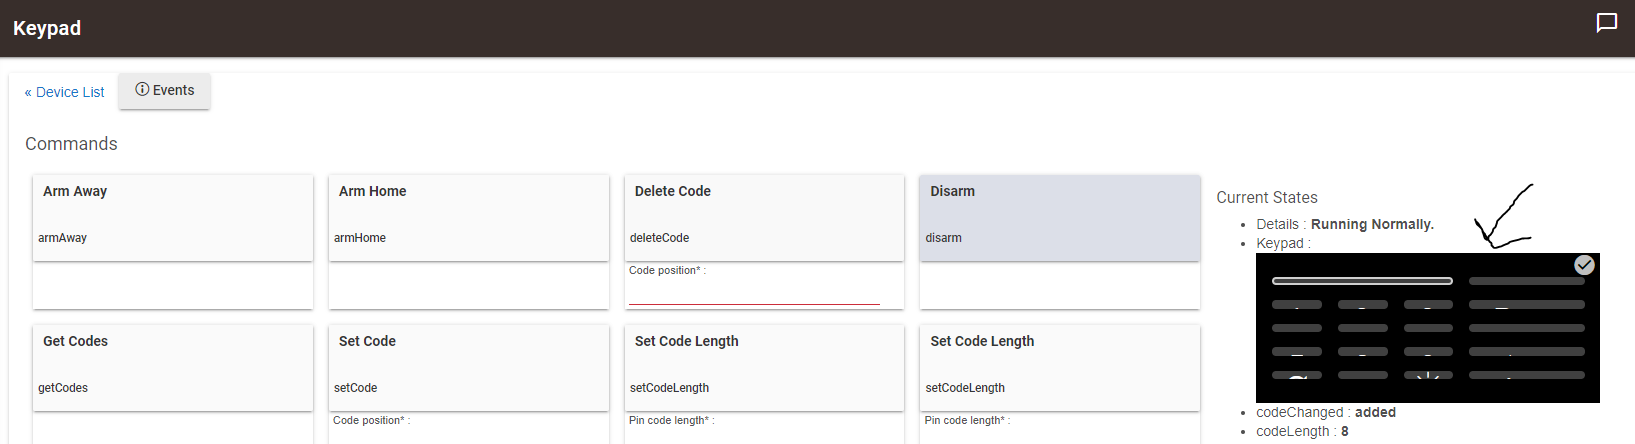
once you get this dashboard working (you can test by clicking on the keypad buttons, and you should see feedback in the keypad (InputDisplay) device tile), you will need to get the direct dashboard url from your apps page in hubitat, and paste that into the main Keypad device you created:
Evething is set now.
I have credated a PIN code at the Virtual keyboard device, and it has being automaticly stored at Lock Code Manager
Numbers do give feedback in the keypad (InputDisplay) device tile as * * * * *.
But it will be nice if posible to arm with out any PIN.
Just an Idea.
Yes, HSM and Modes are optional. In the app that you create/configure the keypad, you can create custom actions that will automatically create keypad child buttons that have a switch attribute.
When the custom trigger is executed by pressing the button, the switch attribute turns on, then off. You can use the switch as a trigger for Rule Machine or webcore to run any functions you want. If you use RM, I would probably create RM global variables to restrict functionality like notifications and use the keypad custom trigger to toggle the global variables.
You will just need to add the custom action buttons to your keypad dashboard, and modify the css for its display name. See the example css in the first post.
Depending on how you use modes, you could alternatively create a 'guest' mode or whatever you want to call it that will restrict actions of motion/contact events to not notify you/etc. (I use 'party' mode which assumes people will be in and around my house and disables motion notifications and disarms HSM via rule machine). Then use the keypad to change modes.
Let me know if you need more details or have any other questions setting it up.
First of all, this is awesome and exactly what I've been looking for, so thanks! Is there a way to adjust the size of the keypad frame? When I add the keypad to my main security dashboard, there is like 3 inches of blank space at the bottom of the keypad. If I adjust the size it will make everything bigger, including that blank space. Do I need to somehow adjust the keypad attribute somewhere? I'm rather new to Hubitat so I may be missing something obvious.
Did you add the css to the dashboard that the keypad (iframe) is on (your main security dashboard)? it will adjust the tile template and take out some of the blank spacing so it fits the whole tile. You may still need to adjust height/width of it to help with aspect ratio and how it shows on your device/screen size. Let me know if you need additional help getting it to look correct for your setup.
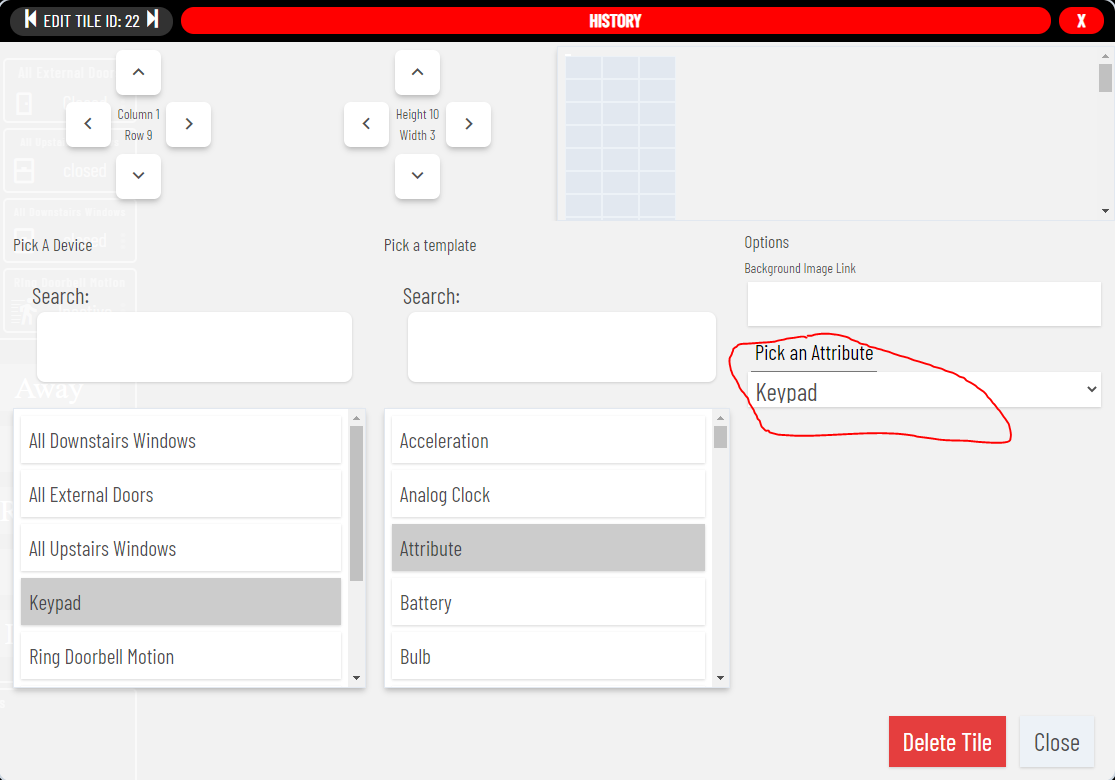
/* keypad iframe specific - #tile-25 is the Keypad device with attribute: Keypad */
/* replace #tile-25 with your specific tile number */
#tile-25 .tile-title {
display:none;
}
#tile-25 .tile-contents {
padding: 0;
height:100%;
}
#tile-25 .tile-primary {
padding: 0;
}
Thanks, I'm dumb - just forgot to change the tile number. Now its working perfect. Do you know if there any way to remove the options at the top? (gear, check, plus). I know smartly can do it, but for some reason when I use that it resets all the formatting and looks terrible.
you may need access to the gear to adjust things later, and its kind of a pain if you hide it with css, as you need to use the developers tools in the browser to un-hide it.
This is what i use on my dashboards to reduce the clutter at the top, and keep the check icon (which will refresh the dashboard when clicked which can be useful):
// fits content better on screen
.wrapper {
    overflow-x: hidden;
    padding-left: 5px;
    padding-right: 5px;
}

// removes extra spacing from header
.header {
    padding: 0 !important;
}

// removes the dashboard icon and name from upper left
.header .dashBack, .header .dashName {
    display:none;
}

// changes the color of the green checkmark to transparent white
.header .material-icons {
    color: rgba(255,255,255,.75);
}
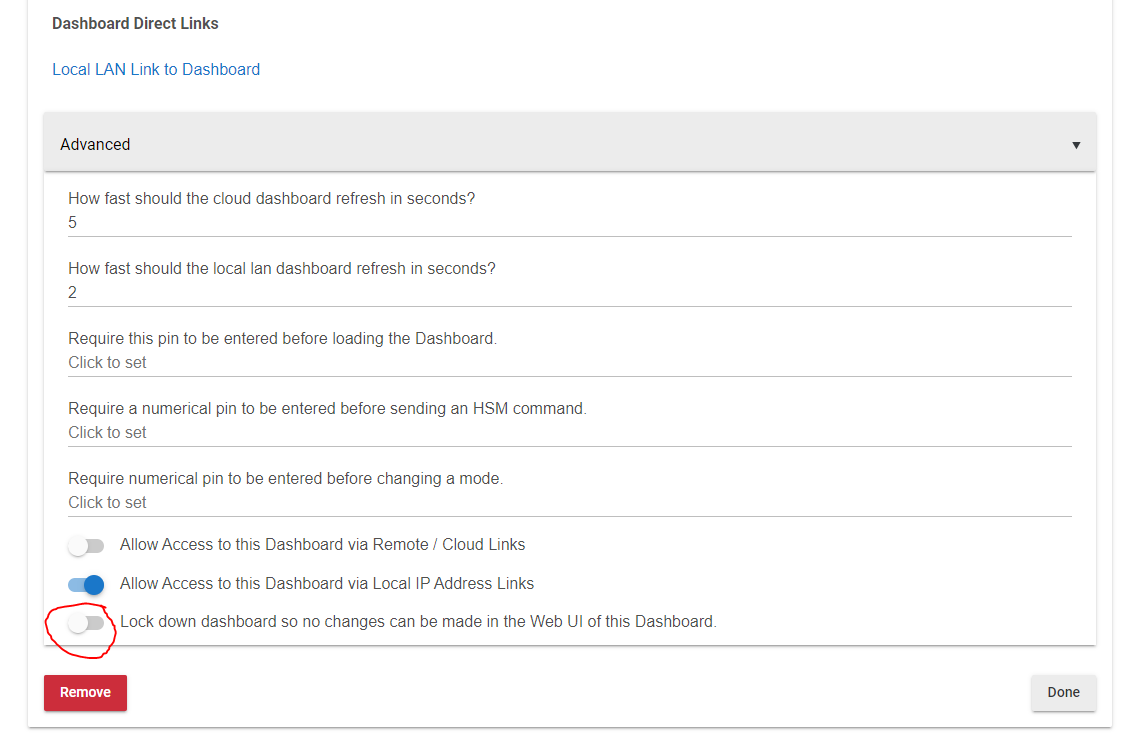
Then i use the setting in the screenshot above to hide the gear and + icons from dashboard.. that way if i need them later, its easy to uncheck in the app settings for that dashboard.