[RELEASE] Shelly Wave Shutter community driver

Shelly Wave Shutter Z-Wave 800 Driver for Hubitat

Description

This is a custom driver for Shelly Wave Shutter that is intended to be used instead of the Hubitat in-built drivers. As of the time of writing, the in-built driver suffers from multiple issues encountered on S2-included devices from EU distribution.

This custom driver fixes the following issues:

  • shows properly "opening", "closing", "partially open", "open", and "closed" states,
  • calibration button works correctly,
  • all parameters defined in the manual are configurable, and the configuration is properly saved on the device.

Additionally:

  • the driver properly leverages S2 supervision and infers "closing" and "opening" states from acknowledged commands, thus reducing radio traffic,
  • upon hitting the "refresh" action shows the current calibration status,
  • lifetime energy consumption is shown.

Notes

  • The driver has been tested on Shelly Wave Shutter from EU distribution module with firmware version 12.23 and securely paired with Hubitat.
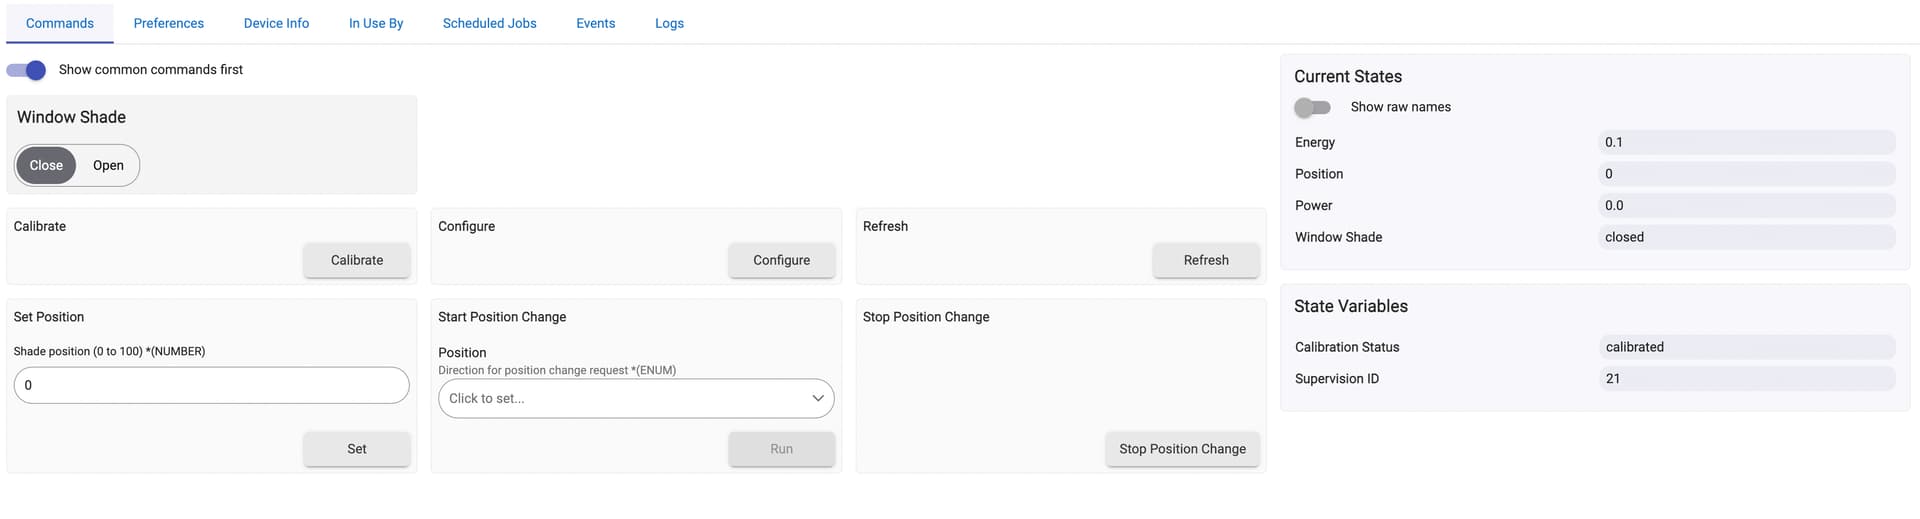
Screenshots

Changelog

  • v0.1.0 - 03.05.2025: Initial working version.
  • v0.1.1 - 19.06.2025: Minor fix when reading enumerated configuration params.
  • v0.1.2 - 25.06.2025: Minor safeguard against logging level set by different custom driver.

Installation
It is recommended to install through Hubitat Package Manager by searching for Shelly Wave Shutter. Alternatively, you can download the code and install it manually.

Download

5 Likes

I'm using this drive to control my Shelly Wave Shutters. I love how it gives me access to the Status and all the parameters. So thank you @bogus.wojcik Incredible work!

I'm having a small issue where the status is always inverted (it shoes opened when it's closed and vice-versa). I know I could revert the buttons, but the buttons work fine - the button on the left opens it and the button on the right closes it. But the "online" behaviour is switched on Hubitat (the buttons and the status).

@gugavieira Hello. It looks like you need to set both settings to reverse:

  • Parameter No. 3 – Inputs orientation (set reverse)
  • Parameter No. 5 – Output orientation (set reverse)

The thing is that if the installer (or you if you installed this by yourself) plugged buttons' wires incorrectly and engine's wires incorrectly, then physically the up button will result in shades opening and down button will result in shades closing, while the device is thinking otherwise. Setting both settings to reverse should make both the buttons and the "online" status to show the same.

Let me know if this helped.

Just intall the driver and movements are ok, directions are ok, BUT no information on shutter position!!! what can I try?
When I pressed calibration the shutter just moved a few cm on opening direction and close again! is this corrrect? What should be the driver calibration routine?

Based on the official instruction you should first open the blinds manually and only after that start calibration. If calibration is being executed properly, the blinds will close, then open, and then close again and stop in the middle.

Only after the calibration is successful the module and the driver will show the position of the blinds.

Furthermore, the module sends updates after finished movement. When you press close you will not get gradual updates like 0%, 10%, 23%, .... You will get just 0 and then 100%. But if you move the blinds manually or set a particular level, it should show it correctly, providing the module is calibrated.

Uau quick answer, this is really a great comunity.
Can I presume you mention calibration made by the software buttom? Or do i need to perform the hardware S buttom calibration routine?

Tried both by software and by S buttom doenst calibrate as it should, it just runs down once and stops! Any advice?!