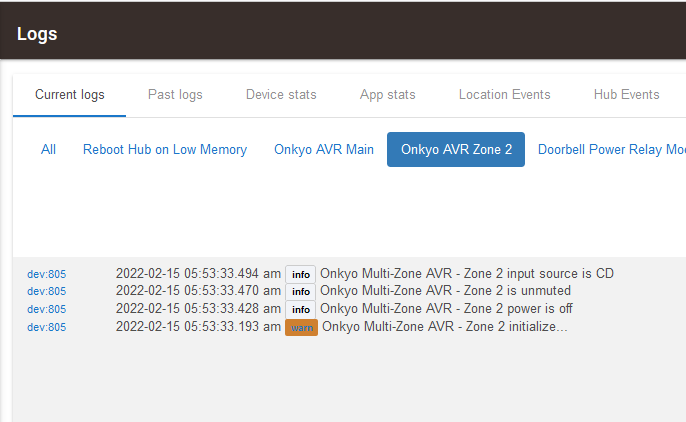
Your settings look OK but clearly the connection Telnet is failing. Here's what you should see in the logs with debug logging enabled on the parent and child drivers:
Have you tried clicking the driver's Initialize button while the AVR is powered on? This might help rule out an issue with the AVR's network power saving settings
Are the HE Hub and the AVR on the same subnet?
Can you try connecting your laptop to the same network switch as the HE Hub using an Ethernet cable? Once connected, can you establish a Telnet connection to the AVR from your laptop?
First off Thank You for trying to help!
Yes, I tried commands after the TX was powered up and the output you see is from that.
Flat 10.10 network no subnetting. 255.255.255.0
I will try wiring in at the switch and see. (good Idea)
I wired into my switch on the port next to where the Hubitat hub is attached and shut off the wireless. I can telnet to the TX NR and connect on port 60128 (I just get a blank screen after connection).
@SteveV, Are you still maintaining this driver? I have an ask . I would like to have an attribute that displays the input selector hex value. I figured out I can send a raw command to set it properly but would like to display the current selection in a tile in The Home Remote. I have outdoor speakers that I use for Zone2 and Zone3 and will change the input to Net for streaming music, CD to pipe sound from a roku connected to my outdoor TV, and a couple other inputs.
I fiddled with the driver a bit to add an attribute called currentSourceHexValue and can get it to set when I change the input, but I can't get it to initialize. I must be inserting the sendevent command in the wrong place. It doesn't seem to be persistent.
It would be great to display the text associated with the hex, but that could be too cumbersome. I only use a couple of inputs and can handle that in the dashboard.
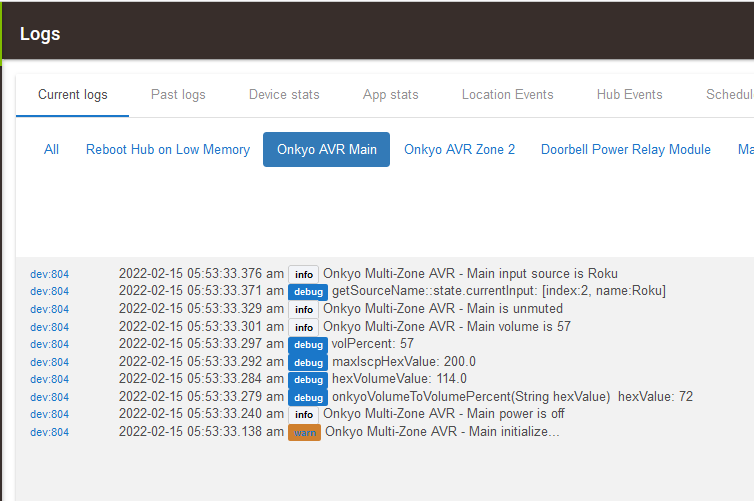
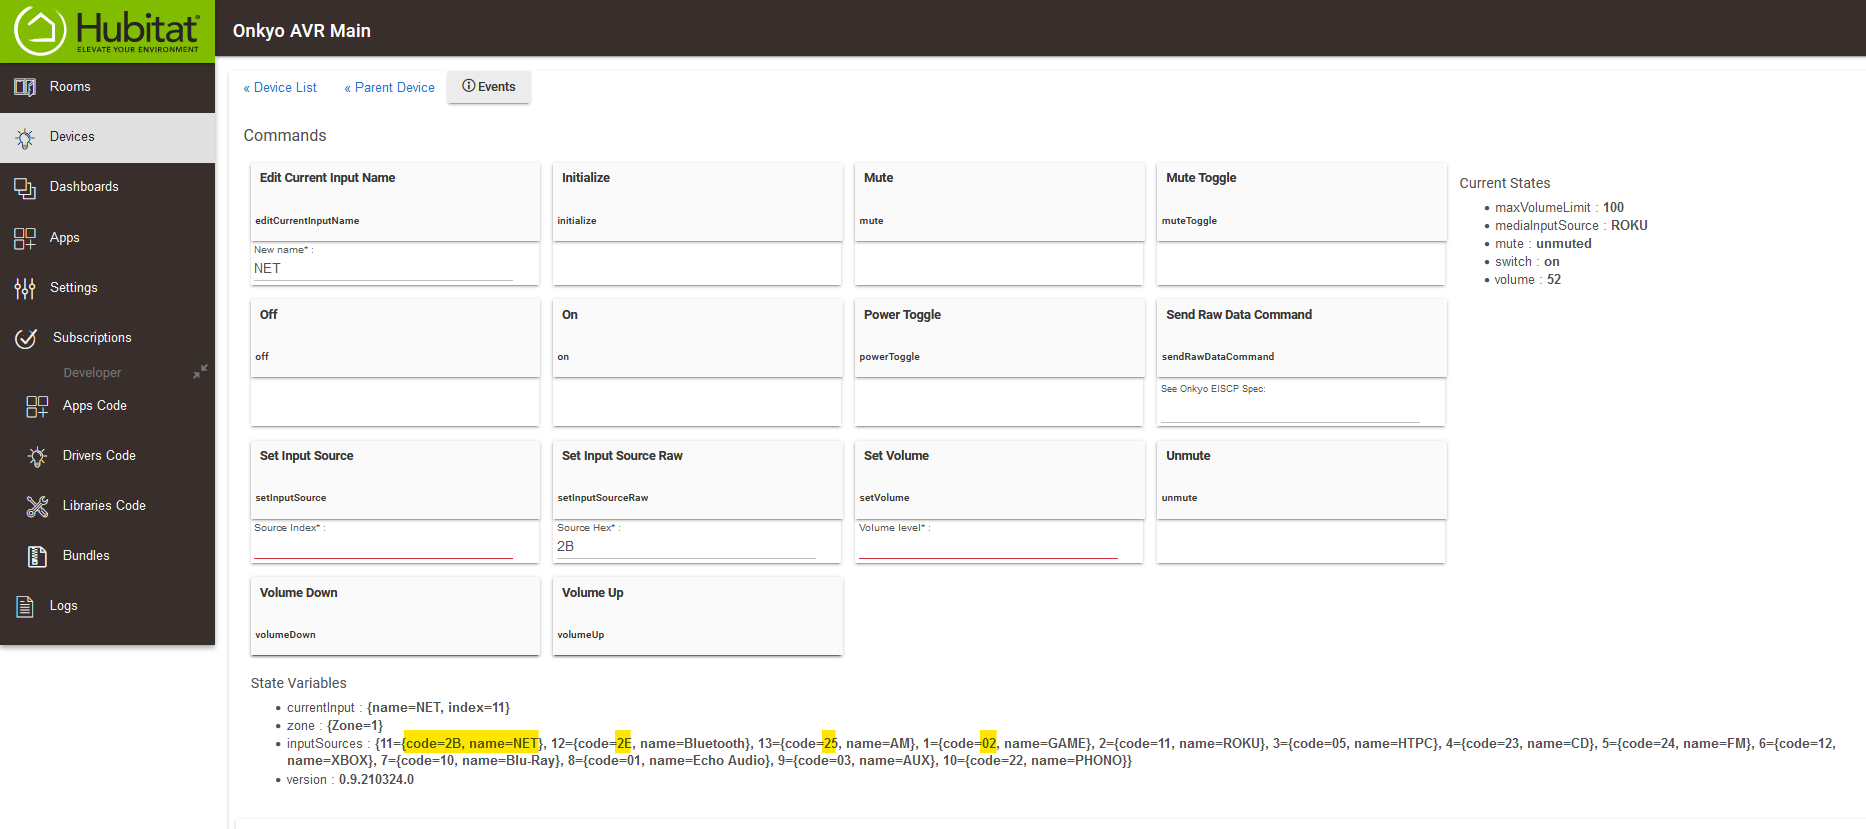
The "State variables" for each zone should show the raw hex values for the inputs. Note that you'll need to select the input at least once for the value to show up in the state variables list. The easiest way to do this is to use the Onkyo remote to select each input. You need to do this on each zone in order to see all of the values for each zone. Here's what mine looks like for the Main zone:
Ah, I didn't realize choosing inputs populated that state variable and that they remained. That'll do it!! Sorry, I didn't understand that is how it worked.
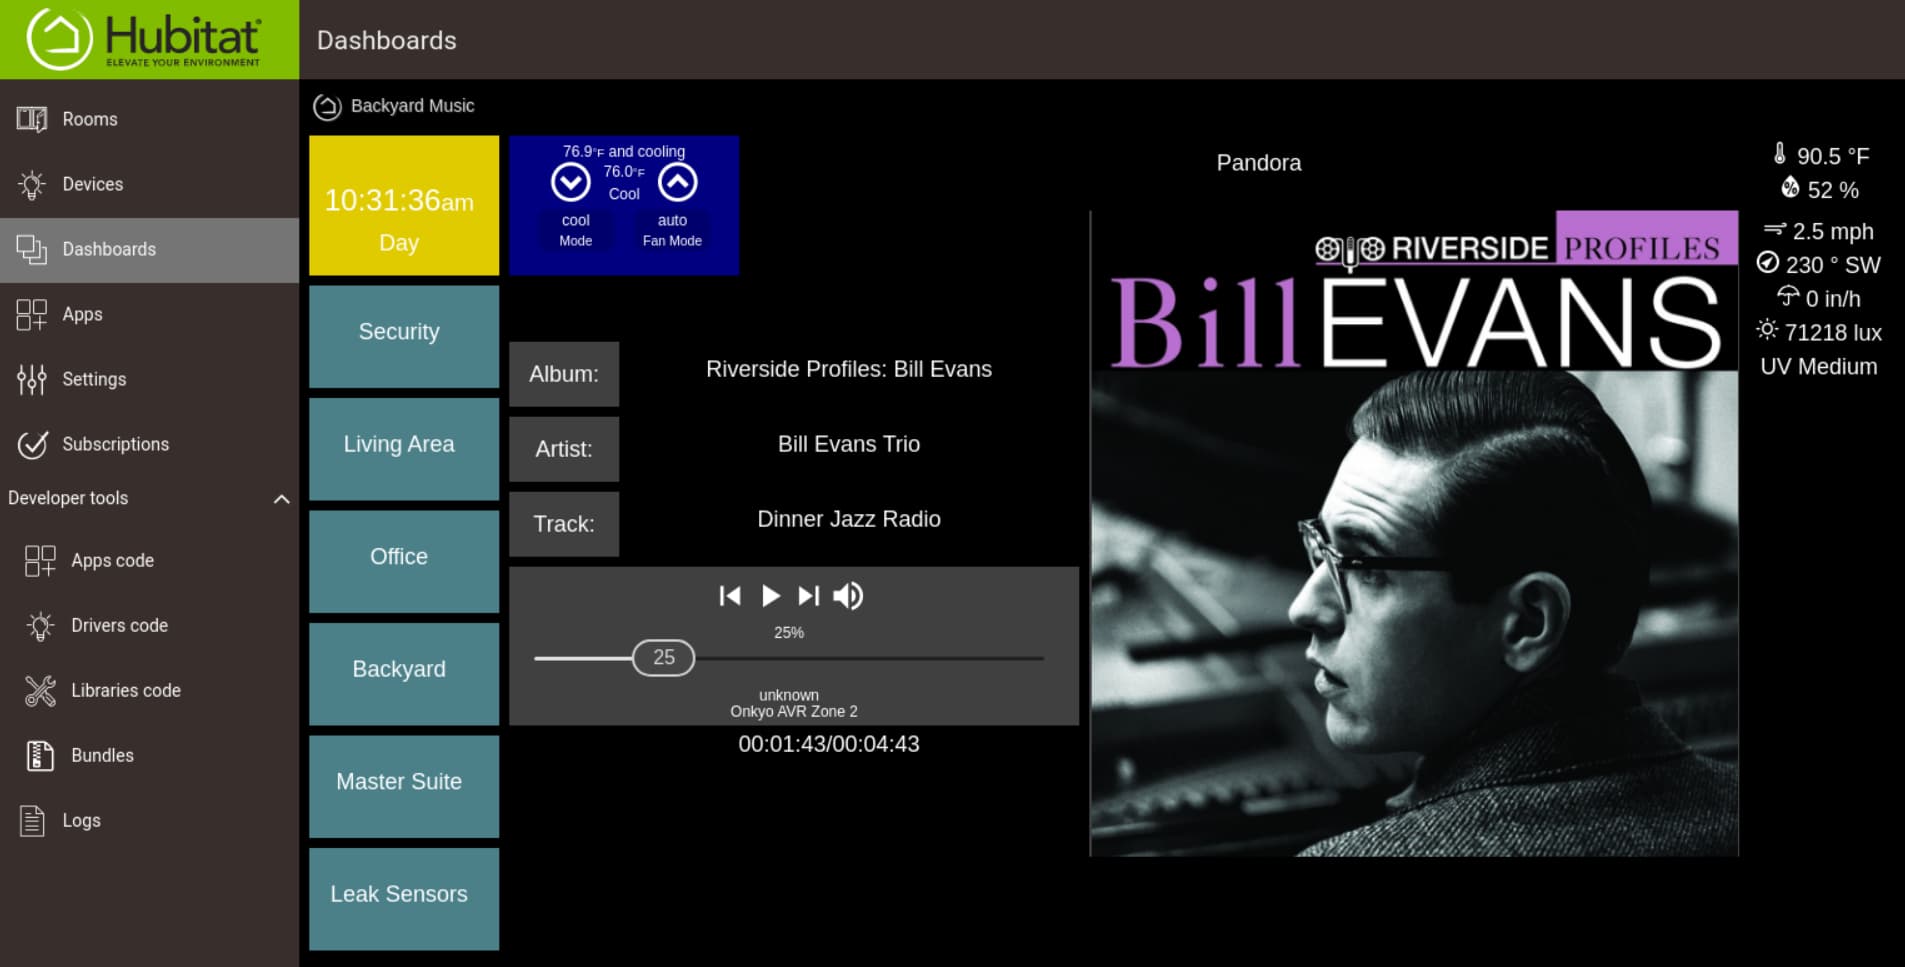
I have been working on adding functionality to the drivers to support the MediaPlayer capability. So far, I have built it for the Network Source. I still have to add the ability to select the Network Service and look at the functionality of the other sources. Here is a dashboard I built for this.
You’ll need to create a rule machine rule that runs a custom command and uses a virtual button as a trigger. Each AVR zone on the driver has a setInputCommand that takes the numeric index of the input. The find the index numbers, select the zone you’re looking to control from the devices screen. Assuming you cycled through all inputs for each using your AVR’s remote after you installed the driver, the “State Variables” will include an entry for each input such as: 1={code=23, name=Roku}. In this example “1” indicates the index, “23” indicates the raw input source value, and “Roku” indicates the input name. If the “State Variables” list is empty or the inputs are generic "Input [n]" labels I'd recommend breaking out the Onkyo remote and cycling through each zone and naming them so it's easier to determine what named input the index belongs to.
Create a virtual button that will trigger your rule. Next, create a new rule and use the virtual button you just created as the trigger. For the rule action, select “Set Variable, Mode, of File, Run Custom Action” from the “Select Action Type to add” dropdown and “Run Custom Action” from the “Select Which Action” dropdown.
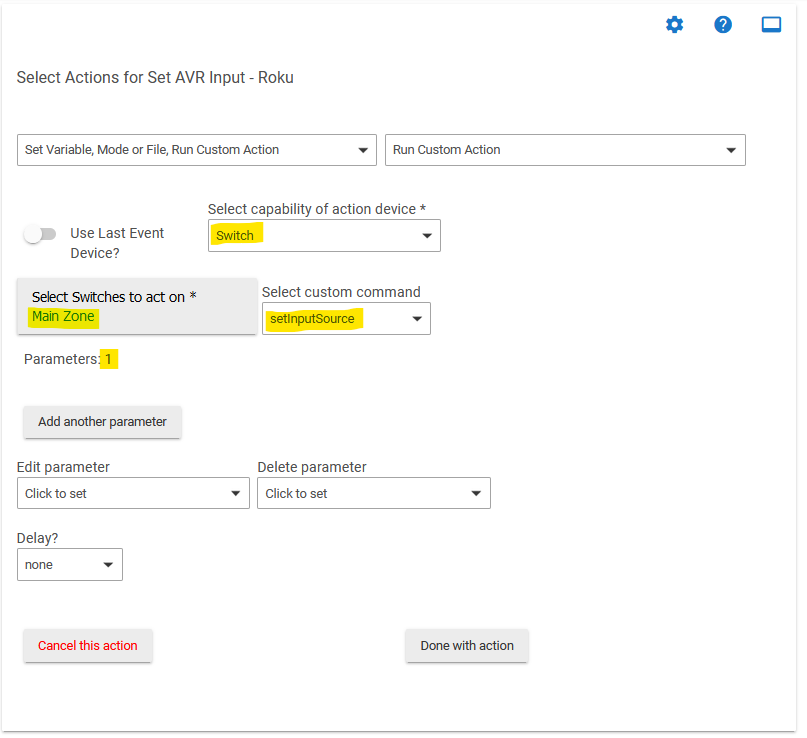
Next, select “Switch” from the “Select capability of action device *” dropdown and select the AVR zone you want to control from the “Select Switches to Act on *” dropdown and click the “Update” button. Next, select “setInputSource” from the “Select custom command” dropdown, and “number” from the “parameter type” and set the index of the input you want to set. Here’s a screen clip of a rule action that sets the input index value to 1:
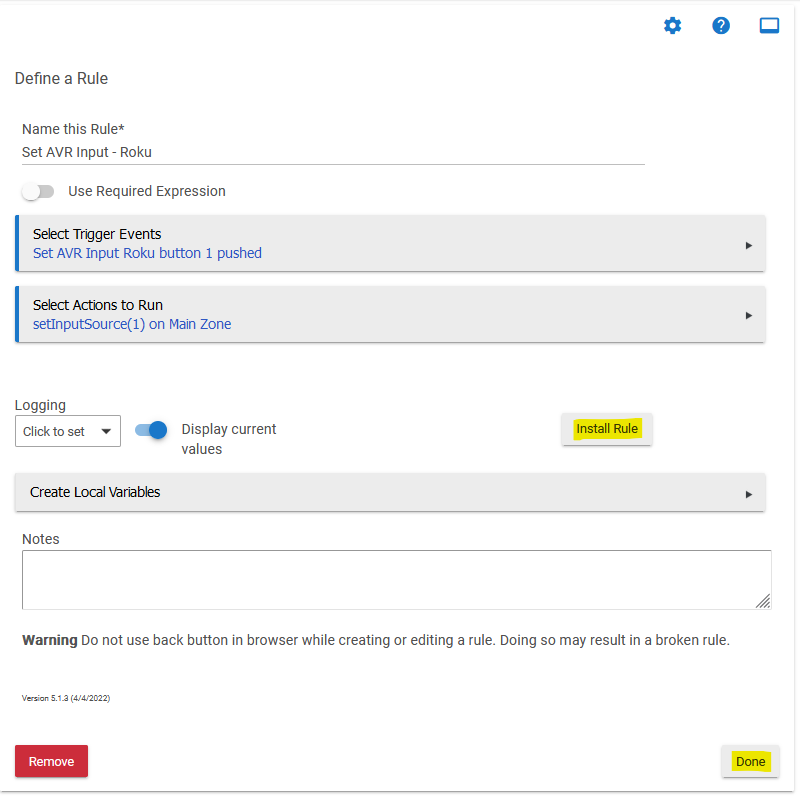
Click the "Install Rule" button and then the "Run Actions" button to confirm the rule works as intended. Once you've confirmed the rule works, click the "Done" to exit out of the rule. Repeat the process for each input you want to control.
Lastly, you'll need to add the virtual button(s) you created earlier to your dashboard.
 . I would like to have an attribute that displays the input selector hex value. I figured out I can send a raw command to set it properly but would like to display the current selection in a tile in The Home Remote. I have outdoor speakers that I use for Zone2 and Zone3 and will change the input to Net for streaming music, CD to pipe sound from a roku connected to my outdoor TV, and a couple other inputs.
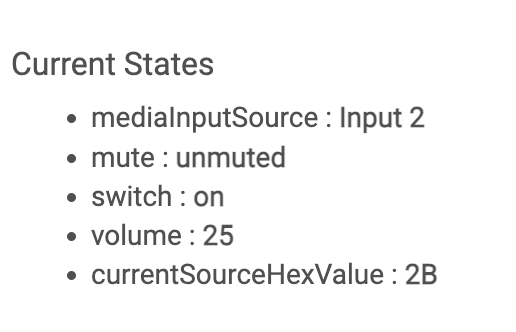
 Glad to hear it--enjoy.