Yes I did change the port to 39501! I've tried using two of the different source codes supplied in the hubduino github by Daniel/Dan Ogorchock with a couple of the sensors commented due to lack of I/O pins on the Arduino Uno I am using as well as the temp/humidity library due to an error I was getting with the .h file. I tried logging in to my account on my computer to copy and paste it but I'm having trouble logging in. Maybe because I'm already logged in on my phone? Or because I just made an account a couple minutes ago. What do you mean the hubduino parent device settings? Like the driver code in the hub?
I am the author of HubDuino. My son and I wrote it (ST_Anything) years ago.
Using an Arduino UNO is going to be a challenge, due to it only having 2KB of RAM. You may want try this sketch which was stripped down for an UNO with a 5100 shield (I haven’t tested this in a long time.)
Your phone and the fact that you recently created an account have nothing to do with anything.
Did you manually Add the Virtual Device for the HubDuino Parent Ethernet device? Have you added all of the HubDuino drivers, both Parent and Child drivers to your hub?
Thank you, I will try the Uno code you posted! However, I am actually planning on upgrading to the mega 2560 due to the increased RAM and I/O pins. Similarly, I'm planning on upgrading the ethernet to something name brand, is there a preference over the 5100/5500 shield with the mega2560? Also is there a preferred input voltage (DC Barrel Jack) for these setups as I usually see it advertised as 7-12V?
Figured out the confusion on the login, I was using the wrong password, lol. I manually added the child and parent drivers, then added the virtual device via the static address I assigned it. Which although my Hub was showing up on my router configurations as a LAN device, my arduino wasn't so there might be a deeper issue with how I assigned the IP address to it, or the off-brand shield compatibility. Is it okay to assign the IP address with a subnet of something like xxx.xxx.x.10 vs something like xxx.xxx.x.101.
I run an MEGA 2560 + W5500 Ethernet Shield on one of my primary HubDuino deployments. It has been running for 2+ years without any issues. I use a decent quality regulated 9VDC power supply, as shown below.
For my other HubDuino systems, I am using the NodeMCU ESP8266 boards which are inexpensive, reliable, and have built-in WiFi. These can be powered by a decent microUSB phone charger. They are 3.3v GPIO devices (whereas the UNO/MEGA’s GPIO pins operate at 5V.)
I also like the NodeMCU ESP32 boards, as well as the newer Arduino MKR1010 and Nano33IoT boards. All of these have WiFi and are 3.3v GPIO boards.
Thank you for the advice and quick response! Super helpful. I also saw some groovy files with Device IDs in the GitHub HubDuino Master File but I assume it was a ST file as it wasn't in the actual HubDuino file. Are these intended for use in the Hubitat?
This is the guide you should follow for Hubitat. The drivers are specific to Hubitat. Do not use the SmartThings versions of the groovy code.
The Arduino code/libraries are shared between both platforms.
Okay, awesome! Has anyone had luck using an ethernet switch to control arduino to the router?
I have network switches all over my house, connecting all sorts of devices, including Arduino’s to my home network.
Hi All, I am looking for some guidance on a project I am working on. I purchased the below electric valve so I can connect it to my home water system cut-off valve as I want to wrap some rules around water sensors or holiday mode etc from HE.
Anyways couple of questions as I have not done anything with motors etc before are:
-
Am I right in thinking I can just use a 2 channel relay via com ports as listed in this article to control the forward and reverse function? https://www.instructables.com/id/DIY-Relay-switch-motor-controller-Arduino/
-
I believe this is a servo motor so any feedback from people using ST_Anything with HubDuino to get this going?
We could definitely work up a sketch for that actuator. I believe it requires the polarity of the wiring to be reversed in order to change the direction of the motor. So, that would require the pair of relays to handle one valve actuator, correct?
If you have a working Arduino sketch, I could probably get it working with Hubitat pretty easily.
Hello @ogiewon I hope your well mate.
You are most correct if I reverse the polarity it goes forward and reverse. Agreed I just ordered the 5v 2 channels Arduino relay to switch left to right.
That is something I havent worked on yet also I had to order the 2 channel relay so won't be able to test until it arrives. If you have something I can start with that would be really good? I am a little out of my depth on this one 

1 Like
Do you know if the actuator has any sort of overload protection built in? If it actuated fully in either direction, with power still applied, does it automatically stop before damaging itself?
If not, we’ll have to apply power for a certain amount of time in either direction and then turn it off. Probably a good idea anyway...
Might take a few days to figure out...
1 Like
Correct if power is applied it completes its cycle and stops. You then need to reverse the polarity for it to return the other way and again it completes its cycle and stops so definitely has overload protection.
btw, the specs from the sales website is below.
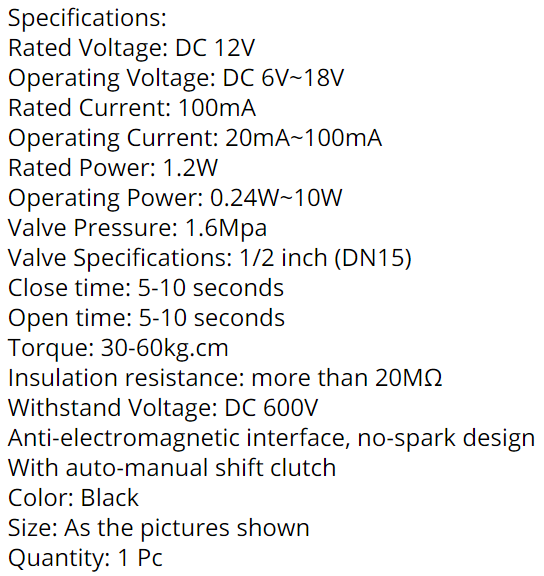
Anyways mate i'd really appreciate it, I am sure others would love to hear about this as well (which I will document in detail) as it's a pretty cool little motor that could be used for fire places, gas tanks, water systems etc etc.
I have made some progress on this tonight. I have create a new EX_TimedRelayPair device class within ST_Anything/HubDuino. I have also create a new "Child Valve" groovy driver. So far, so good. I have it designed so 'open' has relay1 on/relay2 off AND 'closed' has relay1 off/relay2 on.
What I need to add in now is the timers to remove the need to have one of the relays energized at all times. I would prefer both relays be normally off after a certain amount of time, but I will make this a user selectable option.
This new code is not yet in my GitHub repo in its current unfinished state.
1 Like
Very cool mate well done. I really look forward to testing this out once my 2 channel relays arrive which should be within the next 5-7 days. btw, If I could also get you to help out with a sample sketch i'd greatly appreciate that too just to get me started although I am getting alot better these days as I have come along way LOL
1 Like
Dan
I may have found a bug in child humidity and child temperature code. Or I am using it wrong, lol.
If I use a decimal number ex. 8.8 rather than a whole number ex. 8 in the humidity/temperature offsets I get these errors in my logs and the values stop updating..
Error from humidity:
org.codehaus.groovy.runtime.typehandling.GroovyCastException: Cannot cast object '47.38.8' with class 'java.lang.String' to class 'float' on line 90 (parse)
The number 47.3 was the humidity and 8.8 was the offset.
Error from temperature:
org.codehaus.groovy.runtime.typehandling.GroovyCastException: Cannot cast object '75.56-3.5' with class 'java.lang.String' to class 'float' on line 100 (parse)
75.6 was the temperature and -3.5 was the offset
Mike
Mike,
Thanks for the bug report! I have fixed both of these Child Drivers. Please "IMPORT" both drivers and save them. The error should be fixed.
Note: I also modified the behavior of when the offset is applied in the Temperature driver to be after any optional unit conversion. I assume if the user wants to convert the units, the offset should also be in the same units as well.
Again, thank you for noticing this and reporting it!
Dan
I have a similar situation to jchurch. I have a valve assembly that has a common, a close and an open input. It will need to open and close or even stop half way open (or closed if you are a half full type of person lol) This valve uses 24vac. I have thought about using a SPST relay to switch between the open/closed inputs and a second SPST relay to control the common to stop the valve where I need it. They woul have to operate together. The valve has a clutch to make sure it doesn' t get in trouble by over rotating. I would like to set a timer to stop the vavle when it nears full open or closed. Thinking about that if it took 10 seconds to open and it stopped at 5 seconds would there be a way to know that it would only need 5 more seconds to finish the operation.
1 Like
Yes, that was my plan. I have it working in a state now that I believe is ready for testing. I'll be putting it all on Github probably tomorrow. Gotta get some sleep!
1 Like

