not sure how to pull the json from bluestacks - I think this is it. my text editor says its 958 in length.
{
"date": "2023-09-22T19:05:48",
"device_id": "246",
"isStateChange": "true",
"label": "Tile Builder Storage Device 2",
"name": "tile2",
"source": "DEVICE",
"value": "\u003chead\u003e\u003cstyle\u003e.BbC,.BbC\u003e*{position:absolute;transform:translate(-50%,-50%);color:#000}.BbB{width:100%;height:100%;border:10px Inset;border-color:#daa #c88;background:#debF;overflow:visible;box-sizing:border-box}.BbB{top:50%;left:50%;}.BbB \u003e*{display:flex;padding:3px}.BbT{left:50%;top:50%;color:#000;z-index:-2}.Bb1{left:10%;top:10%}.Bb2{left:20%;top:20%}.Bb3{left:50%;top:50%}\u003c/style\u003e\u003c/head\u003e\u003cdiv class\u003d\u0027TB BbB BbC\u0027\u003e\u003cdiv class\u003d\u0027BbT \u0027\u003eRoom Name\u003c/div\u003e\u003cdiv class\u003d\u0027Bb1 B5\u0027\u003e🔋\u003c/div\u003e\u003cdiv class\u003d\u0027Bb2 B5\u0027\u003e🅰\u003c/div\u003e\u003cdiv class\u003d\u0027Bb3 \u0027\u003e❓\u003c/div\u003e\u003c/div\u003e"
}
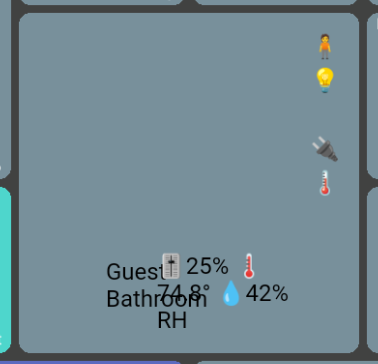
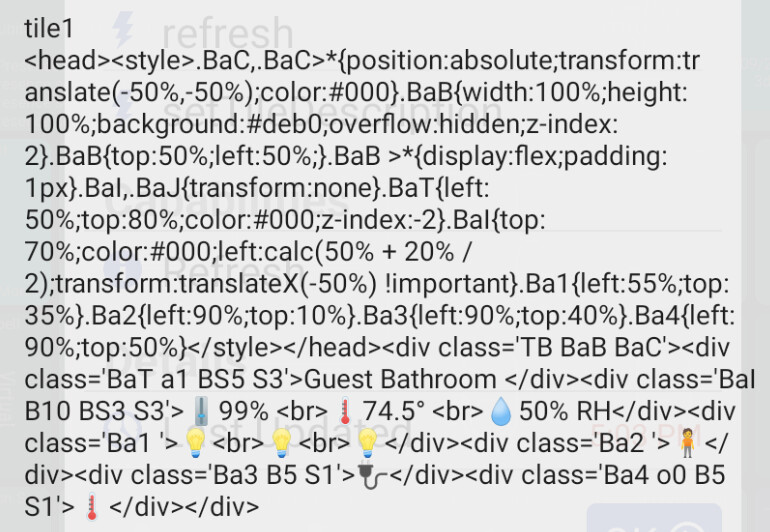
Not sure the html text grab will display here here is direct from the tile as well as a screensnap of that.
[head][style].qqC,.qqC]{position:absolute;transform:translate(-50%,-50%);color:#000}.qqB{width:100%;height:100%;background:#deb0;overflow:hidden;z-index:2}.qqB{top:50%;left:50%;}.qqB ]{display:flex;padding:1px}.qqI,.qqJ{transform:none}.qqT{left:50%;top:80%;color:#000;z-index:-2}.qqI{top:70%;color:#000;left:calc(50% + 20% / 2);transform:translateX(-50%) !important}.qq1{left:55%;top:35%}.qq2{left:90%;top:10%}.qq3{left:90%;top:40%}.qq4{left:90%;top:50%}[/style][/head][div class='TB qqB qqC'][div class='qqT a1 BS5 S3']Guest Bathroom [/div][div class='qqI B10 BS3 S3'] 99% [br]
 74.5° [br]
 50% RH[/div][div class='qq1 ']
 [br][br][/div][div class='qq2 ']
 [/div][div class='qq3 B5 S1']
 [/div][div class='qq4 o0 B5 S1'][/div][/div]
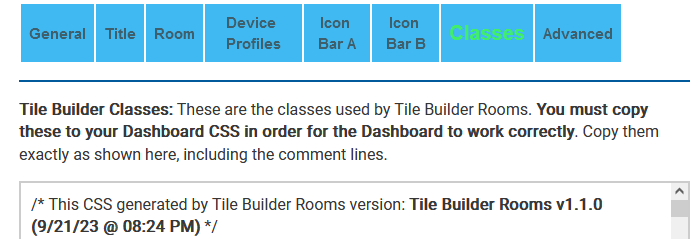
/* This CSS generated by Tile Builder Rooms version: Tile Builder Rooms v1.1.0 (9/21/23 @ 08:24 PM) */
/* Make the tile background transparent and allow all the tiles to overflow to adjacent tiles.*/
[class*='tile']{background-color:rgba(128,128,128,0) !important; overflow:visible !important}
/* Hide all of the Tile Titles. */
[class*='tile-title']{visibility:hidden}
/* Make sure the contents expand to fill the entire tile and eliminate the gaps between the tiles. If there are still gaps make sure setting Gridgap on Layout tab is set to a 0 between quotation marks! */
[class*='tile-contents']{width:calc(100% - var(--myRoomGap) ) !important; height:calc(100% - var(--myRoomGap) ) !important}
Finally - here is the css the TB author wants embedded in the HE dashboard css - where his magic comes from so to speak.
/* Make sure the image tiles are configured correctly. The image fills the tile and the tiles are place in the far background. */
.tile.image .inset-auto img {object-fit:fill}
.tile.image {background-color: rgba(128,128,128,0) !important; z-index:-3 !important}
/* Hide any classes using the 3d_rotation symbol/class and then append some visible text which has the effect of replacing it. 3d_rotation is the first in the picklist so it has been picked for convenience.*/
[class*='3d_rotation']{visibility:hidden}
[class*='3d_rotation']::after{color:green; visibility:visible !important;content:'\00A0\00A0\00A0\00A0'; transform:translateX(-100%) !important; position: absolute; outline: 2px dotted blue}
/* Tile Builder Section 2 - Tile Classes Start Here */
:root {--myUnderline-color:purple; --myGreen-color:lime; --myRed-color:red; --myOrange-color:orange; --myRoomGap:0px;}
/* Alignment Control goes here - Prefix a */
.a0{transform:translate(0,-50%) !important}
.a1{text-align:center}
.a2{text-align:right;transform:translate(-100%,-50%) !important}
/* Size Control goes here - Prefix S */
.S0{font-size:33%}
.S1{font-size:50%}
.S2{font-size:65%}
.S3{font-size:75%}
.S4{font-size:125%}
.S5{font-size:150%}
.S6{font-size:200%}
.S7{font-size:300%}
.S8{font-size:400%}
.S9{font-size:500%}
/* Background colors go here - Prefix B. */
.B0{display:inline-block;background:black}
.B1{display:inline-block;background:black;border-radius:50%}
.B2{display:inline-block;background:white}
.B3{display:inline-block;background:white;border-radius:50%}
.B4{display:inline-block;background:var(--myGreen-color)}
.B5{display:inline-block;background:var(--myGreen-color);border-radius:50%}
.B6{display:inline-block;background:var(--myRed-color)}
.B7{display:inline-block;background:var(--myRed-color);border-radius:50%}
.B8{display:inline-block;background:var(--myOrange-color)}
.B9{display:inline-block;background:var(--myOrange-color);border-radius:50%}
.B10{display:inline-block;background:yellow}
.B11{display:inline-block;background:yellow;border-radius:50%}
.B12{display:inline-block;background:transparent;border-radius:50%}
/* Background Gradients go here */
.G0{background:linear-gradient(#56ab2f, #a8e063)}
.G1{background:linear-gradient(#56ab2f, #a8e063);border-radius:50%}
.G2{background:linear-gradient(#eb3349, #f45c43)}
.G3{background:linear-gradient(#eb3349, #f45c43);border-radius:50%}
.G4{background:linear-gradient(#E6C853 4%, #FCF48E 75%)}
.G5{background:linear-gradient(#E6C853 4%, #FCF48E 75%);border-radius:50%}
.G6{background:linear-gradient(#36d1dc, #5b86e5)}
.G7{background:linear-gradient(#36d1dc, #5b86e5);border-radius:50%}
.G8{background:linear-gradient(#bdc3c7, #2c3e50)}
.G9{background:linear-gradient(#bdc3c7, #2c3e50);border-radius:50%}
.G10{background:linear-gradient(limegreen,transparent),linear-gradient(90deg,skyblue,transparent), linear-gradient(-90deg,coral,transparent);background-blend-mode:screen;}
/* Background Warning (background image) - Prefix W */
.W0{background-image:repeating-linear-gradient(45deg, red 0px, red 5px, red 0px, yellow 5px, yellow 10px)}
.W1{background-image:repeating-linear-gradient(45deg, red 0px, red 5px, red 0px, yellow 5px, yellow 10px);border-radius:50%}
/* Animations go here - Prefix A */
.A0 {animation:blink1 2s ease 0s infinite normal forwards}
@keyframes blink1{0%,50%,100% {opacity:1}25%,75% {opacity:0.1}}
.A1 {animation:bounce1 2s ease 0s infinite normal forwards}@keyframes bounce1{0%{animation-timing-function:ease-in;opacity:1;transform:translate(-50%,-50%) translateY(-45px)} 24%{opacity:1} 40%{animation-timing-function:ease-in;transform:translate(-50%,-50%) translateY(-24px)} 65%{animation-timing-function:ease-in;transform:translate(-50%,-50%) translateY(-12px)} 82%{animation-timing-function:ease-in;transform:translate(-50%,-50%) translateY(-6px)} 93%{animation-timing-function:ease-in;transform:translate(-50%,-50%) translateY(-4px)} 25%,55%,75%,87% {animation-timing-function:ease-out;transform:translate(-50%,-50%) translateY(0px)} 100%{animation-timing-function:ease-out;opacity:1;transform:translate(-50%,-50%) translateY(0px)}}.A2 {animation:fade1 2s linear 0s infinite alternate forwards}
@keyframes fade1{0% {opacity:0.25}100% {opacity:1}}
.A3 {animation:glow1 2s ease-in-out infinite alternate}
@keyframes glow1{from {text-shadow: 0 0 10px #fff, 0 0 25px #fff, 0 0 45px #e60073;}to {text-shadow: 0 0 20px #fff, 0 0 35px #000000;}}
.A4 {animation:ping1 2s ease 0s infinite normal forwards}
@keyframes ping1{0% {opacity:0.8;transform: translate(-50%,-50%) scale(0.2)} 80%{opacity:0;transform: translate(-50%,-50%) scale(1.5)} 100%{opacity:0; translate(-50%,-50%) transform:scale(2.2)}}
.A5 {animation:pulse1 2s linear 0s infinite normal forwards}
@keyframes pulse1{0%{transform: translate(-50%,-50%) scale(.75)} 50%{transform: translate(-50%,-50%) scale(1.25)} 100%{transform: translate(-50%,-50%) scale(0.75)}}
.A6{animation:slide1 2s linear 0s infinite alternate-reverse}
@keyframes slide1{0%{transform: translate(-50%,-50%) translateX(-20px)} 100%{transform: translate(-50%,-50%) translateX(20px)}}
.A7{display:inline-block;animation:spin1 3s linear 0s infinite normal forwards}
.A8{display:inline-block;animation:spin1 2s linear 0s infinite normal forwards}
.A9{display:inline-block;animation:spin1 1s linear 0s infinite normal forwards}
@keyframes spin1 {0% {transform: translate(-50%,-50%) rotate(0deg); transform-origin: center center} 100% {transform: translate(-50%,-50%) rotate(360deg); transform-origin: center center} }
.A10{animation:wiggle1 0.3s linear 0s infinite alternate-reverse}
@keyframes wiggle1{transform:translate(-50%,-50%);0%, 100% {transform: rotate(-5deg);}50% {transform: rotate(5deg)}}
/* ***** Effects Start Here - Prefix Varies ***** */
/* Effects Rotations - Prefix R */
.R0{transform:translate(-50%,-50%) rotate(45deg) !important; transform-origin:center;display:inline-block}
.R1{transform:translate(-50%,-50%) rotate(315deg) !important;transform-origin:center;display:inline-block}
.R2{transform:translate(-50%,-50%) rotate(90deg) !important;transform-origin:center;display:inline-block}
.R3{transform:translate(-50%,-50%) rotate(270deg) !important;transform-origin:center;display:inline-block}
.R4{transform:translate(-50%,-50%) rotate(180deg) !important;transform-origin:center;display:inline-block}
/* Effects Opacity - Prefix O*/
.O0{opacity:0}
.O1{opacity:0.1}
.O2{opacity:0.2}
.O3{opacity:0.3}
.O4{opacity:0.4}
.O5{opacity:0.5}
.O6{opacity:0.6}
.O7{opacity:0.7}
.O8{opacity:0.8}
.O9{opacity:0.9}
/* Effects Color - Prefix C*/
.C0{color:var(--myRed-color) !important}
.C1{color:var(--myGreen-color) !important}
.C2{color:var(--myOrange-color) !important}
.C3{color:yellow !important}
.C4{color:blue !important}
.C5{color:black !important}
.C6{color:white !important}
.C7{color:gray !important}
.C8{color:#744735 !important}
.C9{color:transparent !important}
/* Effects Underline - Prefix U */
.U0{text-decoration:underline solid var(--myUnderline-color)}
.U1{text-decoration:underline dotted var(--myUnderline-color)}
.U2{text-decoration:underline dashed var(--myUnderline-color)}
.U3{text-decoration:underline wavy var(--myUnderline-color)}
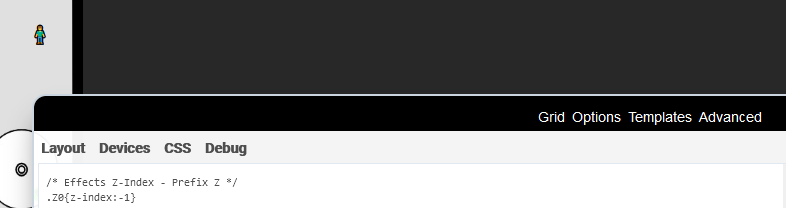
/* Effects Z-Index - Prefix Z */
.Z0{z-index:-1}
.Z1{z-index:1}
.Z2{z-index:2}
/* Effects Outlines - Prefix o (Lower case is deliberate) */
.o0{outline:2px solid black;border-radius:50%}
.o1{outline:2px solid black}
.o2{outline:2px solid white;border-radius:50%}
.o3{outline:2px solid white}
.o4{outline:2px solid var(--myRed-color);border-radius:50%}
.o5{outline:2px solid var(--myRed-color)}
.o6{outline:2px solid var(--myGreen-color);border-radius:50%}
.o7{outline:2px solid var(--myGreen-color)}
.o8{outline:2px solid var(--myOrange-color);border-radius:50%}
.o9{outline:2px solid var(--myOrange-color)}
.o10{outline:2px solid yellow;border-radius:50%}
.o11{outline:2px solid yellow}
/* Effects Box Shadows */
.BS0{box-shadow:0px 0px 5px 5px var(--myRed-color)}
.BS1{box-shadow:0px 0px 5px 5px var(--myGreen-color)}
.BS2{box-shadow:0px 0px 5px 5px var(--myOrange-color)}
.BS3{box-shadow:0px 0px 5px 5px Yellow}
.BS4{box-shadow:0px 0px 5px 5px Blue}
.BS5{box-shadow:0px 0px 5px 5px Black}
.BS6{box-shadow:0px 0px 5px 5px White}
.BS7{box-shadow:0px 0px 5px 5px Gray}
.BS8{box-shadow:0px 0px 5px 5px #744735}
/* Effects Text Handling goes here */
.T0{white-space:nowrap}
.T1{padding:0px !important}
.T2{padding:5px !important}
.T3{padding:10px !important}
.T4{padding:15px !important}
.T5{letter-spacing:2px}
.T6{letter-spacing:3px}
.T7{letter-spacing:5px}
.T8{text-shadow:5px 5px 10px #f00;}
.T9{text-shadow:5px 5px 10px #0f0;}
.T10{white-space:nowrap;word-spacing:10px;}