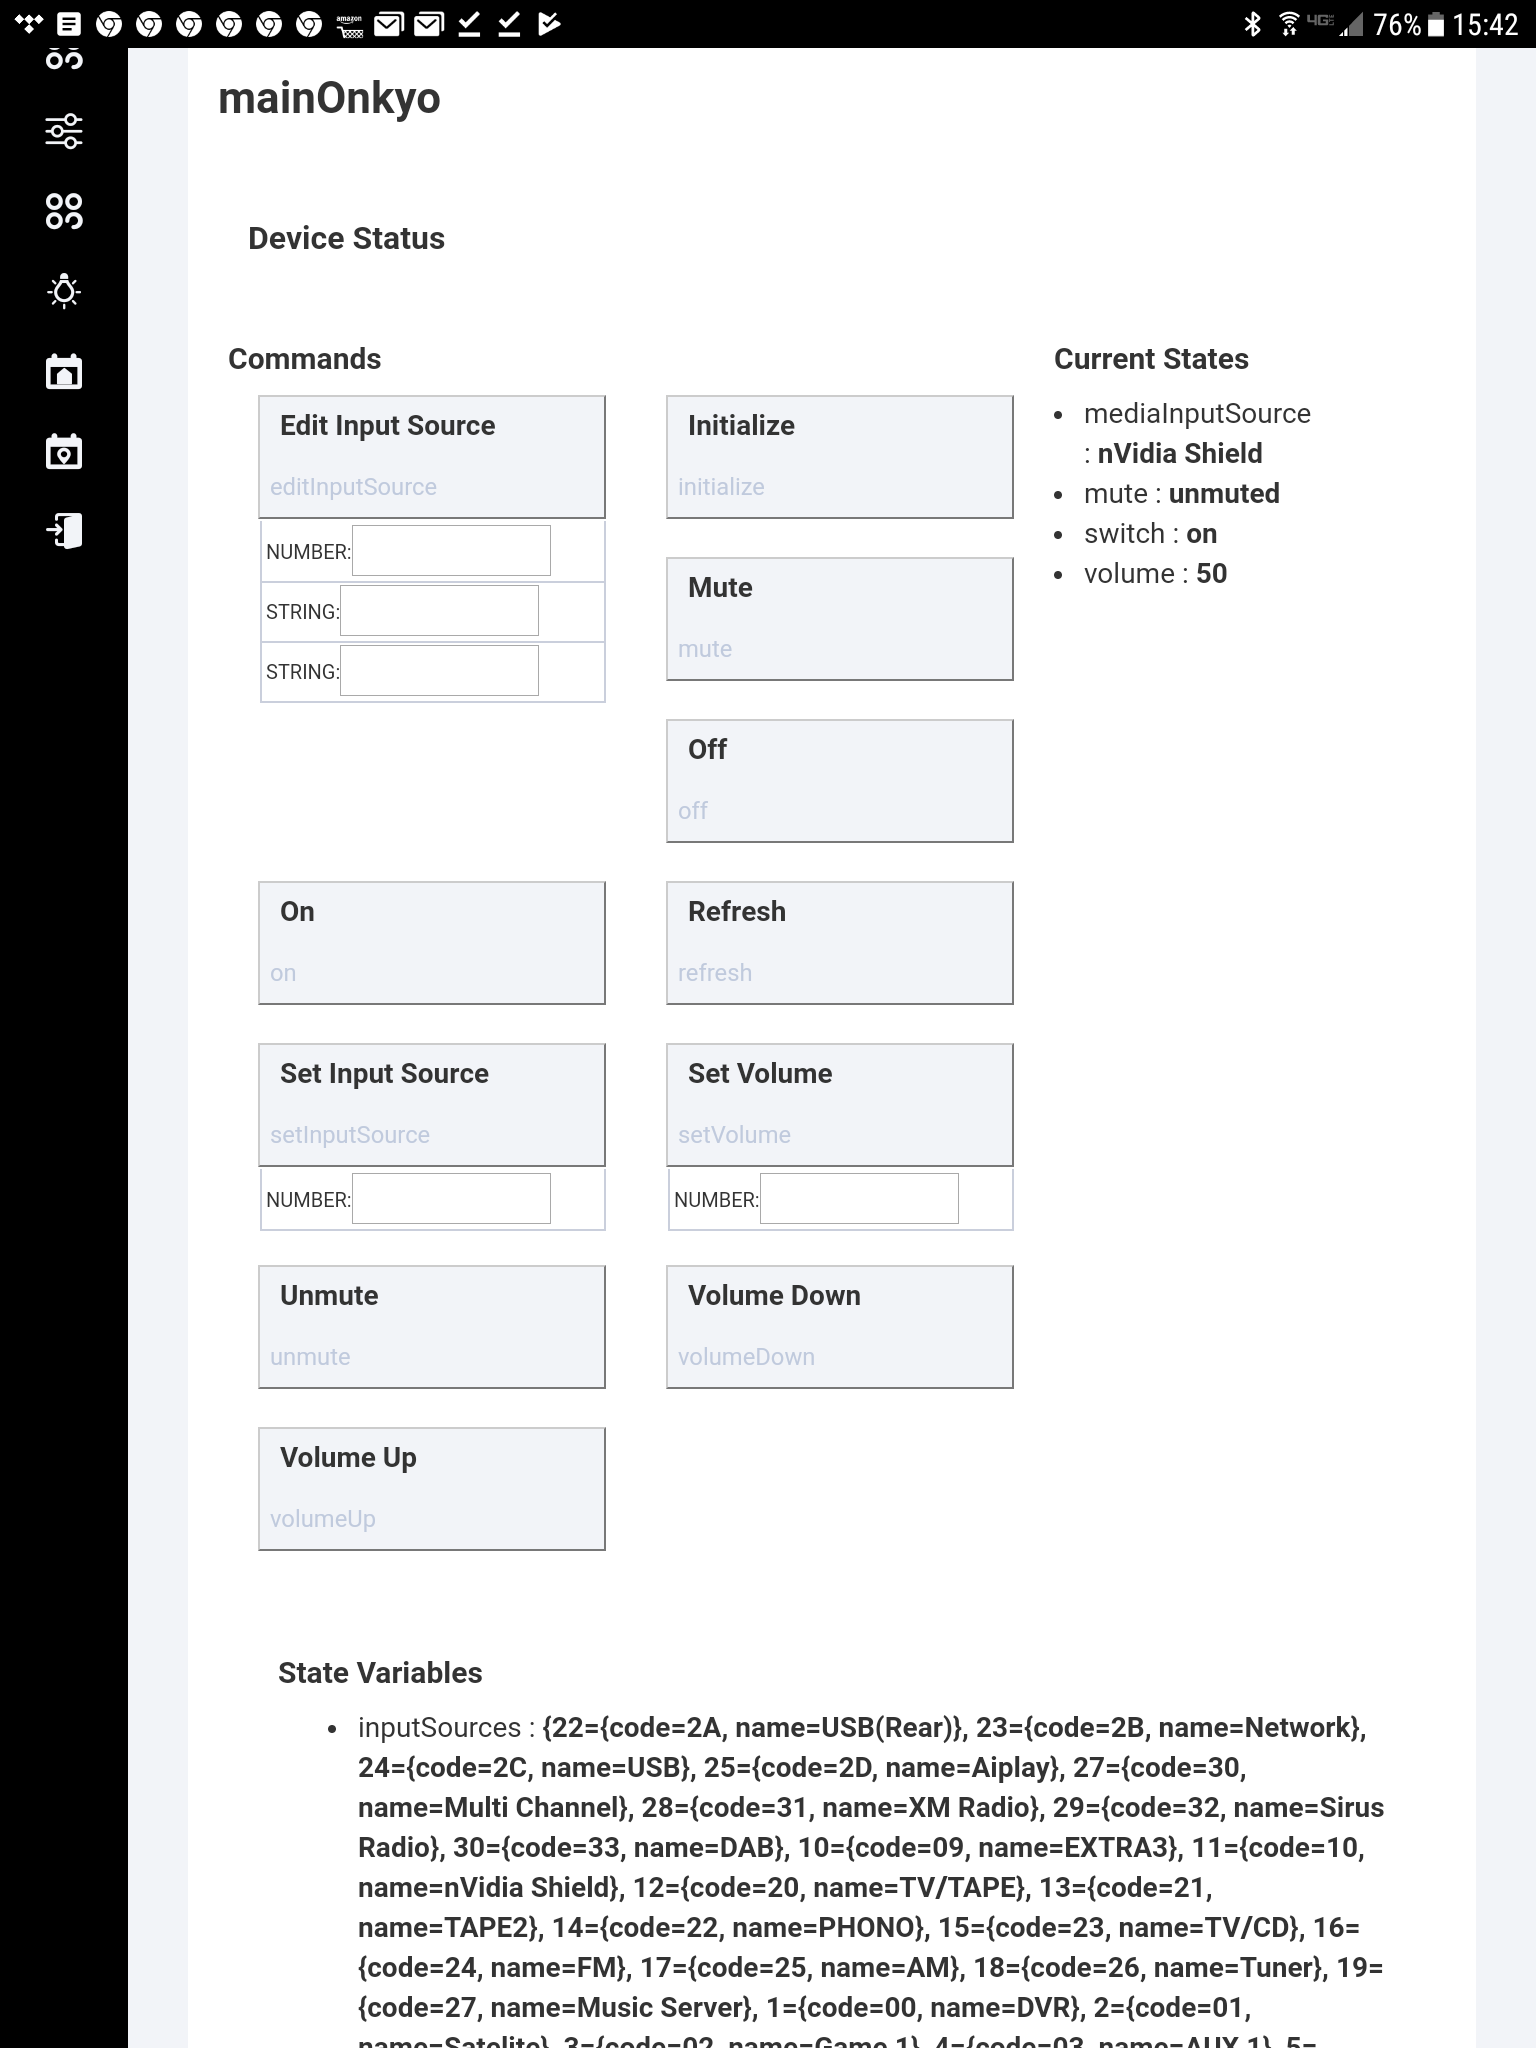
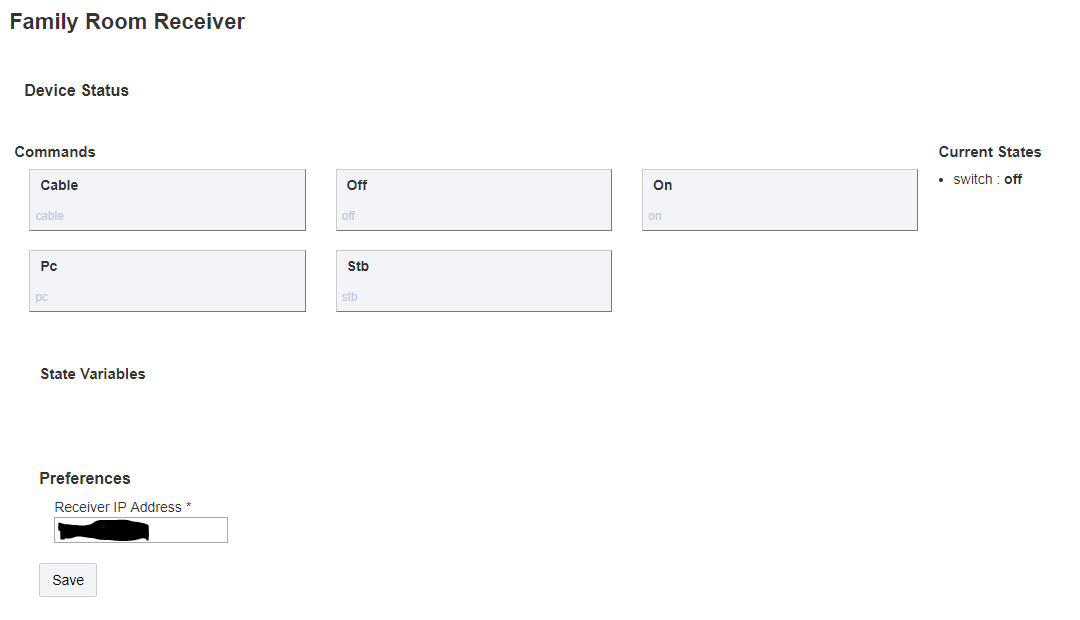
I finally got a driver for my Onkyo receiver working! I have a couple of receivers in my house, so one thing I need to figure out is how to set the IP address of each device dynamically. I added an IP preference, but it only shows up in one of the devices I create.
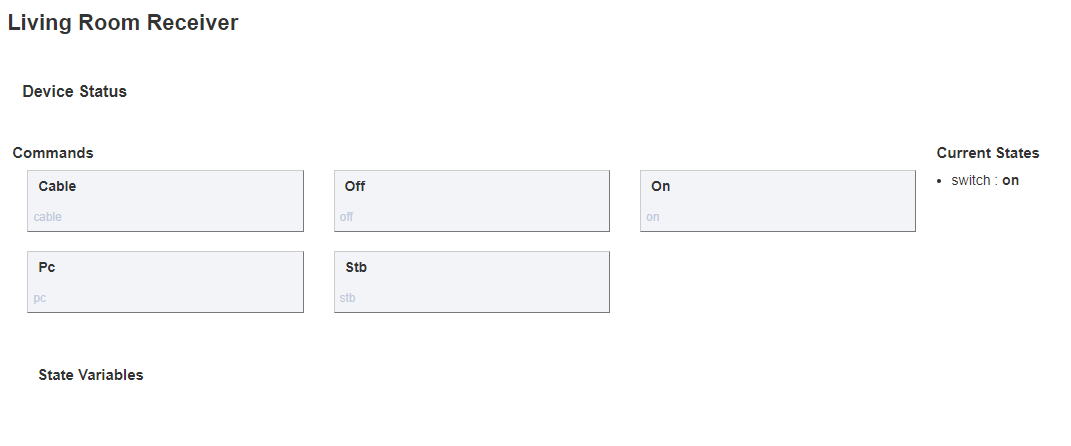
In the second one it's not showing up.
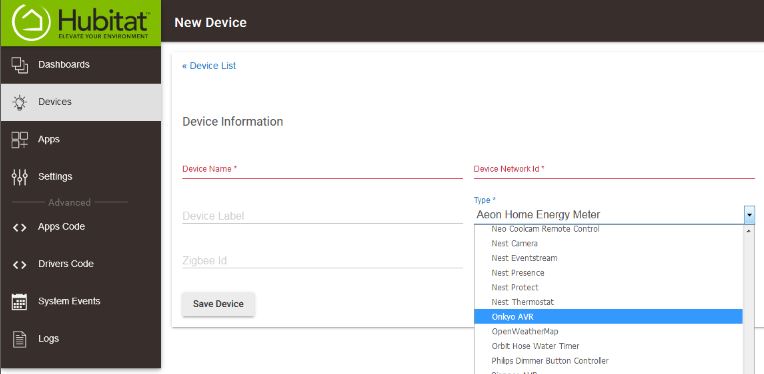
Is there another way, without creating two DTH's, to reuse the same DTH for multiple devices while setting the IP separately for each device?
/**
 *  Onkyo IP Control Device Type for Hubitat
 *  Carson Dallum (@cdallum)
 *  Originally based on: Mike Maxwell's and Allan Klein's code
 *
 *  Usage:
 *  1. Be sure you have enabled control of the receiver via the network under the settings on your receiver.
 *  2. Add this code as a device handler in the Hubitat Drivers Code section
 *
 *  Licensed under the Apache License, Version 2.0 (the "License"); you may not use this file except
 *  in compliance with the License. You may obtain a copy of the License at:
 *
 *      http://www.apache.org/licenses/LICENSE-2.0
 *
 *  Unless required by applicable law or agreed to in writing, software distributed under the License is distributed
 *  on an "AS IS" BASIS, WITHOUT WARRANTIES OR CONDITIONS OF ANY KIND, either express or implied. See the License
 *  for the specific language governing permissions and limitations under the License.
 *
 * Some future commands that might be useful to incorporate reading:
 * Power Status: PWRQSTN
 * Input Selected: SLIQSTN
 * Volume Level: MVLQSTN (value in hex)
 * Artist Name: NATQSTN
 * Track Name: NTIQSTN
 * Zone 2 Mute: ZMTQSTN
 * Zone 2 Volume: ZVLQSTN
 * Zone 2 Input Selected: SLZQSTN
 * ISCP commands were found at https://github.com/miracle2k/onkyo-eiscp/blob/master/eiscp-commands.yaml
 */

metadata {
	definition (name: "Onkyo Receiver (Family Room)", namespace: "cdallum", author: "Carson Dallum") {
	capability "Initialize"
    capability "Telnet"
    capability "Switch"
	command "cable"
	command "stb"
	command "pc"
	}
    main "switch"
    details(["switch","cable","stb","pc"])
}

def on() {
	log.debug "Powering on receiver"
	sendEvent(name: "switch", value: "on")
	def msg = getEiscpMessage("PWR01")
    return new hubitat.device.HubAction(msg,hubitat.device.Protocol.TELNET)
}

def off() {
	log.debug "Powering off receiver"
	sendEvent(name: "switch", value: "off")
	def msg = getEiscpMessage("PWR00")
    return new hubitat.device.HubAction(msg,hubitat.device.Protocol.TELNET)
}

def cable() {
	log.debug "Setting input to Cable"
	def msg = getEiscpMessage("SLI01")
	return new hubitat.device.HubAction(msg,hubitat.device.Protocol.TELNET)
}

def stb() {
	log.debug "Setting input to STB"
	def msg = getEiscpMessage("SLI02")
	return new hubitat.device.HubAction(msg,hubitat.device.Protocol.TELNET)
}

def pc() {
	log.debug "Setting input to PC"
	def msg = getEiscpMessage("SLI05")
	return new hubitat.device.HubAction(msg,hubitat.device.Protocol.TELNET)
}

/* This is where I construct the entire message character by character. Each char is represented by a 2 disgit hex value */
def getEiscpMessage(command){
	def sb = StringBuilder.newInstance()
	def eiscpDataSize = command.length() + 3  // this is the eISCP data size
	def eiscpMsgSize = eiscpDataSize + 1 + 16  // this is the size of the entire eISCP msg

	sb.append("ISCP")
	// the following are all in HEX representing one char

	// 4 char Big Endian Header
	sb.append((char)Integer.parseInt("00", 16))
	sb.append((char)Integer.parseInt("00", 16))
	sb.append((char)Integer.parseInt("00", 16))
	sb.append((char)Integer.parseInt("10", 16))

	// 4 char  Big Endian data size
	sb.append((char)Integer.parseInt("00", 16))
	sb.append((char)Integer.parseInt("00", 16))
	sb.append((char)Integer.parseInt("00", 16))
	// the official ISCP docs say this is supposed to be just the data size  (eiscpDataSize)
	// ** BUT **
	// It only works if you send the size of the entire Message size (eiscpMsgSize)
	// Changing eiscpMsgSize to eiscpDataSize for testing
	sb.append((char)Integer.parseInt(Integer.toHexString(eiscpDataSize), 16))
	//sb.append((char)Integer.parseInt(Integer.toHexString(eiscpMsgSize), 16))

	// eiscp_version = "01";
	sb.append((char)Integer.parseInt("01", 16))

	// 3 chars reserved = "00"+"00"+"00";
	sb.append((char)Integer.parseInt("00", 16))
	sb.append((char)Integer.parseInt("00", 16))
	sb.append((char)Integer.parseInt("00", 16))

	//  eISCP data
	// Start Character
	sb.append("!")

	// eISCP data - unittype char '1' is receiver
	sb.append("1")

	// eISCP data - 3 char command and param    ie PWR01
	sb.append(command)

	// msg end - this can be a few different cahrs depending on your receiver
	// my NR5008 works when I use  'EOF'
	//OD is CR
	//0A is LF
	/*
	[CR]			Carriage Return					ASCII Code 0x0D
	[LF]			Line Feed						ASCII Code 0x0A
	[EOF]			End of File						ASCII Code 0x1A
	*/
	//works with cr or crlf
	sb.append((char)Integer.parseInt("0D", 16)) //cr

	return sb.toString()
}

// General App Events
def initialize(){
	telnetConnect("192.168.1.xxx", 60128, null, null)
	log.debug "Opening telnet connection"
}

def installed(){
	initialize()
}

def updated(){
	initialize()
}