The issue you might be running into is the fact that at 5% dim (if all were linear) the AC waveform into the dimmer is only on for 5% of the time.
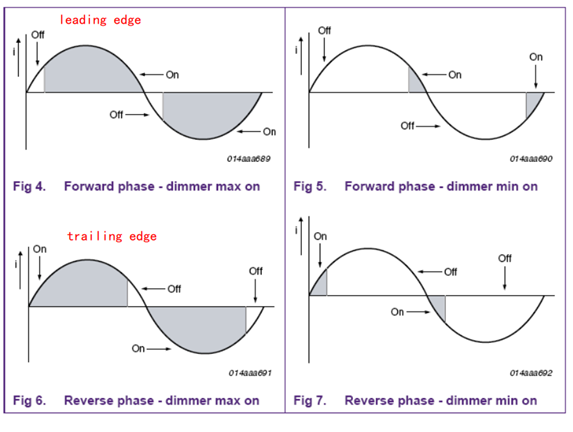
Look at the top right waveform. It shows the ON time for a very dim condition. The shaded portion shows how much energy is available to the circuitry that must create and control the output DC.
Top Left is a bright condition where the shaded area provides plenty of energy to the power supply to do its job.
It is not unreasonable the dim condition shown could have a significant delay compared to the max condition.
However I do not know anything about your power supply to make a statement from fact.
This startup lag when using LED lighting with low dim levels is a known issue, I found it documented all over the internet. It has to do with the power converters used to power the LEDs. I noticed this problem when I started replacing incandescents with LEDs.. the old incandescents turned on instantly even when dim was set to like 2%. When I switched to LEDs, there is now a 1-2 second delay between switch and light. It's annoying, but I do not know of any solution.
While you wait for the Zooz to arrive, you could try finding a spot 2 seconds away from the top of the stairs to put another motion sensor. Yes, they may light more often than needed BUT you get more control possibly with the ramp. In other words use the ramp to your advantage.
Like a lot of house designs, to get to my master bath, one must walk through the master bedroom. So I have the motion sensor for the bedroom light the bath at 12% every time (at night,) It's so dim as to be unusable, but when the bathroom motion sensor trips, there's a shift from 12% to 30% and is practically instant.
You could detect potential stair users and set it to 1%, then when the top of stair motion is detected, increase to 5%.
True.
I thought about lowering the lumens of the lights I'm using in some locations where I like a low initial dim level so that I can use a higher dim level for the same light output and get a quicker response - at the expense of full-on lumens of course.
Agreed. I typically see slight delay with all LEDs but subjectively, it seems to be in the less than 1 second range. This is really the only situation where I'm seeing two seconds or more of delay. One second or less is tolerable--two seconds feels like an eternity.
I may try that. Unfortunately, there's a bedroom right off the landing and the loft area has a pull out couch and doubles as a sleeping area when we have guests so I'm trying to avoid unnecessarily lighting up the stairwell. At this point I'll likely wait until I get back from my trip and order the ZOOZ dimmer. If it works, great. If it doesn't, I'll find another use for it and look at other options.
I just purchased a Zooz ZEN54 LR with the intention on testing it on a power supply that has a 0 to 10V input command signal. I've not tested it yet but I would expect the response time of a power supply would be pretty fast as the electronics will remain powered when the lights are off.
If I get a chance I'll test it out and post my findings.
As for a delay in the LED's lighting, there is none. Any delay is in the control and power circuits. For all practical purposes LED's respond instantly.
This does not apply to regular LED bulbs as there are electronics built into the bulb base. For Strip LED's there are no electronics to cause a delay.
For a test you could put a simple Dimmer control between your power supply and the LEDs. This would allow you to start the powersupply at full power but keep the LED dim. One of these for instance.
One thing that we do with lighting that's too bright in show biz is, when it can be hidden from view, use a few plies of toilet paper carefully covering the lights. Helps soften and add diffusion, and looking at that banister you could probably hide it up inside there where it would never be seen.
If you soften the light a bit, maybe you could use a higher dim level that activates the LEDs faster.
Hmm, that gives me an idea. I may order one of these and swap out the z-wave dimmer with a z-wave switch I have kicking around to see if it makes a difference since the z-wave switch control should be near instantaneous (no dim ramp). The LED driver is located in the attic so it should be easy to connect the external dimmer control to it to quickly test.
I can see how the installation could prove a challenge, but I wouldn't worry about heat. Believe me, the LEDs we would use on a set or event are significantly hotter and consume far ore power than anything you'd ever use in a home... every 6' of LED fixtures we use for up-lighting is around 200 watts of power, hence why they often need something to act as an additional layer of softening and diffusion. Although, I will admit that our setups are always temporary. These are never permanent installations, as next week the entire set will be different, as will the client, the look, everything..
I have a couple of extra GE/Jasco switches so not a problem. Traveling so might be a several weeks before I get to it. I'll post results once I'm back.
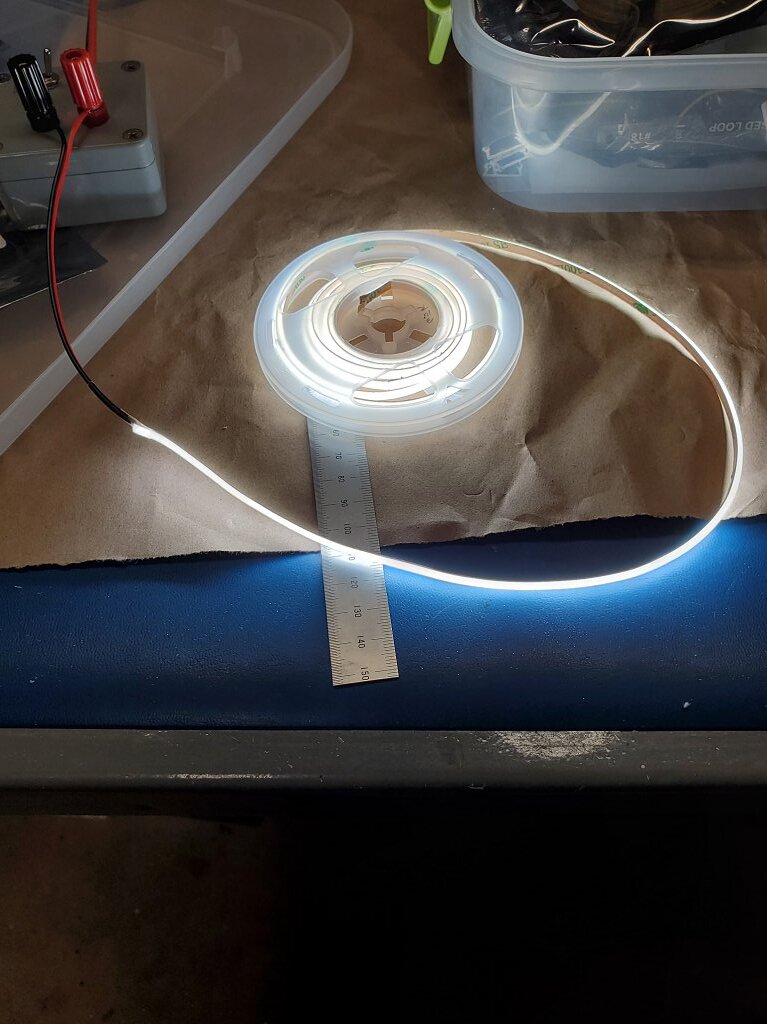
Not sure what SteveV used for LED's but I've been looking at doing another stairway. Again for me it will be under the stair thread lip. I'm going to use the newer COB (chip on board) type of LED strip. They are thin, you cannot see the individual LED's and they have a built in cover/protection. They are adhesive backed.
I will be using them at a very low brightness level so I won't need to worry about heat. But if you want to run them full on for any significant period of time you will need an aluminum strip to spread the heat.
Unfortunately, I didn't--I always intend to but I get involved and focused on the the project and then realize I've forgotten to document any of it.
There's a bit of info in post 13 on this thread that might be useful. I ended up using 6' long LED channel to avoid having to butt pieces of the more common 3' long sections together since most of the runs between the handrail brackets are nearly 4' long.
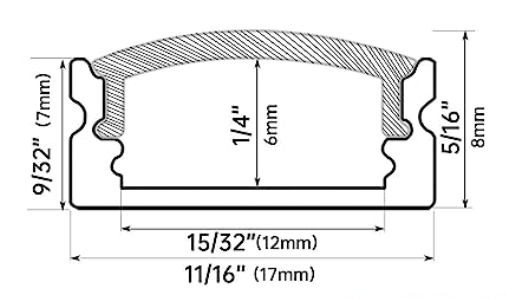
The aluminum LED channels are 11/16" wide. The 3/4" dado is a bit oversized but allows for a tiny bit more room when running the interconnecting 18 ga wire that connects the various strip sections.
The channel is screwed to the handrail using #6 X 1/2" screws via holes I drilled and countersunk in the aluminum channel.
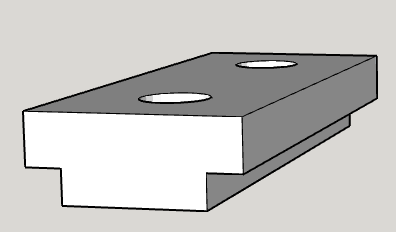
Since the handrail brackets screw into the bottom of the handrail and I needed a way to fill-in the full length dado I cut in the handrail so the bracket had a flat surface to rest on. I made 4 spacer blocks that fit into the routed dado in the handrail.
The spacer are 1 3/4" long, 3/4" wide, and 5/16" thick. A 1/8" rabbet provides a place to route the 18 ga wire that is soldered to interconnect each section of LED strip and channel.
The rest of the work is cutting the channels to length, cutting and sticking the LED strips to the channels and soldering the wires to the strips to connect all of the sections. The interconnect wire I chose is 18 ga high strand count wire with a silicone jacket. It's very flexible which made routing the wire (one on each side of the rabbet cut into the spacer) pretty easy.
Yeah, tricky for sure. In my case, the LED driver is located in the attic area just above the top landing of the stairs. First, I cut an opening for a low voltage plaster ring in the bedroom wall next to the stairs in the stud bay where the end of the handrail is located. I drilled through the wall's top plate from the attic and fished the low voltage wire from the LED driver down the wall and out the low voltage plaster ring. Next, I drilled a hole in the wall where the 90 degree miter joint is on the handrail. The hole is covered by the return piece on the handrail so it's all hidden pretty well. The low voltage wire from the LED driver and the wire going to the handrail are connected using wago connectors and a blank cover plate covers the low voltage plaster ring in the bedroom.
Your installation looks awesome.
For my stairs I couldn't figure out how to screw the aluminum strip after the LED tape was on the strip. Solution, double sided tape.
So here’s a bit more info on the long turn-on delay at low brightness levels issue. I’m still several weeks away from being able to try this at the house where the illuminated handrail is installed, but this has been bugging me enough that I tried to duplicate the issue on a test bench.
TLDR; It's not the dimmers--it's the LED Driver that's are causing the delay. I tried two other LED drivers and had the same issue. Read on for a work-around.
The recap; at brightness level above 20%, a Z-Wave command sent to a dimmer or switch illuminates the LED strip in approximately one second. At brightness levels lower than 20%, the lower the dim level, the longer it takes for the LED strip to illuminate. At 5% brightness, it’s taking more than two seconds for the strip to turn on—less than ideal since the strip is providing lighting for stairs triggered by motion sensors.
I’ve been able to duplicate the issue with the same LED strip model, two different LED drivers, a GE/Jasco Z-Wave dimmer and a Zooz ZEN77 dimmer. I used the Basic Z-Wave Tool driver on the dimmers to set the appropriate Z-Wave parameters to values that resulted the lowest dim ramp times. Changing these values made no perceptible difference. The bottom line is that the issue I’m seeing has nothing to do with dim ramp or Z-Wave—it’s caused by the LED driver and the time it takes for it to power up sufficiently to drive the LEDs. At full brightness the LED driver turns on instantaneously, at 5% brightness--not so much.
Here's the best solution I’ve been able to come up with.
Wire the LED driver so it’s connected directly to 110VAC so it’s always powered on
Connect the LED light strip to the output of the of the dimming controller
Install a Z-Wave or Zigbee dry contact relay such that the normally open contacts are wired in-series with one of the output legs on the dimming controller. When the relay is on, the LED strip will be powered on.
Turn on the relay and set the dimming controller to the desired brightness level.
Barring the time it takes for the relay to respond to the Z-Wave or Zigbee “on” command, the LED strip should now turn on instantly. The obvious trade-off here is that I lose the ability to use a Z-Wave dimmer to control the brightness of the LED strip. But the reality is that I’d probably never do that anyway—I only need enough low brightness lighting to allow someone to see the individual steps so the strip would likely always be at approx. 5% brightness.
Also, I haven’t decided on which relay to use. I simulated the relay using a barrel connector to manually connect and disconnect the strip from the dimming controller.
It's also worth noting that with this setup an dimmable LED driver isn't necessary. You should be able to substitute it for a much cheaper 12 VDC power supply such as this one.
I’ll post real life results in several weeks when I have this setup installed and working.