the X1s is on sale for $169.99 on Amazon.
1 Like
Yup, I broke down and ordered one. Gets here tomorrow.
1 Like
I am not a dealer. I do it all myself. It's possible and actually about as complex as using hubitat.
If you wanted to only control one room like a theater with a bunch of av gear you can do it without the annual fee.
2 Likes
I simplified the setup and driver code a bit for anyone that doesn't want to edit the code themselves...You just have to setup the buttons in the app like below. I'm currently using 40 buttons and it works great. AFAIK there is no limit on how many buttons you can add.
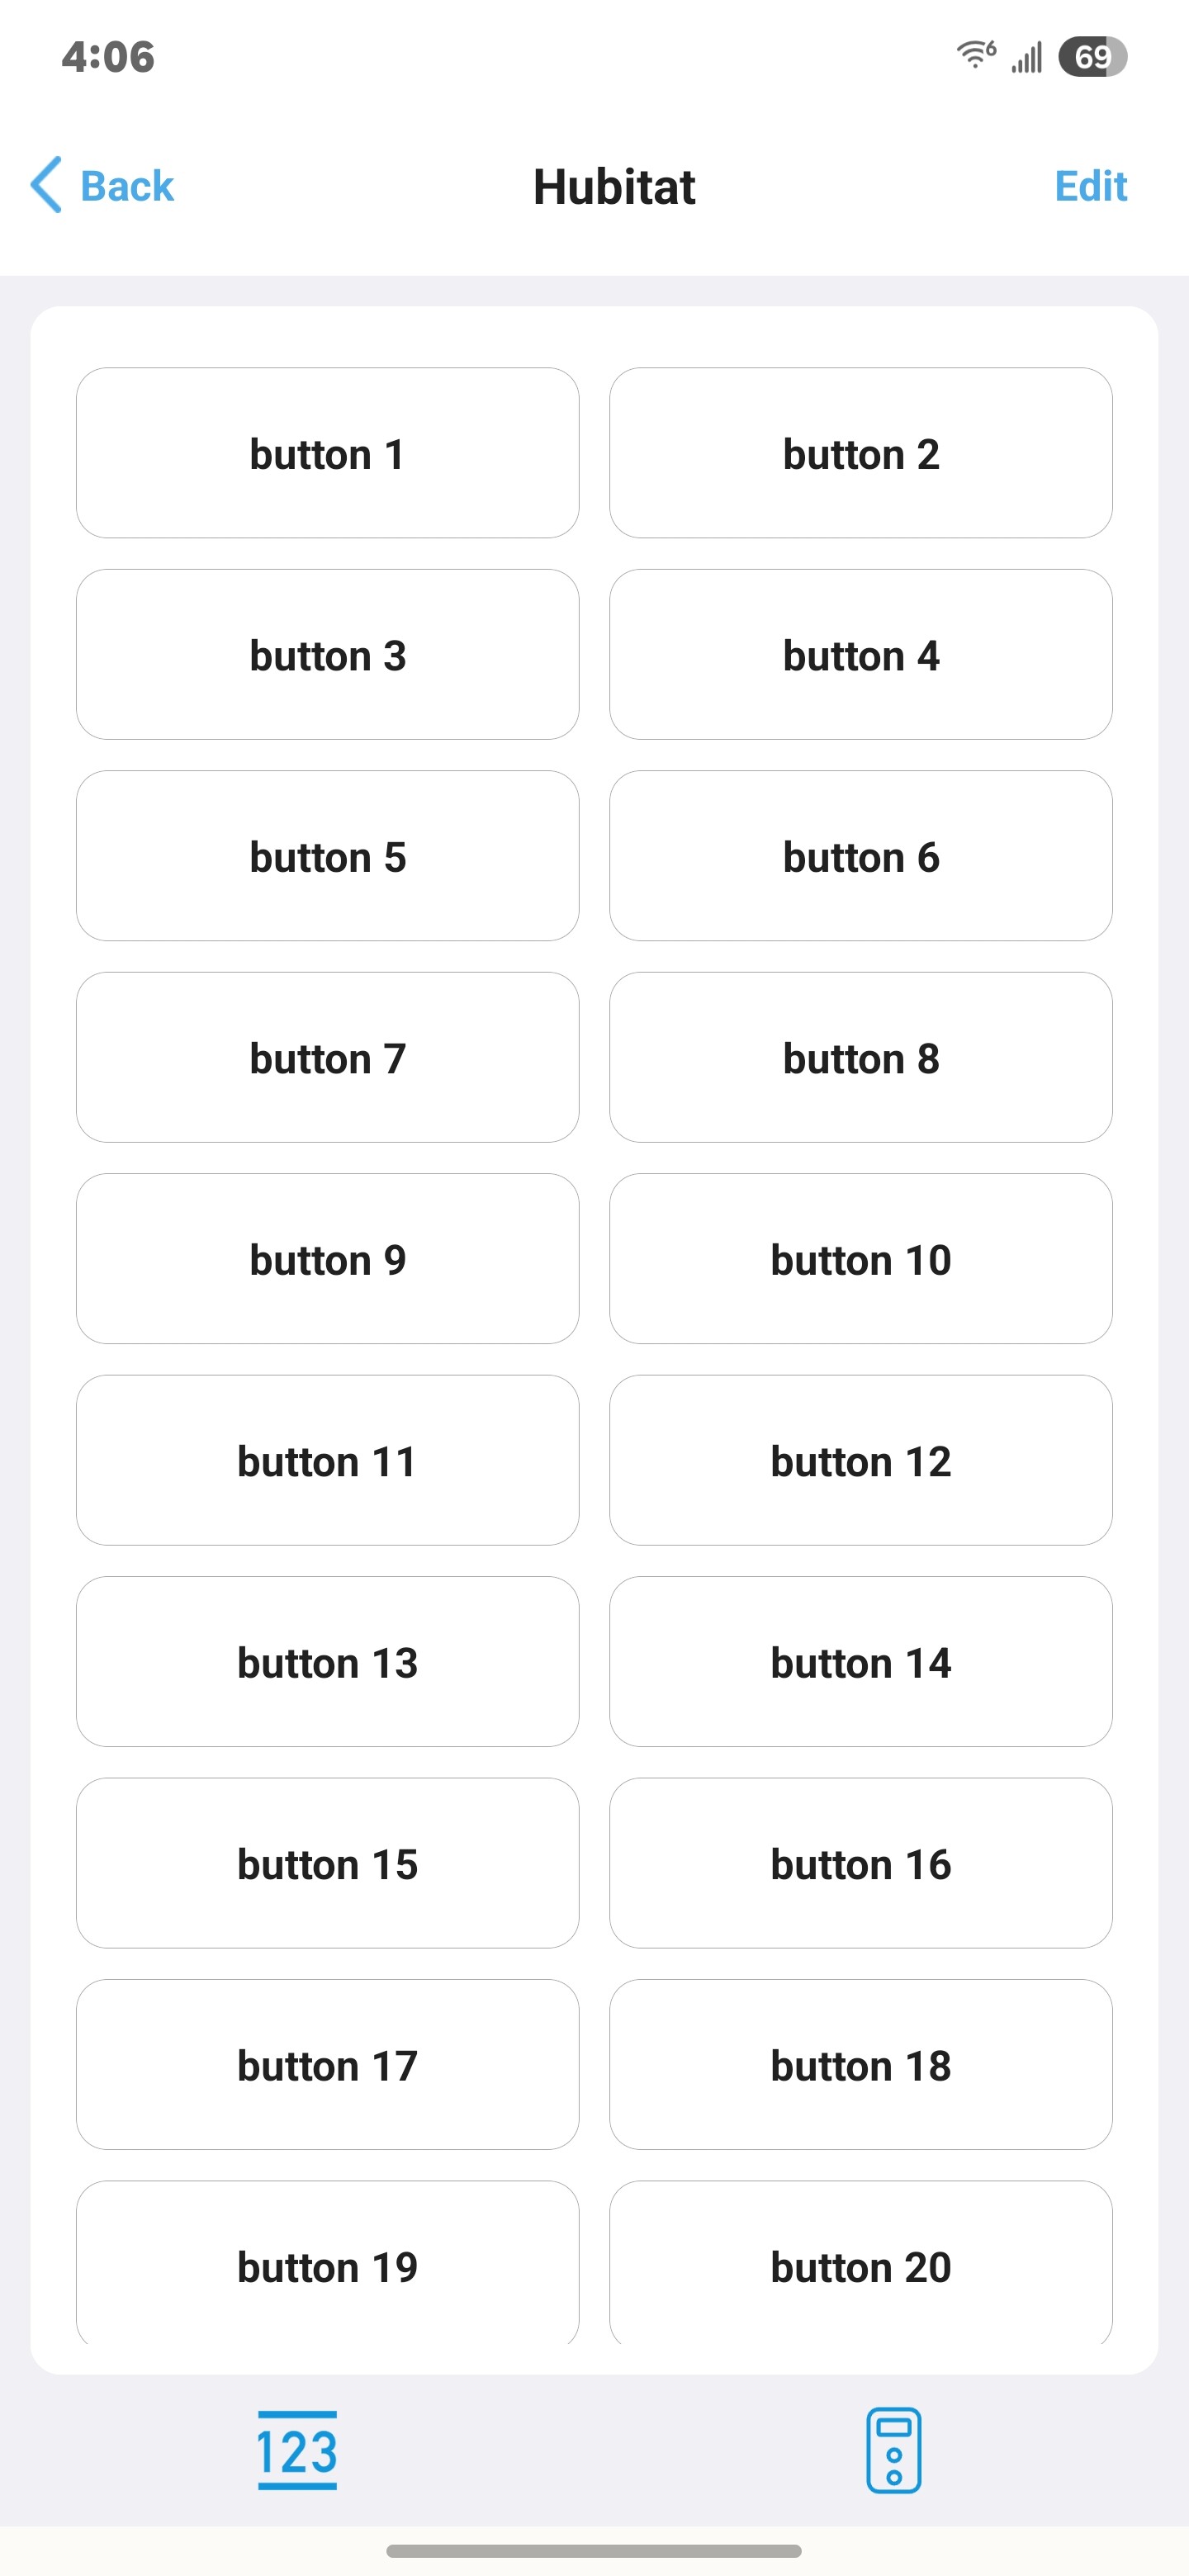
Enter your button name + number
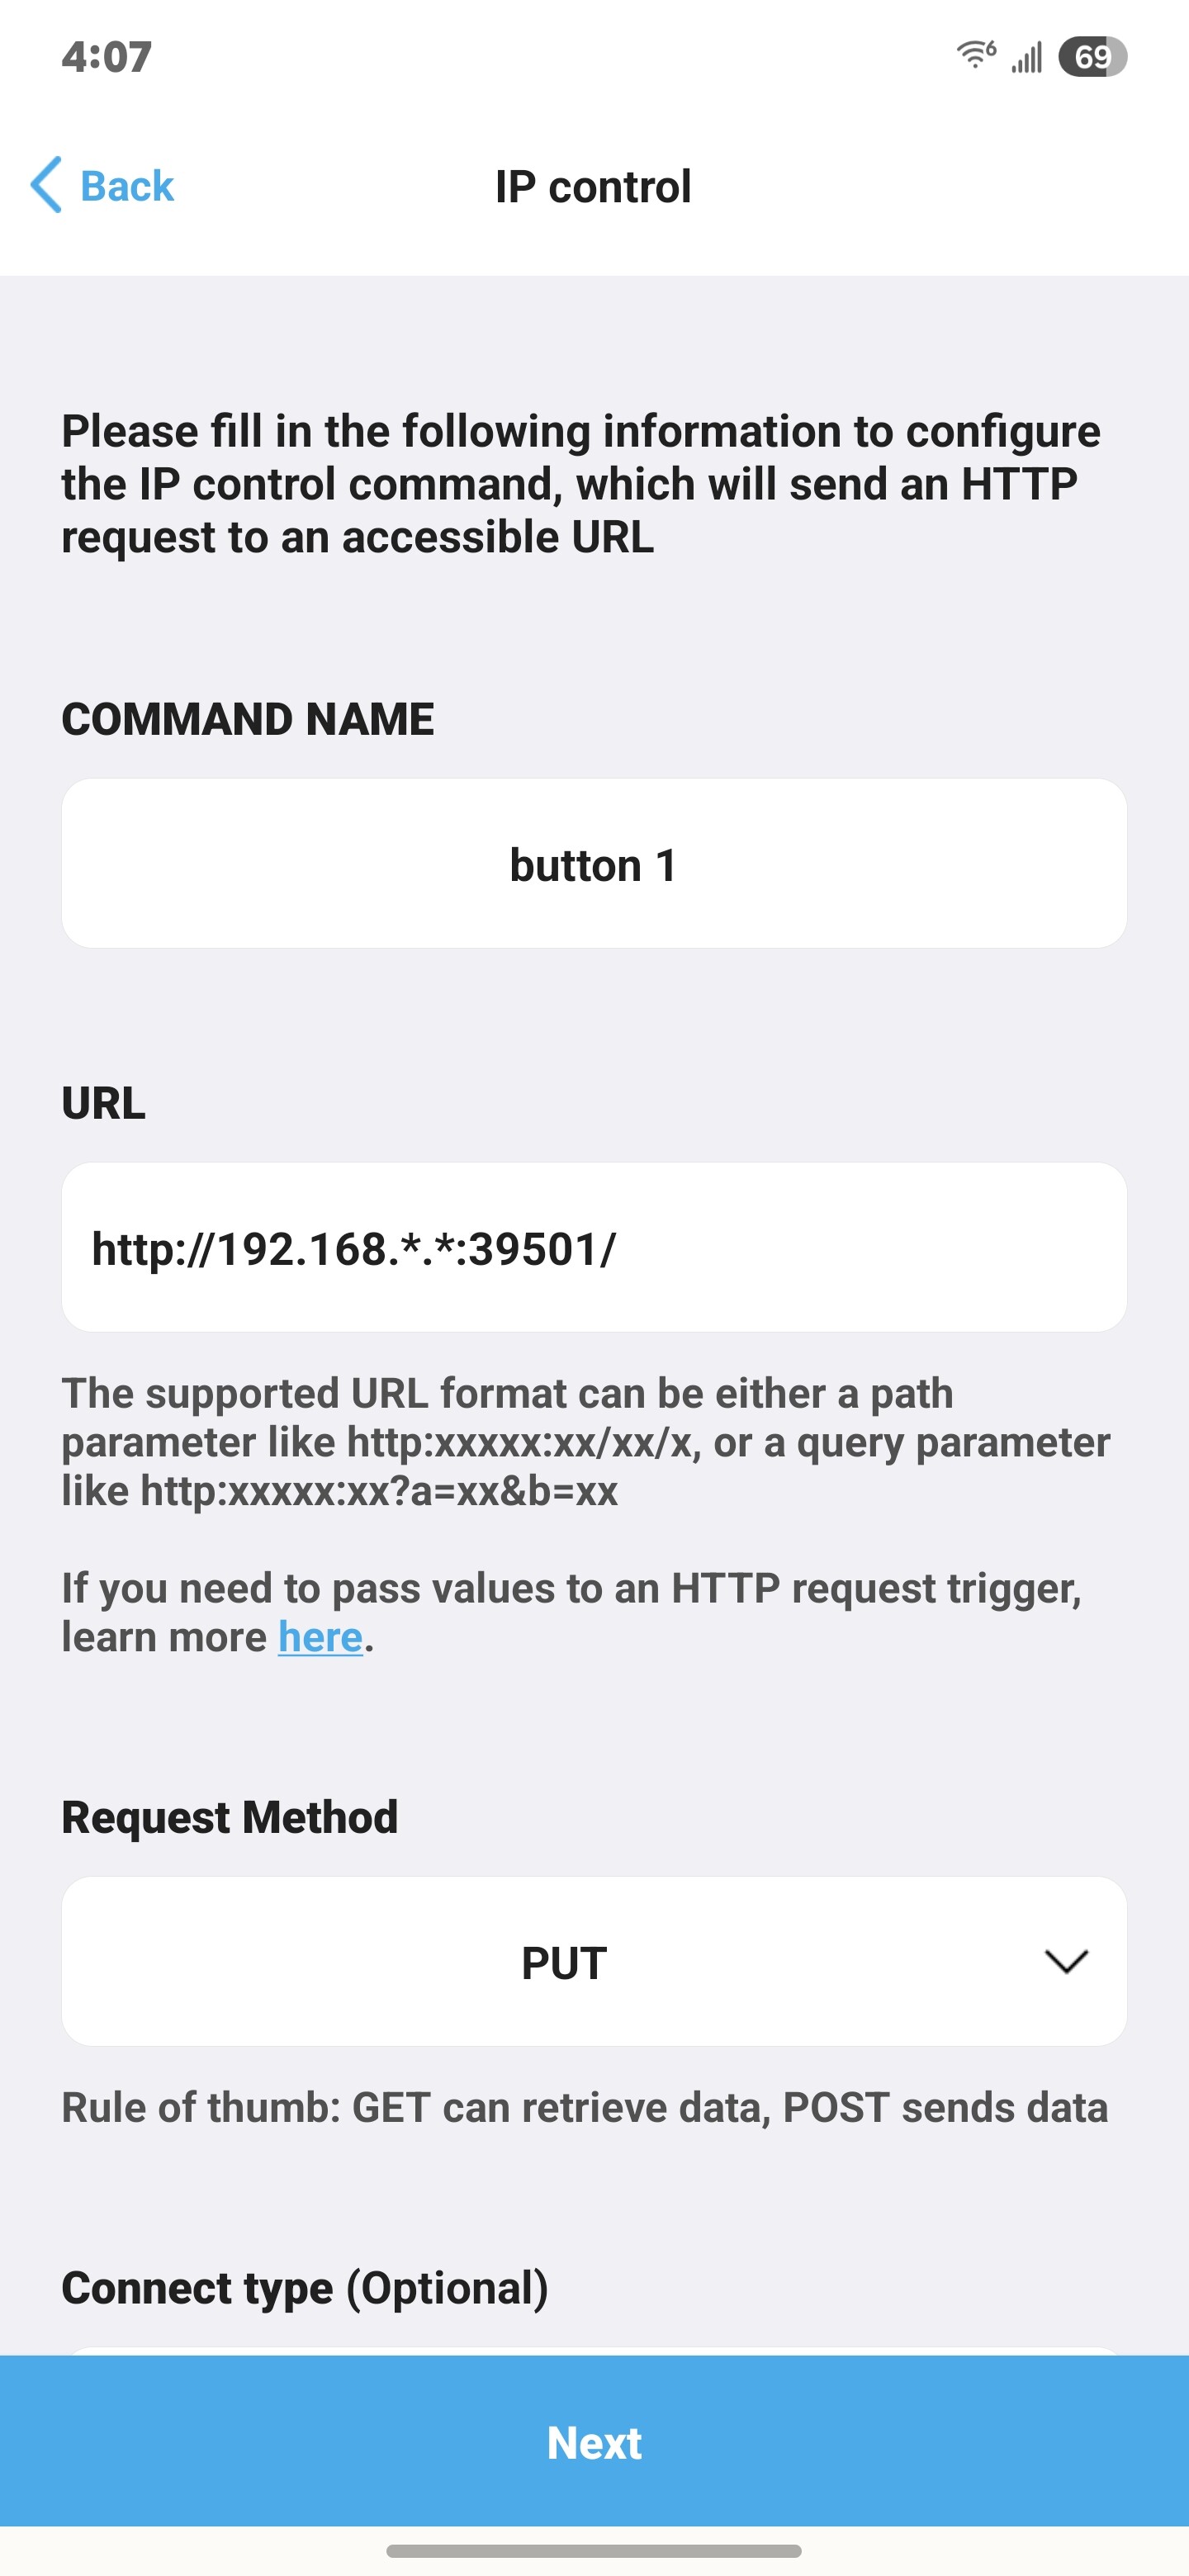
Enter http://my hubitat IP address:39501/ for the URL
Set PUT as the request method
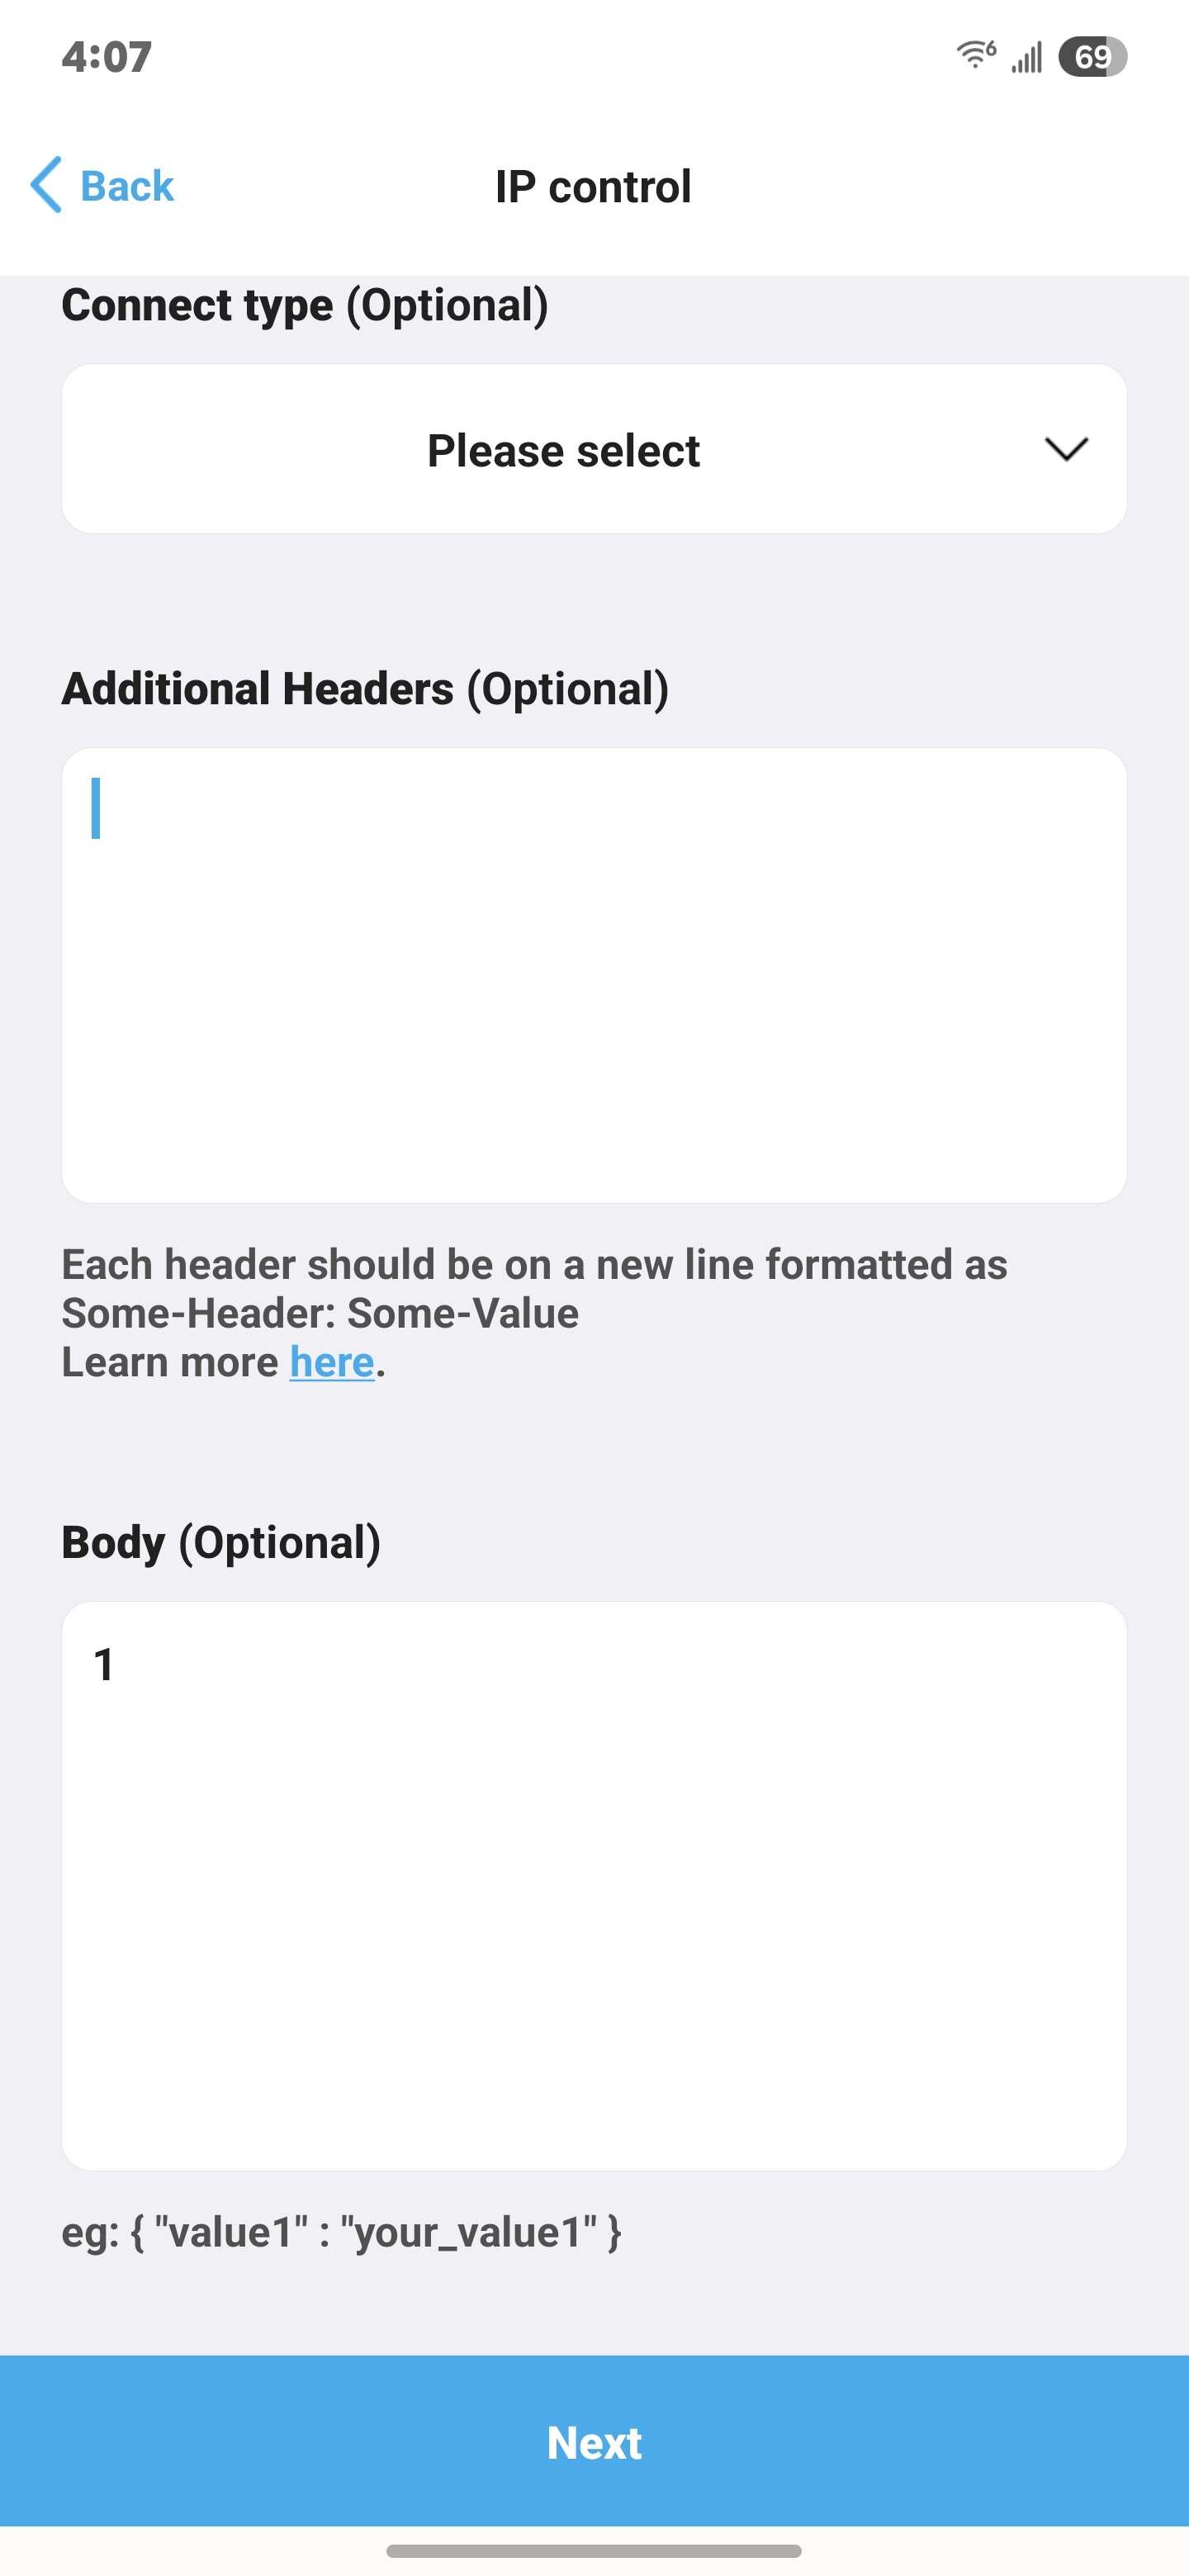
Leave Content Type and Additional Headers blank
And then just enter the button # in the body.
You'll have to do this for every button so it's a good idea to have the url copied so you can just paste it in each time
/*
    Sofabaton X1S
	Copyright 2025 Hubitat Inc. All Rights Reserved

	2025-03-22 maxwell
		-initial publication in github repo

    2025-03-28 Gassgs
        -Made Button Count a preferences & changed parse to just send the number from the body as the button press

	*simple example driver for Sofabaton X1S remote, allows mapping X1S remote buttons to Hubitat button events

	*driver configuration
	-set a static DHCP reservation for the XS1 hub
	-use that reserved IP in this drivers preference setting


	*mobile app configuration on the X1S side for this specific driver instance:
	-click add devices in devices tab, select Wi-Fi
	-click link at bottom "Create a virtual device for IP control"
	-enter   http://my hubs IP address:39501/
	-set PUT as the request method, for the Content Type leave blank, for Headers leave blank, for the Body, enter just the button number.


*/

metadata {
    definition (name: "Sofabaton X1S", namespace: "hubitat", author: "Mike Maxwell") {
        capability "Actuator"
        capability "PushableButton"
        preferences {
            input name:"ip", type:"text", title: "X1S IP Address"
            input name:"buttonCount", type: "number",title:"Button Count", description: "Set button count to suit your needs", defaultValue: 10
            input name:"logEnable", type: "bool", title: "Enable debug logging", defaultValue: false
            input name:"txtEnable", type: "bool", title: "Enable descriptionText logging", defaultValue: true
        }
    }
}

void logsOff(){
    log.warn "debug logging disabled..."
    device.updateSetting("logEnable",[value:"false",type:"bool"])
}

void updated(){
    log.info "updated..."
    log.warn "debug logging is: ${logEnable == true}"
    log.warn "description logging is: ${txtEnable == true}"
    if (logEnable) runIn(1800,logsOff)
    if (ip) {
        device.deviceNetworkId = ipToHex(IP)
        sendEvent(name:"numberOfButtons",value:settings.buttonCount)
    }
}

void parse(String description) {
    msg = parseLanMessage(description)
    def data = msg.body
    if (txtEnable) log.info "$device.label Button $data Pushed"
    sendEvent(name:"pushed", value:data,isStateChange: true)
}

void push(data) {
    if (txtEnable) log.info "$device.label Button $data Pushed"
    sendEvent(name:"pushed", value:data,isStateChange: true)
}

String ipToHex(IP) {
    List<String> quad = ip.split(/\./)
    String hexIP = ""
    quad.each {
        hexIP+= Integer.toHexString(it.toInteger()).padLeft(2,"0").toUpperCase()
    }
    return hexIP
}
3 Likes
This addition is very nice!
Using this integration, I am setting-up a synchronization between SofaBaton and Hubitat which works quite well.
Summary
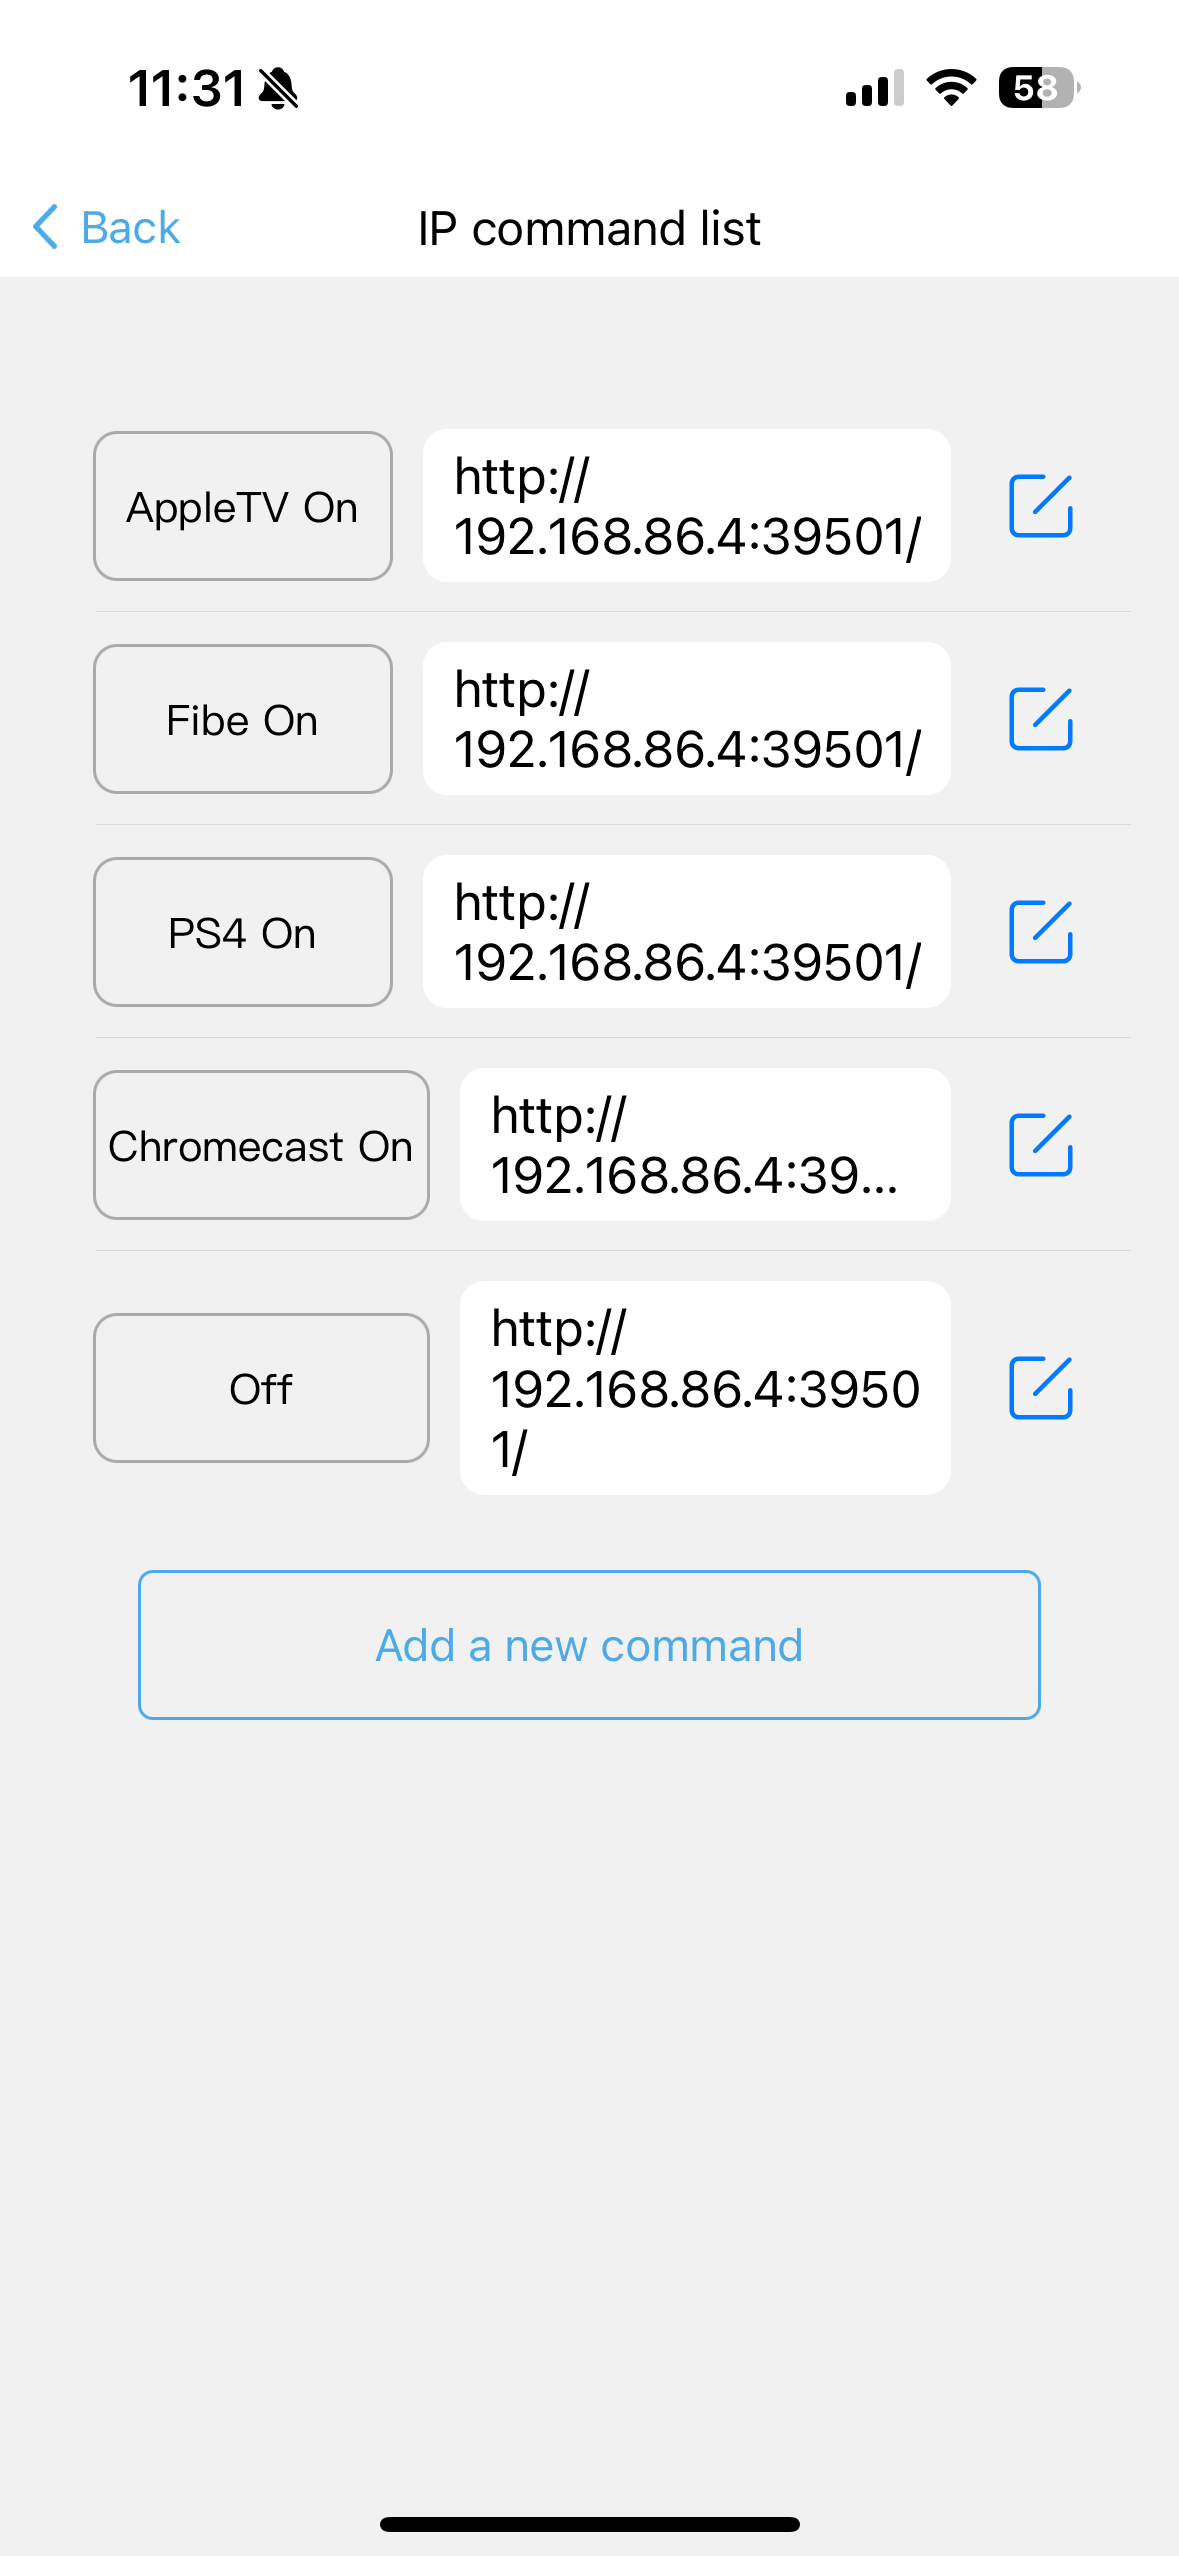
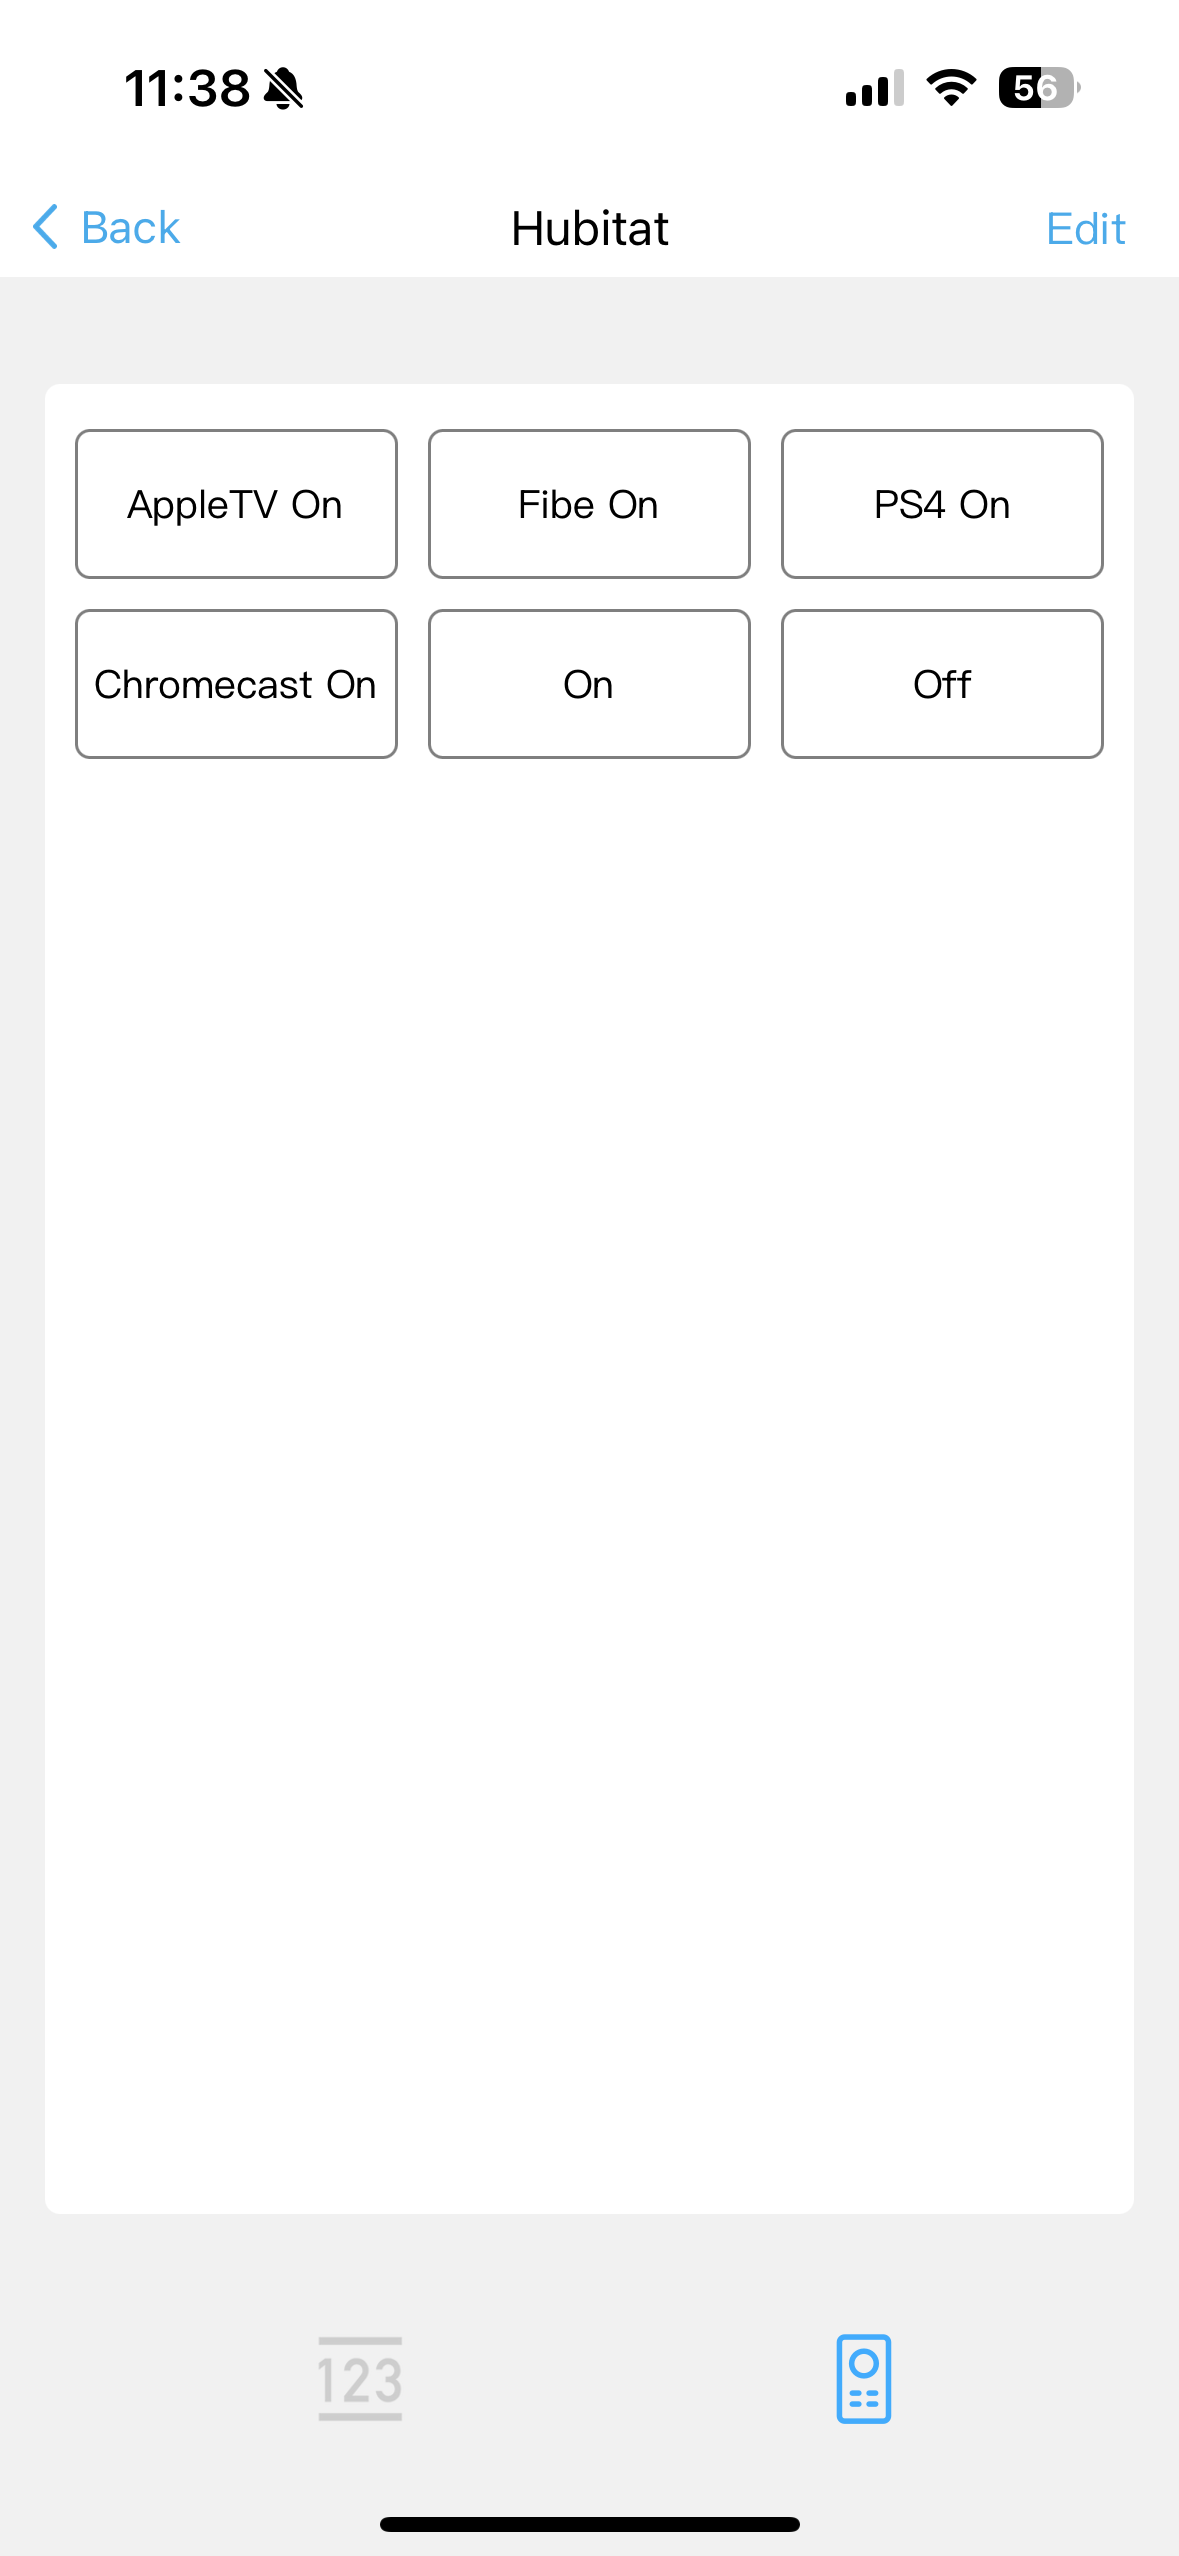
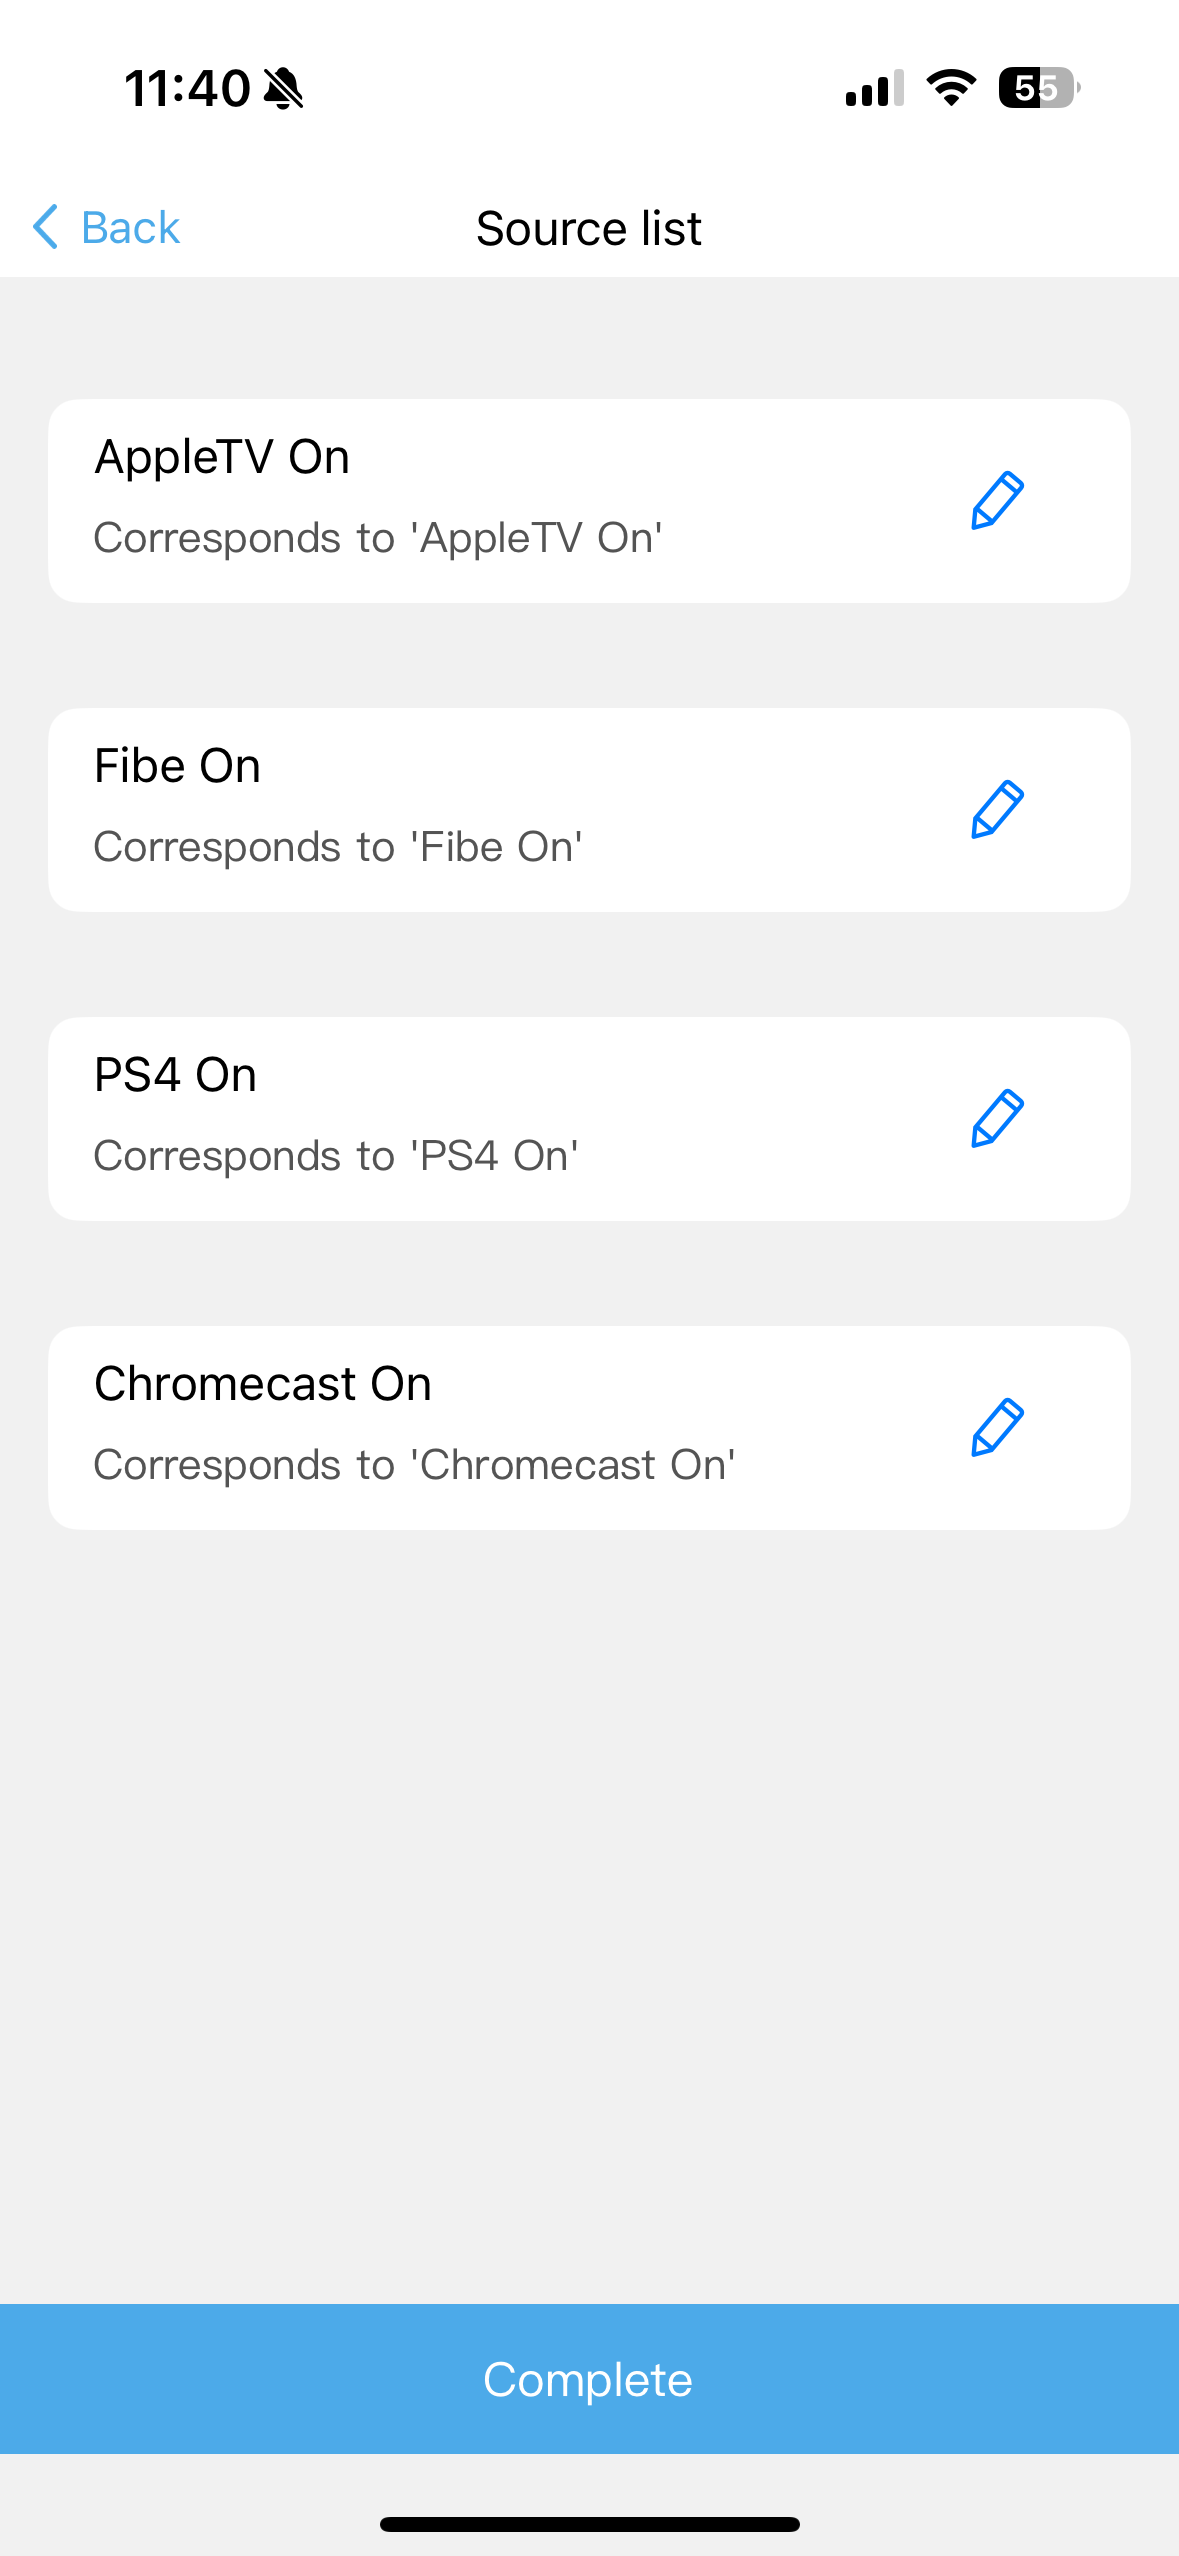
In the SofaBaton app, I have setup a button per activity which I named: on. I also setup an “On” and an “Off” command.:
(I did have to select a connection type for some reason, but “application/json” works)

This ended-up looking this:
And then in the device, you can see those buttons:
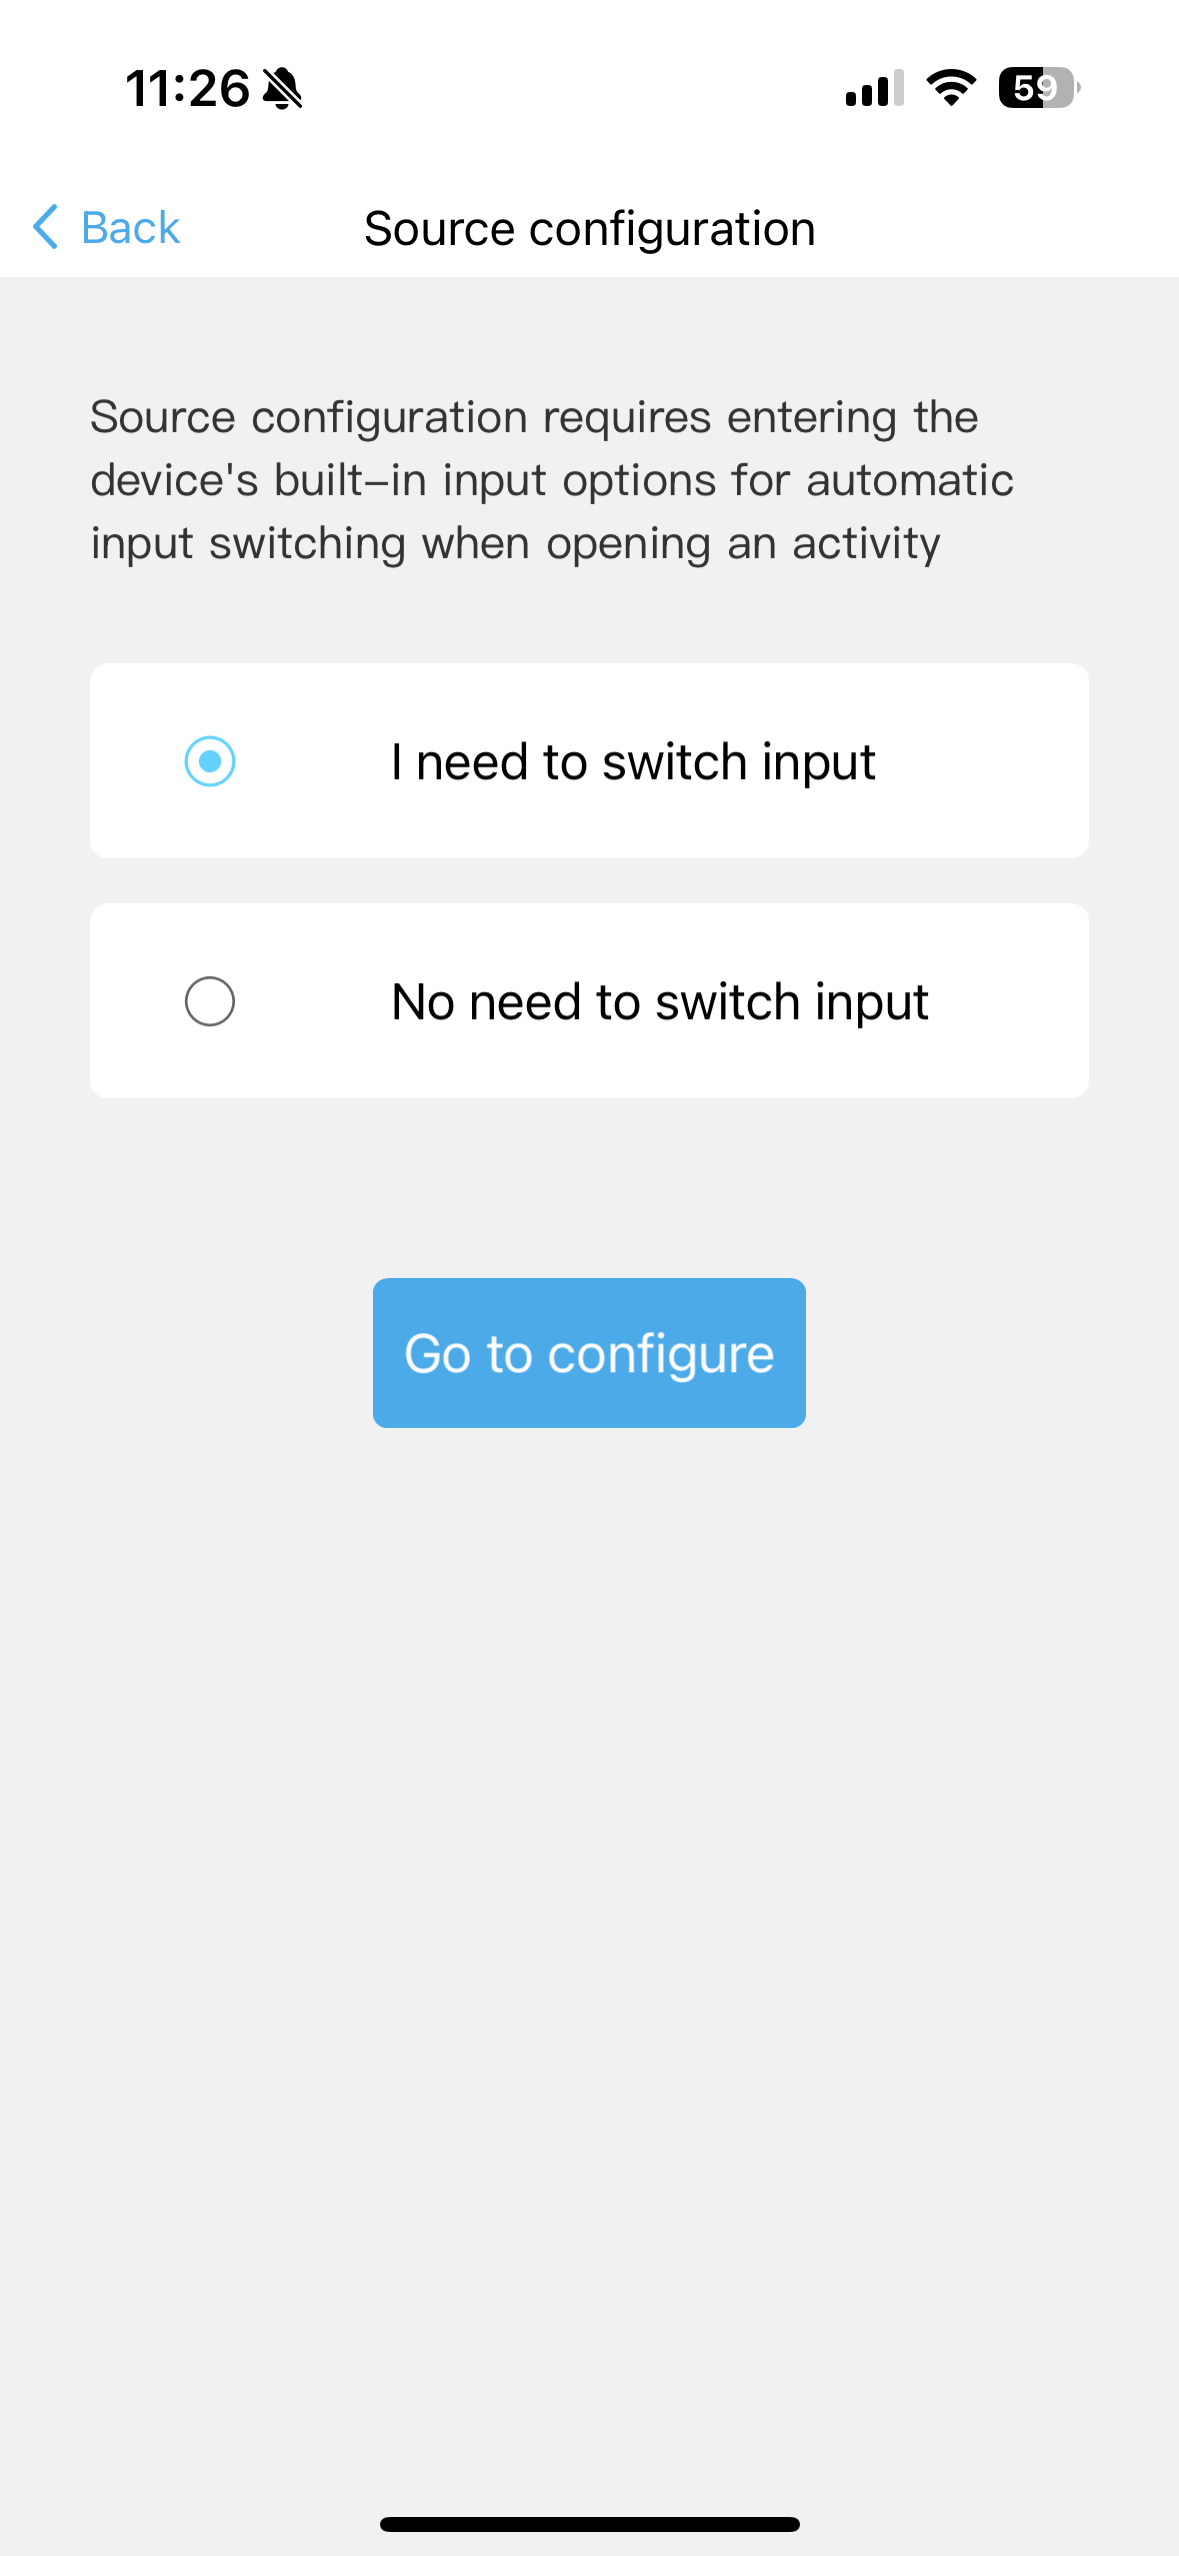
Then, this next step allows those buttons to be used as a “Select Source” for Hubitat:
-
From the “Hubitat” device, select “Edit” on the top right
-
Select “Source configuration”
-
Select “I need to switch input”
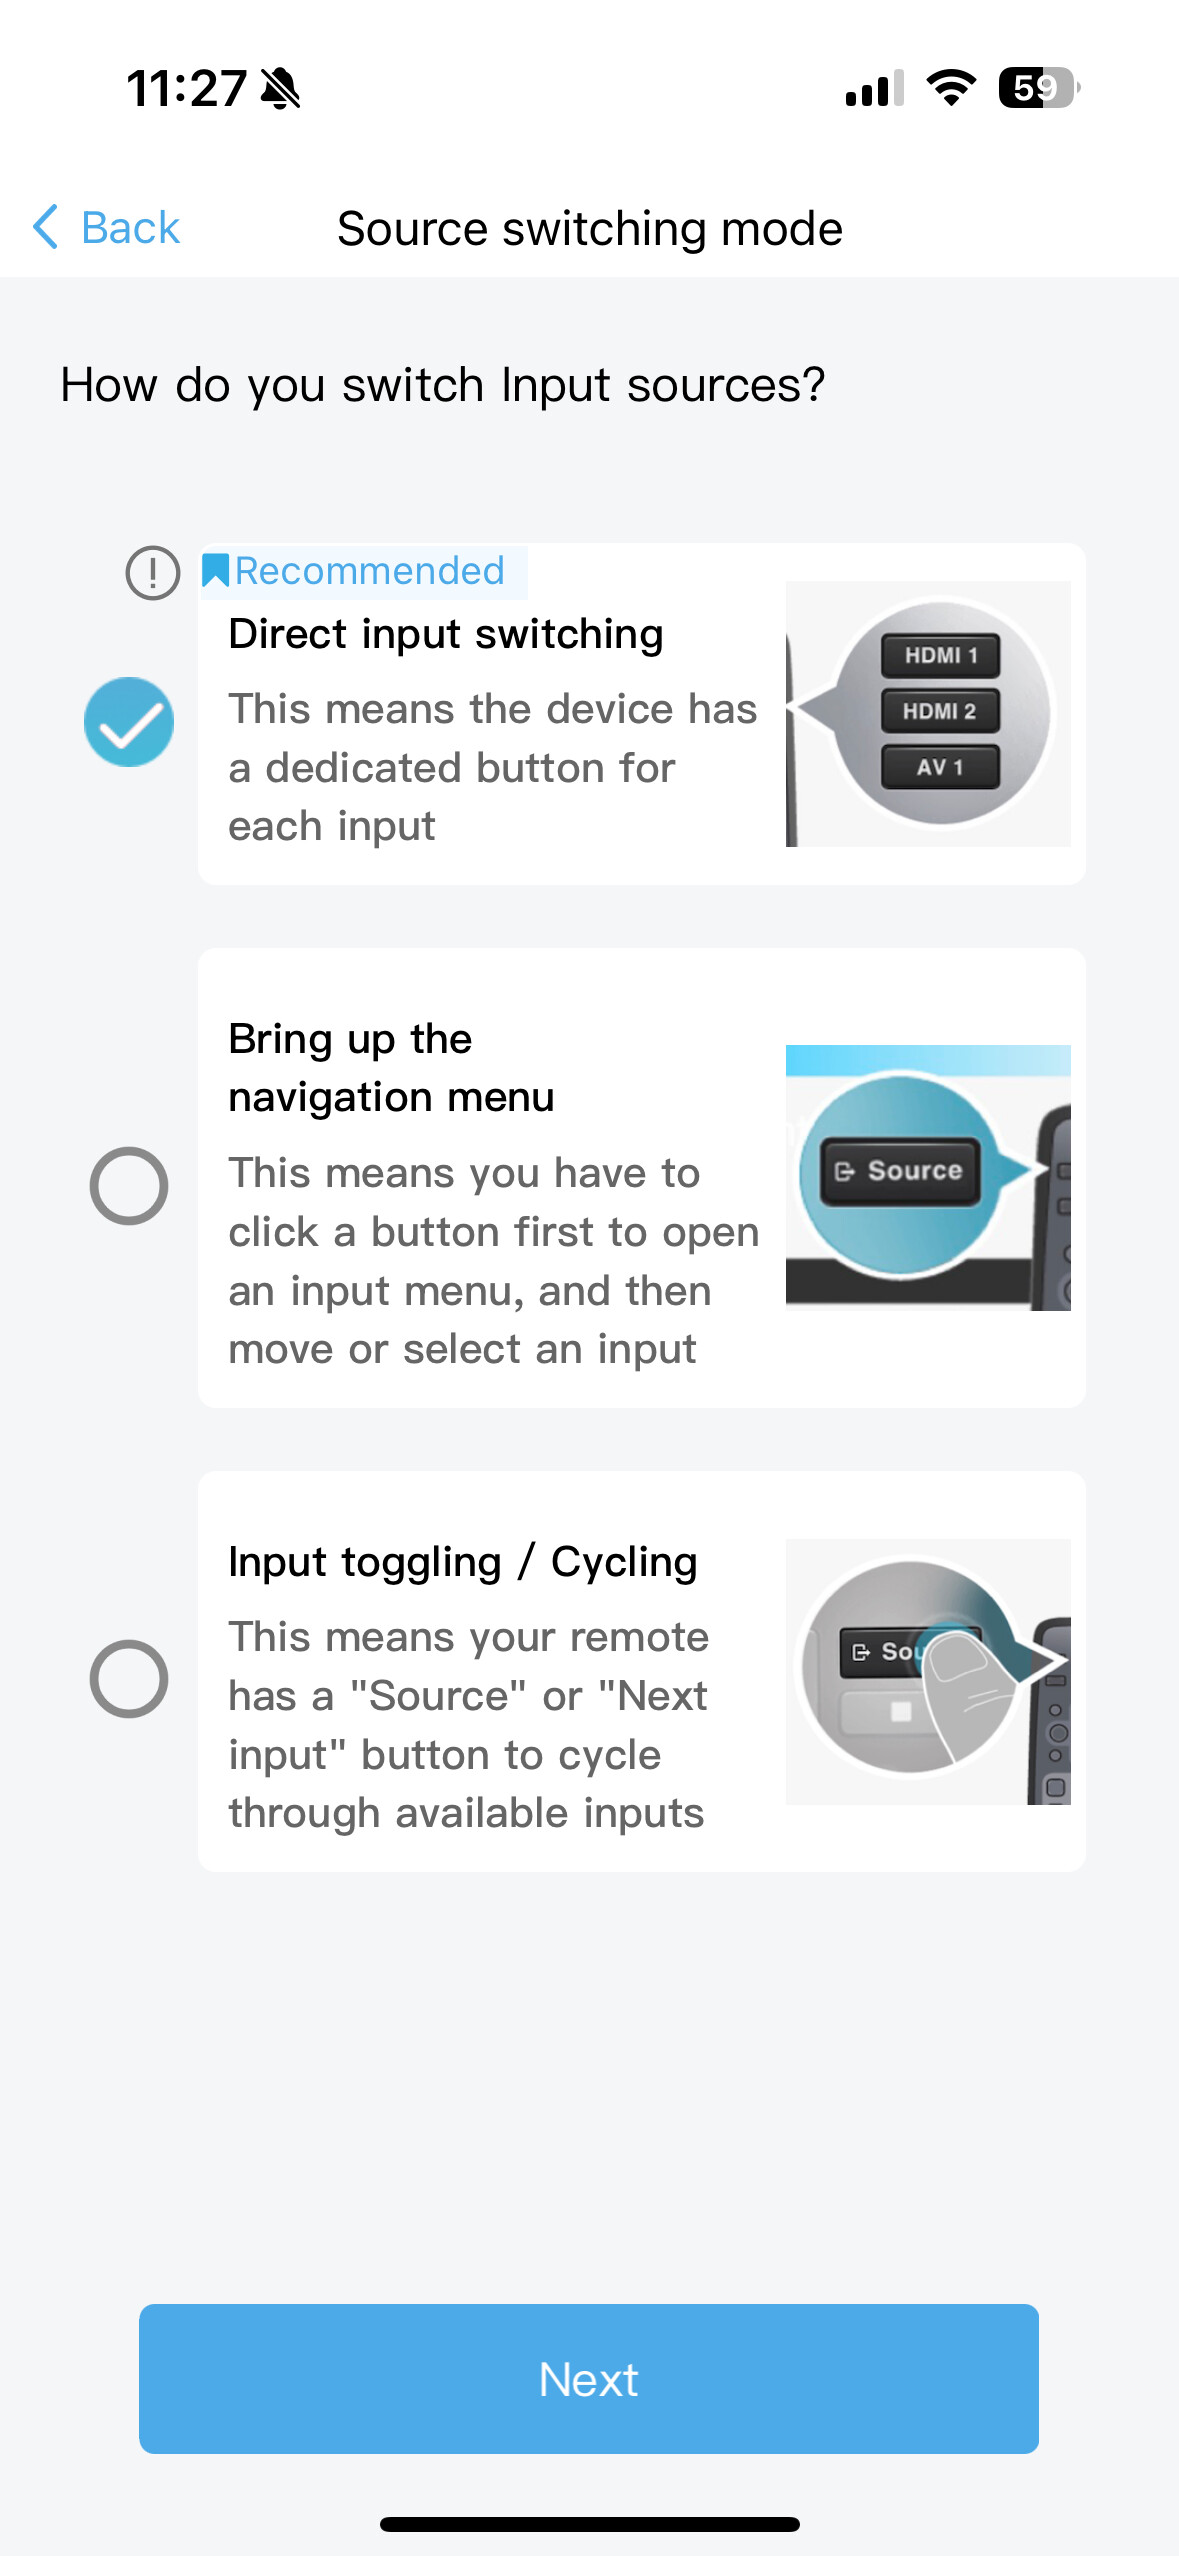
-
Select “Direct input switching”
-
Select all the activities’ “On” commands - Since it doesn’t move away from
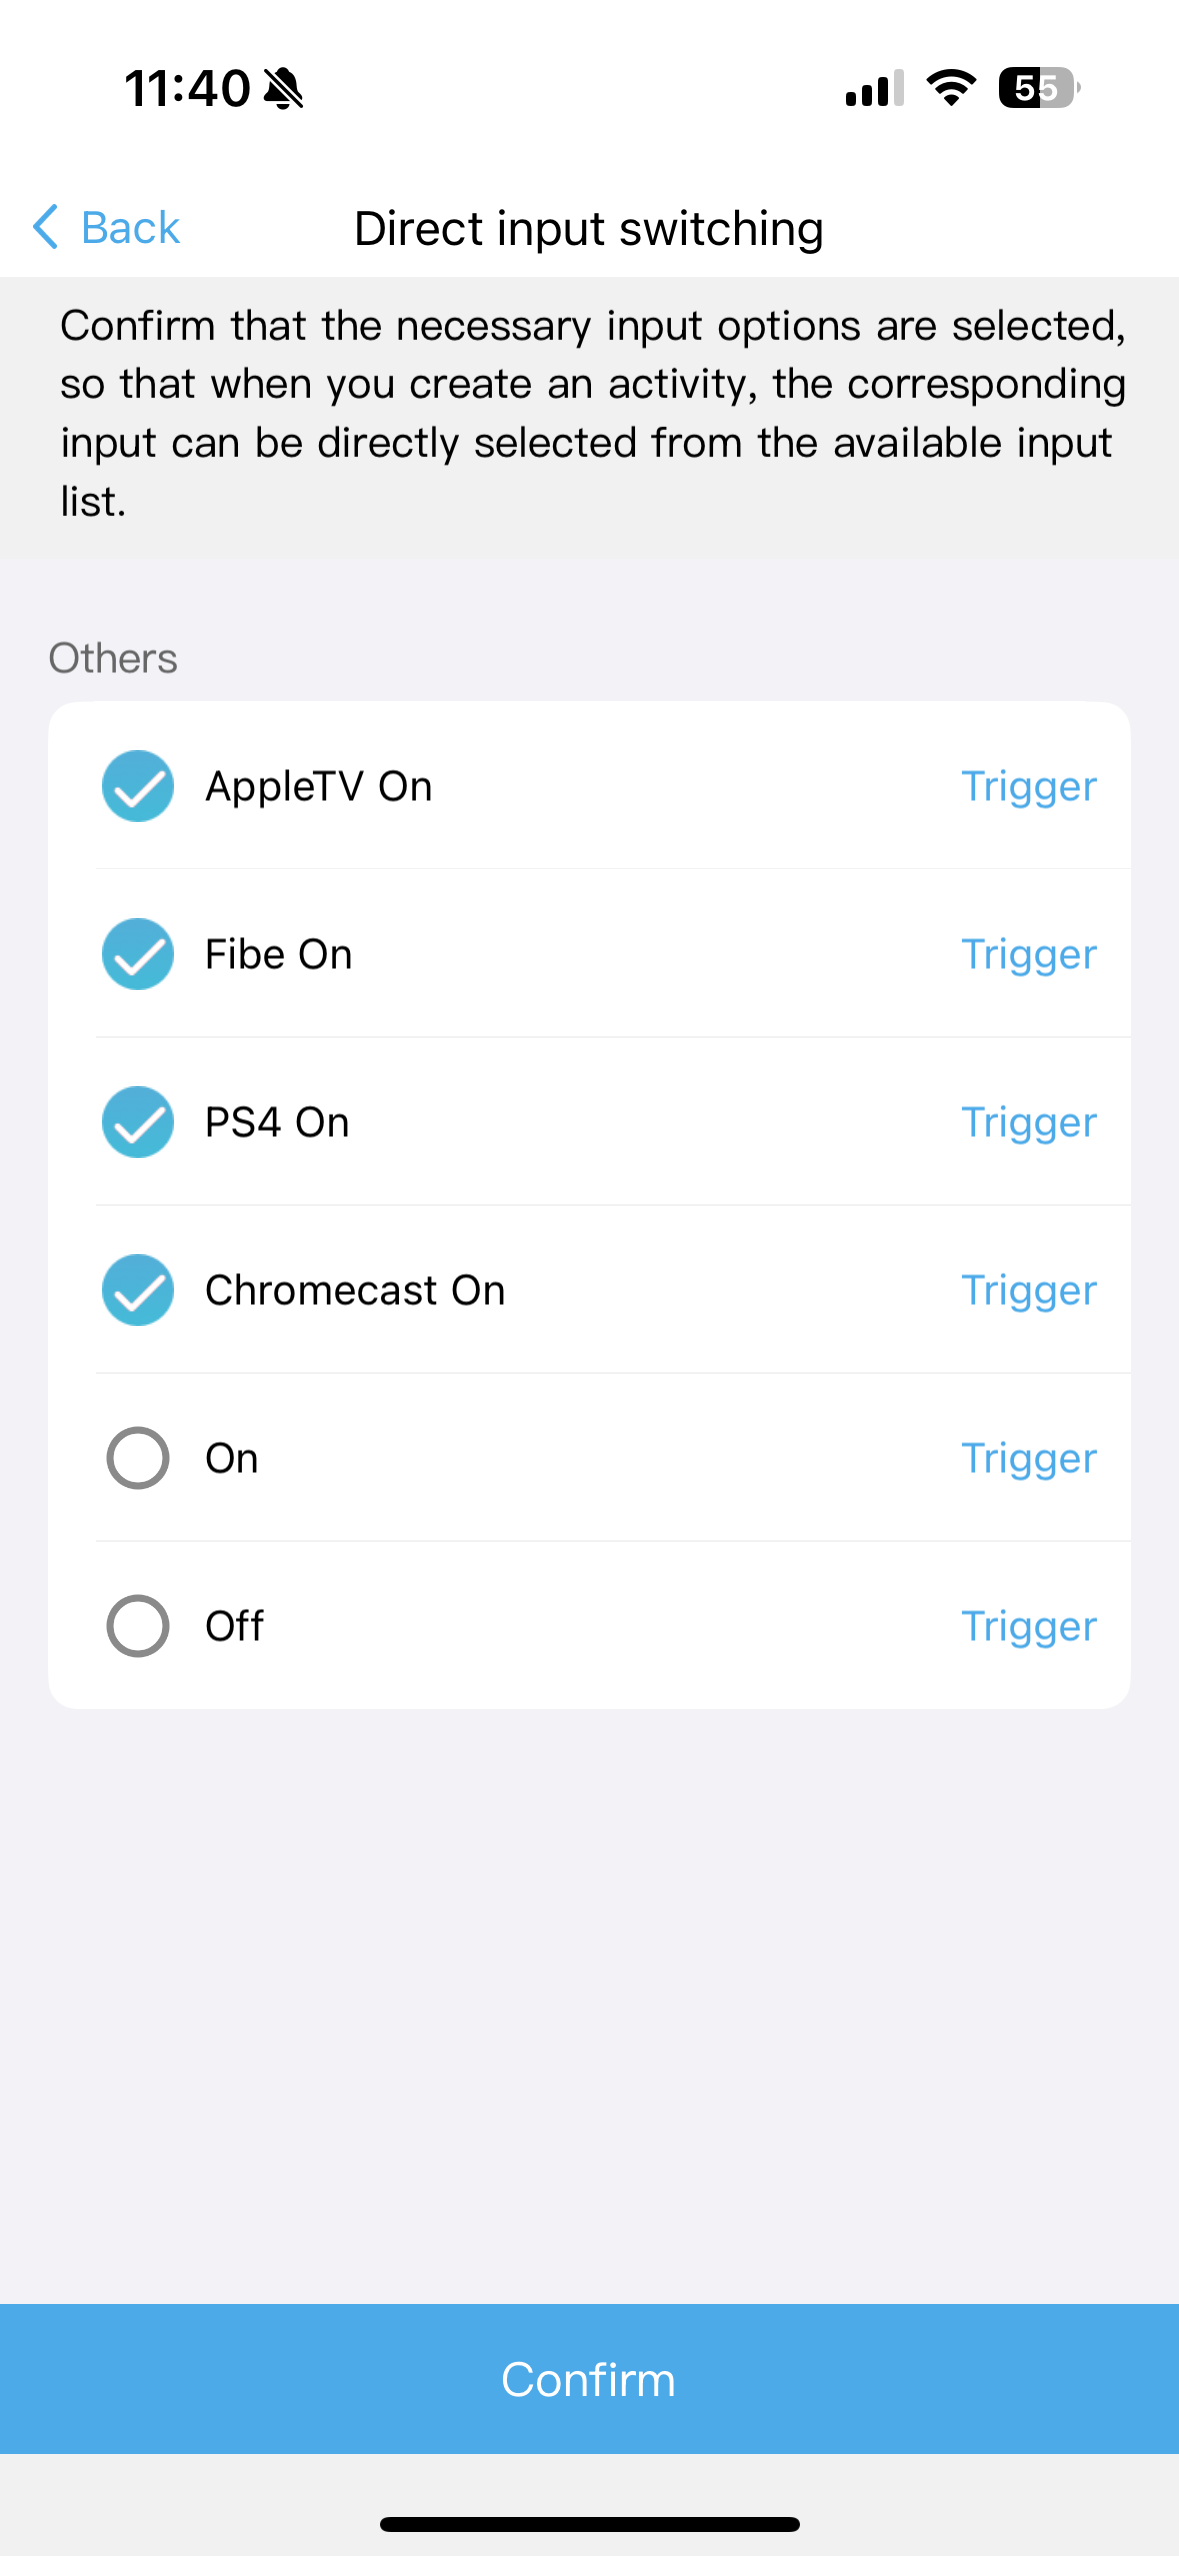
In the next step, I setup the “On” and “Off” buttons for the “Hubitat” device:
- From the “Hubitat” device, select “Edit” on the top-right
- Select “Power Settings”
- Select “Turn off when not in use”
- Select “Separate Power on & Power off”
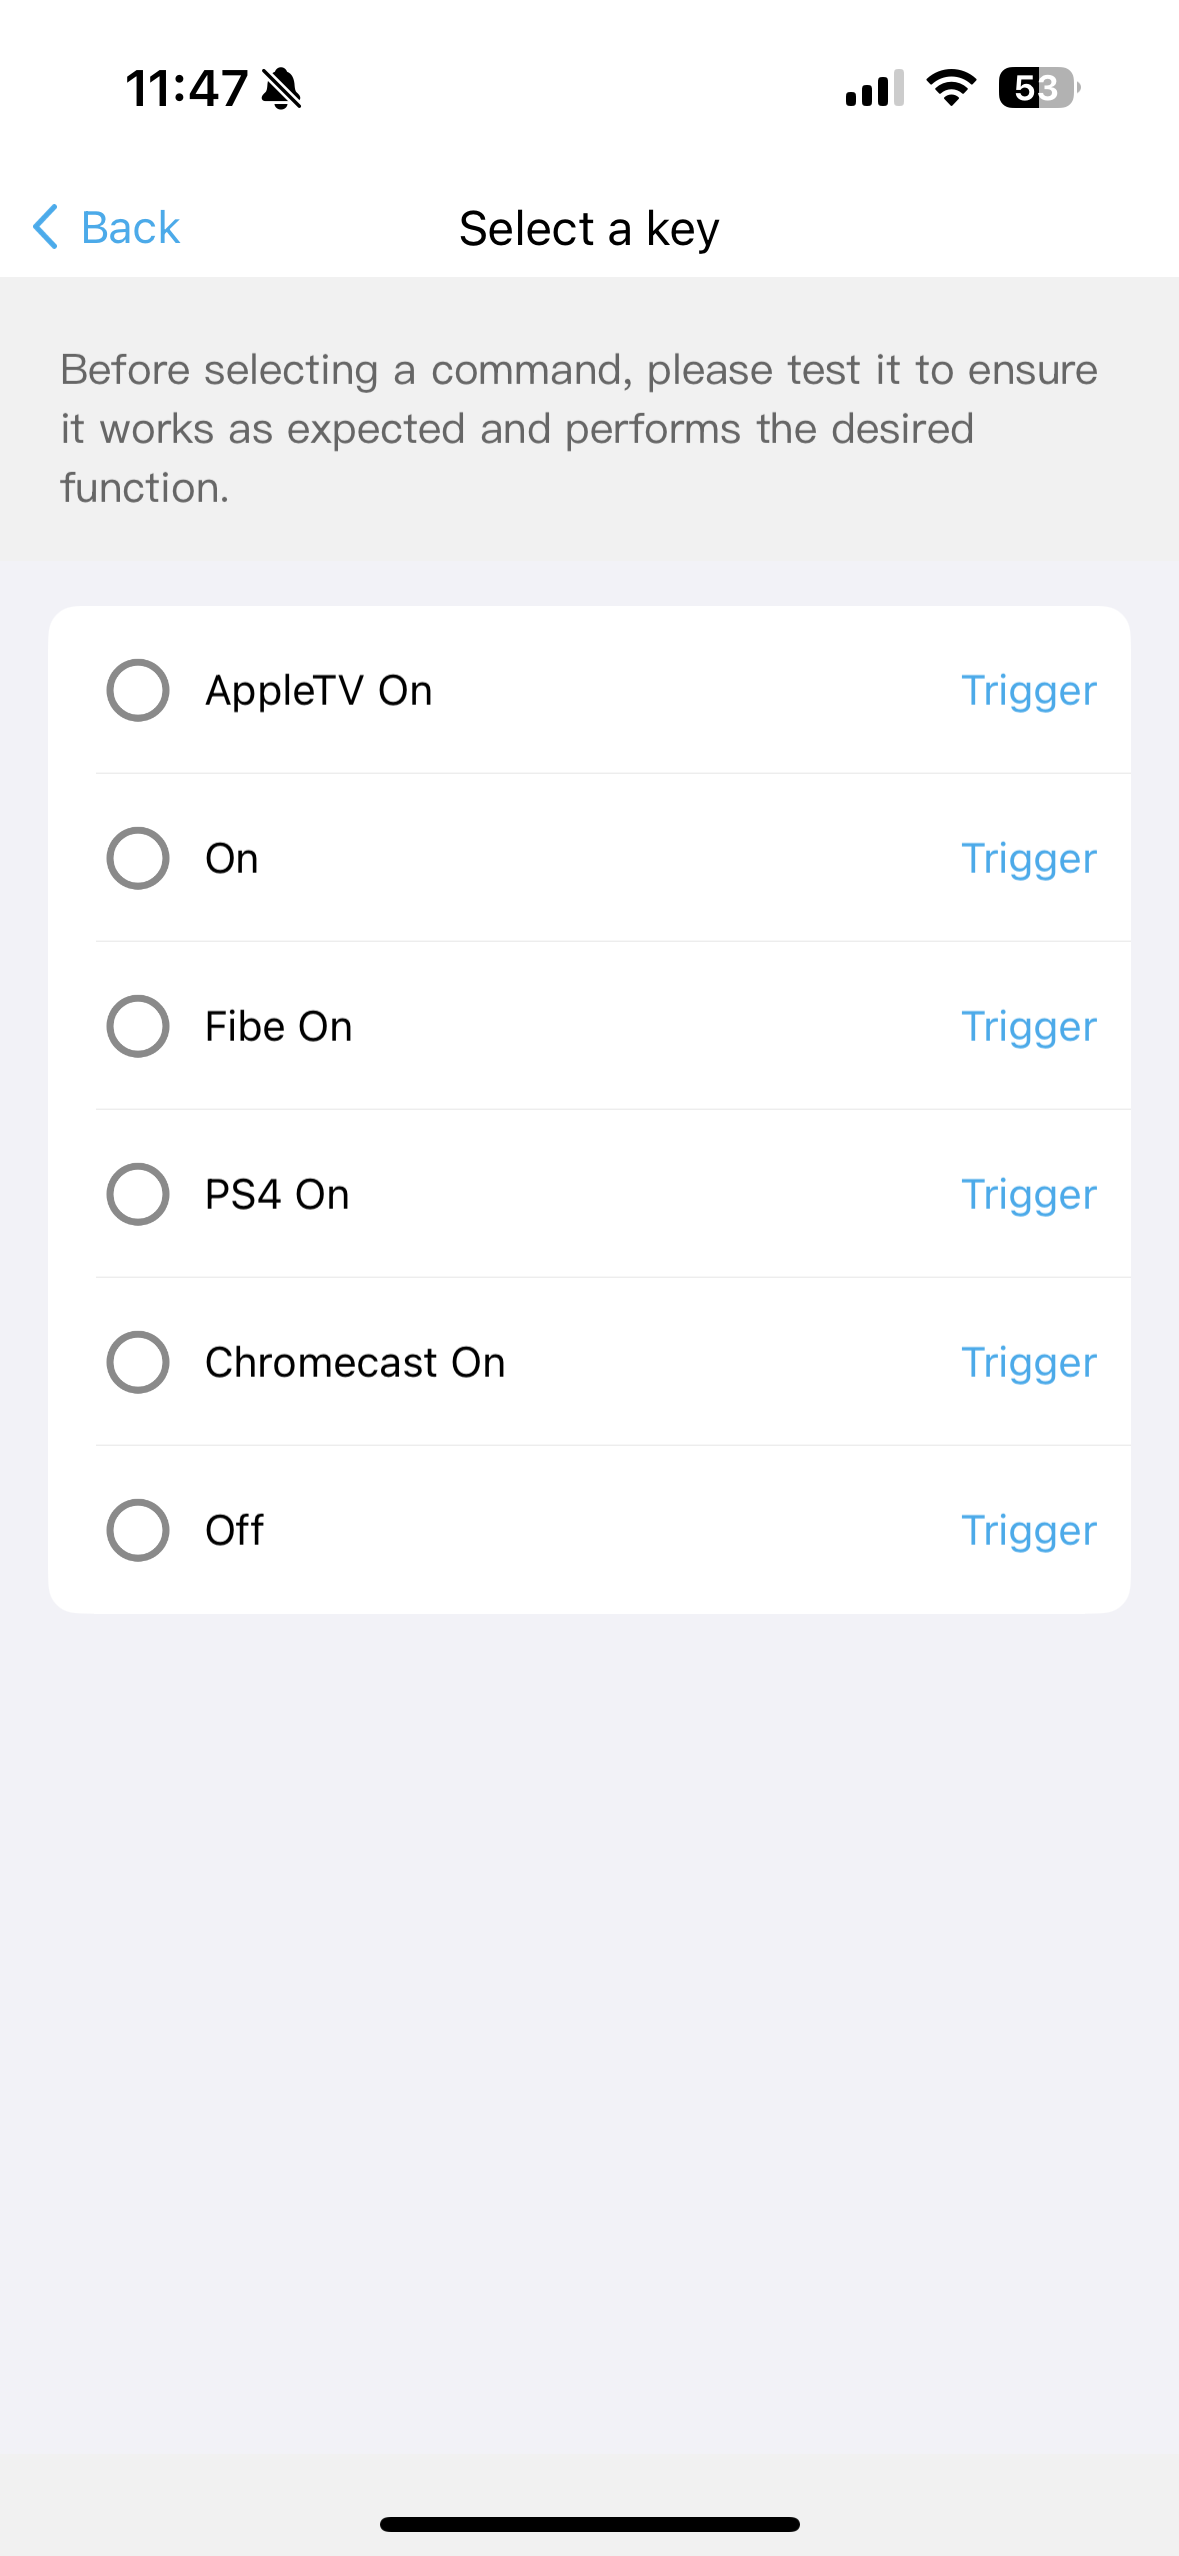
- From the “Turn on sequence” screen, select “+”, then “Add a command”, then select “On” (If you test it, in Hubitat, the button press screen will show the “On” command if that is what was setup):
- Then from the “Turn off sequence” screen, select “+”, then “Add a command”, then select “Off”.
- After selecting “Complete”, the on/off commands will automatically be sent when choosing to turn on/off the hub.


Once these are all setup, all that is needed is to setup your activities to use the “Hubitat” device. You will be prompted for a source during the setup, which should be the activity name.
Then from Hubitat, this button can be used in rules to trigger whatever automation your heart desires - but essentially, the hub will know that this was the last action sent to it.
In this type of setup, the driver could ideally be modified to be able to accept 3 button types, one that has the on/off state, another that has the last activity state, and a third that could be used to receive other commands. I’m not sure how this would be setup though… maybe with Additional Headers?
1 Like
I’ve made a small change to the driver to recognize “On” or “Off” buttons:
/*
    Sofabaton X1S
	Copyright 2025 Hubitat Inc. All Rights Reserved

	2025-03-22 maxwell
		-initial publication in github repo

    2025-03-28 Gassgs
        -Made Button Count a preferences & changed parse to just send the number from the body as the button press
	2025-03-30 SViel
		-Added recognition of on/off button
		-Added the option to store the name of an activity if included in the button press

	*simple example driver for Sofabaton X1S remote, allows mapping X1S remote buttons to Hubitat button events

	*driver configuration
	-set a static DHCP reservation for the XS1 hub
	-use that reserved IP in this drivers preference setting


	*mobile app configuration on the X1S side for this specific driver instance:
	-click add devices in devices tab, select Wi-Fi
	-click link at bottom "Create a virtual device for IP control"
	-enter   http://my hubs IP address:39501/
	-set PUT as the request method, for the Content Type leave blank, for Headers leave blank, for the Body, enter just the button number.


*/

metadata {
    definition (name: "Sofabaton X1S", namespace: "hubitat", author: "Mike Maxwell") {
        capability "Actuator"
        capability "PushableButton"
        capability "Switch"
        preferences {
            input name:"ip", type:"text", title: "X1S IP Address"
            input name:"buttonCount", type: "number",title:"Button Count", description: "Set button count to suit your needs", defaultValue: 10
            input name:"logEnable", type: "bool", title: "Enable debug logging", defaultValue: false
            input name:"txtEnable", type: "bool", title: "Enable descriptionText logging", defaultValue: true
        }
        attribute "Activity","String"
    }
}

void logsOff(){
    log.warn "debug logging disabled..."
    device.updateSetting("logEnable",[value:"false",type:"bool"])
}

void updated(){
    log.info "updated..."
    log.warn "debug logging is: ${logEnable == true}"
    log.warn "description logging is: ${txtEnable == true}"
    if (logEnable) runIn(1800,logsOff)
    if (ip) {
        device.deviceNetworkId = ipToHex(IP)
        sendEvent(name:"numberOfButtons",value:settings.buttonCount)
    }
}

void parse(String description) {
    msg = parseLanMessage(description)
    if (logEnable) log.debug "String is: $msg"
    if (logEnable) log.debug "String Header is: $msg.header"
    if (logEnable) log.debug "String Body is: $msg.body"
    if (txtEnable) log.info "$device.label Button $msg.body Pushed"
    def data = msg.body

    //Recognize if the button name was "On" or "Off" and set the swtich instead of the button.
    if (data.equalsIgnoreCase("on")){
        sendEvent(name:"switch", value:"on")
    } else if (data.equalsIgnoreCase("off")){
        sendEvent(name:"switch", value:"off")
    } else {
	    sendEvent(name:"pushed", value:data,isStateChange: true)
        sendEvent(name: "Activity", value: "$data", isStateChange: true)
	}
}

void push(data) {
    if (txtEnable) log.info "$device.label Button $data Pushed"
    sendEvent(name:"pushed", value:data,isStateChange: true)
}

String ipToHex(IP) {
    List<String> quad = ip.split(/\./)
    String hexIP = ""
    quad.each {
        hexIP+= Integer.toHexString(it.toInteger()).padLeft(2,"0").toUpperCase()
    }
    return hexIP
}
EDIT: I just did a pull request to add the latest changes from @gassgs and myself to the driver in GitHub. I’ve never done this before, so followed ChatGPT directions. @mike.maxwell, hopefully, I didn’t screw-up anything… please let me know if I did though… ![]()
Also, there is very likely a much better way to do this than what I did, so anyone can feel free to fix it up!!!
1 Like
I just ordered one as well. There was a 10% coupon, which lowered the priced from $170 down to $153. I doubt that remote is going to get much cheaper in the near term. Supposed to arrive on Wednesday.
3 Likes
Wondering how this remote and hub compares to the Harmony Elite and Hub which I use with your driver currently.
This community can be a PITA at times, always recommending tech that makes my money evaporate ![]() - a salesman's dream I am
- a salesman's dream I am
3 Likes
I find that it works very similarly. I’m currently attempting to synchronize both together though Hubitat, so that I might use either interchangeably.
Will see if it works! ![]()
2 Likes
Just a quick update - It required a few RM rules to synchronize both ways (between SofaBaton and Harmony), but it works!
I had to create a rule for the on/off, and one for the activities to be synchronized from SofaBaton to Harmony.
Then I created a rule per Harmony activity, plus power off to ensure that the SofaBaton would start those same activities (using their API).
Now I can control my devices with either the SofaBaton or the Harmony. Not sure if I will use this for long, but happy that it works!
1 Like
Yep, I am wondering the same. I saw recently that Logitech announced the end support for early generation Harmony remotes. Seems like they’re signaling the beginning of the end. Hopefully the Harmony Hub based remotes are supported for a few more years, as I have 4 of those working great in my house.
3 Likes
Still Happy with my X1s after making the leap.
1 Like
Well... no it cannot learn bluetooth!
This remote is becoming more useless than my Harmony 650, so it will probably go back...
I have contacted sofabaton and they pretty much gave up helping me, and I have emailed "support" at Formovie....
I am going to give them a few days to respond to see if they have any helpful ideas.
The Android app will not allow me to save an "invalid" JSON string in the Body field, and when I do put in a valid string like {"command":"red"} as soon as I save it the app turns the string into "{\"parse\":\"red\"}" (including those outside quotes) that is a pain to clean up for the switch logic in the driver. It also becomes "invalid" again if I have to go back into the app to edit the string and I have to clean up all the garbage the app inserted. But as I said earlier, I got it working.
But after stewing for a couple of days about how messy my additional code in the driver was I came back to the app to try to figure out a better way, at least for Android.
Leaving aside all the colorful language I used during the trial and error process, it turned out to be a relatively minor change. Instead of a single word in the body I use a key-value pair like command:red in the header and leave the body blank. The app does not mess with the formatting of the header and I can simply use a second map in the driver to grab my command.
void parse(String description) {
    Map msg = parseLanMessage(description)
    Map header = msg.headers
    switch (header.command) {
        case "red" :
        	sendButtonEvent("pushed", 1, "physical")
        	break
        case "green" :
        	sendButtonEvent("pushed", 2, "physical")
        	break
        case "yellow" :
        	sendButtonEvent("pushed", 3, "physical")
        	break
        case "blue" :
        	sendButtonEvent("pushed", 4, "physical")
        	break
        default :
        	log.debug "unknown command:${header.command}"
    }
}
I hope this can be of some use for any other Android users out there. I'm totally going to steal the configurable number of buttons that @gassgs came up with!
1 Like
I just got my Sofabaton ...have 5 or 6 devices set up with only a couple buttons I need to fix
My little bit of programming experience never involved HTTP stuff. The only thing that I'm not thrilled about so far is that it doesn't appear the remote actually sends anything...like the Harmony did, You can't just carry the remote to another room and use it?
"in the body type the command text (no quotes), that you want to parse, toggle in this example code"
How do I figure this part out? Is this documented at all anywhere? THX
Is this just copy the commands under the API interface when you enable it?
The hub is the IR (and everything else) transmitter AFAIK. The remote only talks to the hub.
1 Like
Thanks...and still what I'm finding but can cure that with some IR extenders to other rooms...so I can work through that.
For those of use that don't use endpoints a lot...I'm sure it's simple and clear to those that do. Is there a step-by-step guide for this? I have so much trouble finding stuff like that here or GitHub. I'm really on day 1 still with this device...so thanks for the patience.
There are instructions on how to configure the SofaBaton to use the example driver at the top of the driver code.
I think I’m just totally missing some basic setup concept here…
The only place I see a link to create an IP button is on the add a device menu after selecting Wi-Fi….right? I don’t see this option under any existing device or under an activity. In gassgs example I see “Hubitat ” at the top of the screen like it’s a device or a activity and he’s adding buttons to a device.
The device looks like at the top of one of his screenshots shows as Hubitat. How did you create that device? What is that?
gassgs entered a “1” in the body … Sebastien entered text “AppleTVOn” – The “1” makes sense since the app in Hubitat lets you send only numbers? (there are on/off commands in Hubitat too) Is there a correlation in what the Hubitat app sends and that field to trigger which “number” button you send from the app? I certainly at least looks that way.
So, this is what I did…I also tried putting a 1 in the body and then sending a command ….Hubitat logs showed the one being sent but nothing happened.
What I’m doing that must be wrong…
Open the Sofabaton app to devices
Click the add button at the top right of the app
Select W-FI device type
At the bottom click the link that says create a virtual device for IP control
Command Name = LG-TV-ON
URL = http://192.168.X.X:39501/
Request Method = Put (though often changes to .aPut when I go back to edit
Connection Type = application/JSON
Additional Headers = NO TEXT ENTERED (blank)
Body = LG-TV-ON
Once I get here and then try to edit the startup stuff the only “trigger” I see is the button I created.

