Introducing RoboDomo

For the past few years, I've been working on my own custom Home Automation system. It's written in JavaScript everywhere I possible can, and it uses MQTT exclusively for all communication.

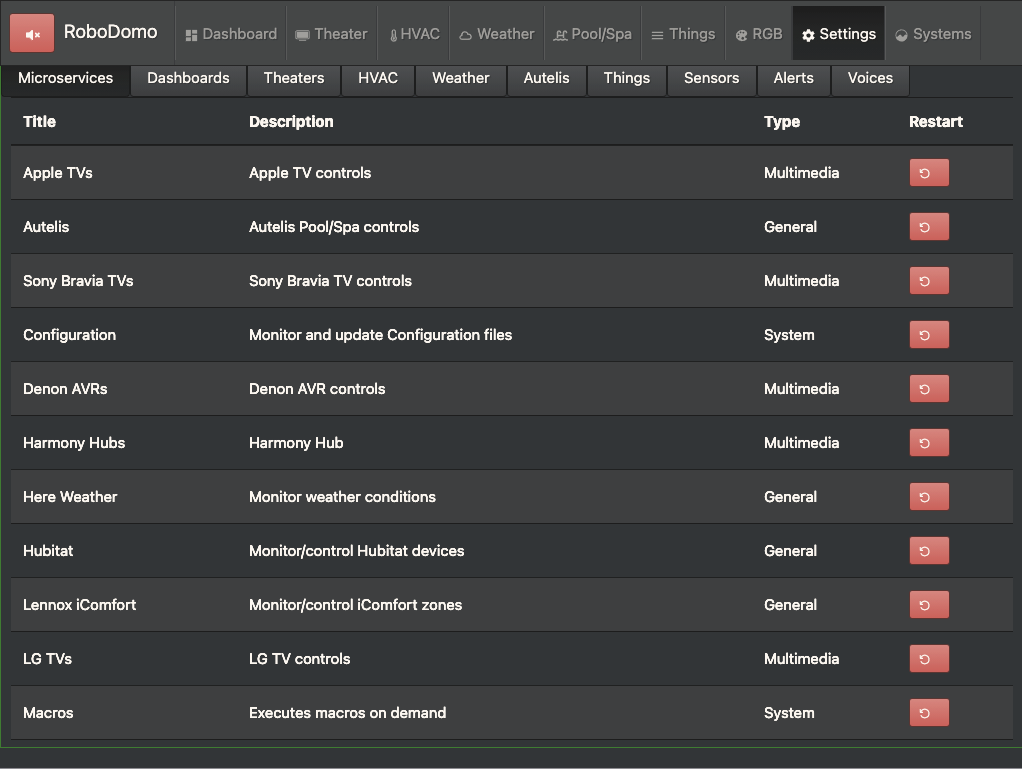
The back end is made up of a selection of Docker containers that are Microservices. A microservice is a very short JavaScript program, typically under 200 lines total code, that monitors and controls a kind of thing. As events arise from the things being monitored, a microservice will post a topic/message via MQTT. A client can request the microservice change the state of a thing via sending a topic/message via MQTT.

I have written quite a few microservices at this point:

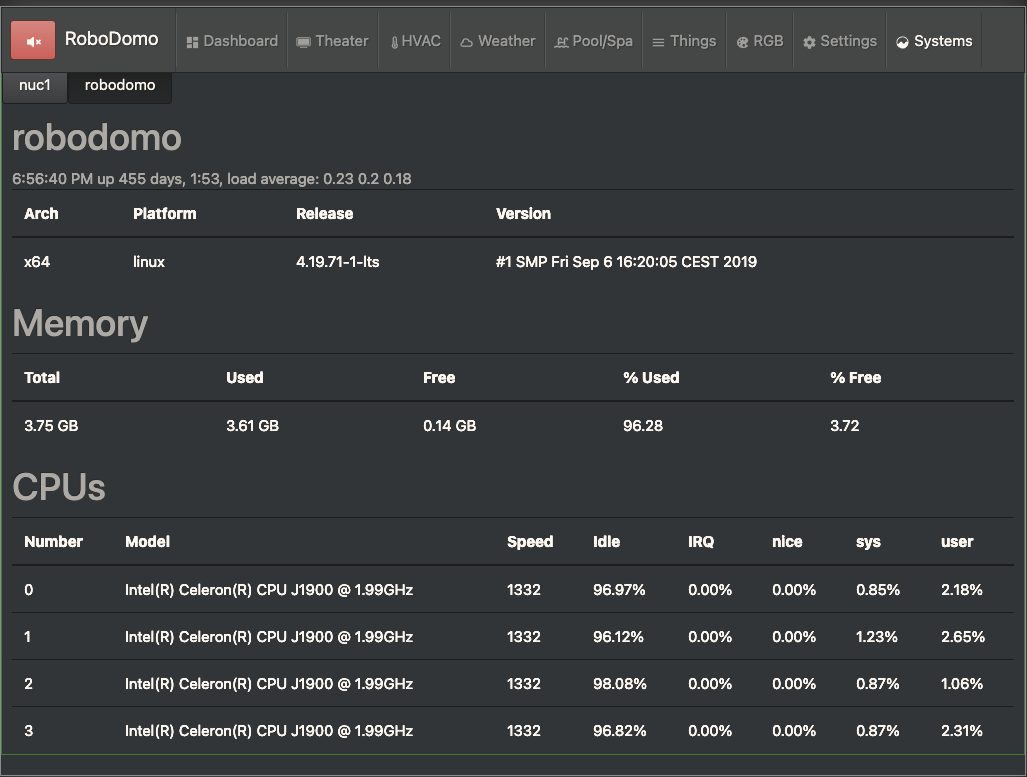
  • sysinfo-microservice - sends period MQTT messages about the host/container's status (uptime, loadavg, and that sort of thing)
  • hubitat-microservice - listens to Hubitat hub events via the web socket and Maker APIs and publishes device state changes via MQTT. It accepts MQTT messages to effect a change in any connected device (e.g. turn on fan, or set fan speed to high).
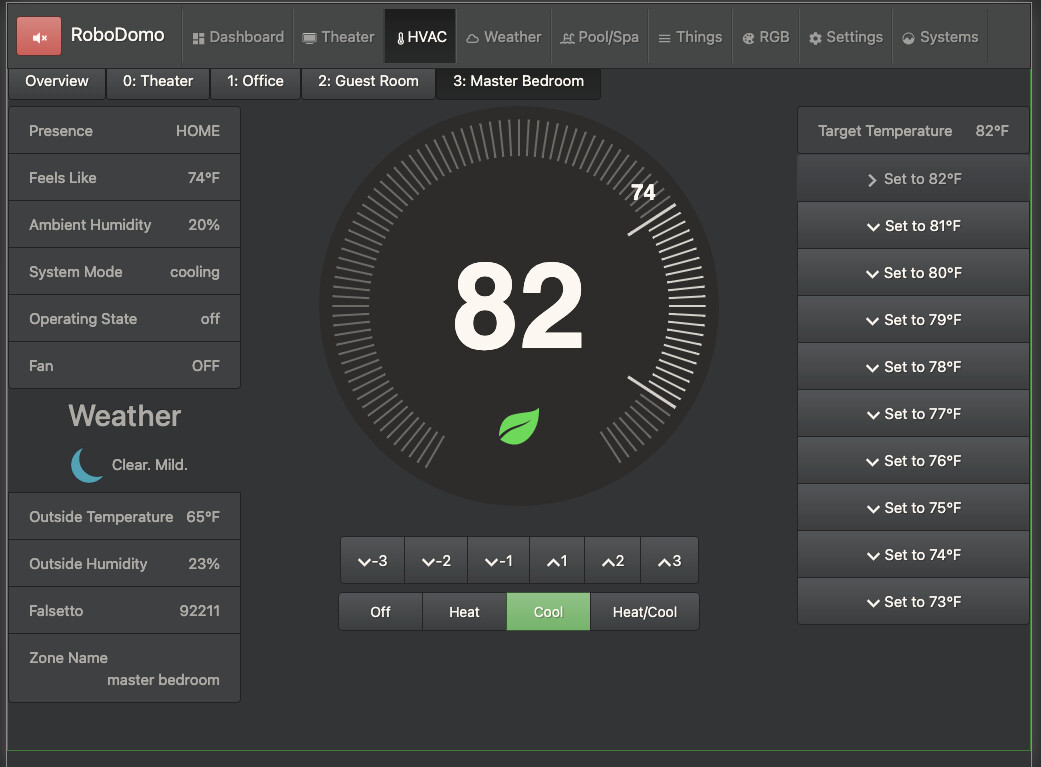
  • icomfort-microservice - interfaces to the Lennox icomfort multi-zone (S30) HVAC system.
  • tivo-microservice - interfaces to one or more TiVo DVRs or set top boxes.
  • macro-microservice - listens for commands to run a macro (a macro is simply a list of topic/commands to send via MQTT, as in a scene)
  • nest-microservice - uses the deprecated Google Nest API to monitor and control Nest thermostat and sensors.
  • harmony-microservice - monitor and control Logitech Harmony remotes/hubs.
  • config-microservice - monitors a global config.js file and when changed publishes via MQTT. Clients and other microservices might detect this message and restart/re-render.
  • appletv-microservice - monitors and controls one or more Apple TVs.
  • here.com-microservice - provides weather data via MQTT from the here.com cloud API.
  • tvguide-microservice - provides TV guide (cable TV lineup, etc.) via MQTT from SchedulesDirect API (subscription is $25/year)
  • myq-microservice - monitor and control one or more MyQ garage door openers and sensors
  • triggers-microservice - rules machine on steroids
  • lgtv-microservice - monitors and controls one or more LG TVs (WebOS)
  • denon-microservice - monitors and controls Denon AVRs
  • bravia-microservice - monitor and control one or more Sony Bravia TVs.
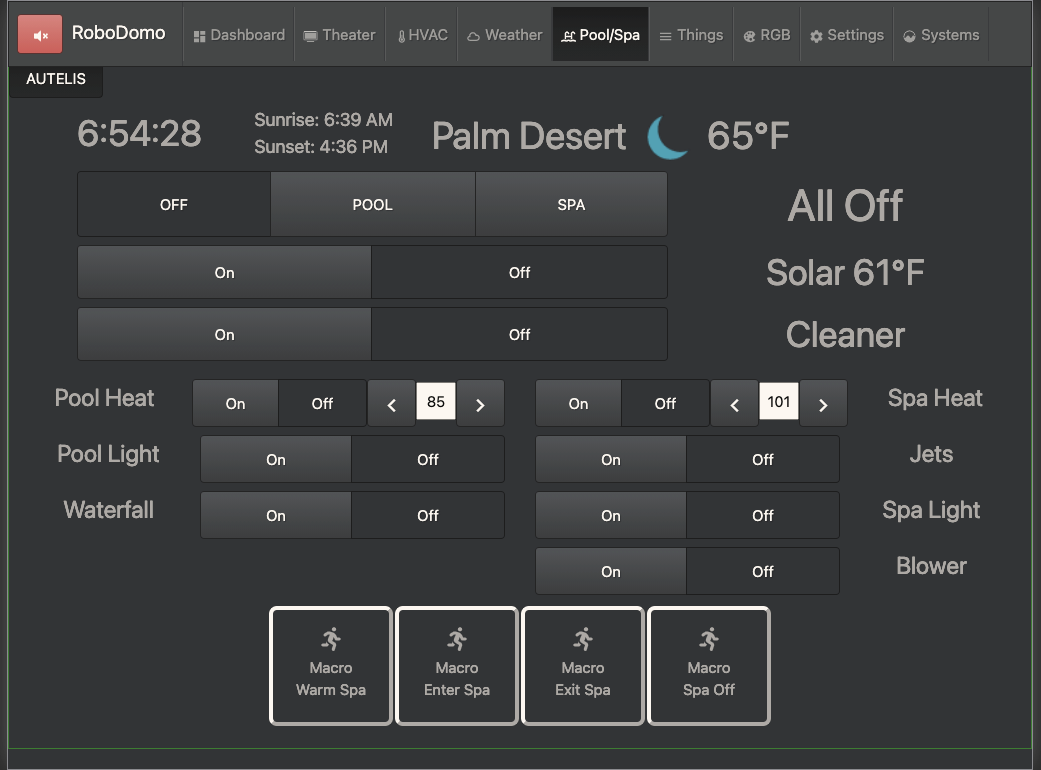
  • autelis-microservice - monitor and control pool and spa equipment
  • presence-microservice - monitor iPhones and Apple Watches (probably any device like these) for connected to WiFi.
  • roku-microservice - monitor and control Roku streaming devices.
  • speak-microservice - on messages with "say" as topic, speaks the message. I run this on a raspberry pi with USB speaker attached.

The advantage of microservices is that you only have to start the ones that are relevant to your situation. If you don't have an autelis pool controller, you don't need to start that microservice.

The advantage of MQTT is that the API is very consistent, the topics are obvious (hubitat/porch light/status, etc.), and any number of www browsers or tablets/phones can control devices and the others see the updates/status ASAP. The status is also sent to all clients when you use the switch on the wall or a physical remote.

Another advantage of MQTT is that you can use CRON tasks, command line tools, scripts in any language you choose, etc., to listen to and send messages. You can make a list of messages and send them (one at a time) to control all the things, no matter which microservice handles them. This allows for a "good night" macro to turn off all the Hubitat things, the hot tub/spa, set the A/C to 72, and so on. Works across cloud services and providers.

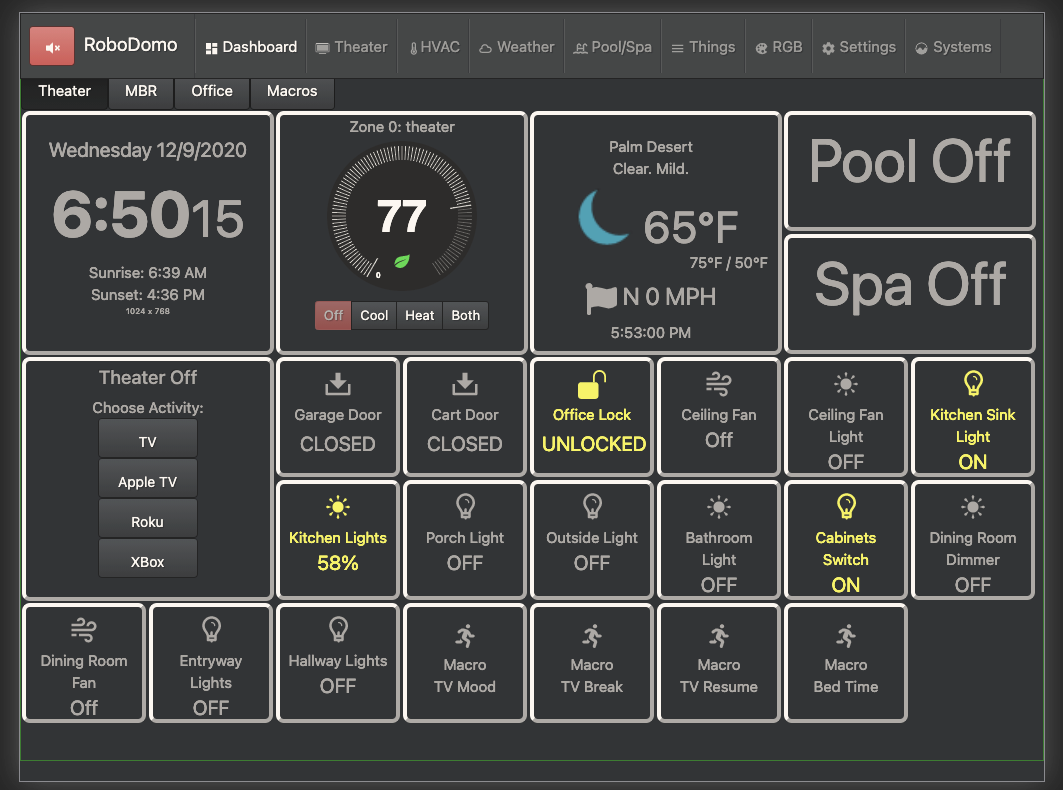
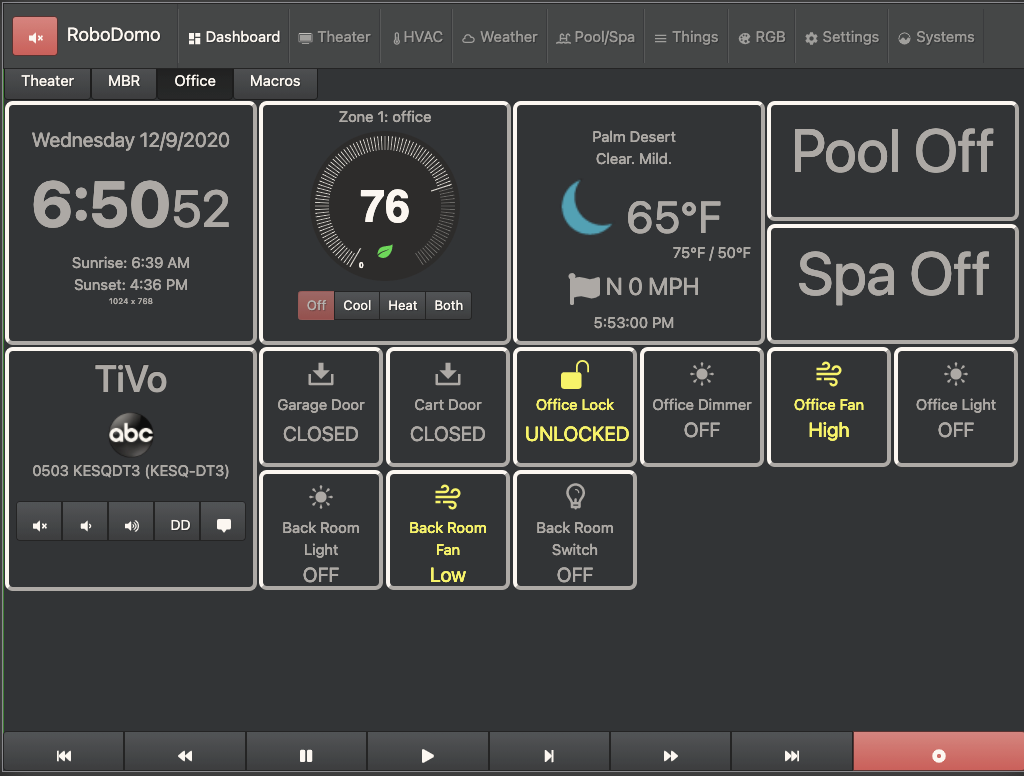
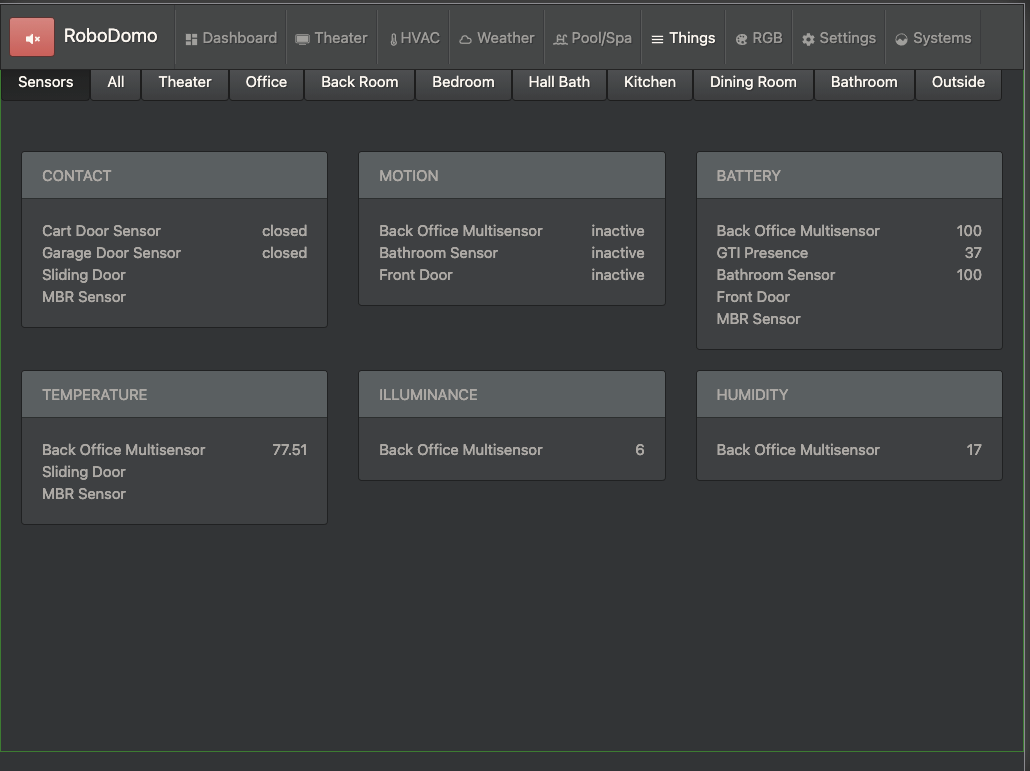
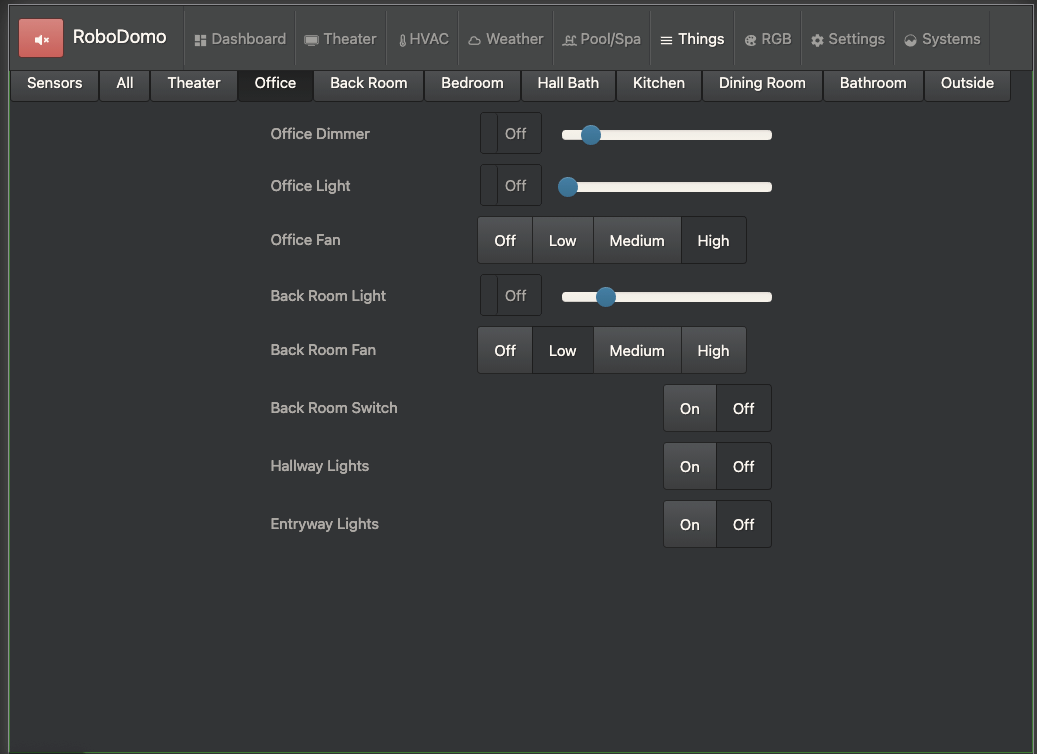
I will say that the design of the client is tile based, but there are additional screens more specific to controlling things. The dashboards screen is tab based, each tab represents a dashboard configuration. I have a dashboard for my home theater with tiles relevant to that room, another dashboard (tab) for the master bedroom, and another for my home office.

The tiles subscribe to MQTT events specific to what they control. A switch tile for the kitchen lights might subscribe to hubitat/kitchen lights/status/switch topic and post to Hubitat/kitchen lights/set/switch, message on.

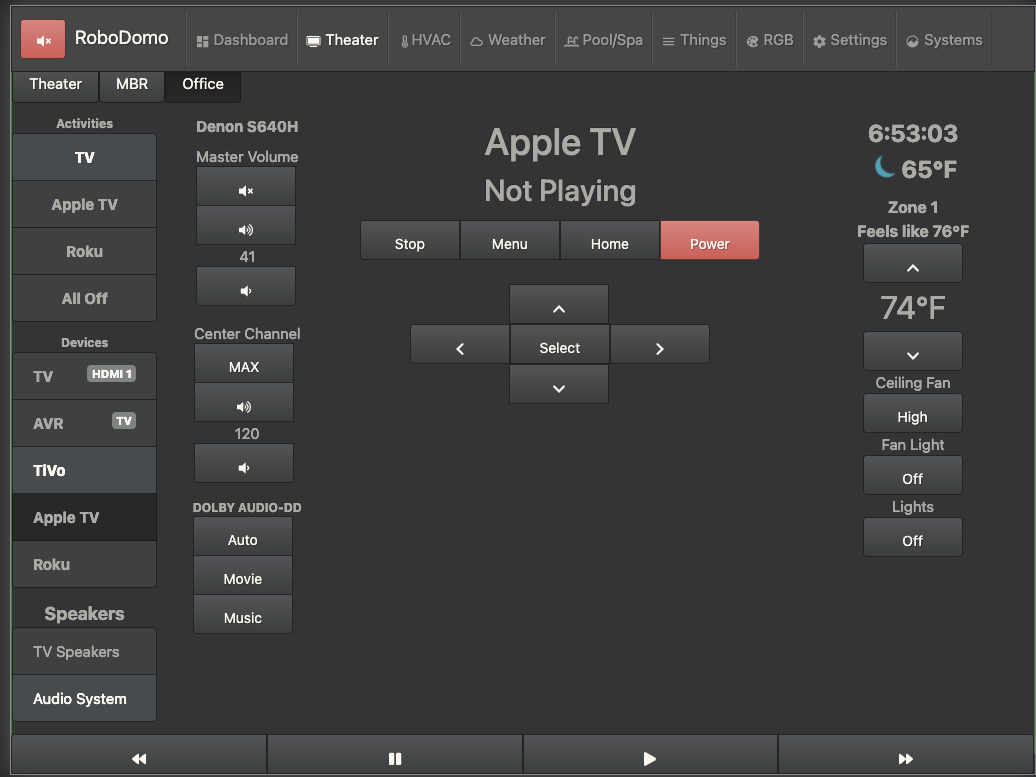
Other tiles are more interesting. The "theater" tile listens to messages for the TiVo, the Apple TV, the Roku, the Harmony Hub, the LG TV, and so on.

RoboDomo also has a very strong theater remote control flavor to it. Very similar to the Logitech Harmony remotes. You assign devices to a theater, and create activities that use the associated devices. For example, the TV activity for the theater might use the Denon AVR, the LG TV, and the TiVo, turning on all the devices needed and setting inputs (HDMI, etc.) to the correct values.

I'll post some screen shots in separate comments after this opening post.

The code is available at RoboDomo Β· GitHub.

The Documentation Repo is a good start, but it has a lot of work to go to complete it.

8 Likes

1 Like

1 Like

The theater screen is similar to the Harmony Remotes. If I'm watching Apple TV, the TiVo controls in the center are replaced by an Apple TV control. The transport controls at the bottom are for the TiVo in this case.

1 Like

1 Like

1 Like

1 Like

1 Like

1 Like

Very impressive. Where’s the code? :grin:

1 Like

1 Like

I added a link in the opening post.

2 Likes

There are a few clients. I"ve written a new one every year or so, if not less frequently.

The latest client, which I used to take these screen shots, are in the new-client/ repository.

The client is written in React JS. The design is for 1024x768 fixed size screen. There is a separate (in progress) complete display for Phone and for tablet in portrait mode (in portrait mode, it's a dedicated theater remote).

1 Like

Dude!
:+1: :+1: :clap:

3 Likes

This is very cool.

RoboDomo supports both Hubitat (preferred) and SmartThings hubs. Both hubs can connect to thousands of kinds of devices, both Z Wave and Zigbee.

Looking forward to hooking this up to my hub for some of the integrations you have covered that I haven't found here.

1 Like

This is REALLY impressive. :smiley:

1 Like

I bought a cheap Celeron based micro PC and put 4G of RAM in it and a 60GB SSD. It cost me < $150US. The thing runs Arch Linux (any linux will do) with Docker. All the Docker containers run on it at the same time and it uses far less than 5% of the CPU. The machine now has 465 days uptime (I should do a software update on it at some point, but that's how non-stop the back end has been).

I have the Hubitat<->MQTT microservice and the triggers microservice running on another machine, an I7 NUC, which has the fastest single core benchmark speed of the computers I have (including the Xeon iMac Pro). The MQTT broker is also running on the NUC. I did this for the short term to assure that it isn't my code that is causing any delays when running or the MQTT broker is not a bottleneck.

Macros are just a list of MQTT topics/messages. Here's an example macro. The macros are defined in a Macros.js file. When you edit the file, the macros-microservice automatically restarts and reloads the new/updated file.

The macros can call other macros (like subroutines). You can see that in the example above.

As you can see, the good night macro turns off a lot of things, several having nothing to do with Hubitat (Z Wave or Zigbee or whatever). Before I added macros, I woke up more than one time to find I forgot to turn off the spa (I had to turn it off by going into the master bedroom and using the physical panel on the wall).

I'll do another post about triggers.

1 Like

triggers-microservice is what really puts the smarts in smart home. It's basically a rule engine kind of thing, but instead of point and click and some (potentially) limited language for defining rules, you have all the power and flexibility of the JavaScript language.

I have a rule that watches the hot tub state. When it goes in, the rule watches the temperature and when it hits 90, it announces the spa has reached 90 degrees. It's desert where I live, and the spa hits 90 on its own (from the heat/sun) in the summer, so a simple "when temp is 90, announce" kind of rule is insufficient.

I have another rule that watches a motion sensor in the master bathroom. When motion is detected, it sets the dimmer to 99% during the daytime, but 5% overnight. This rule is fairly simple, and there's likely a way to do it with Hubitat proper. Although if the motion sensor is on the Samsung hub and the dimmer on the Hubitat one, then my rule works.

For the fart fans in the bathrooms, you don't have to manually turn them off. They turn off after 15 minutes (you can change the timeout). But they don't turn off if you have a light on, so you can force the fan to run while you're doing something like painting or cleaning.

Similarly, the dimmers in the bathrooms turn off after 15 minutes, but not if you have another light on.

The RGB lighting under the cabinets in the kitchen require the RGB values to be set when turned on. There's a button rule that does this. When cabinet switch turned on, send the MQTT to set the RGB values.

Outdoor lighting is turned on at sunset and off at sunrise. There used to be a timer out there, but because the sun rises and sets at different times every day, you would have to adjust the timer every so often. Using sunset/sunrise is perfect every day.

If the garage door is up/open for 15 minutes, there's a rule that sends me emails, text messages, announces out load, etc., that the door is open (every so often). If I forget to close it for some reason, I get to know it's open.

There are triggers to announce certain events, like when a lock is unlocked or locked, or at sunrise/sunset, garage door open/closed, person arrives, etc.

There are triggers to deal with virtual devices. For example, I created virtual switches in the Hubitat UI for the TV in my office, the spa, the waterfall for the pool, the jets for the spa, and so on. When the spa is on, the trigger sets the virtual switch on. When the spa is off, the virtual switch is set to off. If you manipulate the virtual switch via the Hubitat UI (or RoboDomo UI), the spa goes on or off. If you use the pool control WWW site (it's a local http server) or the on wall pad, the switch gets set proper.

The real reason I did the virtual devices is that it's a clever and free way to add things for Alexa, Google Home, and Siri (via Homebridge) to control. I can do things like, "hey Siri, turn on the spa" or "hey Siri, turn on the Office TV".

The rule for the Office TV isn't all that simple. It deals with the Denon AVR, the AVR and TV inputs, the AVR and TV power status. Turning on the TV really means, turn on the TV, turn on the AVR, set TV input to HDMI1, set AVR input to TV Audio, etc.

There is no limit to what you can do in JavaScript as far as rules go. You can get all the events going on via MQTT that you care about, and you can send MQTT messages to control things.

My current project involves arrival detection. I want to reliably open the garage door when one of the two cars arrives, and open the golf cart door when the golf cart arrives. And to lock the locks in the home when nobody is home.

Other rules are kind of obvious. Like disable A/C if a window or door is open (or refuse to turn it on). Hubitat might control and monitor the door and window sensors, but the A/C is not controlled at all by Hubitat (it has no clue about it).

1 Like