In Zigbee, you have 64bit address, 16 bit address and endpoint.
The endpoint is like port in tcp ip addressing. In a packet, there will be 2 address/port pair that indicate where the packet come from and its destination.
In the log, the source address has been translated to a device name like "DIY Sensor". The desitnation is implicitly understood as the hub. The log say that a packet from DIY sensor with endpoint 8 is directed to hub with endpoint 1 with the said information.
@iharyadi is there anyway to add a reset the TXFail & TXRetry or PacketDrop counts option in the DH?
Trying to figure out away to use those as a notification of an interference event warning/alarm.
2 days ago a few of my devices got knocked off the network in the evening but I noticed your Environment Sensor starting detecting a large number of TXFail, TXRetry & PacketDrops earlier that day.
Those information is available in DH. They are just not auto update.
They are part of Zigbee Cluster Library for diagnostic. To keep compatible with the spec, they are not report-able. Therefore, they cannot be auto update.
Most importantly, I am concern that some of the information can cause clogging your Zigbee network if they are auto update. For example, potentially, reporting RSSI will generate "received packet" which in turn will generate another report and so on. It can also happen on reporting TXFailed and etc.
In your case, would it be enough to have an application to refresh the DH once a day( once an hour) and send you a report? It is nice to have it detect a network issue in real time. It is just this particular cluster is not intended for that purpose.
Having an option to refresh the DH at a set time or simply on request to zero out the counts would be handy to help keep track of network issues.
Perhaps even just an alert if TXfail, TXRetry or PacketDrop reach a settable count.
I rarely have any issues now with devices falling off (I think I know what I did to cause this last occurrence).
I just noticed this as an unintended feature of your device which could be useful.
This is interesting. The issue is that the value are stored in the MCU (not on the hub side). To zero them out is to issue a custom command. Let me investigate about adding this capability. I am not aware whether there is a standard support for this in Zigbee Cluster. If this is important enough, I can look into custom command.
The time setting to do this action, I think is better handled in the hub side. The MCU is unlikely have "synchronized" clock. In fact, I think all this business logic is better handled in application side rather in DTH. In fact, zeroing the counter value can also be handled by application side. You can write and application that monitor diagnostic attribute and report the delta from the last read value. That way, you do not need to reset the diagnostic counter on the MCU.
If an application use an unsigned integer, the app can do "newvalue - oldvalue" to get the delta without worrying about the unsigned integer value wrapping around with the exception that the value does not wrap around multiple time between refresh.
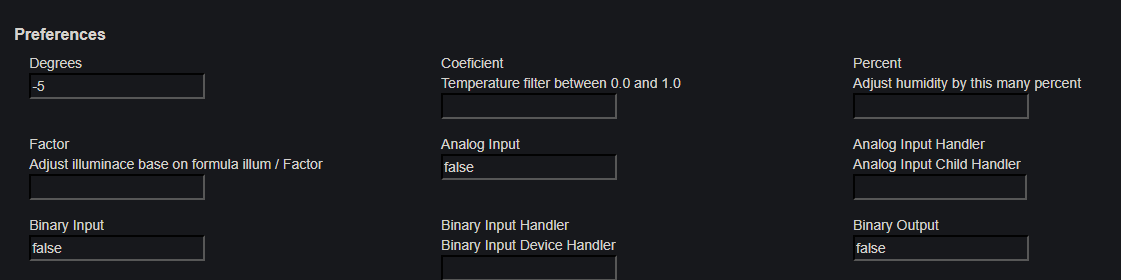
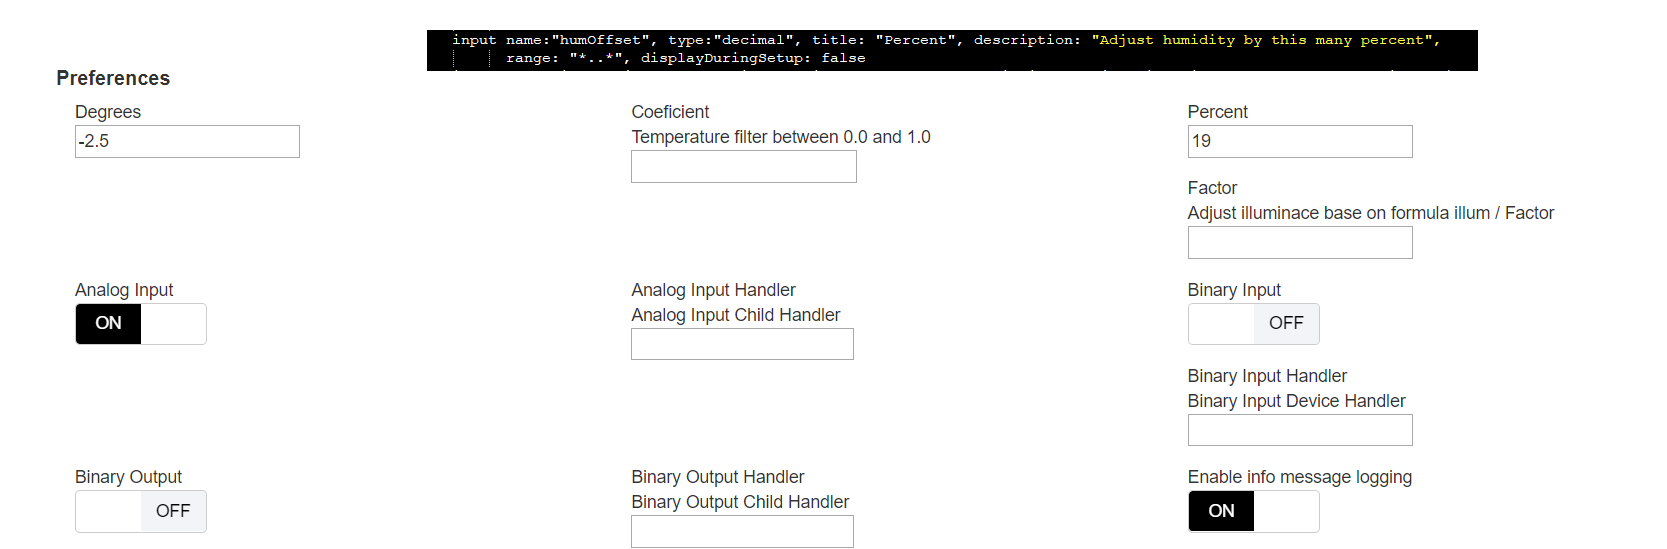
Coeficient is IIR filter coefficient. It basically dampen the fluctuation for the illumination reading.
Factor is a value which illumination reading is divided with. This is a parameter that put as a feedback from members here. The illumination value reported will be in integer when this preference is set.
Is this for illuminance or temperature? The driver says "temperature," but your explanation says illuminance. I'm trying to get mine to report small fluctuations in lux less frequently, so I'm hoping this can help, but I haven't figured out what effects this value (and "factor") have on my reading.
@bertabcd1234. You are right. It is filter coefficient to dampen temperature changes.
If you have small fluctuation that you want to filter, The zigbee configureReporting call can filter that small changes. The last parameter (before manufacture specific parameter) tell the sensor not to send any sensor reading when the changes is less than this parameter.
I do not have adjustment on those attribute on the latest DTH.
When I get sometime to work on them, I will add them to the dth. The pressure value seems to be spot on. It does not change that much. I use the humidity relative to some value. I do not trigger command based on absolute value like temperature. That is why I do not have a need to adjust these attribute yet.
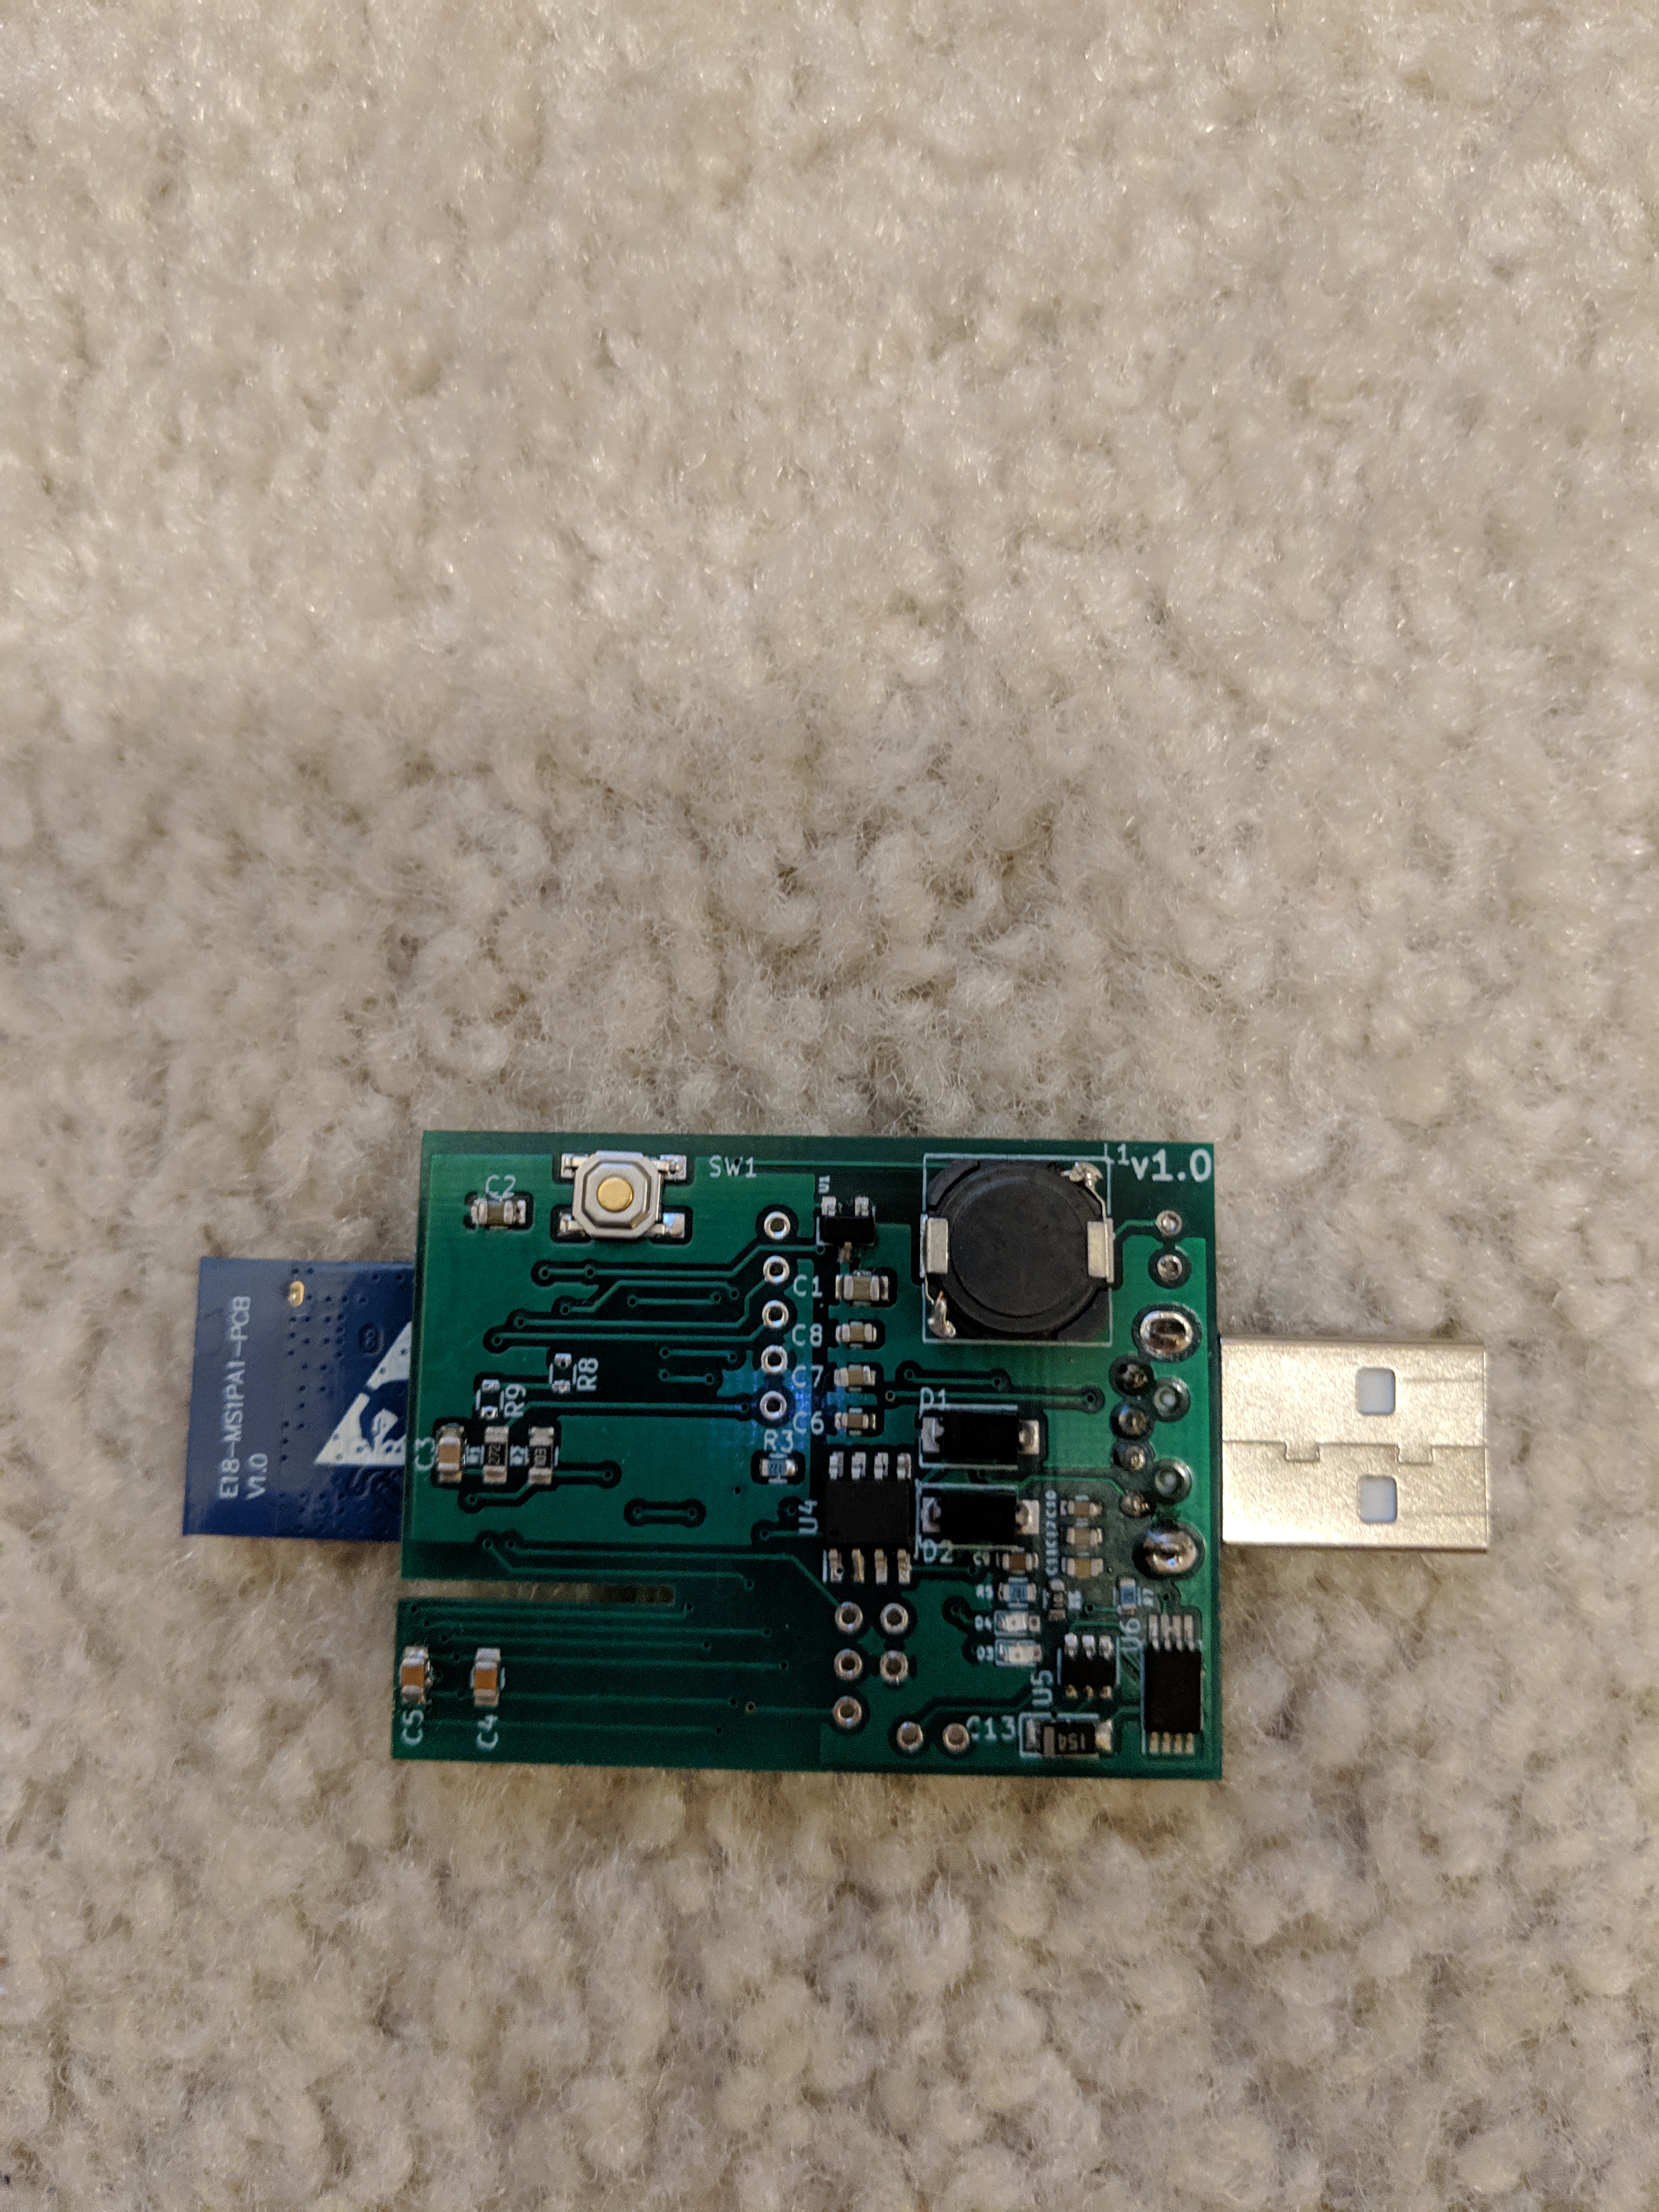
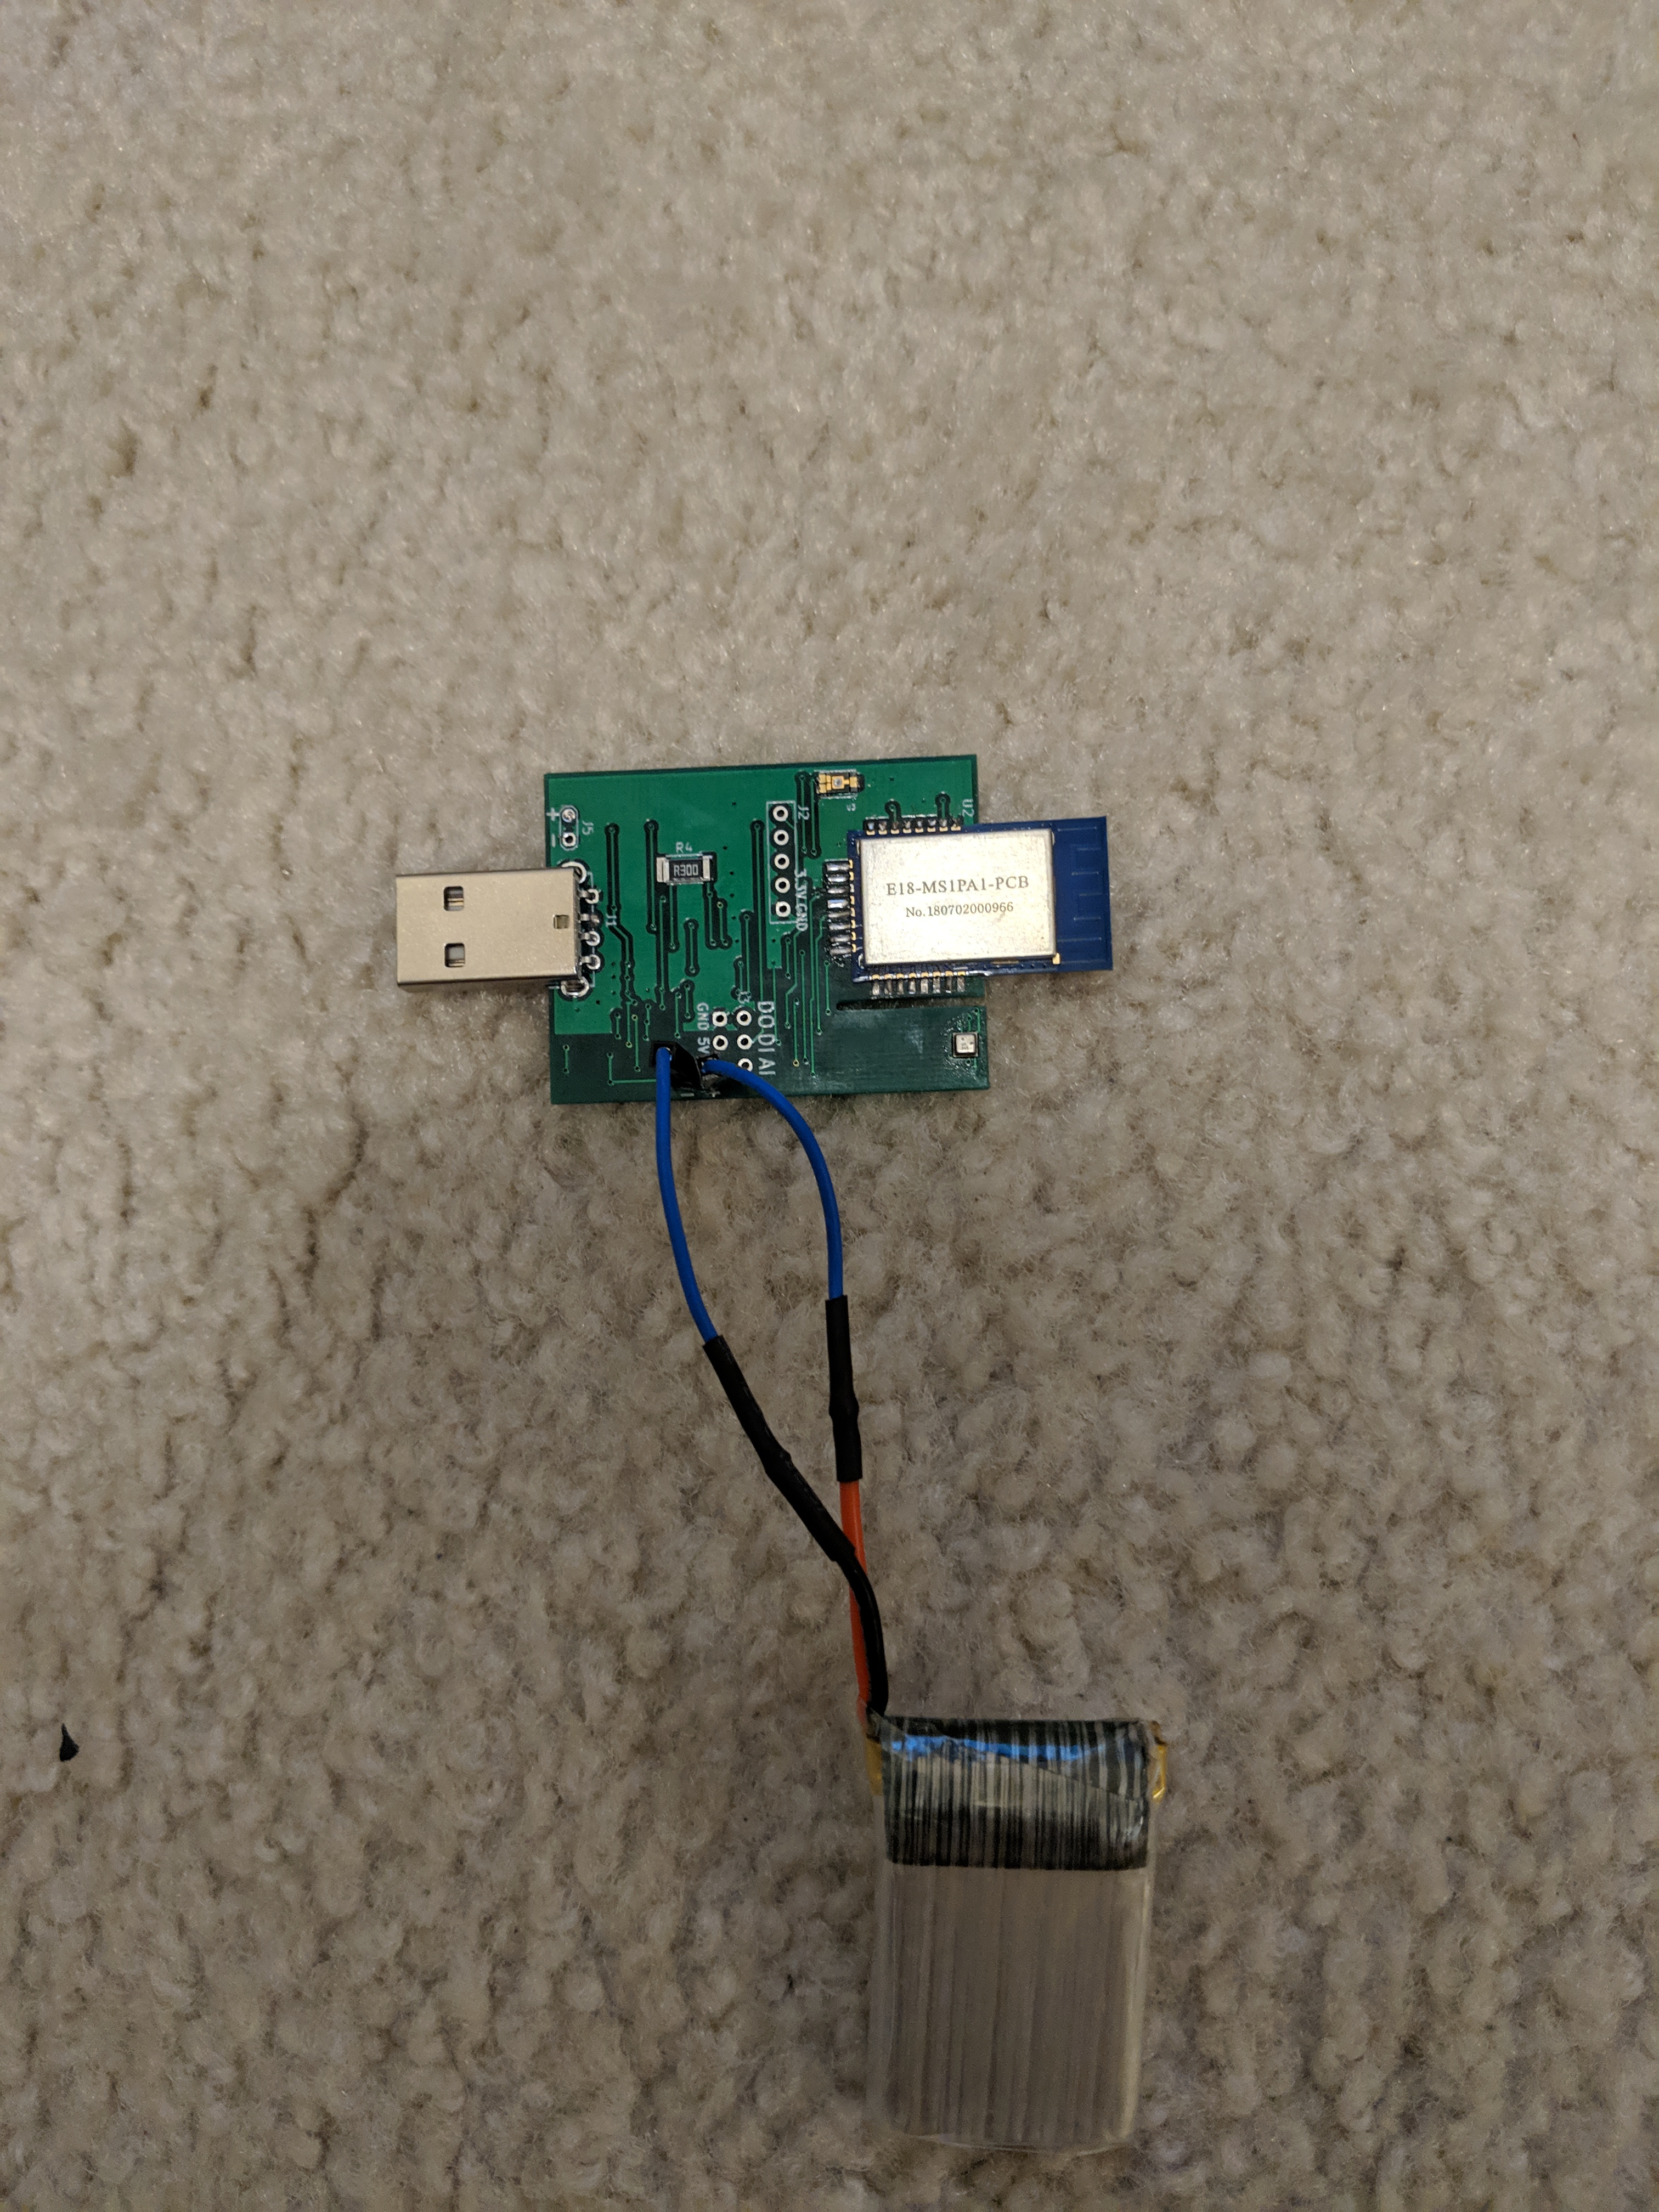
I just want to update everyone with the latest improvement on the Environment sensor.
In this iteration, I am trying to improve the power management system. It is important for the sensor to be able to operate during short power outage especially since it is double up as a repeater. For those who has Xiaomi devices, one may want to keep them as a child of this sensor.
This power management is unique for this type of sensor compared to what is available in the market. A lot of DC or AC powered sensor/devices which ac as repeater do not have battery backup. In the event of power outage, the battery power the sensor automatically.
I am still in the process of testing the power management and making adjustment. I will update again when I am close to have something to share.
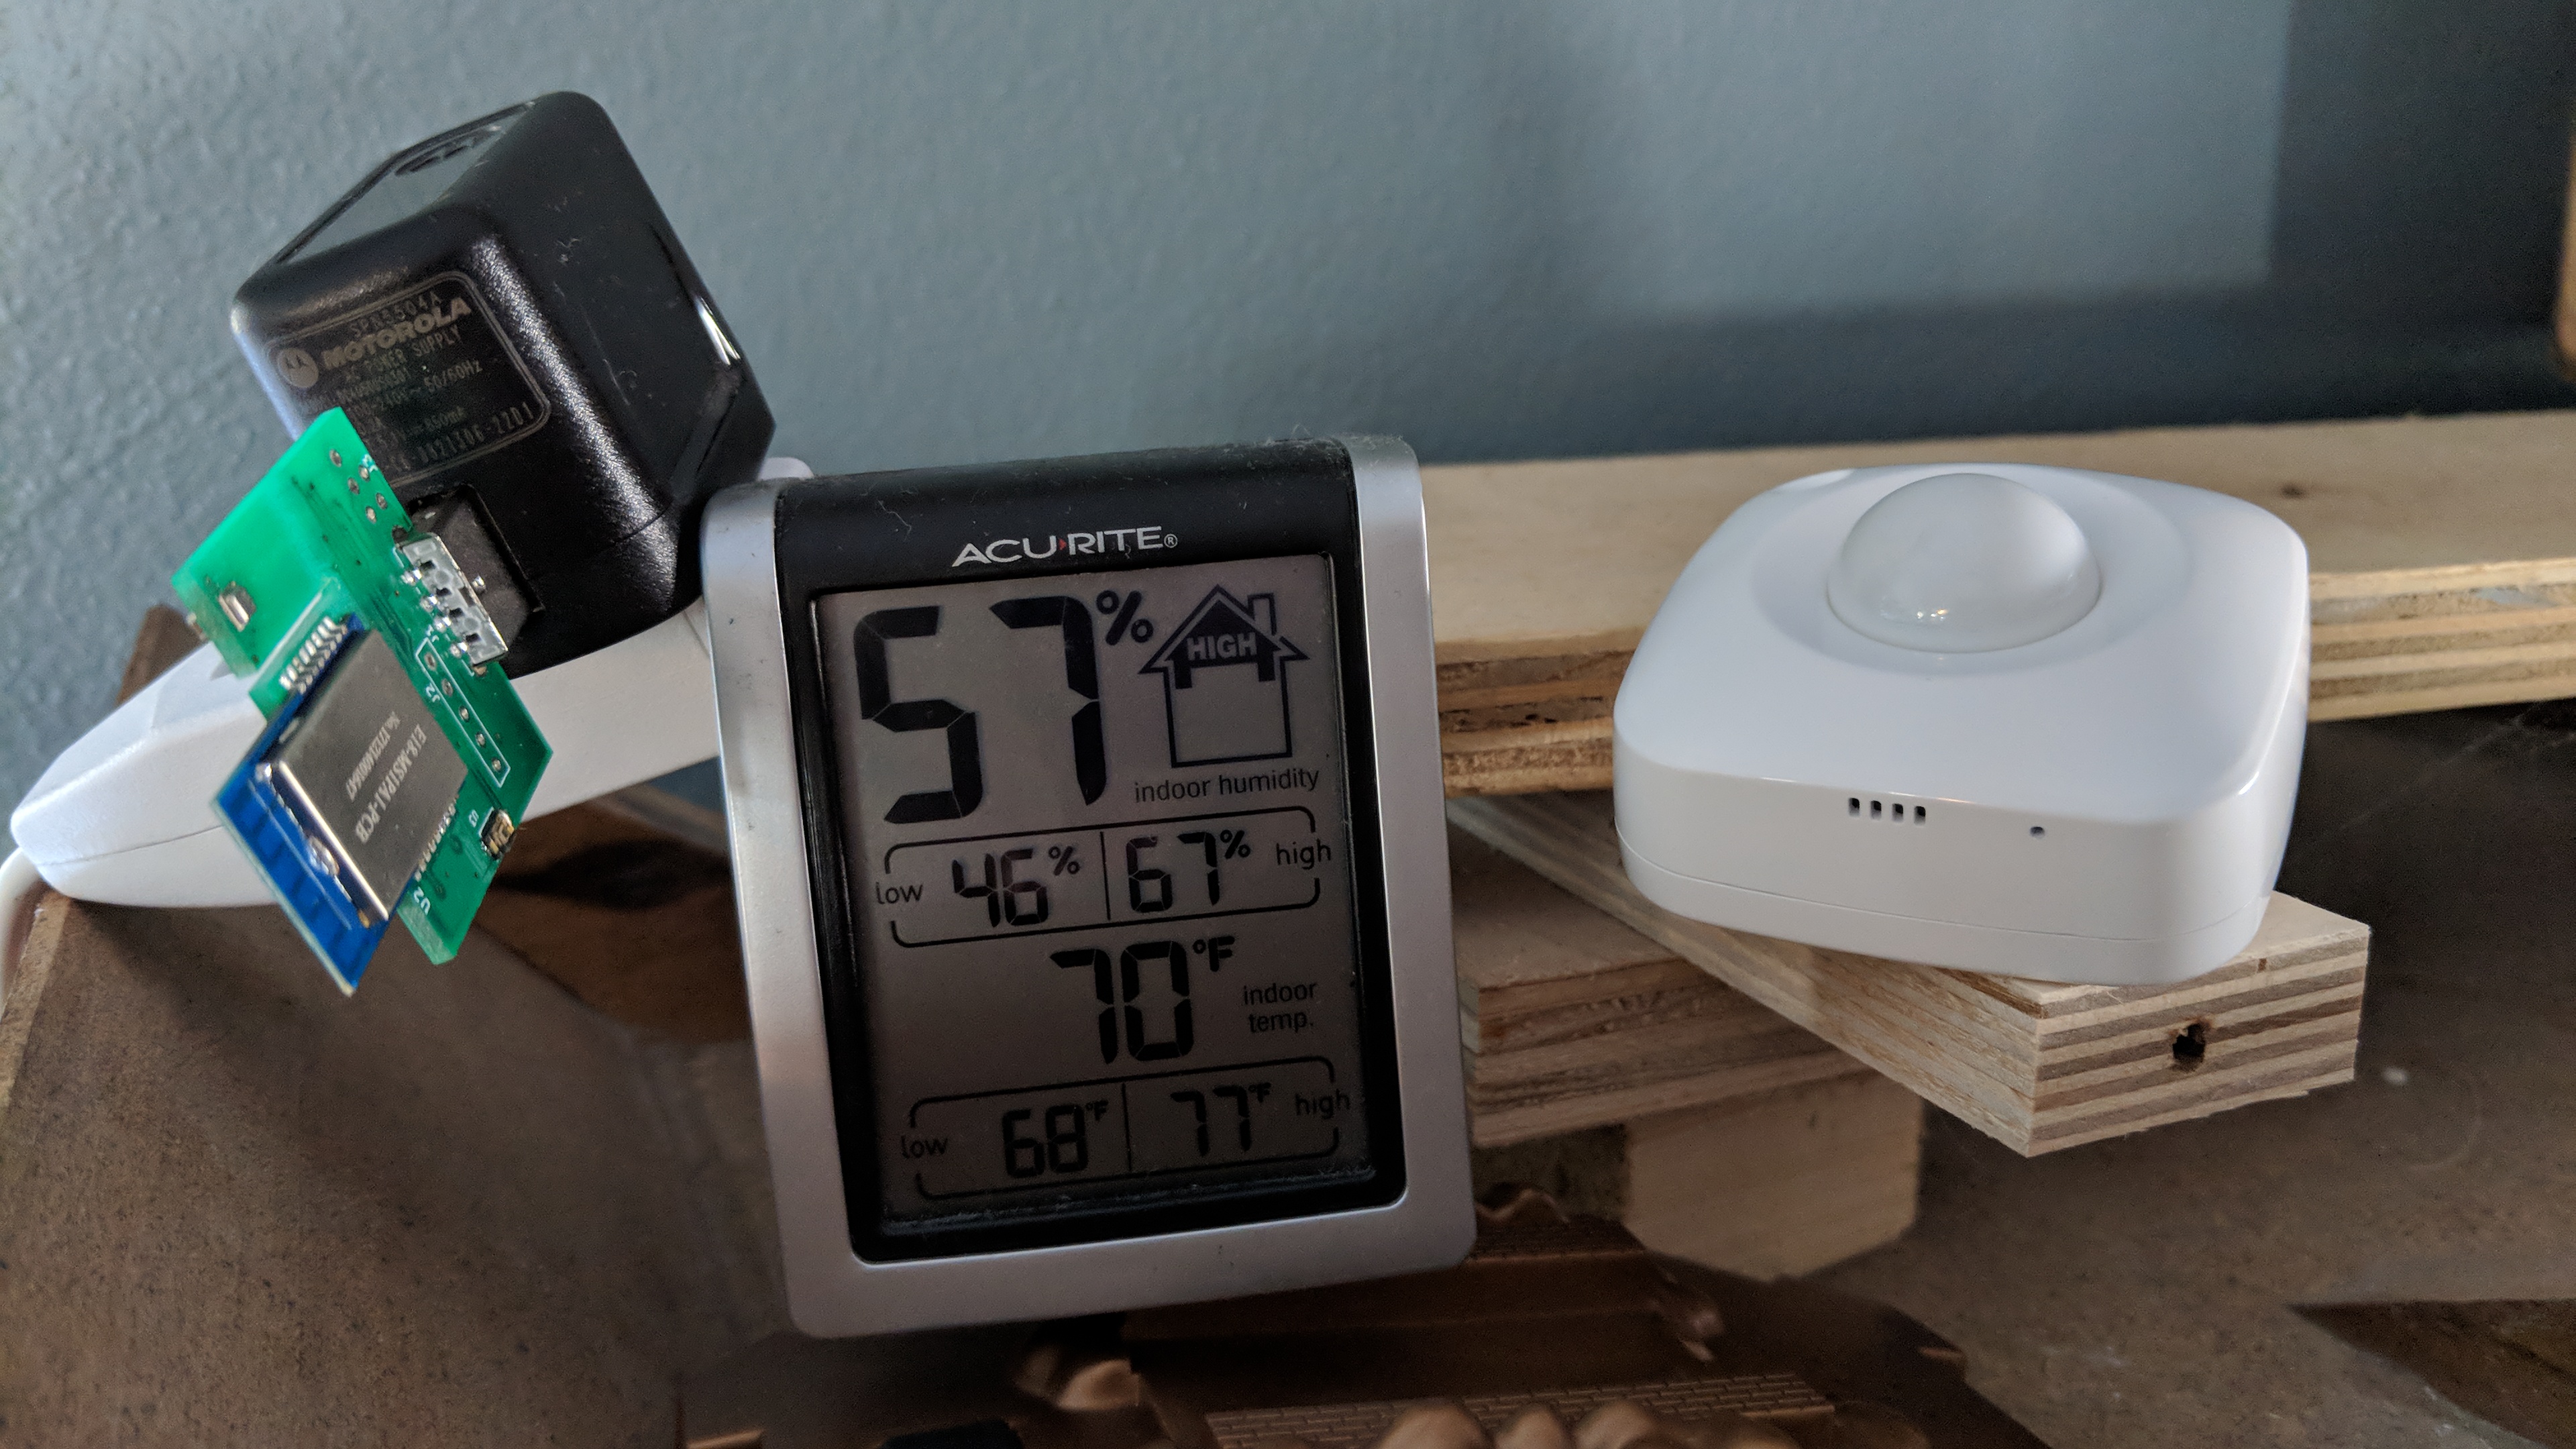
Anyone have any comments on the accuracy of the parts used here? I noticed that these sensors tend to read a very low %RH vs other sensors in the same placement.
For example, in this photo the 4 in 1 device is ready 56%, the acurite cheap sensor is 57% and the sensor from this thread is 44% all within a few inches of one another, having been there a few hours.
This device seems to be darn near perfect for my needs (AC powered, battery backup now, temp/RH/Lux) and I'd be trying to get them in every room of the house if I felt they were accurate.
We are using BOSCH BME280 for the humidity sensor. It is measuring "Relative Humidity". I learn that it compensate using the temperature to give us the reading. I am not sure whether this are the same methodology as other sensor is doing. I am using humidity reading not in absolute term. I set my action based on the delta of humidity reading. For example, I turn my fan when humidity change by %.
A powered Environment Sensor has small complication compared to battery powered. They will be on all the time. My sensor will be slightly hotter from the board and the fact that BME280 will be powered all the time. This is not hard to solve. I have attempted in the DH to provide some calibration for some temperature and humidity. There are still a few hardware feature and firmware feature that I am working on. Once the hardware and firmware feature stabilized, I will go back an work on the DH to make it easier to calibrate. There are a few technique to calibrate your sensor. The good news is that they can be calibrated in DH.
One thing, I notice on your setup, is that the sensor is on the top. You may want to flip it so that it will be at the bottom. The heat from zigbee radio will radiate upward. Our skin cannot feel this. However, that will get you a couple degree Celsius lower temperature. Your humidity reading will be higher.
Thanks for the note on the sensor, I have some experience with this sensor, and typically find it to be accurate. I may load a sketch on my Spark and hook a breakout board to it with this sensor to see if I can replicate your board's results.
Either way, great work I and look forward to snapping up the next iteration and continue testing. I nearly handed your boards off to a friend to 3D print a case but even with the offsets and what I consider very accurate temperature readings I don't agree with it's RH calculation.
I have been thinking about case. Please do share with us what you find and your design. Casing will complicate a lot. Unlike your other sensor, this sensor heat can be trapped inside the case. This can influence the reading. This is what you pay when you have the sensor powered all the time. However, you do get the benefit of it becoming a router. At that time, I think the routing capability is very important. I am willing to have a naked sensor rather than having it sleep. Case will be something that I will look into later. You will need to compartmentalize to isolate the sensor from the rest of the system. This is solvable. It is just need some design work.
A battery or sleeping sensor does not have heat issue. They will be sleeping most of the time. Their board and sensor will not heat up.
I have not looked at integrating CCS811. The sensor is expandable. It does not have I2C expansion. I will continue working on improving the expand-ability of the sensor. This is another firmware feature in my list before I can make improvement on the DH.
For now, in my head is to get the battery backup done.
It work. It may not be accurate. However, it is enough to detect dangerous or not dangerous level of CO2. I do not like the MQ-7 since it will need to be heat up. It is just simply a resistor that when heated change its value depending on some gas detected. It is cheap.
I have one of the first "homemade" temp/humidity/pressure/light sensors. I find the humidity to be about 20+ % low. I've used a BMP280 on a RasPi and found it to be accurate. I've been thinking perhaps small processor cannot do the required calculations.
On the other note: I've tried a CCS811 an could get no useful data from it. It exhibited significant drift. I have A BMP680 but have not had time to try it yet.
UPDATE
I did find the CCS811 required "clock stretching" to communicate with my RasPi. Info from CCS811 tech support and verified by my testing.
I seem to be running 4-5% low somewhat consistently, though I've seen some erratic dips. I too have previously seen success with this sensor on arduino/netduino systems.