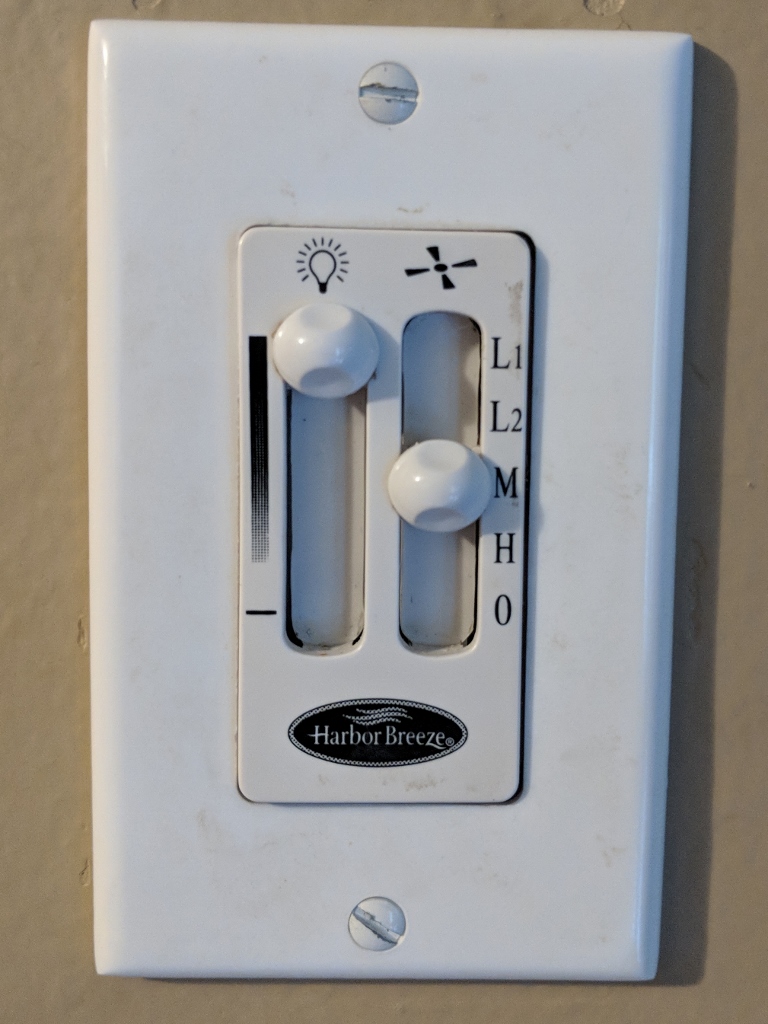
Homeseer has released its FC200+ fan controller. I installed it and it seems to work fine - except for only getting 3 speeds. I have an old hunter fan that had the harbor breeze fan / light controller which would vary the voltages to give 4 speeds. Since I had an unused spot in the junction box I added a separate dimmer for the ceiling fan light. I wish someone would make a zwave version of the harbor breeze switch.. but I digress..
The homeseer fan controller has the 4th speed (medium high) disabled by default. Someone posted on the homeseer fan controller product page in a review that " Note, if you are using Smartthings, you will need the latest device handler. I had a previous version and it couldn't set parameters for led color or status. Also, I don't know why they ship the fan control with only 3 speeds activated but it can be updated to have 4 speeds. I knew nothing about and have never used the groovy programming language in Smartthings but I was able to edit the device handler to add the speed option."
Can this be done in hubitat? and while I am at it.. is there a tutorial to explain how to use the device edit page? I figureed out on / off, etc.. but what does configure do? or set status led? I see this type of page on lots of devices, but cant figure out what some one the butons do?!
Darby,
I'm sorry I can't be of any help here because I don't know about programming either. I would like to say that I also would like 4 speed support and also the set status LED option for these fan controllers. I had been waiting on Homeseer to release these and will be purchasing these for all the fans in my house if there's a supporting driver for these 2 features. I love the set status LED option for the Homeseer dimmers. I have it set so all my dimmer LEDs Turn red when my alarm is on and then Turn green when its disarmed.
Giving this a bump, I'm not versed in groovy programming either but would love it if someone far smarter than me would convert Darwin's Den FC200+ DC from Smartthings.
way above my paygrade.,.. for sh*ts and giggles I put that code into the driver code section app.. and it blew up
unable to resolve class physicalgraph.zwave.commands.basicv1.BasicReport @ line 211, column 16. unable to resolve class physicalgraph.zwave.commands.basicv1.BasicSet @ line 215, column 16. unable to resolve class physicalgraph.zwave.commands.switchmultilevelv1.SwitchMultilevelReport @ line 219, column 16. unable to resolve class physicalgraph.zwave.commands.switchmultilevelv1.SwitchMultilevelSet @ line 223, column 16. unable to resolve class physicalgraph.zwave.Command @ line 227, column 22. unable to resolve class physicalgraph.zwave.commands.configurationv1.ConfigurationReport @ line 237, column 16. unable to resolve class physicalgraph.zwave.commands.hailv1.Hail @ line 245, column 16. unable to resolve class physicalgraph.zwave.commands.manufacturerspecificv2.ManufacturerSpecificReport @ line 249, column 16. unable to resolve class physicalgraph.zwave.commands.versionv1.VersionReport @ line 261, column 16. unable to resolve class physicalgraph.zwave.commands.firmwareupdatemdv2.FirmwareMdReport @ line 274, column 16. unable to resolve class physicalgraph.zwave.commands.switchmultilevelv1.SwitchMultilevelStopLevelChange @ line 282, column 16. unable to resolve class physicalgraph.zwave.Command @ line 286, column 16. unable to resolve class physicalgraph.zwave.commands.centralscenev1.CentralSceneNotification @ line 545, column 16.
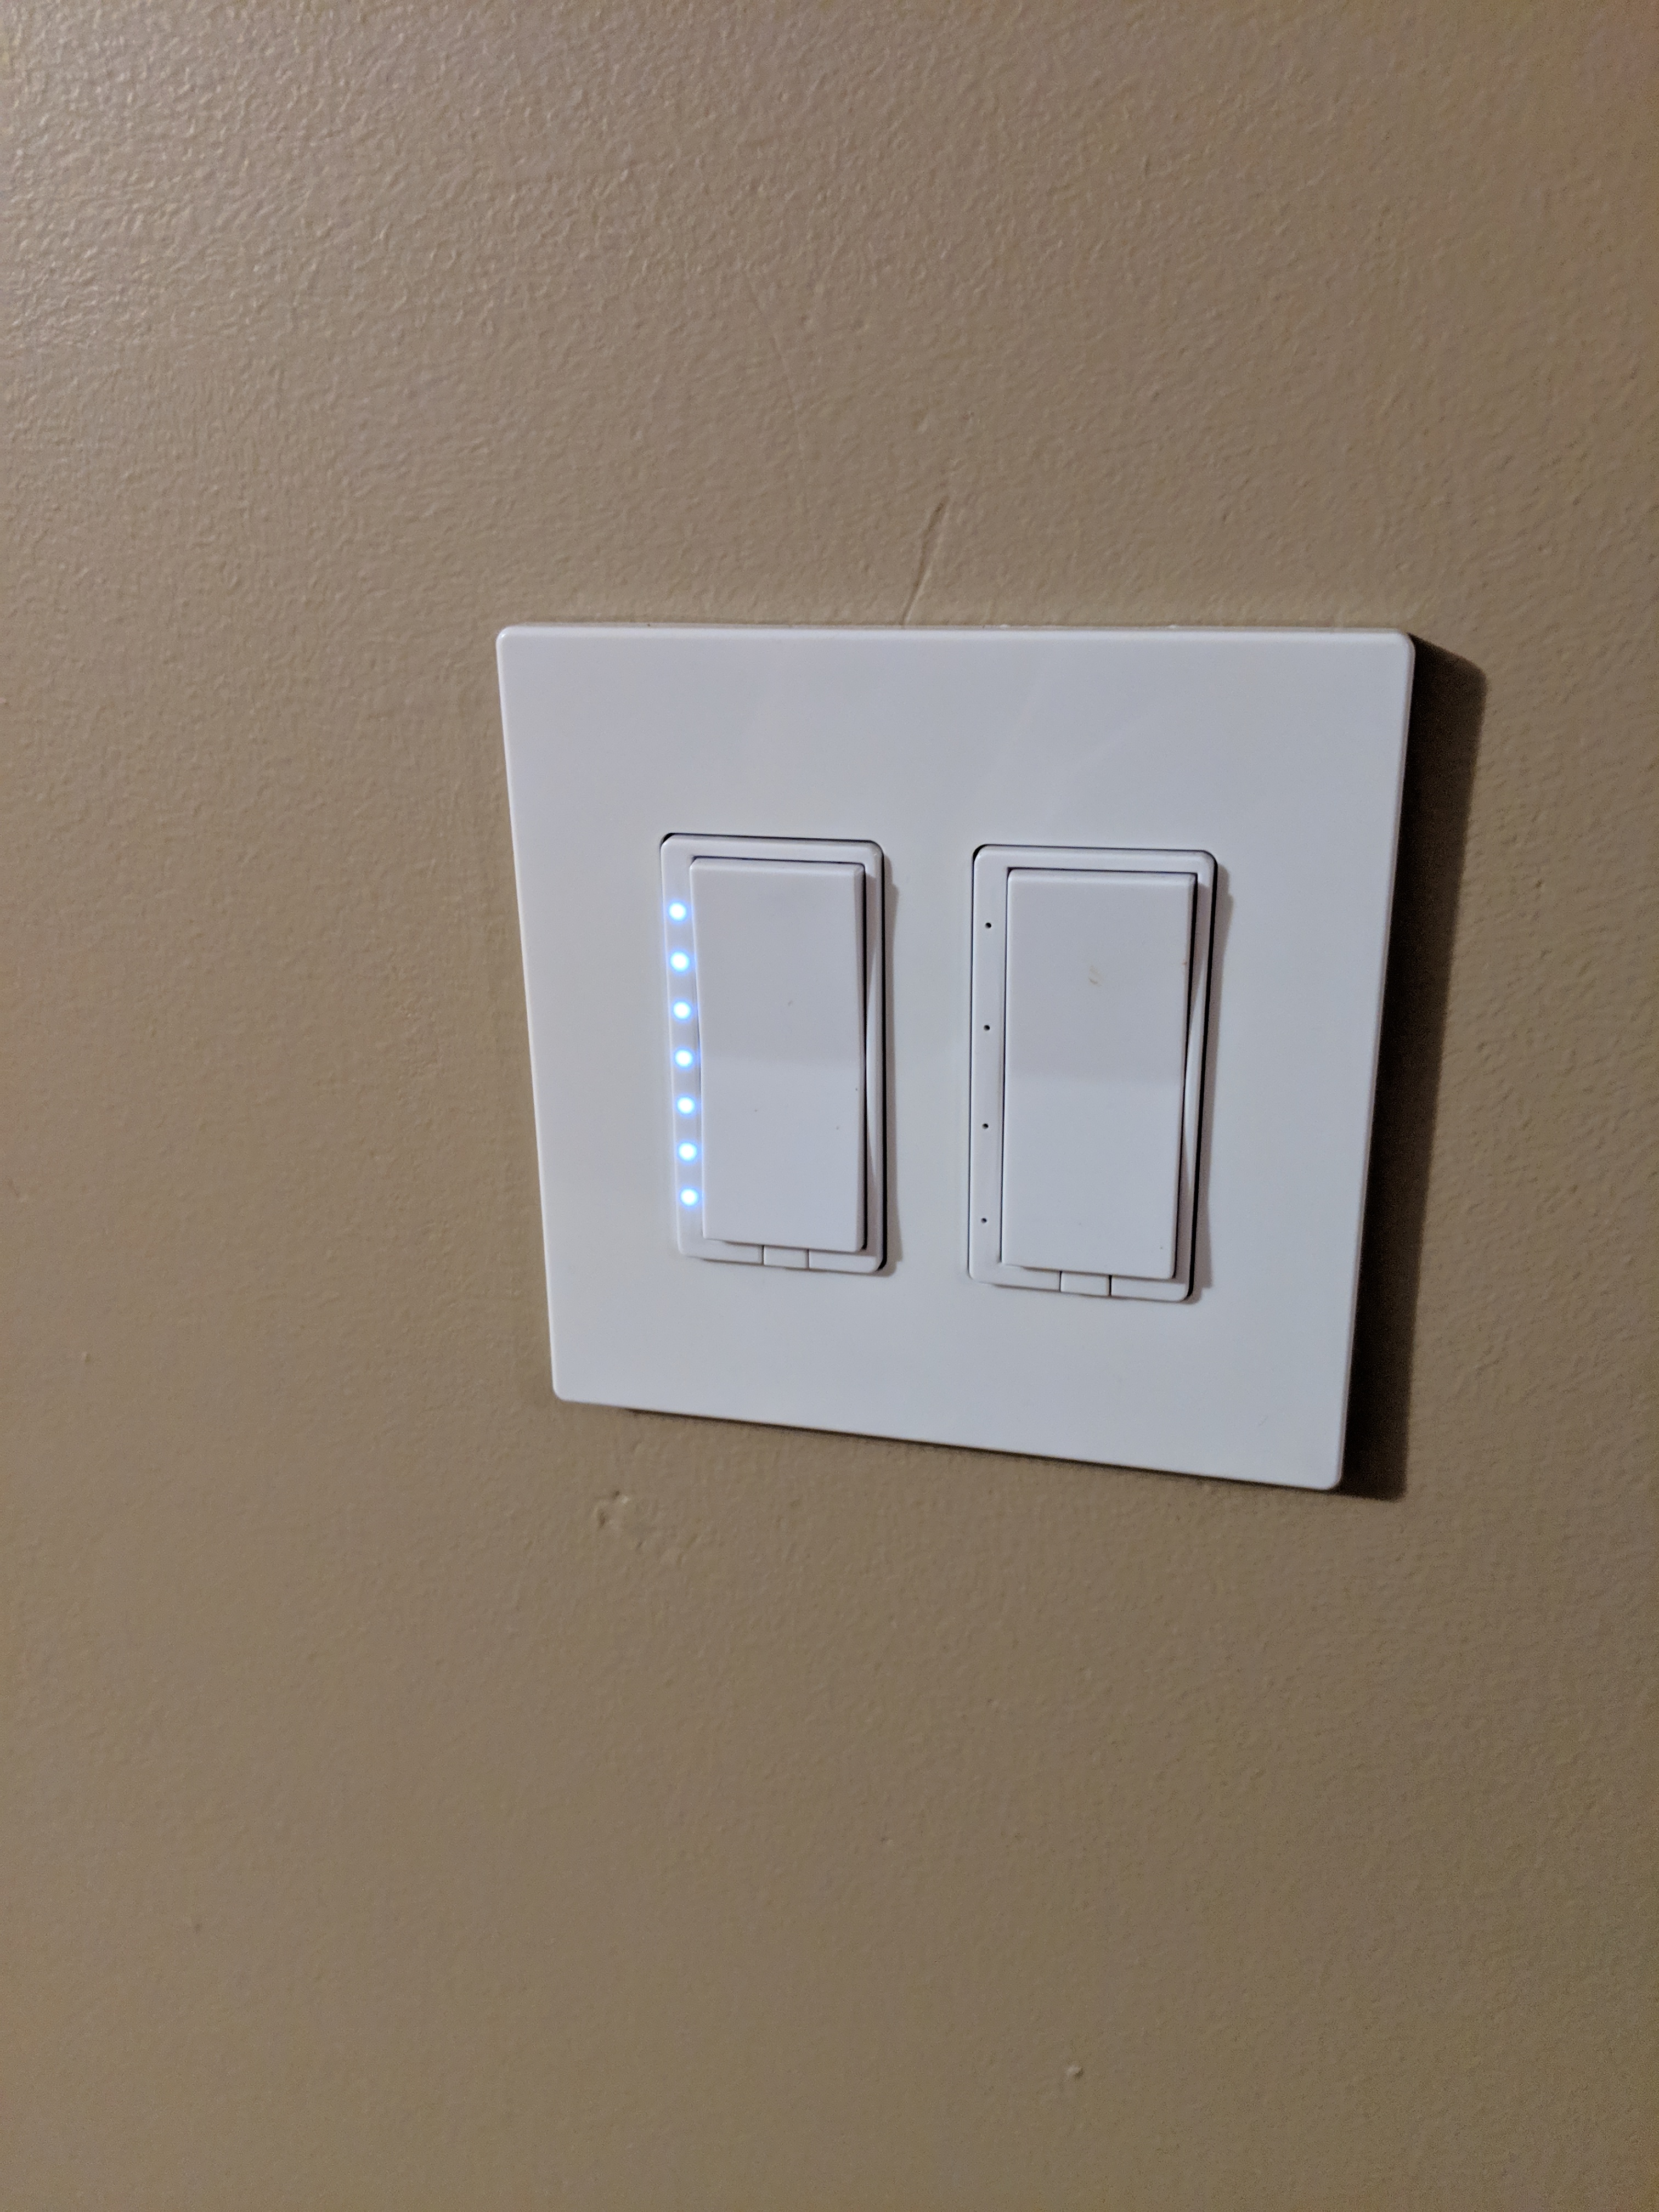
Quick follow up on how I solved my problem with the 1 switch - I ended up cutting the single gang out and putting in an old work 2 gang box by using the traveler wire to the dimmer on the the left.. the right is the fan dimmer - with only 3 speeds Left is a Homseer 100 dimer and right is the 200 fan controller
Decent drywall work for a hack kind of pissed as my self for gouging
 Left is a Homseer 100 dimer and right is the 200 fan controller