If you own an Inovelli LZW36 Fan/Light controller and you looked at the instructions they posted for how to set notifications with Rule Machine, you're probably as lost as I was. Thankfully I was able to piece the puzzle togther by looking at posted screenshots that didn't really explain all that was needed, but I now know how to make it work and wanted to share exactly what you need to do if you want to make it work too.
The Inovelli LZW36 driver allows you to create up to 5 child devices for the Light LED indicator and the Fan LED indicator. You can conveniently set the options for each in the driver settings and it will generate the child devices for you when you select the option to do so. This is great, until you want more the 5 notifications for each. There is a handy community app named LED Mini-dashboard that probably worked great at one time. Unfortunately, it's not been maintained and either doesn't work when expected, or hangs as you're trying to create new configurations.
NOTE: These instructions are for the Inovelli provided driver for LZW36, not the built-in Hubitat driver for the LZW36
-
If you're an LZW36 owner, you can disregard the online instructions posted here. They're not correct.
-
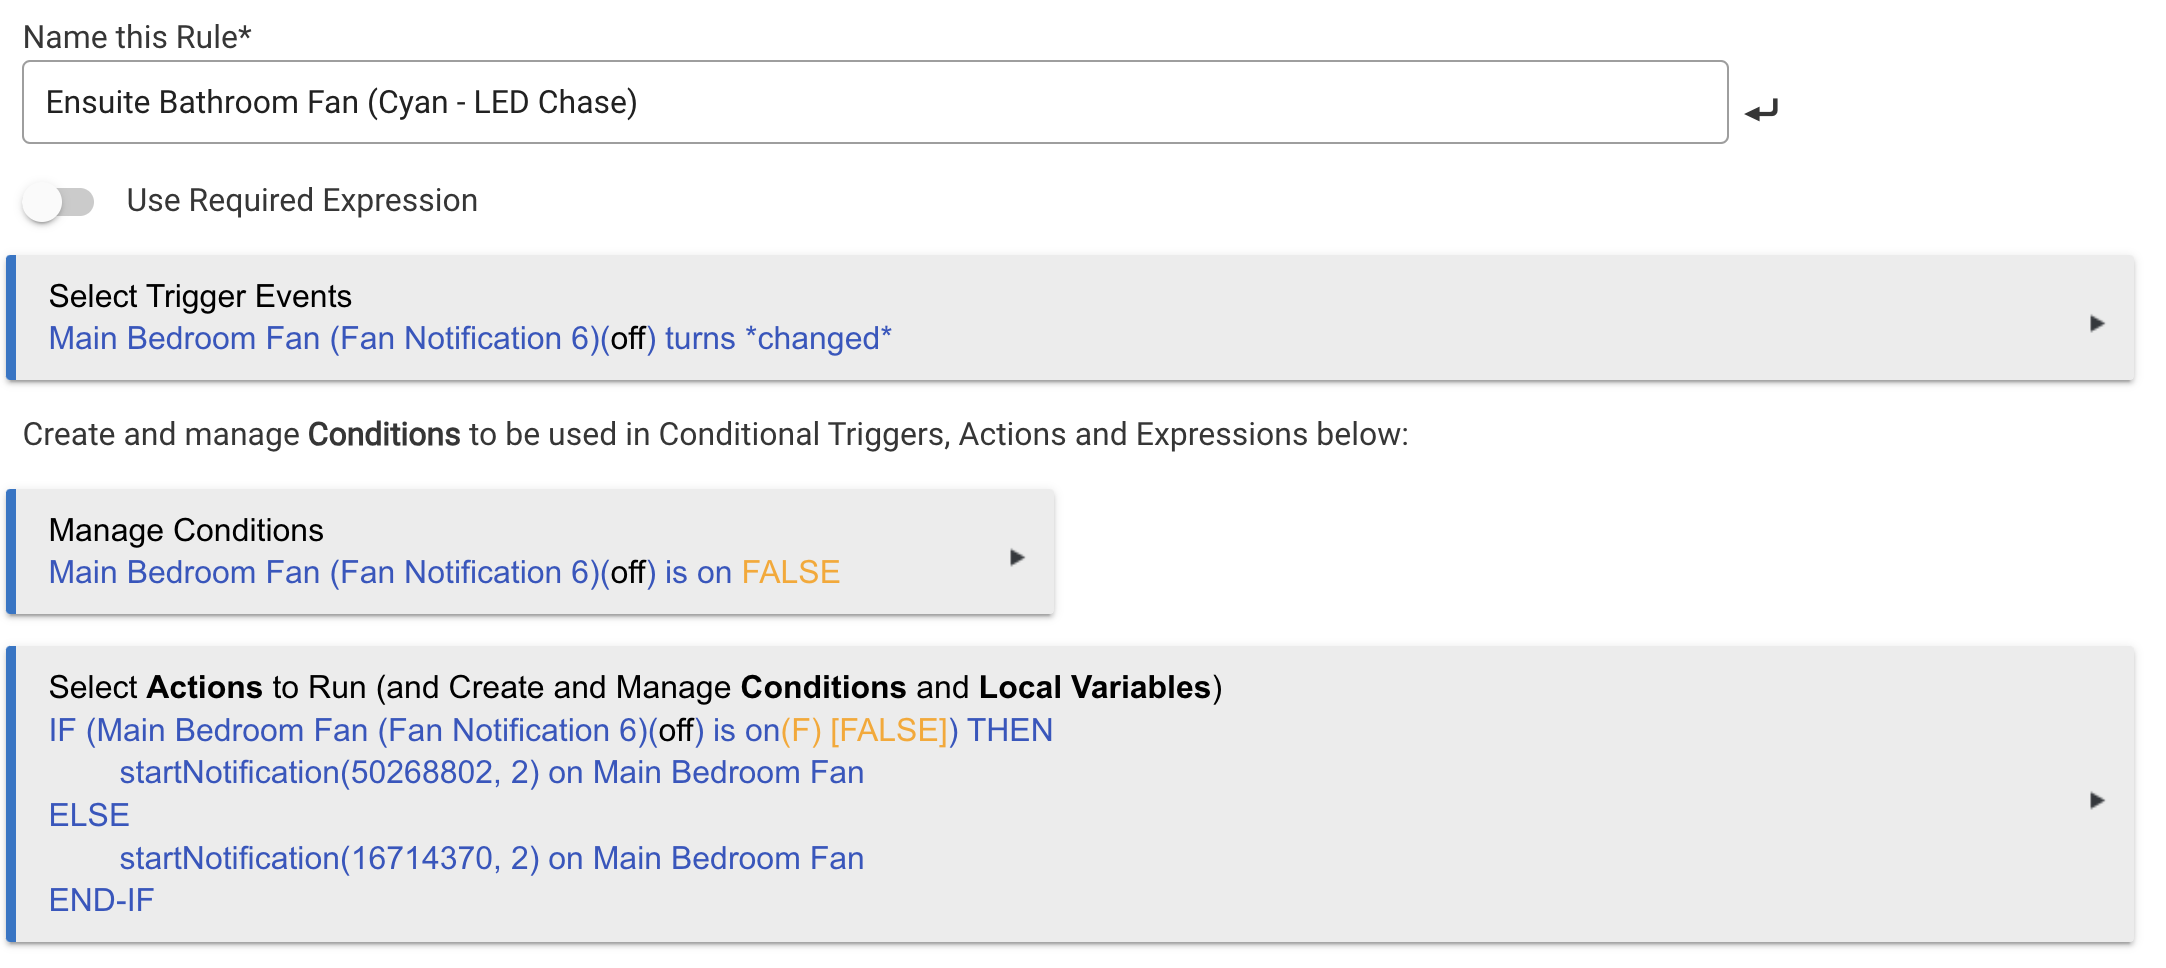
Create your rule trigger
-
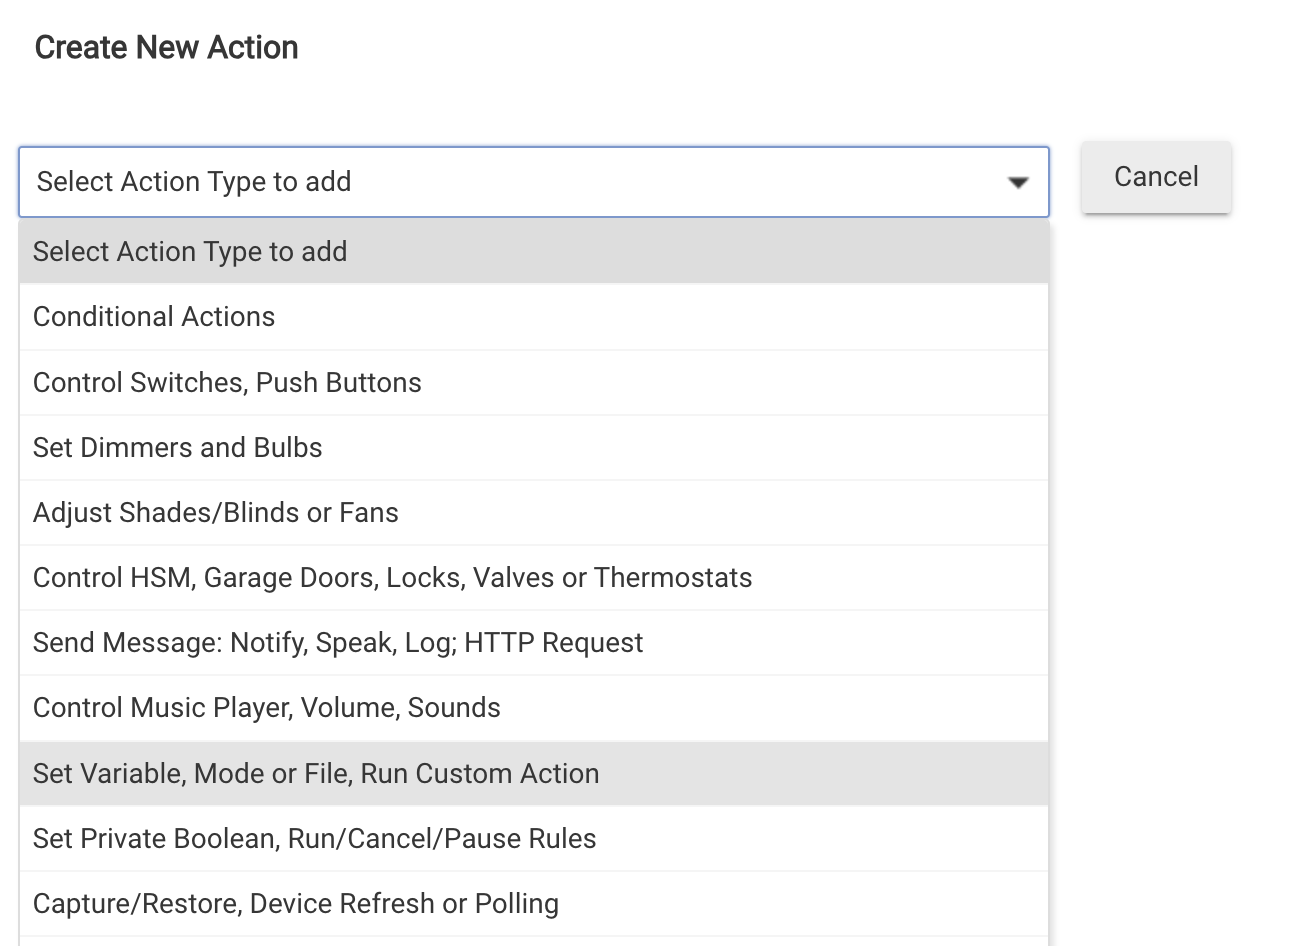
Create a new action
-
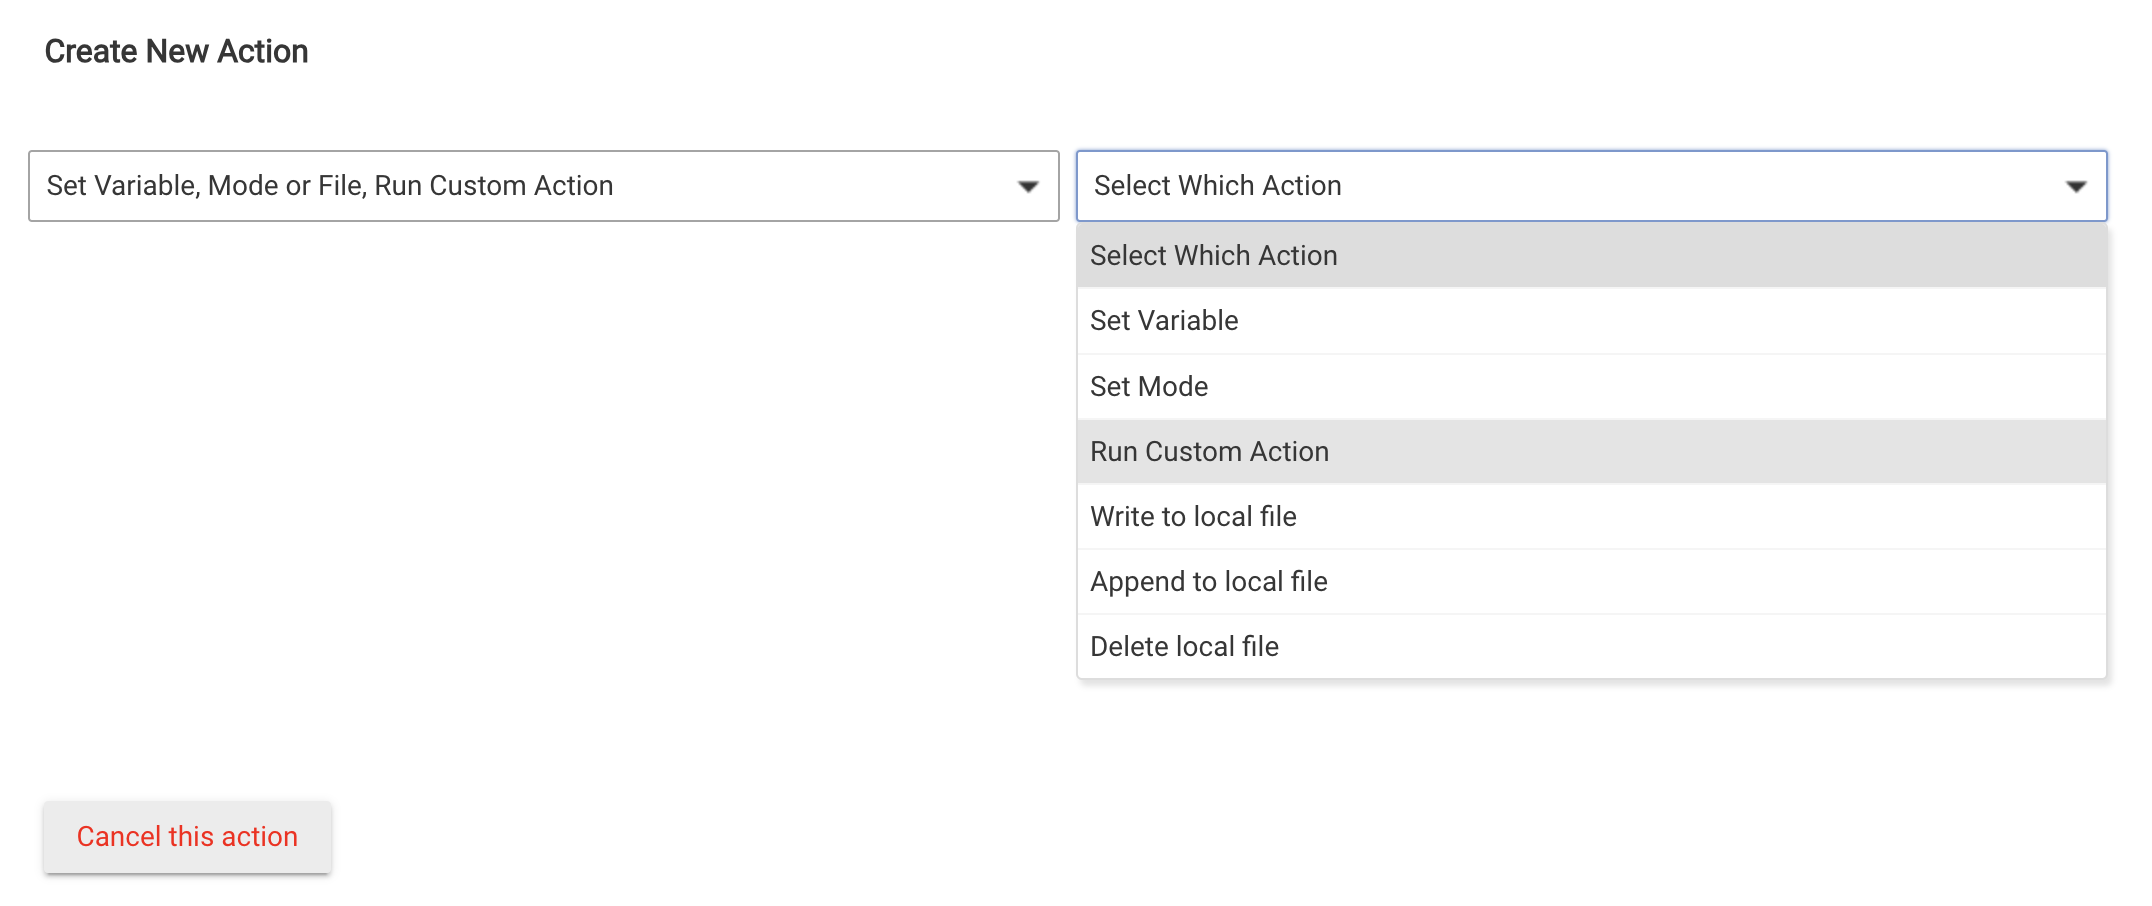
Select Set Variable, Mode or File, Run Custom Action from the list of action types
-
Select Run Custom Action
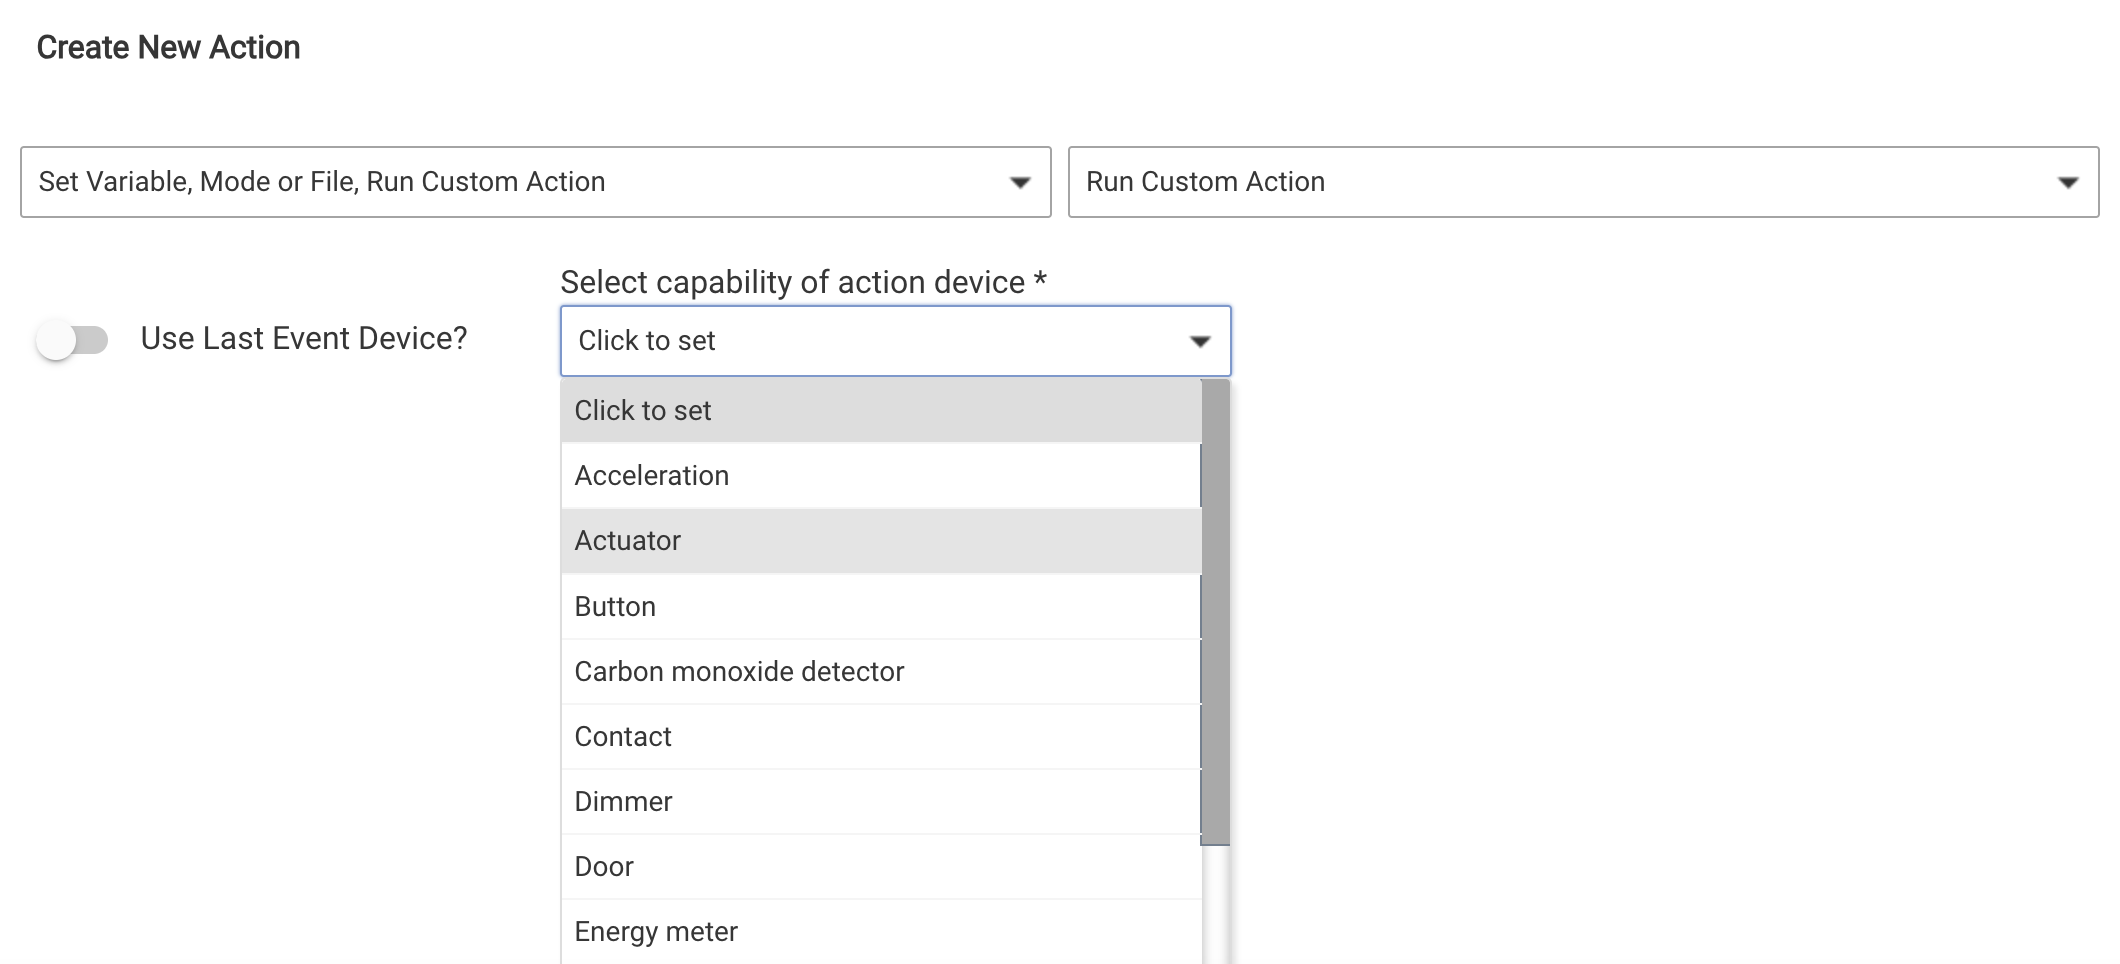
-
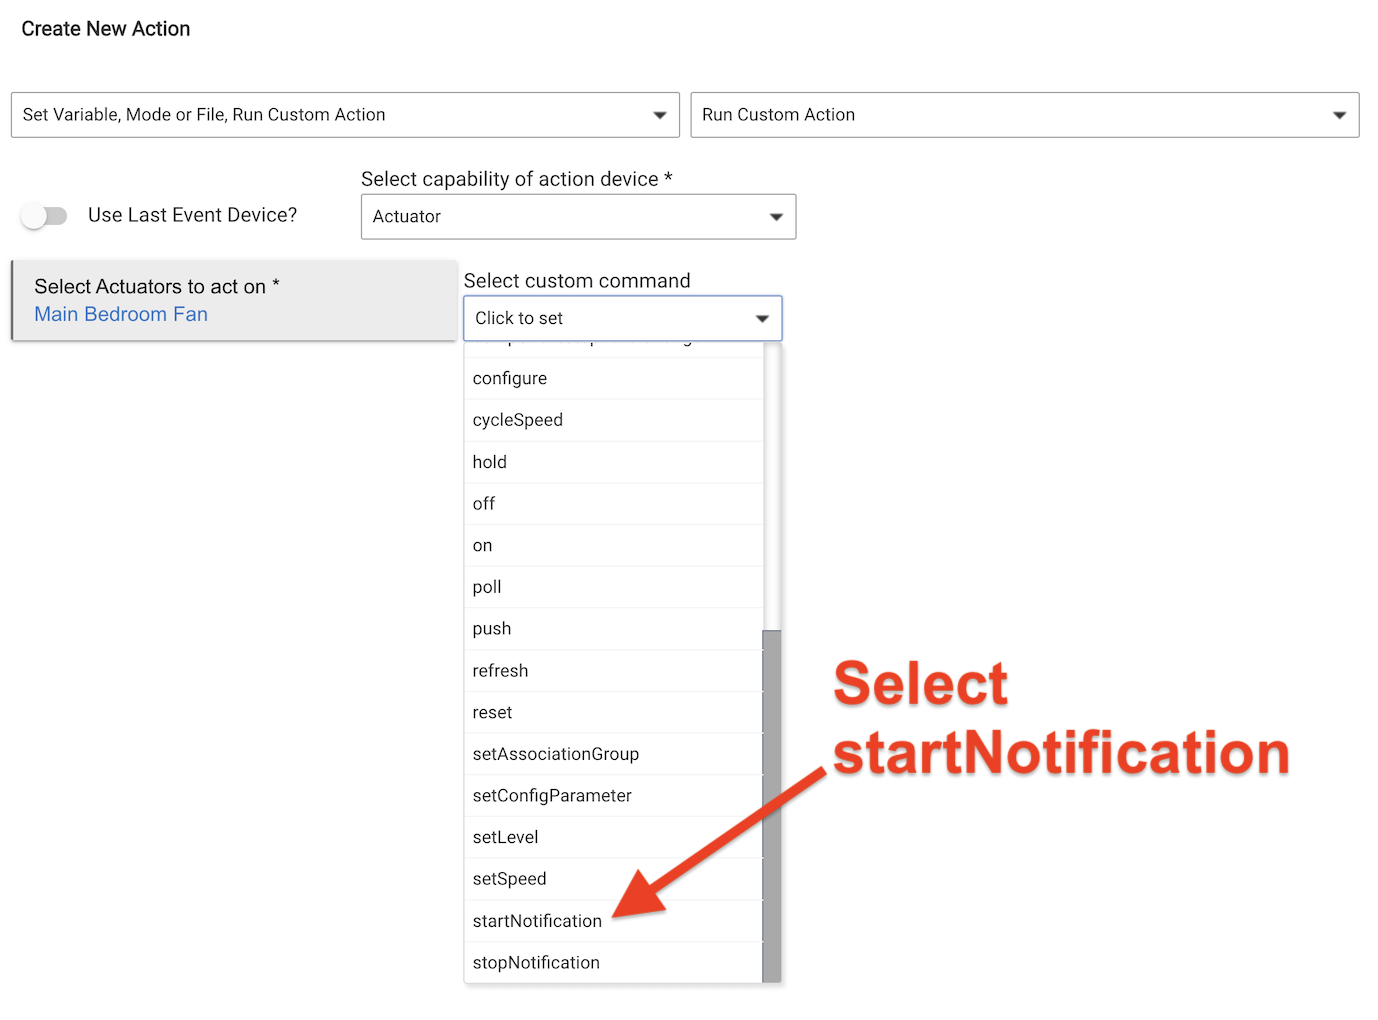
Select Actuator for the capability of the action device
-
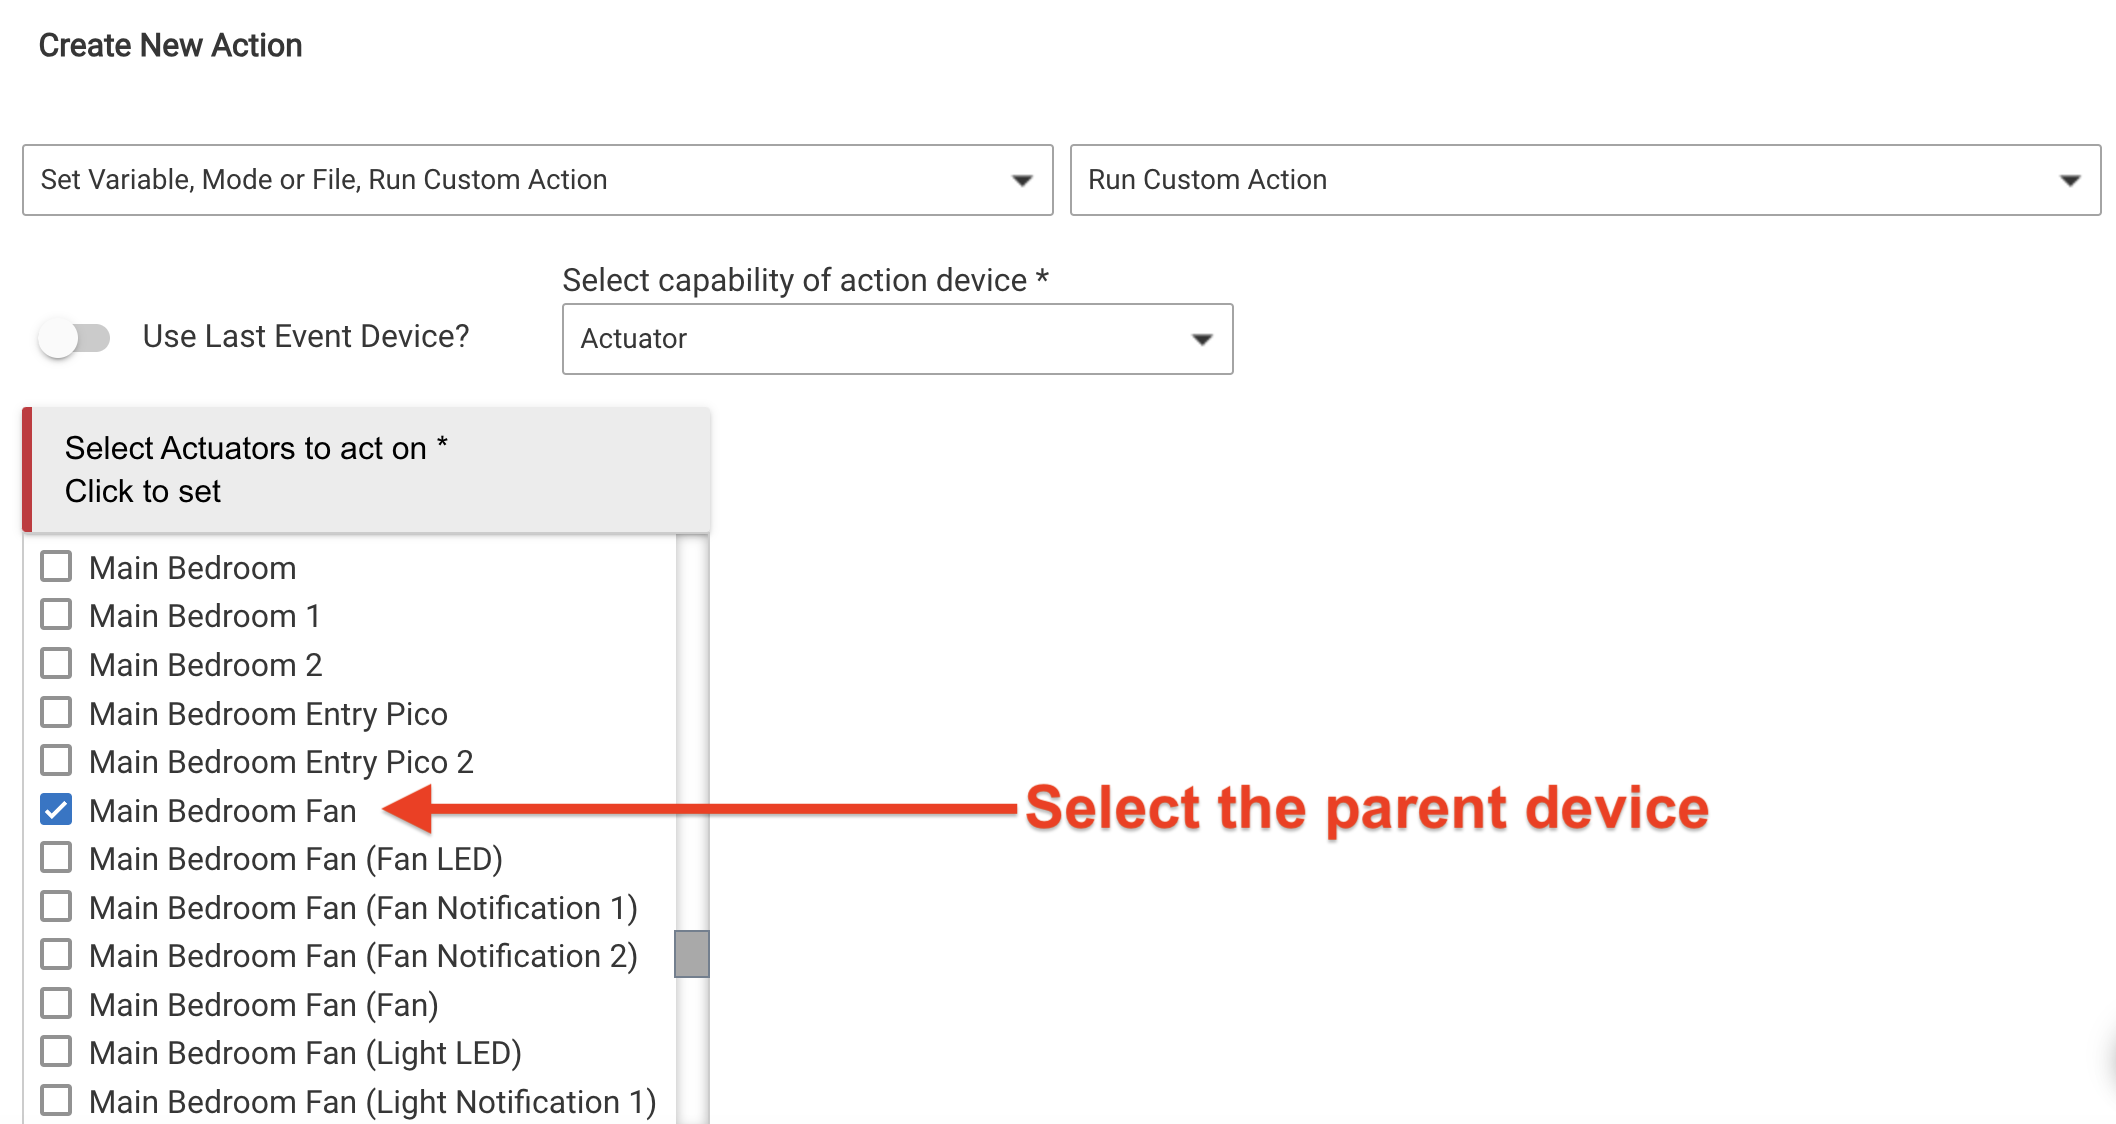
Select the driver parent device
-
Select the custom command startNotification
NOTE: You can disregard stopNotification. You will always use startNotification for both starting and stopping notifications, just with different parameters for each, as explained below.
-
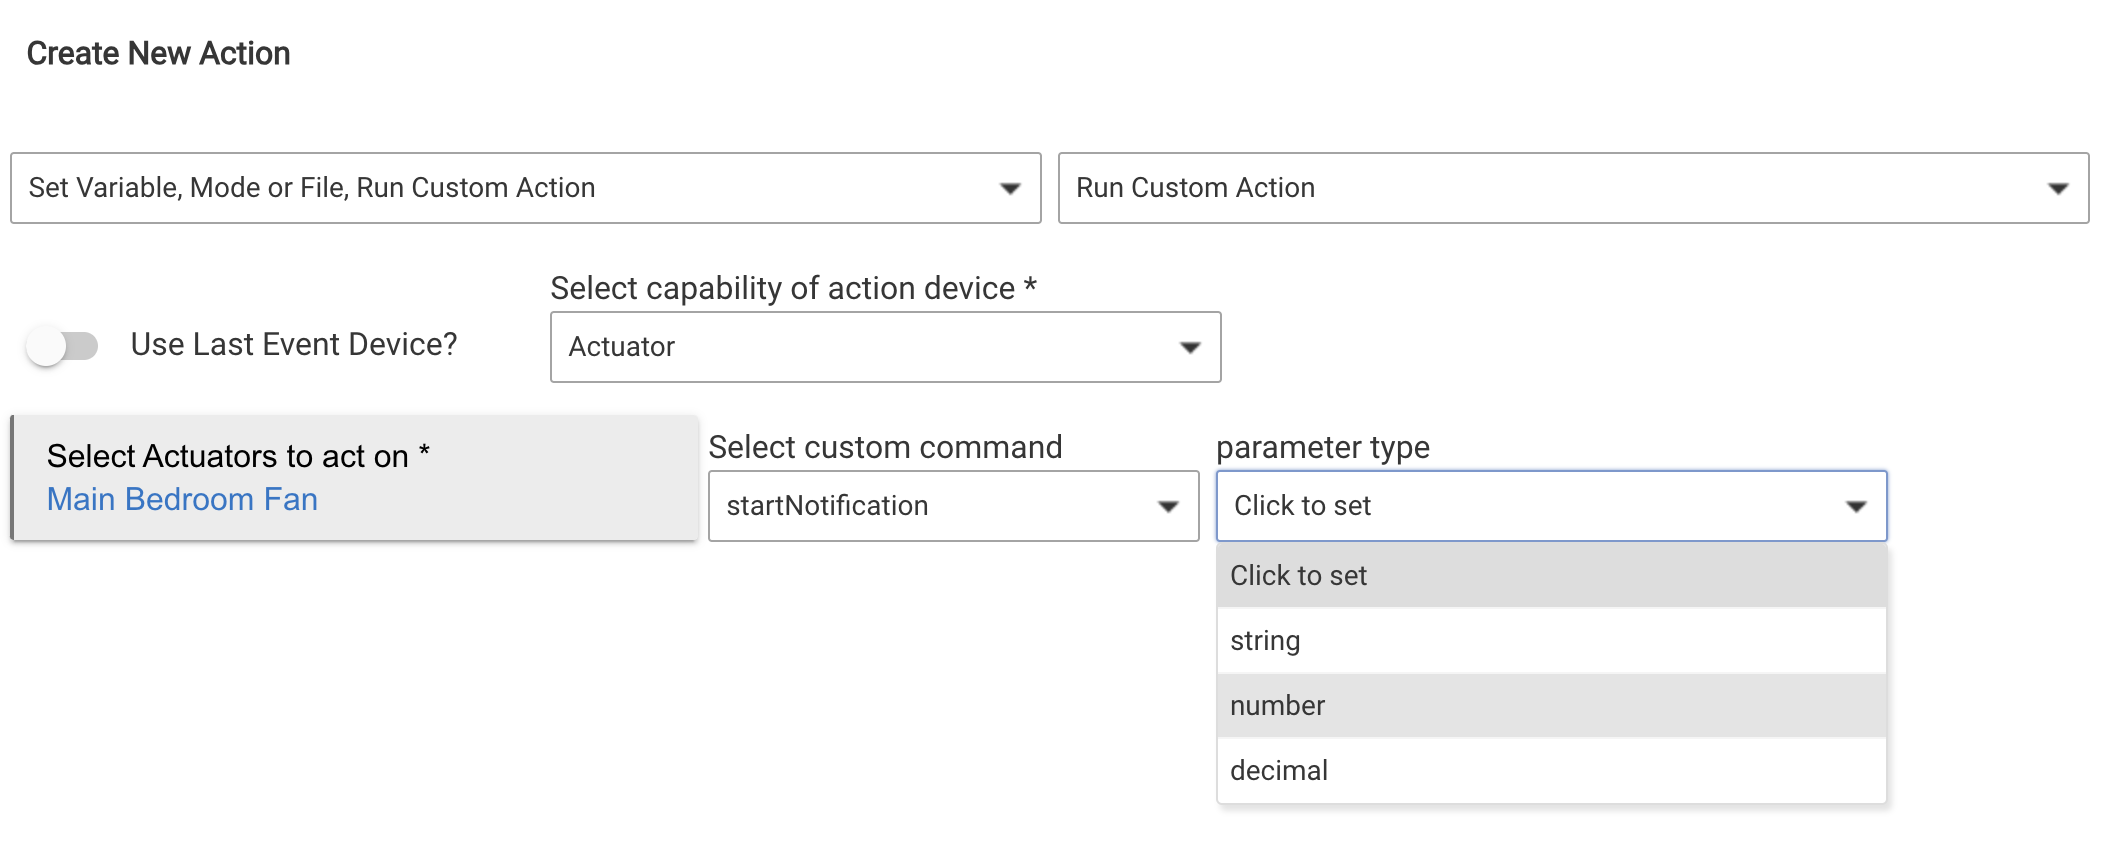
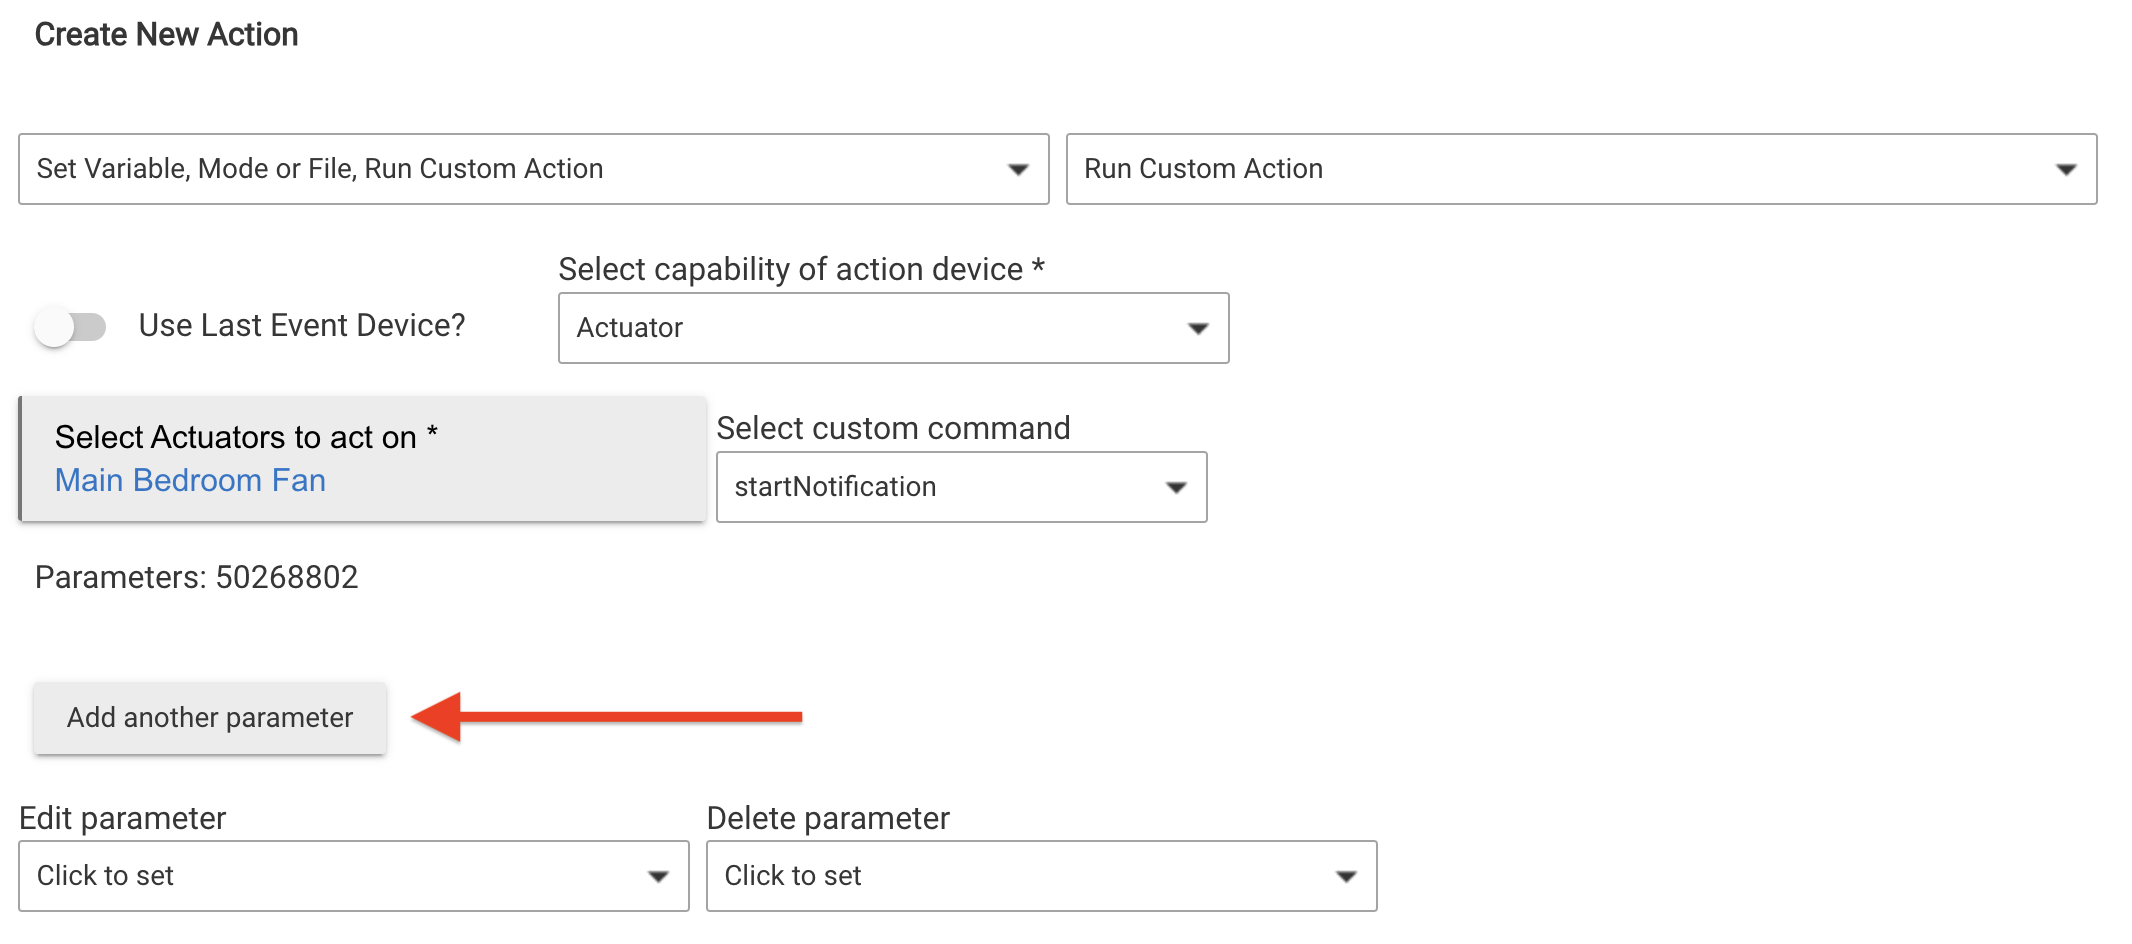
Select number for the parameter type
-
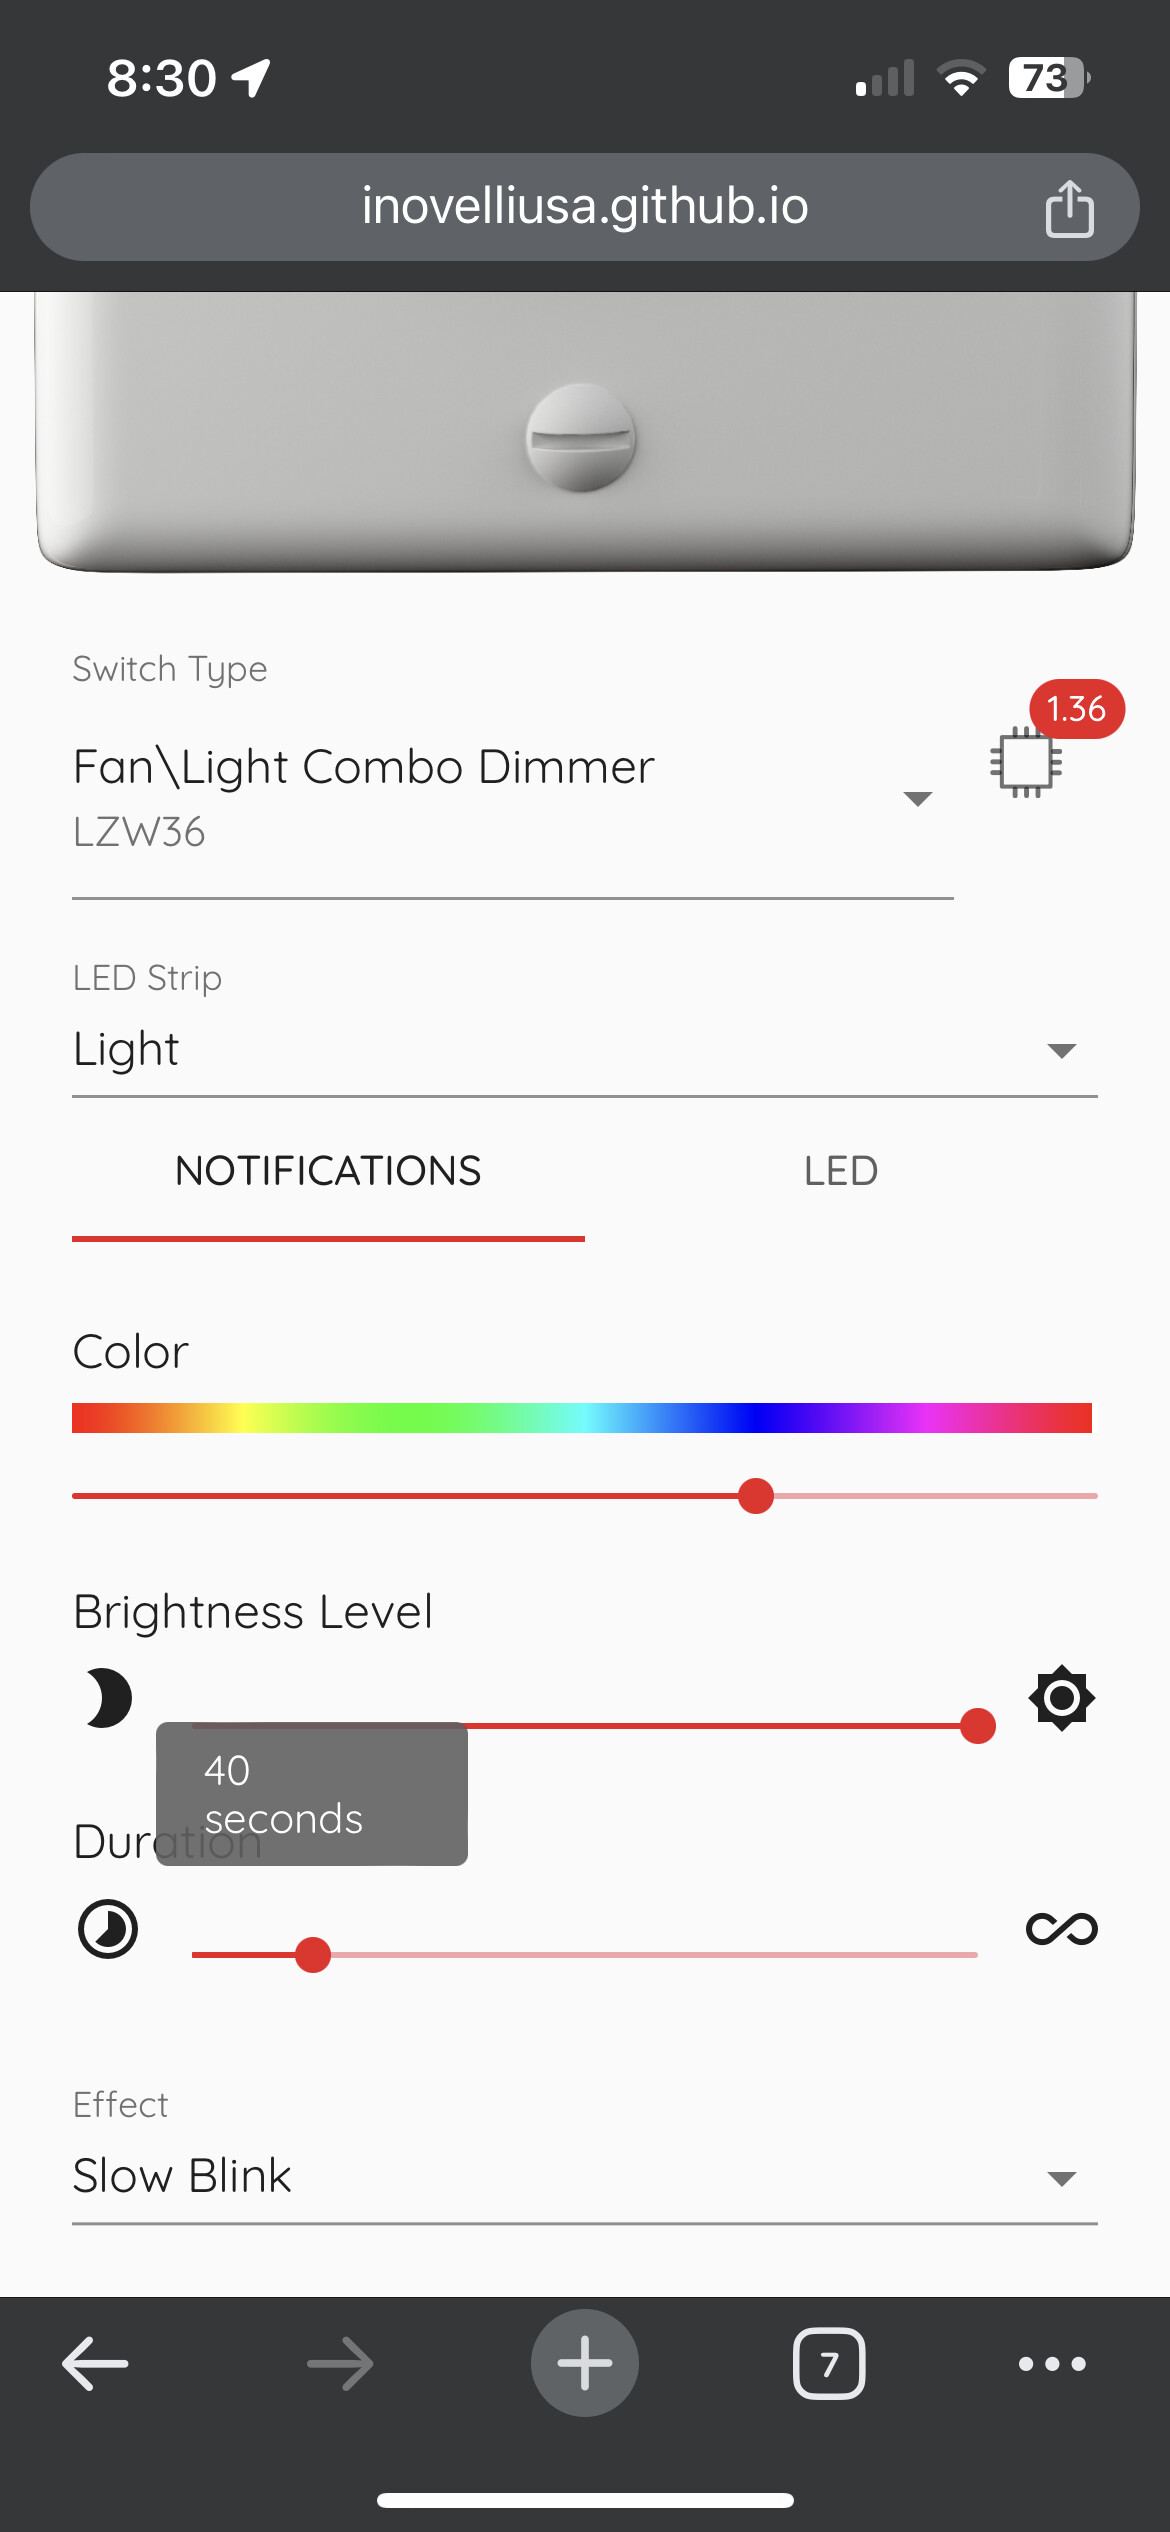
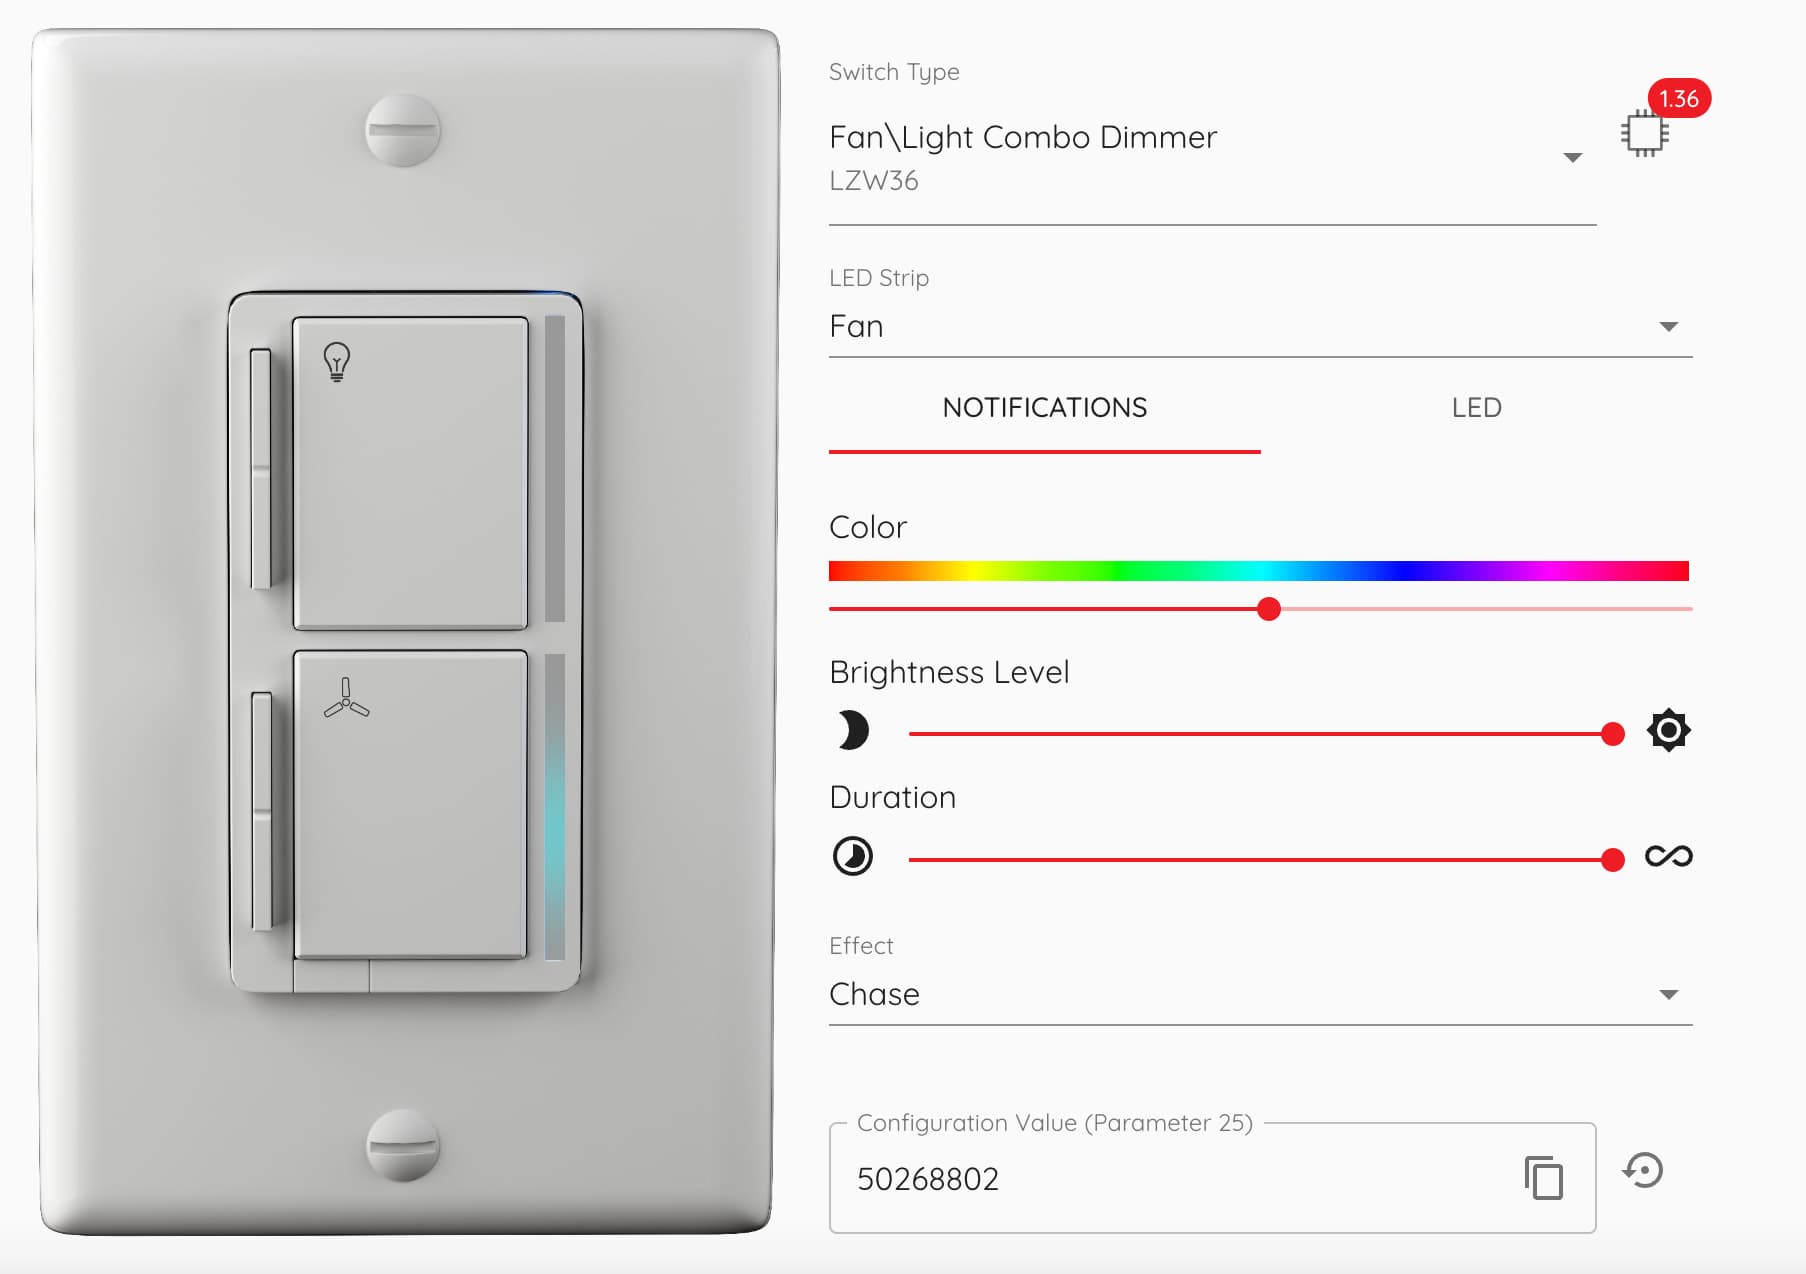
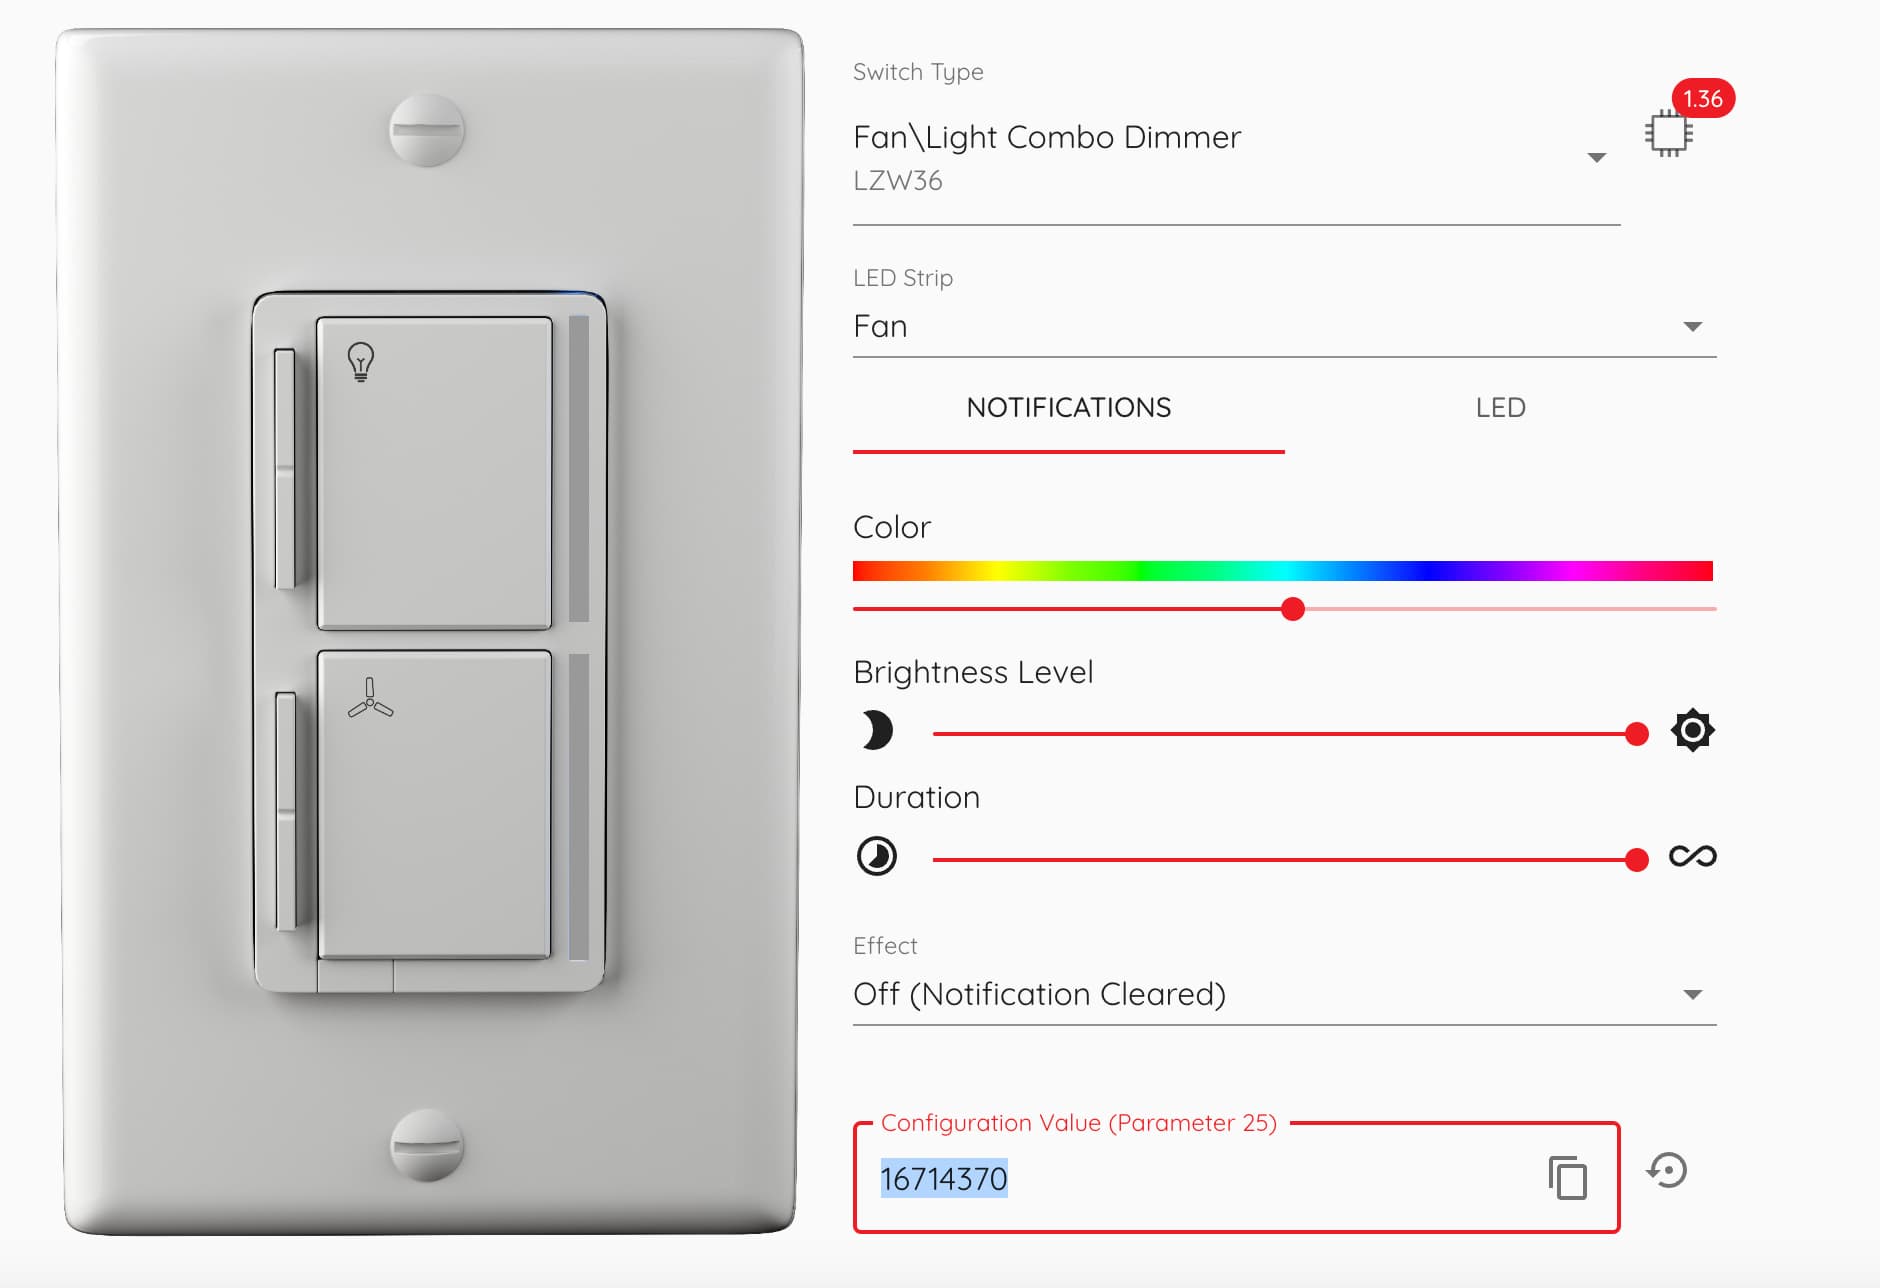
Using the online Inovelli Switch Toolbox select the LZW36 and configure the options for the notification settings you want. In my example, I want a Cyan LED with Chase animation at full brightness running indefinately until I stop it.
-
Copy the configuration value (i.e. 50268802) shown at the bottom of the Inovelli Switch Toolbox.
-
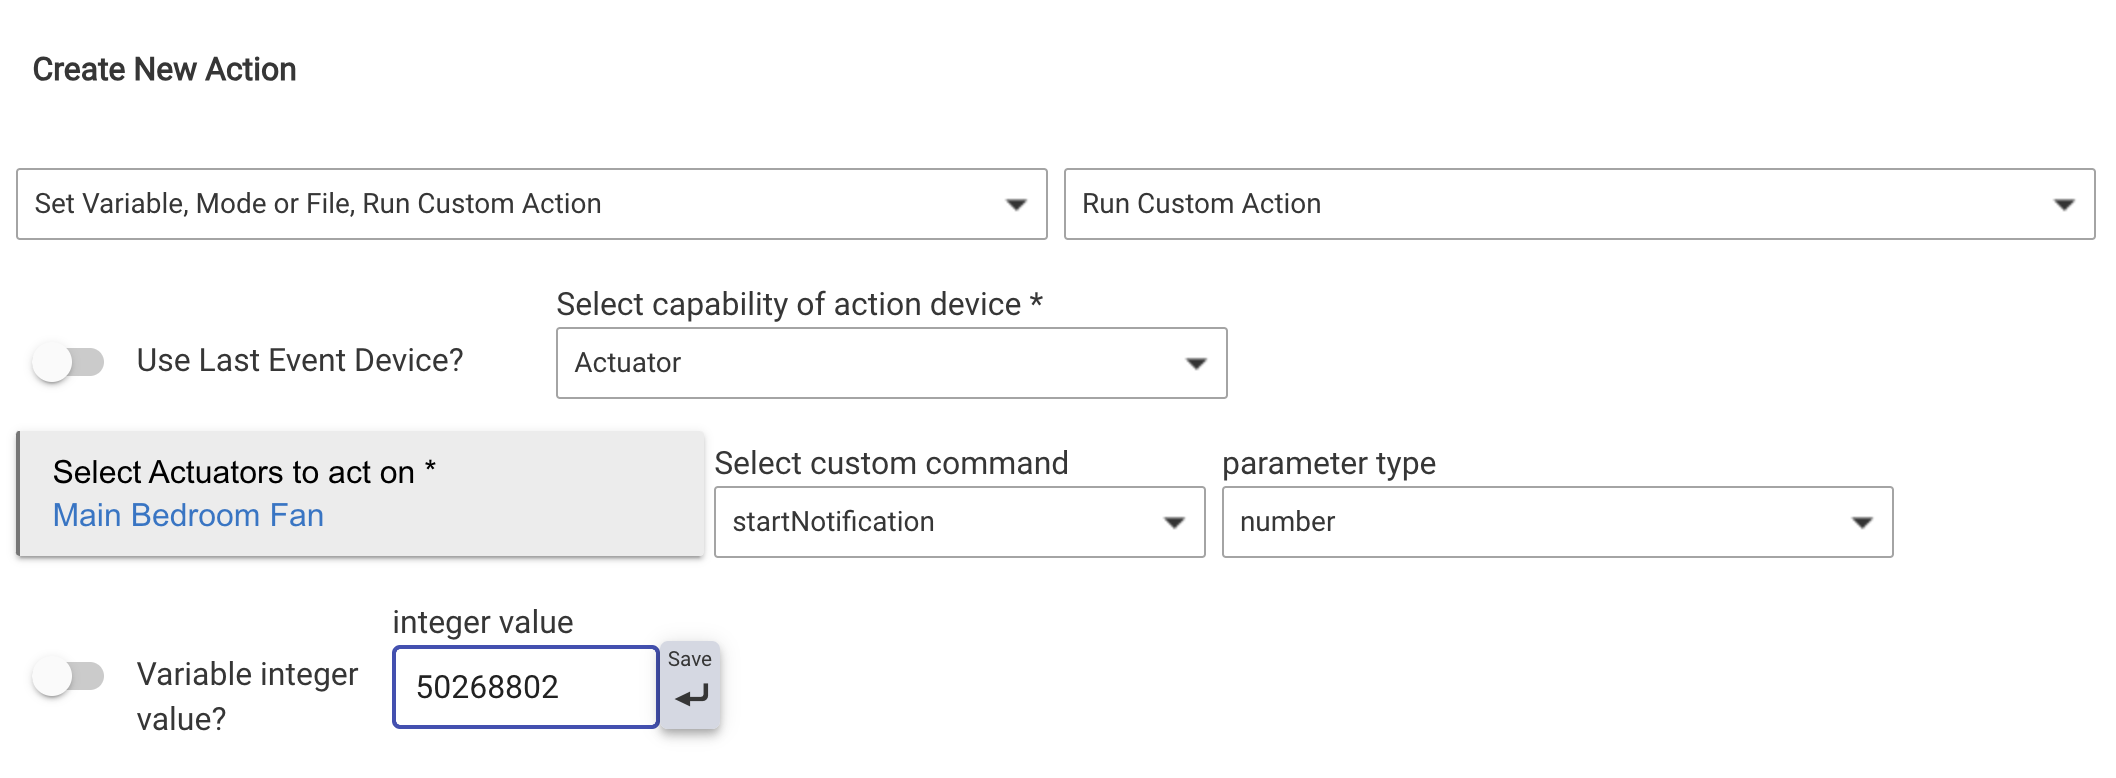
Paste the configuration value in the Integer value box and press the return arrow to save it.
-
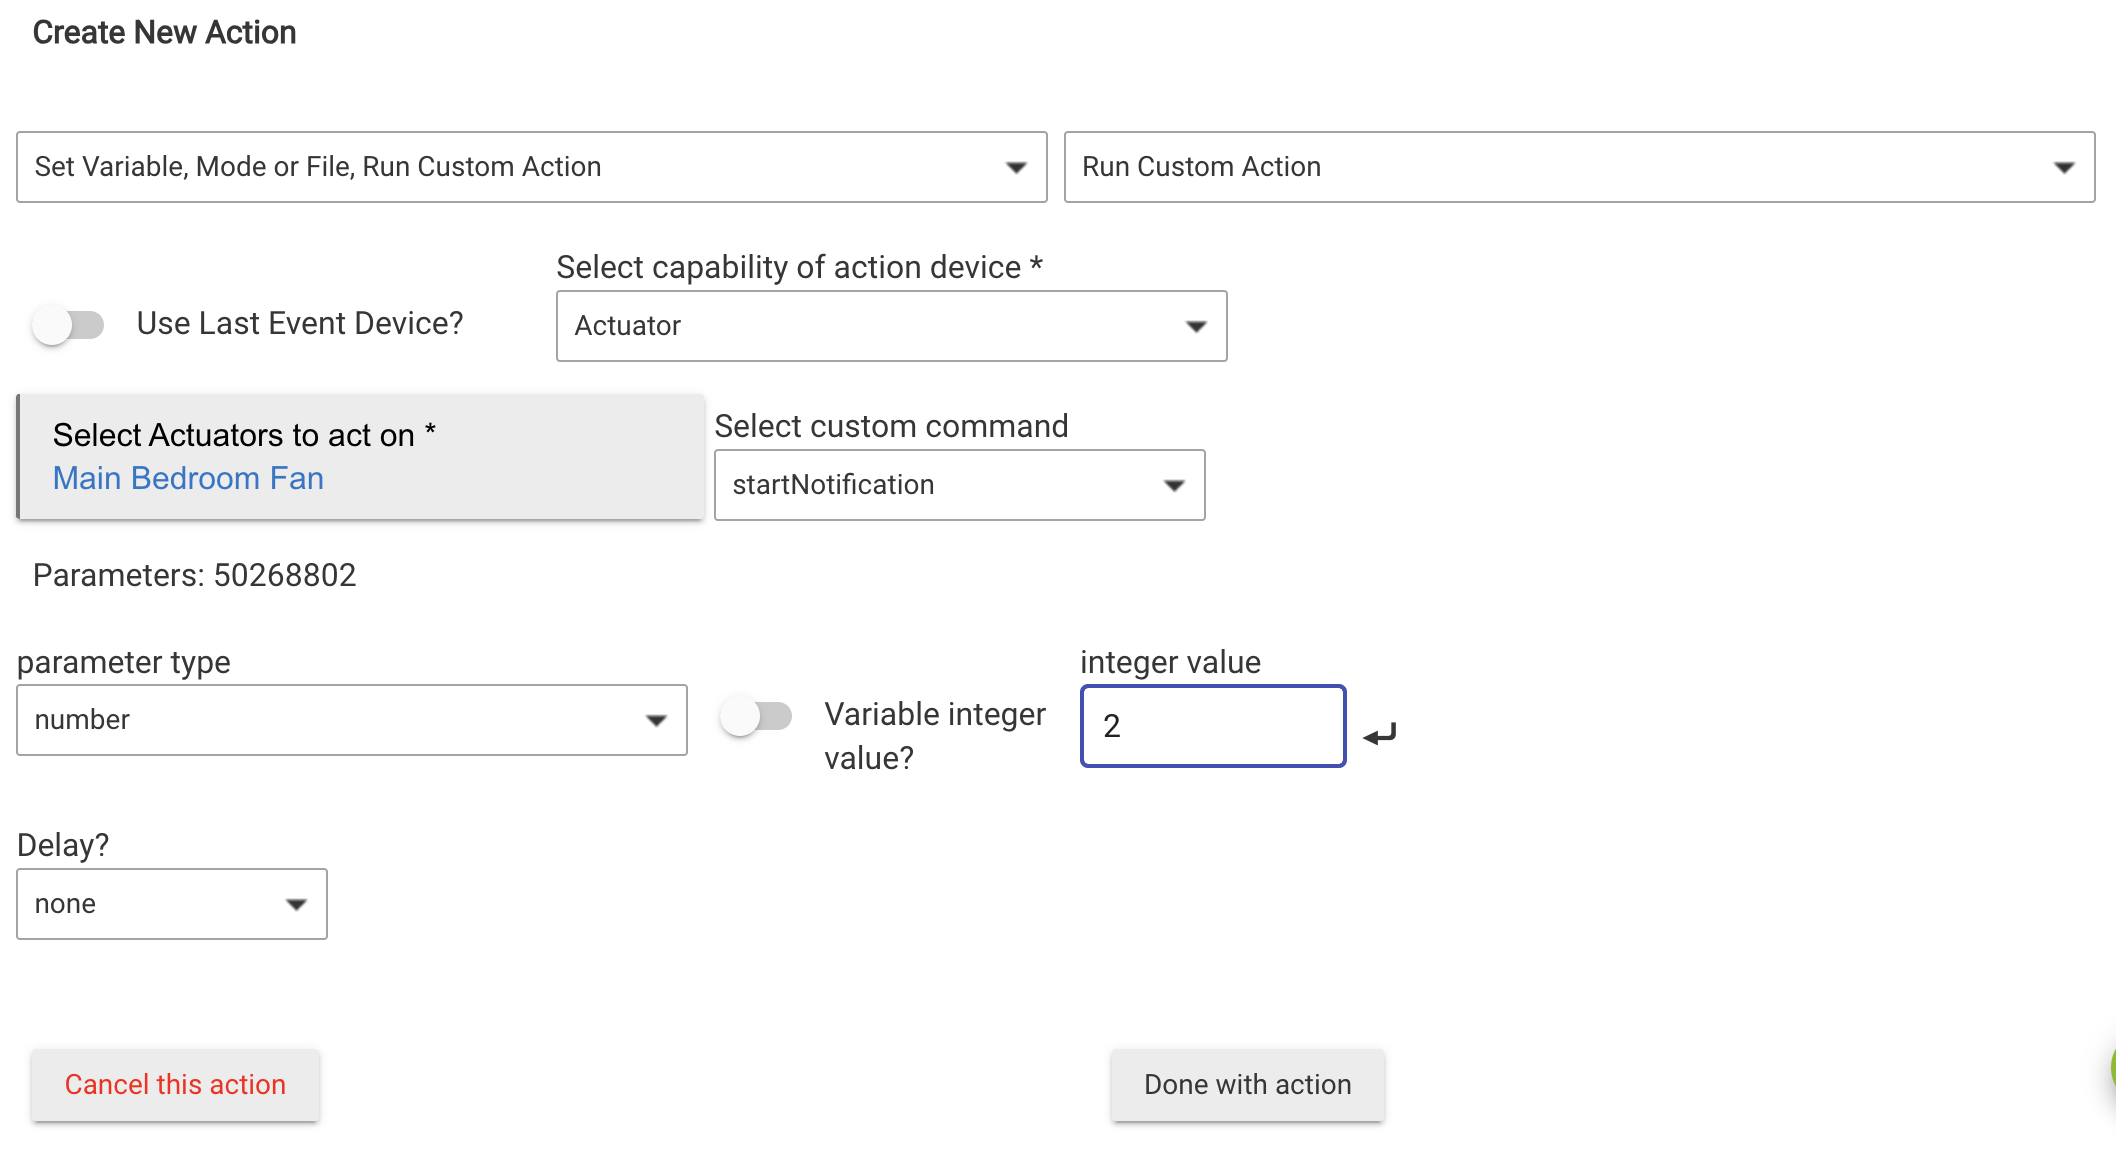
Select Add another parameter and again select number for the parameter type.
-
Enter either 1 or 2 for the LED indicator you want your notification to appear on. The Light LED indicator is 1, whereas the Fan LED indicator is 2
-
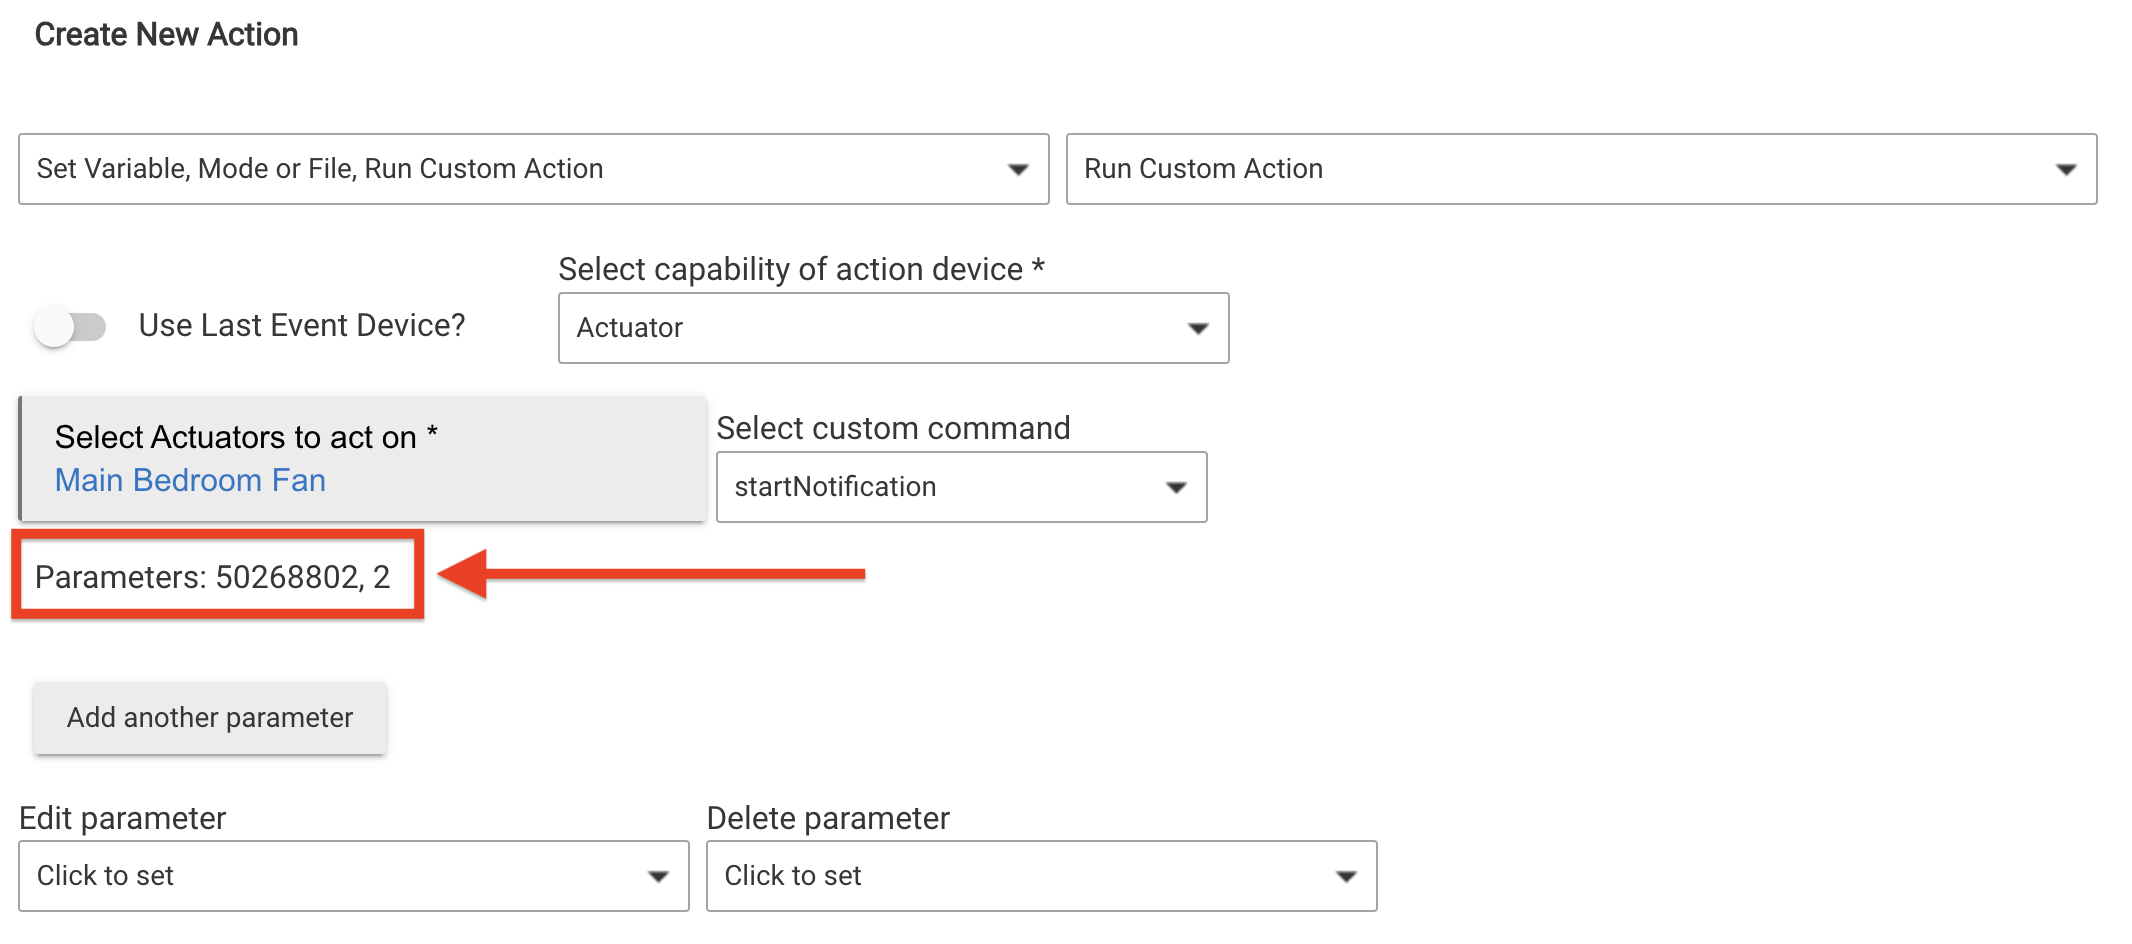
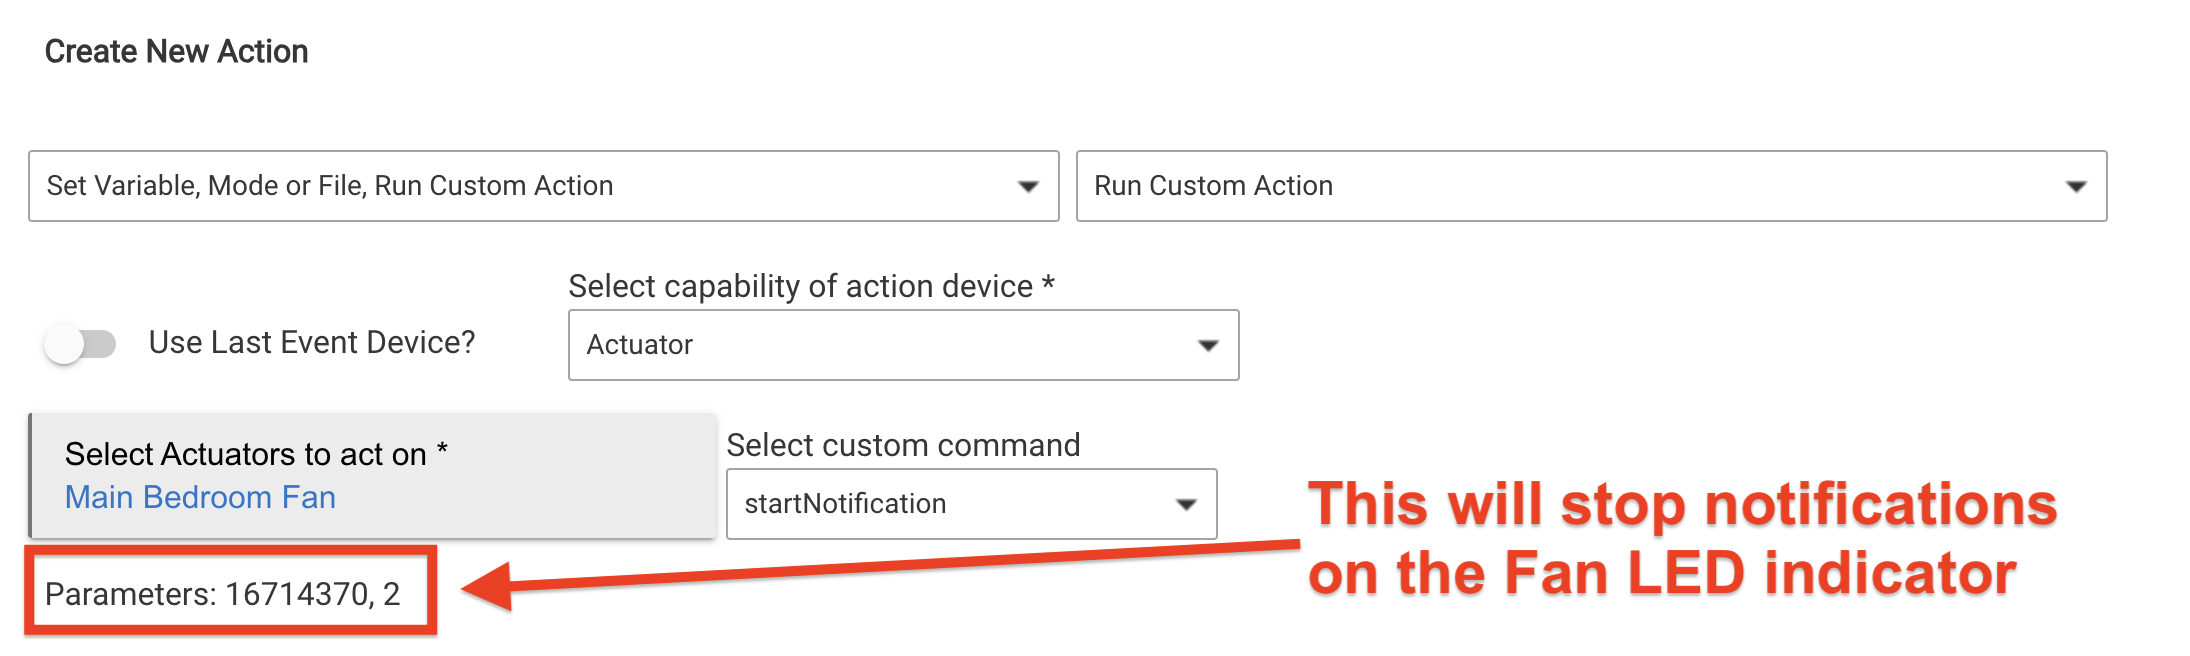
The completed parameter settings should look like this, with the parameter number you copied from the Inovelli Switch Toolbox (this number is different depending on how you configure the options in the Switch Toolbox, and the second parameter as explained in the previous step determines which LED indicator will react to the parameter value copied from the Switch Toolbox).
-
As mentioned earlier, the stopNotification is not used to stop a notificaiton. No clue what it's for, but it doesn't stop notifications. To stop a notificaiton, you have to use startNotification, with the parameter value 16714370, which you can get from the Inovelli Switch Toolbox.
- Put it all together in a Rule Machine rule using conditional actions.