I recently purchased my first sensor (Zooz ZSE42 water leak sensor). I'm not very technically savvy, so trying to get the sensor to work and send me an email when things got wet was a big challenge for me.
I discovered that since the birth of email spammers, pretty much all email is sent/received with some sort of encryption. Most ISP's now block Port 25, which was the original unencrypted port used for email. Trying to figure out how to do encryption on the Hubitat is a far more technical challenge then I was willing to tackle.
So I figured out that what I needed was an SMTP Relay. This would allow me to send unencrypted email from the Hubitat over my local LAN to the relay device. The relay would then encrypt it and send it out to the internet to my email provider.
There are services on the internet that do SMTP Relay. Some are free and others are not. The ones I looked at seem to be major overkill for what I needed to do. That is, send a single email if and when the sensor detects a water leak.
I discovered that my Synology NAS can do SMTP Relay. Here is step-by-step instructions to do that, plus how to setup the Hubitat to detect a condition and create/send an email.
SYNOLOGY NAS SETUP
On the Synology NAS, go to the Package Center and install the 'Synology Mail Server'. It might prompt you to install additional packages. Just accept them all and install it.
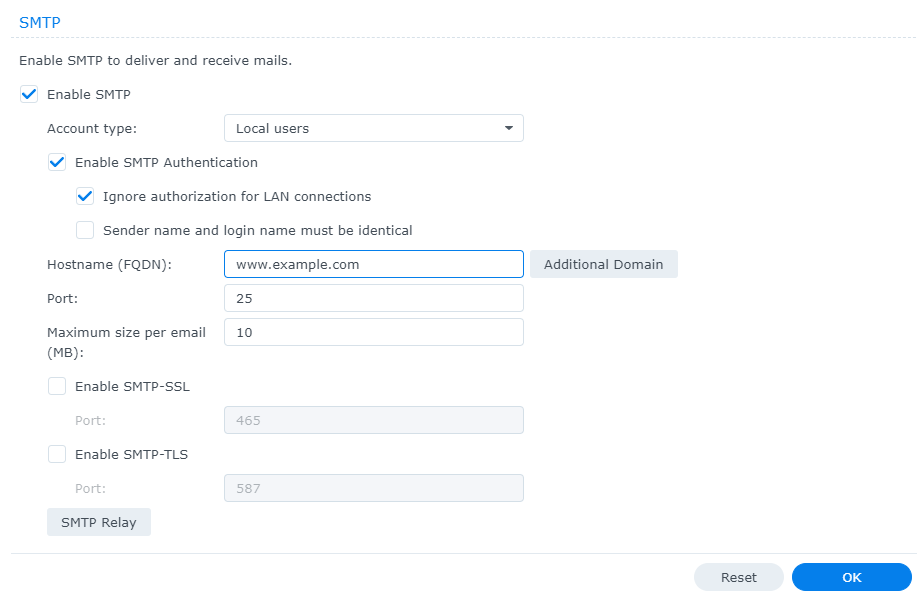
Click on the Mail Server icon. Then click SMPT. You should see the image below.
Set the options as shown above. Check "Enable SMTP" and set account type to "Local users". Then check "Enable SMTP Authorization", and check "Ignore authorization for LAN connections". Finally, enter the internet address of your email provider in the "Hostname(FQDN)" box. Leave the port at 25 and the "Maximum size per Email" can be a number that limits the email size. Specifying a 10 here means emails up to 10 Megabytes will be allowed.
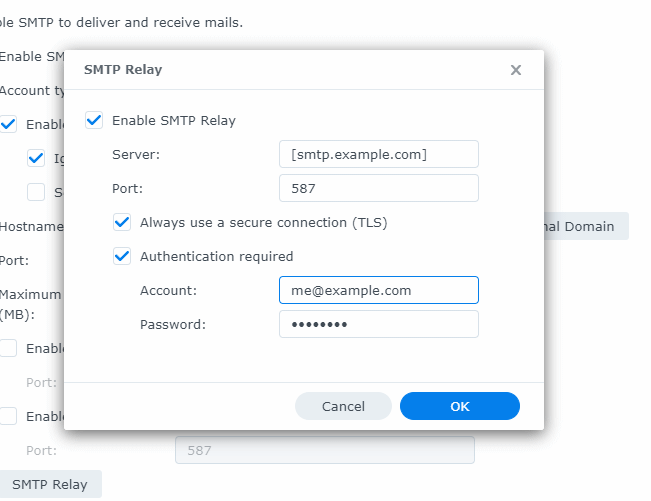
When all your settings are done, click the "SMTP Relay" button.
Check "Enable SMTP Relay". In the server box, enter the SMTP address of your email server. Adding the brackets around the name will prevent certain checks on the server, which may make it all work for you. Check the two remaining check boxes, and enter your email address in the Account box followed by your email password. Click Okay, then Okay again on the previous screen.
HUBITAT SETUP
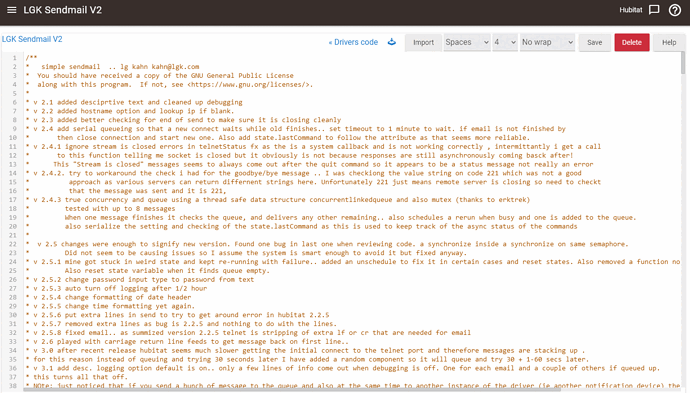
First step is to install "LGK SendMail V2" device. There is a V3 version in Hubitat Package Manager, but I tried it and it did not work me. So we're going to install the driver from Github. Go here to get the code:
https://github.com/lgkahn/hubitat/blob/master/sendmail%20V2
Then click "Raw" on the right side of the browser screen and select and copy all the text in the window. Next click on Hubitat left side menu "Drivers Code", select new device and paste the text into the blank window. The click "Save" button to install the new drivers code.
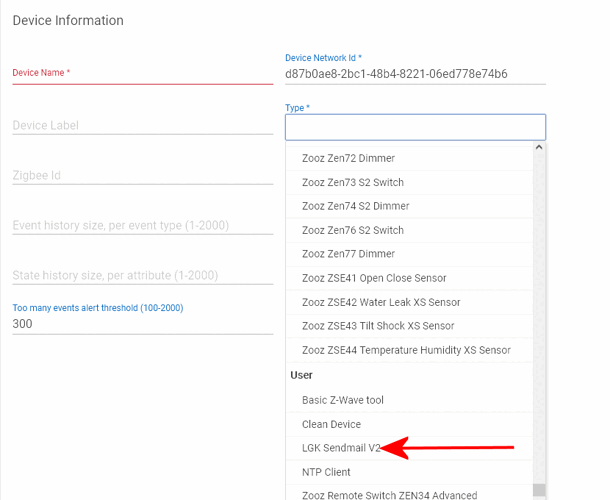
Now we are going to create a new device that will be our emailer device. At the main menu, click on "Devices" in the left menu, then at the top right, click "Add Device". A new window will open up. Click the "Virtual" button. Enter name for your new device for example "Emailer".
Scroll all the way down to the bottom of the type list and under the USER section, select the "LGK Sendmail V2" device.
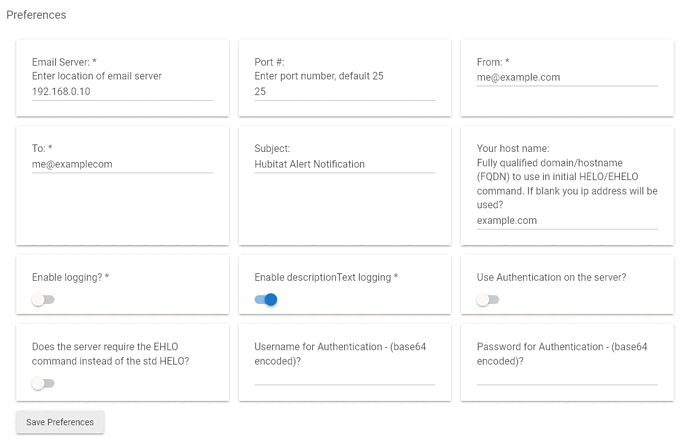
A second window will open up as shown below:
In the "Email Server" box enter the local LAN IP address of your Synology NAS. If your NAS is not setup with a static IP, now would be a good time to that. For Port, enter 25. The "From:" and "To:" boxes should contain your full email address. The "Subject" field can be anything you want, which will appear in the Subject line of the received email. Now click "Save Preference" to save it all.
TESTING
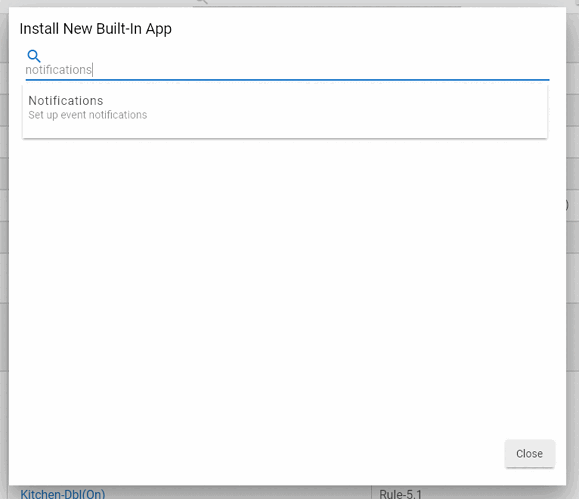
Let's test to make sure it all works. To keep things simple we are going to use a "push" event on a button to send an email. First, install the "Notifications" app by clicking on Apps, then on "Install built-in app". Search for the Notifications app and install it.
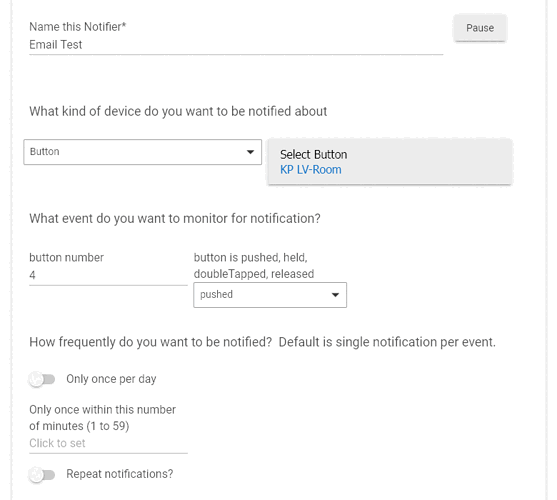
Now go to the apps list and click on the Notifications app to create a new notification called "Email Test".
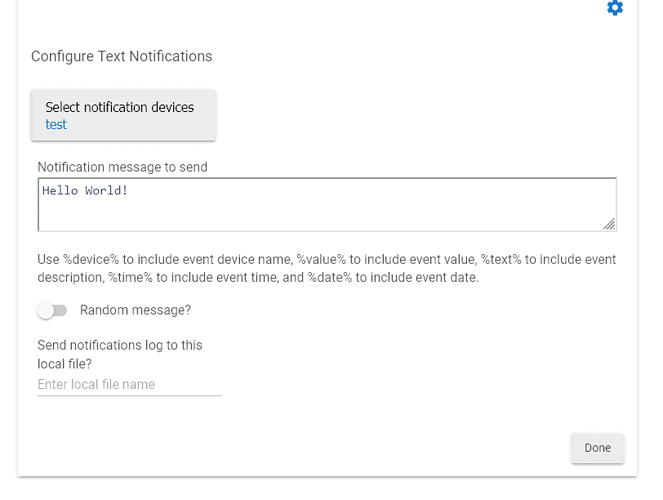
Select the button device and button number you have, and select the "pushed" attribute. Now go down the bottom of the screen and select "Text Notifications".
Choose your emailer device in the "Select notification devices" box. For the "message to send", type anything you want, which will appear in the Body section of the email. Then click done.
To test it, simply push and release the button you specified and you should get an email a few moments later.
A few notes: If you have domain hosting with a shared IP address, you can create another email device with a different "To:" address to send email to any domain within your shared IP. Unfortunately, the Synolgy SMTP Relay does support multiple relays (that is, multiple SMTP external servers) so you're stuck with a single remote email address.
I hope this helps someone out to configure email notifications.
