Homemade Environment Sensor + Arduino Shield

Do you see any hubitat logs coming in after the first 2?

Thanks
Iman

Not for the Child 'ExampleSerial' device. I do see data in the logs for the normal sensors.

The log should be on the parent not on the child as I am not logging any thing on the ExampleSerial.

If you see activity as you toggle (I know it is hard to read as it require some parsing), there could be a logic error on my ExampleSerial. But, this mean the data is received. If you see log activity corresponding approximately to the toggle, that is a good sign.

Data from serial port would look like below on the log

0104 1001 08 01 0040 00 B017 01 00 0000 00 01 XXXXXXXXXXX

I added some simple logging to the Child Driver.

There is no Live Log activity for any device when I toggle the digital input pin, once it stops working (after 1 or 2 transmits immediately after a power on of the shield.)

It's late here so I am going to stop troubleshooting for the night. Thanks for you assistance. If you figure anything out, I'll be happy to test tomorrow. I can also ship the board back to you if you'd like to troubleshoot it locally.

Ok. thanks. Have a good night.

Here's some of the Live Log data for you to review. This is an example where I was able to get it to work twice (once Low and once High) before it stopped transmitting data. I toggled the inputs multiple times afterwards, but no serial data was received by the hub.

Good night to you, too! :slight_smile:

Hi Dan,

I have been thinking about it. I think the issue may not be wiring (connection). I think you are good. I tested the module with my Arduino before I sent it to you.

It could be something else. If possible, can you test with dedicated USB charger. They can supply power better. This is just a try. I do not know whether you have some sort of power issue. But, if this can be done easily, why not?

I took your Arduino code on the ExampleToSendAscii. I have very good result with it.

Thanks
Iman

I have already tried that. I was using a genuine Apple iPhone charger originally (5V @ 1A = 5W). Last night I tried a genuine Apple iPad charger (5V @2A = 10W). There was no difference.

I'll try to find another USB extension cable to see if the one I have has a problem.

At this point, we can rule out a serial port connection issue. I think the packet is dropped on Zigbee side. At one point, I have arduino sketch that send packet every 2 seconds with a counter to test the serial port. I delete it since. It is easy to modify the ASCII example to do this You can run it a while and confirm whether the packet stop sending after the second one. If it not too much problem, you can try to move the module around and re-pair so that the module will be on different route.

If you like to send it back to me, I will be happy to try that module in my home setup and see if I can see your issue. If the issue is on the Zigbee side, this can confirm it as well.

Thanks
Iman

@iharyadi - Iman, not sure what is different this time... :wink:

I decided to try one more time to perform the following sequence:

  1. I unpaired the device from my Hub via the Remove button on the device details page.
  2. I performed a full reset of the Env Sensor Shield by removing power, holding the reset button down, powering the board on, holding the button for ~10 seconds, then releasing the button. I left the board in this state for another 10-20 seconds.
  3. I power cycled the board, then paired it back to my hub. I added the JSON for the two child devices, then clicked SAVE.
  4. Now the Serial test is working exactly as expected.

I have no idea what has changed. I did notice that it took the hub longer during the pairing process when it says 'Initializing' as compared to previous attempts.

I will play around with the sensor some more to see if anything obvious happens that could be linked to the board stopping sending data (if it stops again!) Hopefully it will continue to run properly!

Just some more information - the hub this sensor is paired to has only one other Zigbee device paired to it - one of your earlier Environment Sensor EX boards. No other Zigbee devices are on this development hub. The hub and both sensors are all within 4 feet of one another. I have also made certain that the Zigbee channel in use by this hub does not conflict with my other hubs.

This in line with my expectation that there maybe some issue on the Zigbee side. This is a whole different game. My arduino example send about 10 characters every time (even the ascii string is smaller size for easy implementation) + all the frame overhead. Could there be some path in the middle prior you did the above that is not friendly to sending this size of data?

Please do share with me if you learn more about your previous issue. I am glad that you get it to work. But, at the same time, if we can learn what happen before, I believe the information can be useful for me and perhaps anyone else.

Thanks
Iman

If you have time, would you mind testing this new module with the hub one on one? Then, with the hub and my other sensor and this new one.

Just FYI, I do this testing at home and see no issue. But, I may not have the same hub as yours. I am curious.

Thanks
Iman

I powered down the older Environment SensorEX, so only the new Shield Sensor is connected. It is still working fine. I even power cycled the Zigbee Shield, and it still works. I also restarted the Arduino, and it still works.

I'll keep testing and tweaking to see if the problem returns.

Thanks for your assistance!

1 Like

Quick update. Everything is still running smoothly after another couple of days.

1 Like

Thanks for letting me know.

1 Like

This information is specific form Arduino Mega 2560 shield.

Connections

There are 3 connections that need to be made from the shield to the Arduino. There is one optional connection depending on how you power the Arduino. When starting, it is make sense to use jumper cable to connect the shield and Arduino. Here are the connection that need to be made.

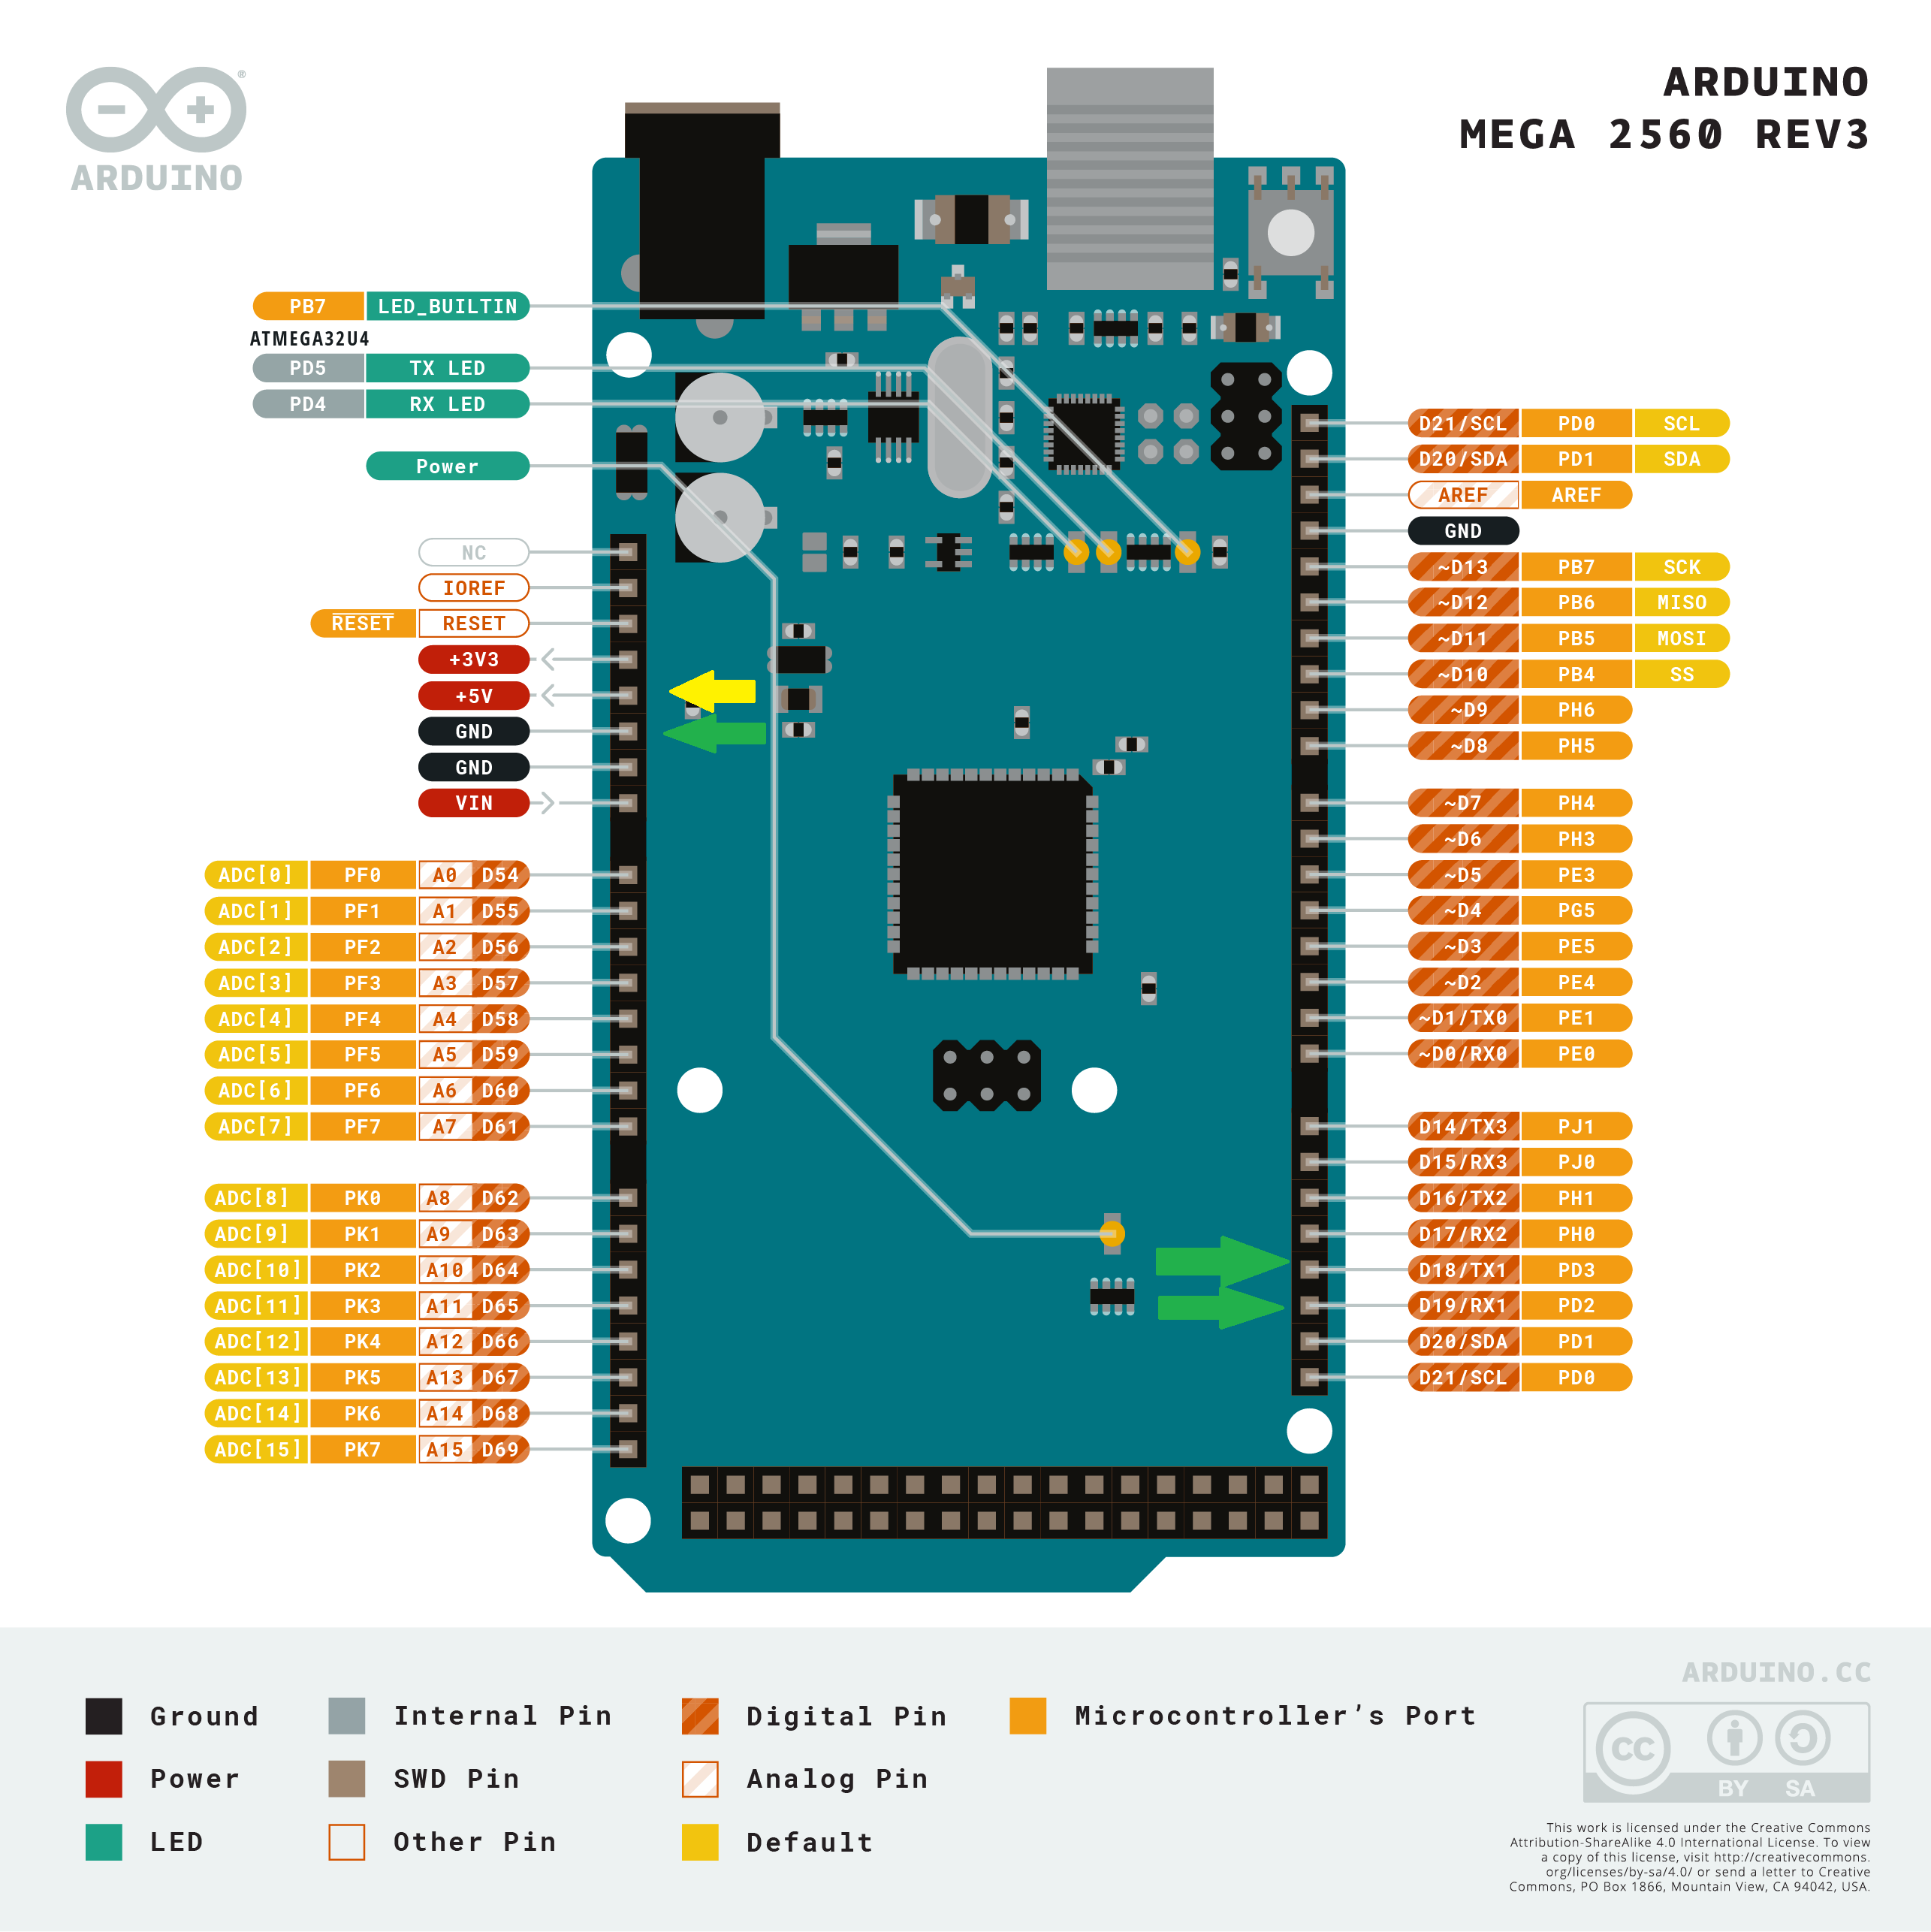
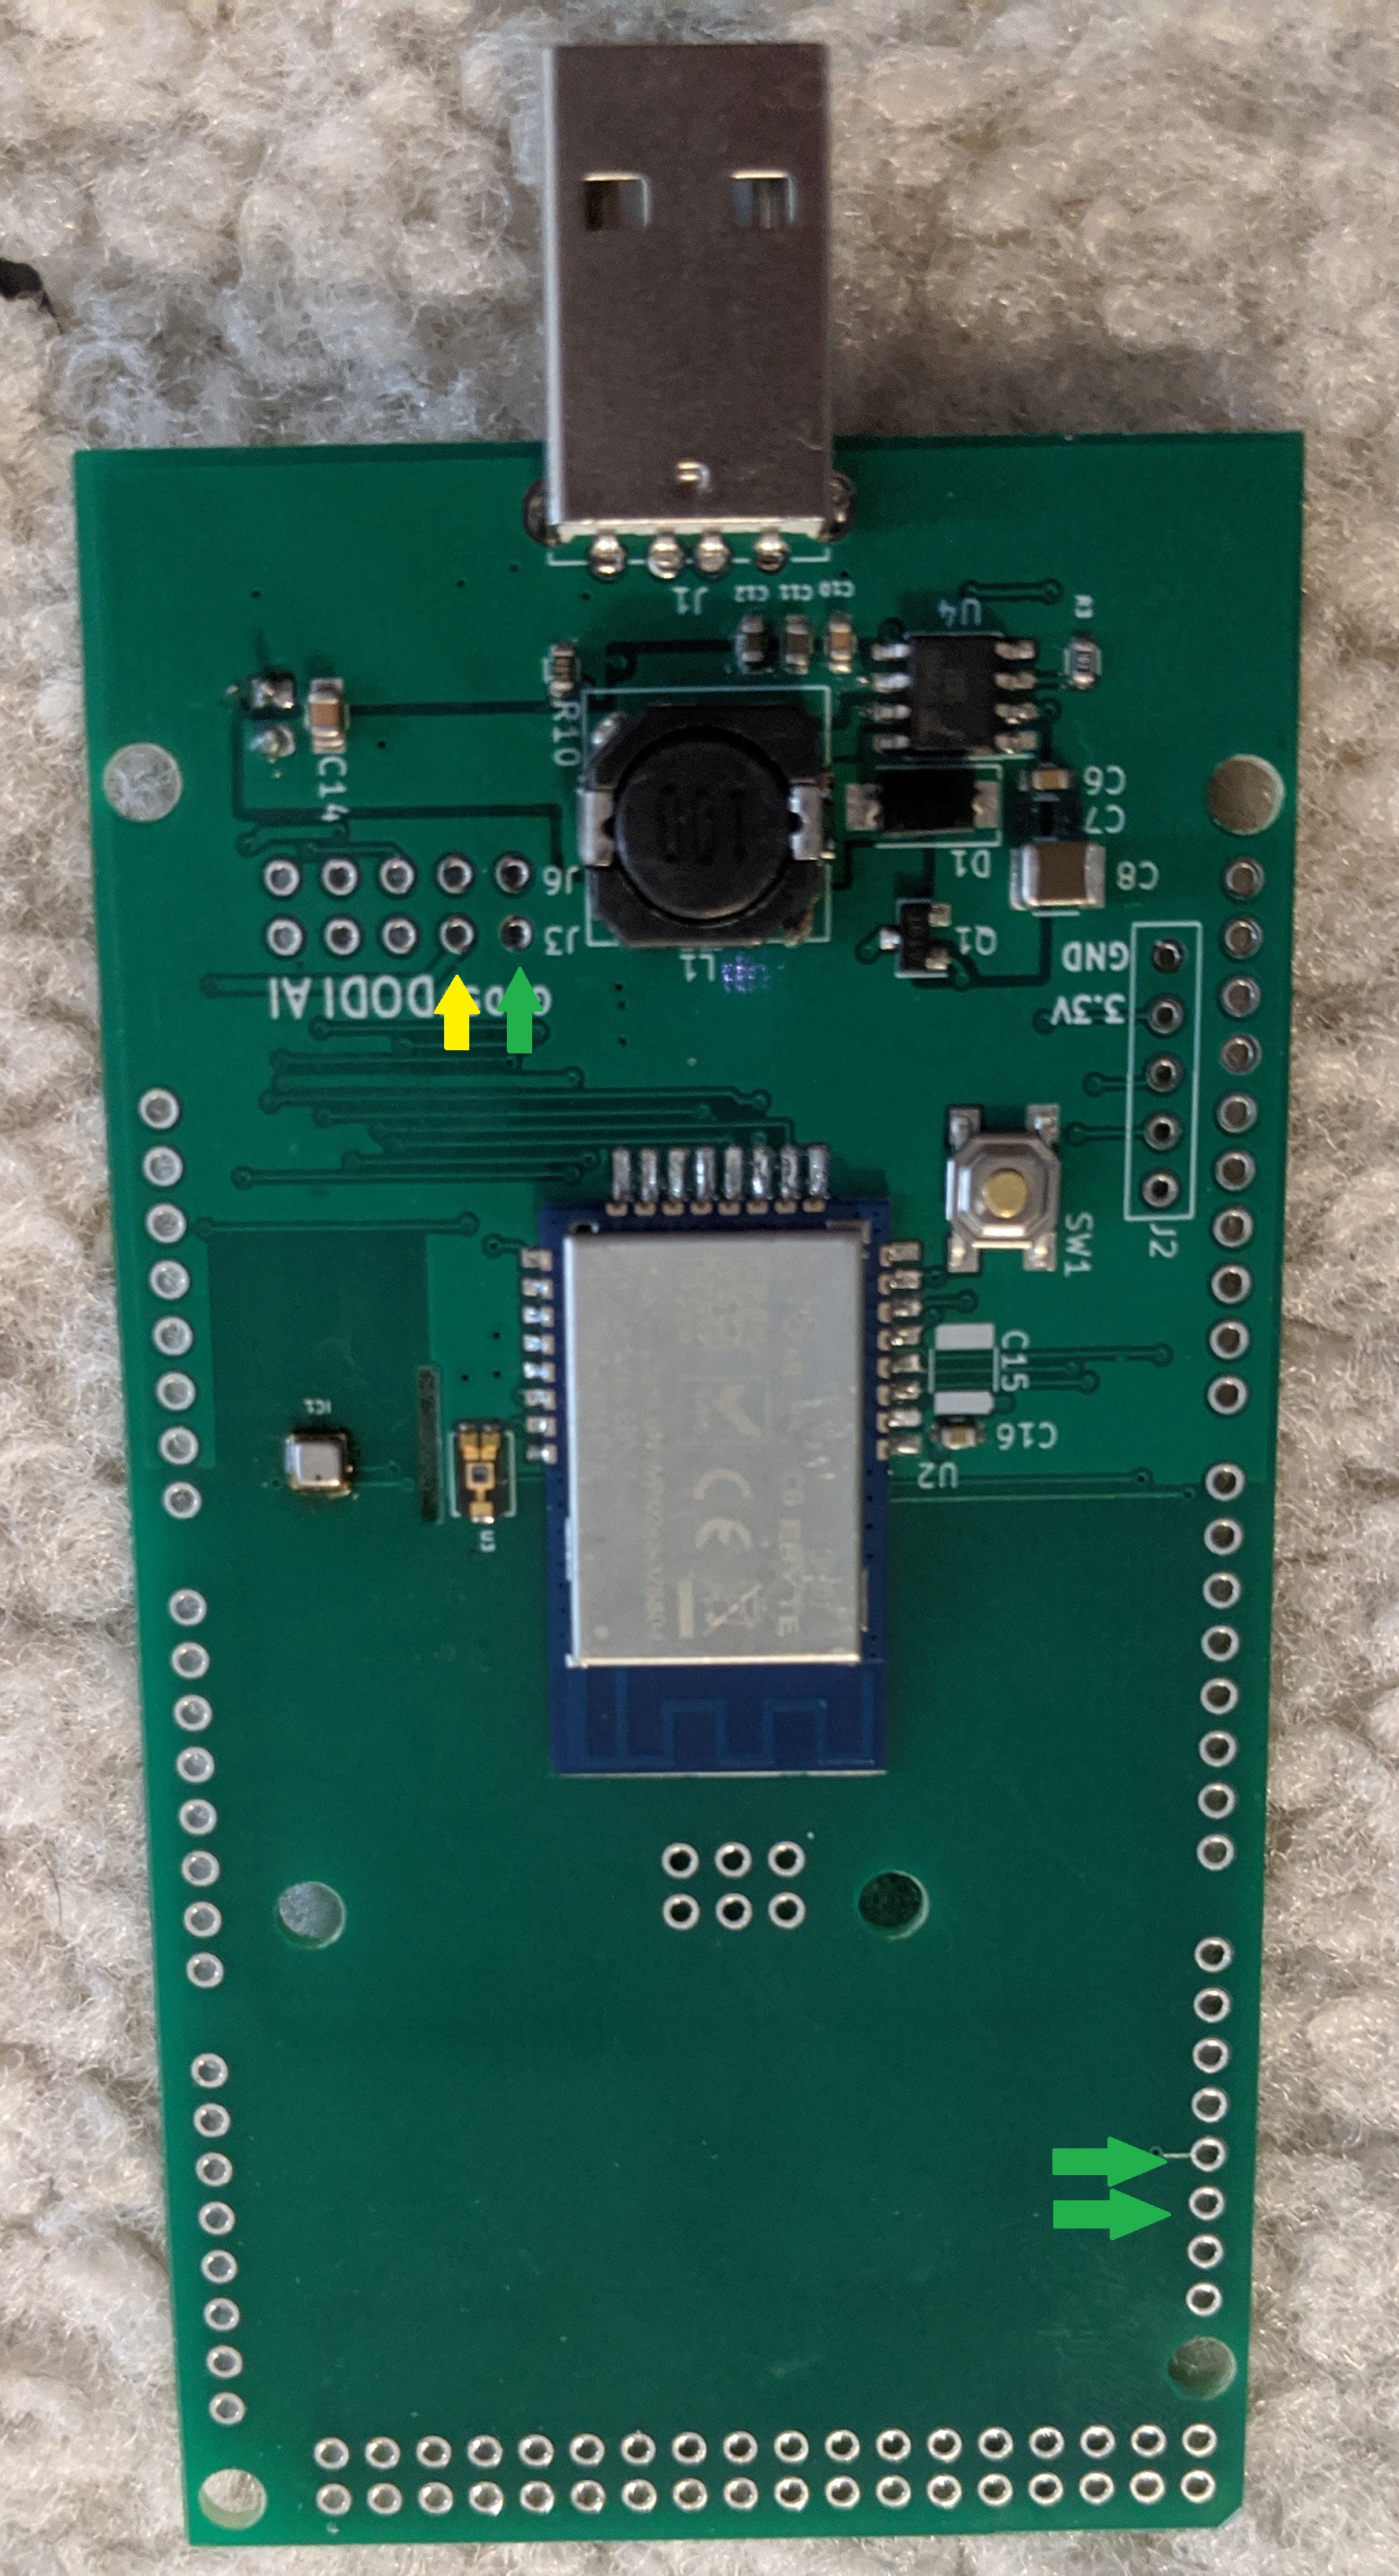
You will need to make the green arrow connection. The yellow arrow is needed if your Arduino take power from the shield. WARNING: If you make the yellow connection, you should not power your Arduino separately. It probably not going to cause any problem, however, my personal opinion is just don't do it.

Moving into more permanent setup, you do not have to consider the green arrow above. With the headers installed and shield and Arduino stacked on top of each other, you will make the green connection by default. Please do not route cable manually once in this configuration. The 5V power is still separated.

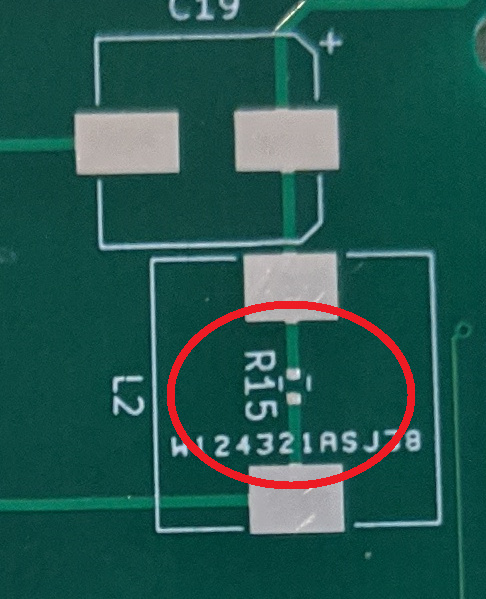
The next stage of connecting if you decided to get power from the shield, you can short the following jumper (red circle).

Example

To introduce this shield I am making GPIO proxy as an example. GPIO proxy sketch is basically expose arduino GPIO for us to use in our DTH. It serialized the Arduino GPIO pin API through the serial port which in turn send them back and forth between DTH and Arduino.

My goal with the example is to make GPIO expansion. Arduino Mega 2560 has 60+ GPIO pin usable to drive relay or take input from sensor and switch. Here is some pictures for the test.

Google Photos

Google Photos

This shield communicate to the Arduino using Serial1 object in the sketch. A couple of the green arrow above is the connection. If you skip the Arduino UNO instruction above, here is a brief information on how to send data back and forth between Arduino and hub though the shield.

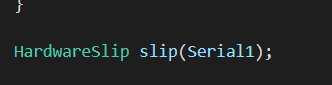
We will be using SLIP protocol. Here is my implementation library for Arduino.

You can declare it as global variable in your sketch.

image

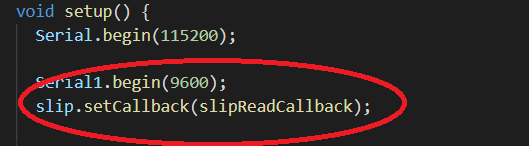
And initialized it this way in the setup.

image

Any time you want to send data to the hub, just do this

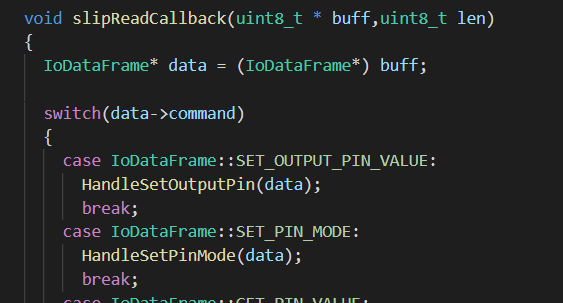
Data coming in to theArduino look like below.

image

The packet it can be any form. The GPIO proxy has format that is specific to the example. However, the only restriction on the packet is the size. It can deliver at minimum 32 bytes. In some case more. This is the detail on how SLIP handle escape bytes. If you need to send data more than 32 byte, you can fragment the data and prefix it with index so the receiving end can re-assemble it. But, word of caution, Zigbee is not design to stream data. It is not like you can stream image or audio back an forth.

DTH for GPIO Proxy device in the example.

Here is the DTH shown in the demo. You will have to install it in your Device Code. There is an app called. GPIOManager_App.groovy to help you adding the child devices and associating it to the GPIO pin.

1 Like

Shield for Arduino Due is available. The information for Arduino Mega 2560 above is the same with the exception that the shield work only with Arduino Due. Arduino due is 3.3V based MCU. The Arduino Due shield will only work with 3.3V MCU.

Arduino Due is faster platform compared to Arduino Mega. It also has more GPIO interrupt support. I am have specific version of GPIOProxy for DUE as an example.

I am personally are building multi relay system. I am up to 24 relay now. I planning to see if I can build something up to 64 relay. The challenge is supplying power to power the relay. It will require a lot of current if one need to turn on all the relay. The type of relay you see below is a mono-stable relay. The relay has 2 positions. It will require power on one position.

1 Like

I have a favorite website for how to properly wire a relay board to to microcontroller which ensures that minimal current is drawn from the Arduino and the relays are powered by a separate power supply.

You’re probably already aware of how to accomplish this... I figured this might be a good place to leave this for others who may have the same question.

http://arduinoinfo.mywikis.net/wiki/RelayIsolation

1 Like

Thanks Dan, Indeed that is a good info.

1 Like