Use Case: Use Garmin watch to control a HE device.
Requirements:
• Tasker Widget
• Android
• Tasker (app and autonotification)
• Maker API
App Installation:
• Android: No install needed
• Tasker
Install from Google Play
• AutoNotification
Install from Google Play
• Tasker Widget
Go to the following link and follow the instructions: Connect IQ Store | Free Watch Faces and Apps | Garmin
Once you have installed the Widget, in the instructions there will be a link to download a profile that will have to be imported into Tasker. This profile is what actually links Tasker and the Widget app so that when a button is pressed, it executes the task in tasker (I just used the simple instructions, not the advanced as, at this point, I want nothing more than to toggle a switch for the garage door opener).
Download the xml file to your phone from the link provided in the instructions to your phone in a place where you can locate it.
To import the tasker widget profile Click on the “Profiles” menu tab on the top left, you should see an option that says “Import Profile”.
• Maker API
I Hubitat go to Apps and under “Add Built-in App” install Maker API.
Everything installed now is clean and ready to be configured.
Configuration:
• Maker API
Go back into Maker API that we installed before, and enable “Allow Access via Remote / Cloud (otherwise your commands won’t execute when you aren’t on your wifi). Next, go to “Select Devices” and select the devices you want to expose to your watch. I recommend being selective and only starting with the one you want to control. Once you learn, add on as you can so that you aren’t exposing your entire home automation system.
All we care about for this activity is to send a command. This isn’t about querying and getting a response or other such cases. In my case, all I want to do is open the garage door, which is basically just sending an “on” command to a device ID with a string for the cloud access. In Maker API, you’ll see something like below:
Background: To determine the device ID and what commands your device requires, use “Get Device Info” and “Get Device Commands”. This will be how you know what to use for Device ID and the Commands the string will accept.
The below link is the titled: Send Device Command
https://cloud.hubitat.com/api/XXXX/apps/XXXX/devices/[Device ID]/[Command]/[Secondary value]?access_token=XXXX
You want the whole string, but need to edit it. In my case I have a device ID for my garage door opener, lets say it is 999, I want it “on” (it is just a momentary relay, so it turns on and then automatically turns off), and there is no secondary value needed. So the string now looks like this:
https://cloud.hubitat.com/api/XXXX/apps/XXXX/devices/999/on?access_token=XXXX
This is the string that will go into the Tasker task that we create next.
• Tasker
Tasker is a very powerful app, though not precisely the most user-friendly (though much better than it was when I started using it 5 or 6 years ago), but no worries, this should be a fairly painless event.
At this point, you should have already opened it and have imported the Tasker Widget 2 profiles
- Open Tasker.
- On the top, you’ll see a menu tab named “Tasks”. Click it.\
- On the bottom right there will be a round circle with a “+” in it. Click it and name your task.
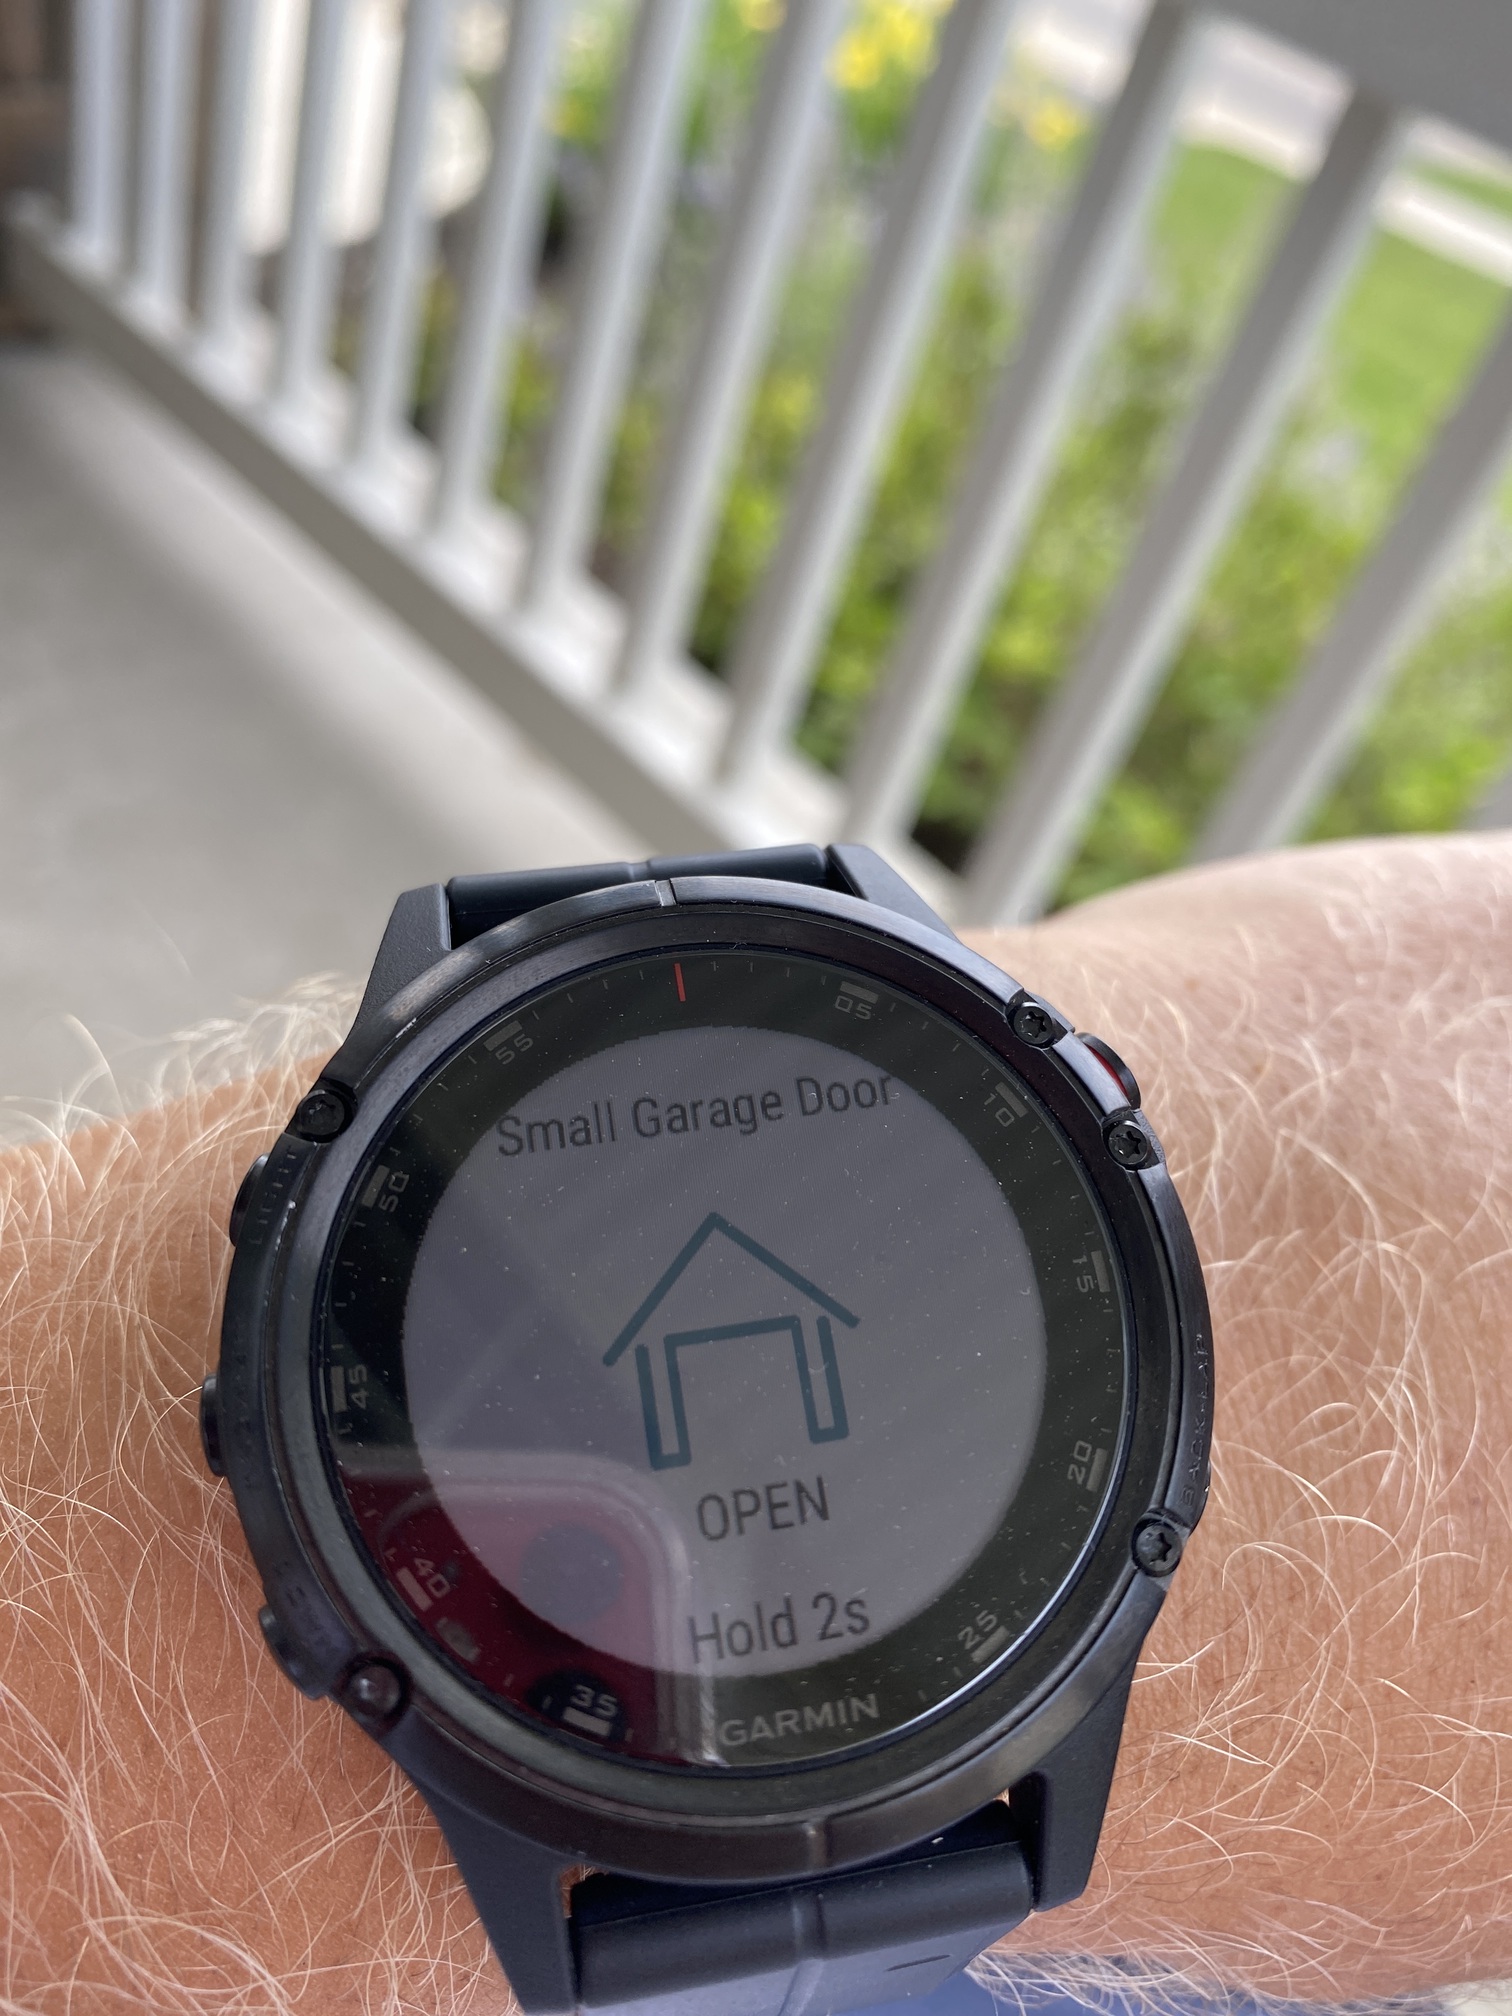
- Make it something short and relative to what you want to see on your watch, as this is what will be displayed. For me, it is “Open Garage Door”.
- At this point, you’ll see an empty list with just another circle and “+”. Click the “+”.
- A menu will pop-up titled, “Select Action Category”. Scroll until you see “Net”. Click it.
- Scroll down to HTTP Request. Click it.
- Once you have clicked it, scroll down to URL. In the URL field, insert the string from above:
https://cloud.hubitat.com/api/XXXX/apps/XXXX/devices/[Device ID]/[Command]/[Secondary value]?access_token=XXXX
- Once you have entered the string, click the back arrow at the top left of the screen.
- You have now configured Tasker to send an HTTP Request to the Hubitat Cloud and activate your device.
At this point, if you want to test if what you have setup in Tasker works, you should be able to click the Play button at the bottom left while in the Task. It should open the garage door…or turn on the light….or unlock a door….or whatever you set it up to go.
Don’t stop! We are almost there!
• Tasker Widget
Now we have to make the Watch work with the Tasker Task we just setup.
- As a Garmin user, you either have Connect IQ setup on your phone, or you have Garmin Express. For me, I have Connect IQ. Open it.
- On the bottom right, you’ll see My Device. Click it.
- Click on My Widgets.
- Click on Tasker Widget.
- Click on Settings.
- I my case, I didn’t want to use buttons, so I enabled “Skip buttons and load task menu…”
- Scroll down to Menu Task 2, and enter in the name of the Tasker Task you created earlier, EXACTLY as you created it. Again, in my case “Open Garage Door” (without the quotes).
- Click Save at the top right.
Open your watch, and setup the Widget so that it is on your widget through settings so that it is easy to get to. Just Google how to add a widget, this is something good to know if you are going to own this watch.
Now, navigate to your widget, click it, and scroll down to the Task name. Click it and one hopes the device will activate!
This was all written very quickly, so if something is weird or just plain sucks, let me know and I can tweak it. I just wanted to get something out there to help where I can.
PS - I have no idea how to remove those links that aren't really links.