Garage Door Double-Sensor Hack

NEWBIE EXAMPLE

In the summer, I sometimes manually “crack open” our multi-panel rollup garage door a few inches during the evening to let accumulated heat out. I have a MyQ rule that closes the door at midnight. [I have not automated the opening using a temperature sensor yet because I haven’t set up a Zigbee interface to the garage door opener.]

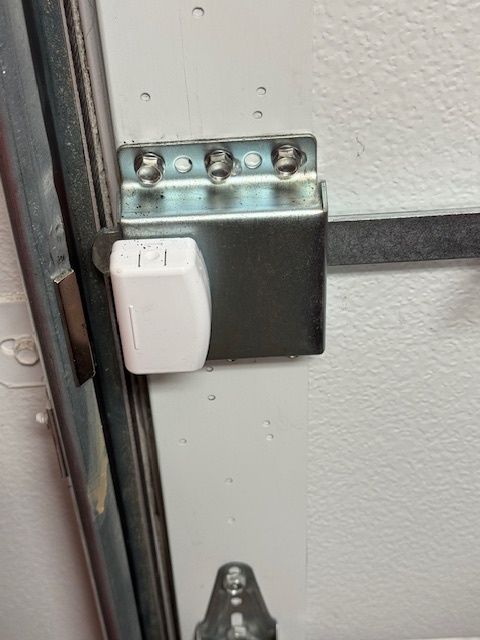
I track the OPEN/CLOSE state of the door using two ThirdReality Zigbee contact sensors. One sensor, mounted on the side of the door, indicates OPEN when the door has moved the length of the magnet (less than about 1.5 inches).

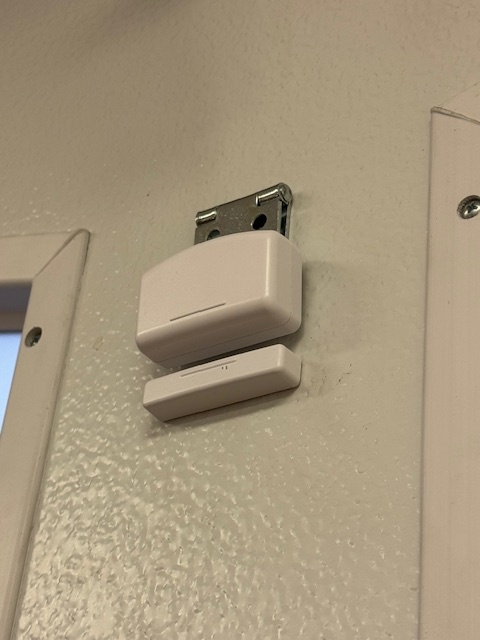
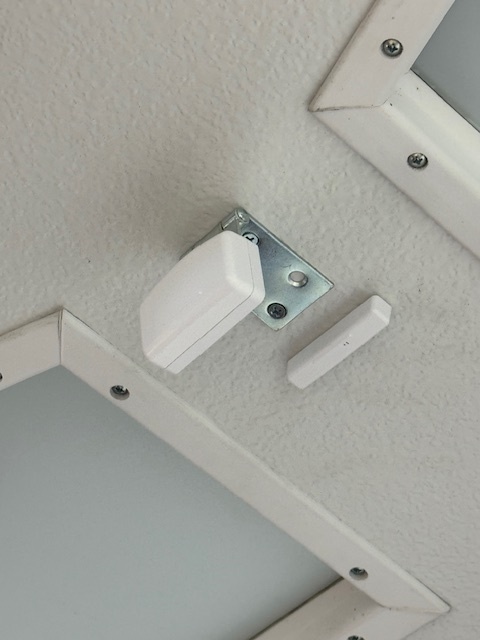
The second sensor is mounted on an inexpensive hinge on the top panel of the door. The door must open sufficiently for the top panel to become substantially non-vertical before the sensor will trigger (typically about 8-10 inches of door travel). See the pictures below.

With this setup, opening the door about 6 inches triggers the side sensor, but not the hinged top sensor. [Note that I also have a ThirdReality Zigbee tilt sensor on the door, but I find that device to be very unreliable and its coming off soon.]

I have one Rule Machine rule that alerts me (via a Google Nest Mini speaker) when either sensor registers OPEN (I can’t hear the door mechanism working from my office).

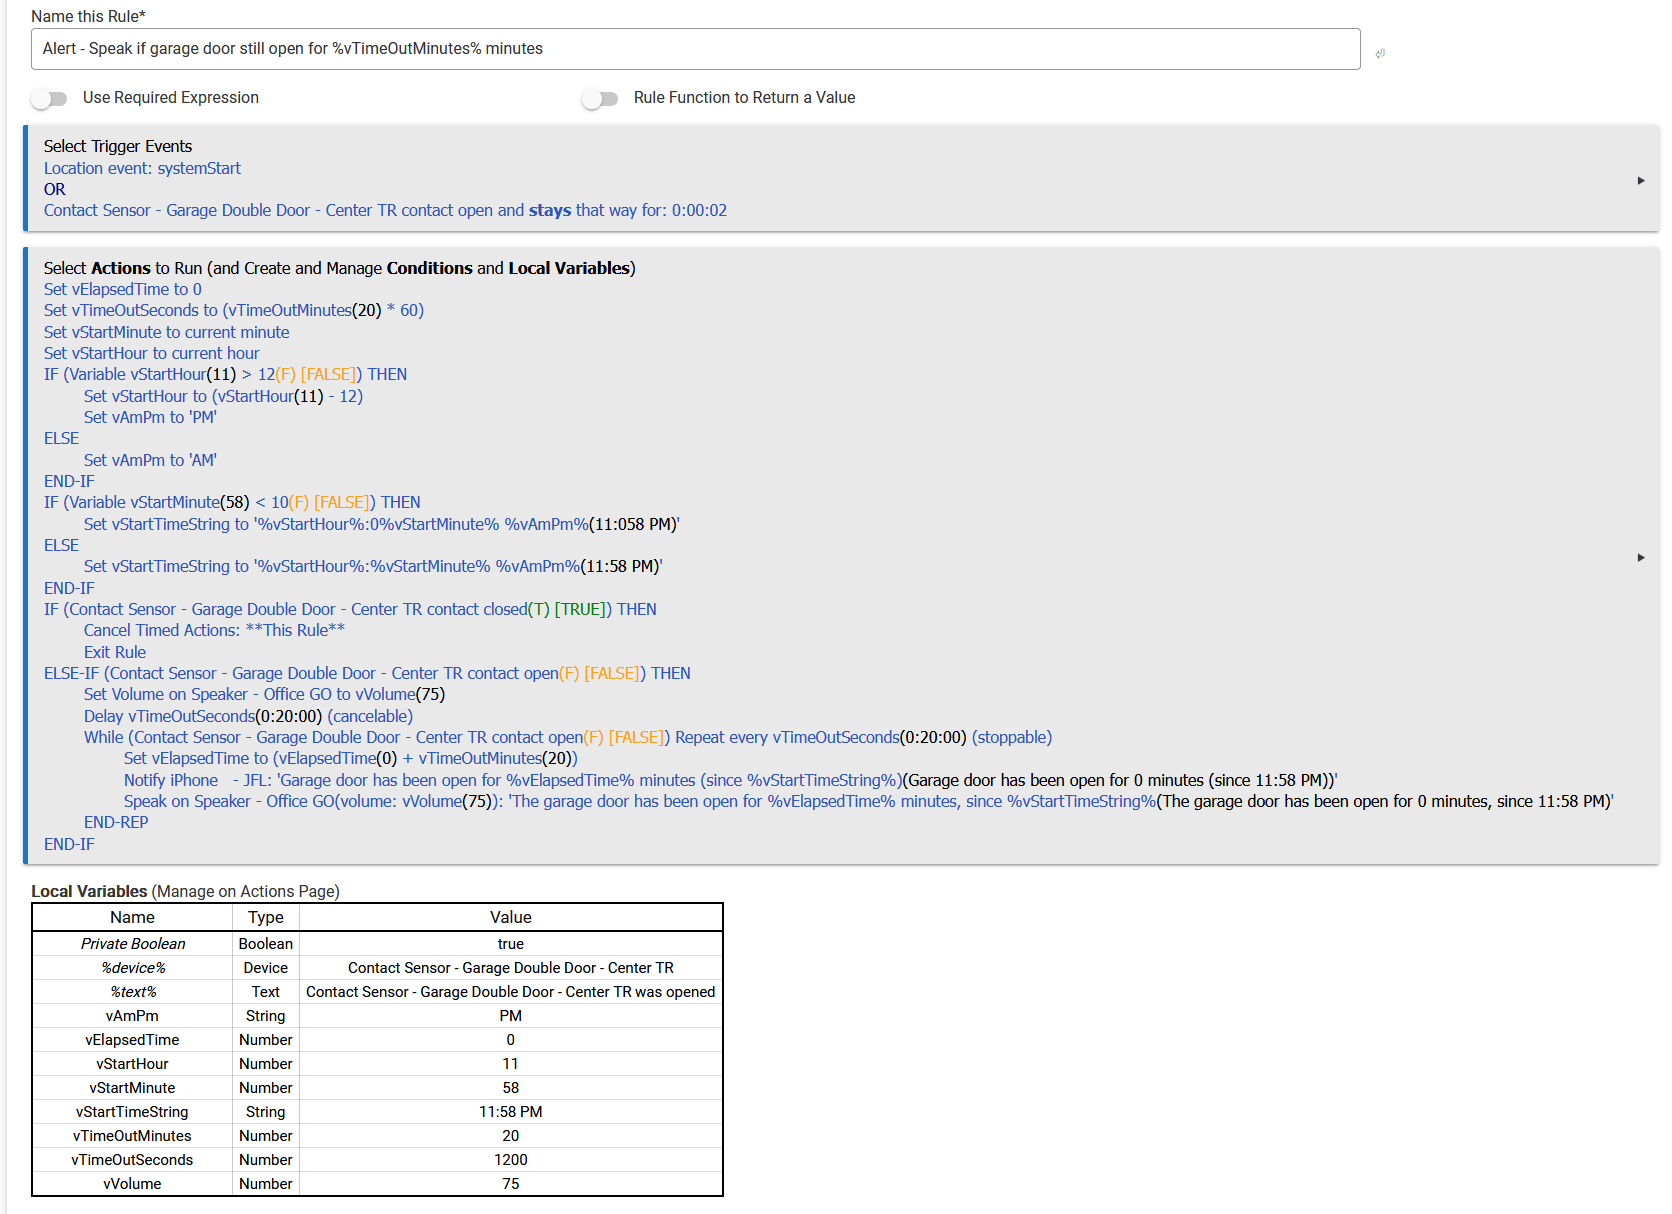
I have a second rule that is triggered ONLY by the hinged top sensor (OPEN for 2 seconds) or at a system start and provides alerts ONLY IF the garage door is open for 20 minutes or more (I cribbed the basis for this rule from someone on this forum, sorry, I forgot the name). The rule will continue to update the number of minutes the door is OPEN until the door is CLOSED. See the rule example below.

By using the second “slow reacting” contact sensor to trigger the second rule, I can crack the door open a few inches without triggering the second rule (and its ongoing notifications) but I still get the brief alert from the first rule even if I open the door only a little.

Hope this helps someone!

PHOTOS:

Contact sensor mounted on the side of the garage door:

Contact sensor mounted on the top panel of the garage door -- CLOSED state (top panel is vertical):

Contact sensor mounted on the top panel of the garage door -- OPEN state (top panel is horizontal):

RULE EXAMPLE:

2 Likes

I am new to a lot of this. What is the entire top of your rule with "v" items?

All of the terms starting in a lower case "v" are variables (local variables, in this case, defined in the table at the bottom of the image) -- that's just my personal naming convention, to distinguish variables from other elements in a programming script or language.

So the first 4 lines initialize various variables. vTimeOutSeconds is computed from vTimeOutMinutes (set by a user in the local variables table) because some Rule Machine (RM) commands take only seconds as a value, but minutes are more useful in conveying info to a user.

The first IF-ELSE-END-IF section simply converts 24 hour time to AM-PM time.

The second IF-ELSE-END-IF section builds up a text string in the form of hours, minutes (padded by a 0 in the case of single digit minutes) and "AM" or "PM".

The third IF section cancels and exits the rule if the trigger sensor has closed (note that the trigger must be open for 2 seconds to avoid "bounce" -- rapid OPEN-CLOSE-OPEN states -- so this IF clause should rarely be executed).

The following ELSE-IF section verifies that the trigger sensor is still open, sets a volume level on a speaker (note that the Speak command in RM is apparently broken, in the sense that its internal Volume parameter does nothing), then delays for 20 minutes in this example (the Delay command requires seconds to be input if setting the parameter value by means of a variable).

Then, every 20 minutes (in this example), a repeating set of statements (starting with the WHILE command) updates the elapsed time variable (by adding 20 minutes), sends a notification to my iPhone, and speaks a text message on my office speaker (a Google Nest Mini) telling me how long the garage door has been open and when it started being open. The WHILE loop terminates if the garage door closes.

Hope this helps!

1 Like

Nice setup but would suggest looking into RatGDO. It connects to your MyQ GDO and is basically another wall remote allowing you to control the door, light, sense if the beam sensor is blocked, lock out the remotes, etc. You can also tell it to open garage door X%. All of this doesn’t require contact or tilt sensors.

There is a community driver for it as well.

1 Like

Thanks for the tip, I'll look into that product.

1 Like
Summary

Bravo. Great idea.