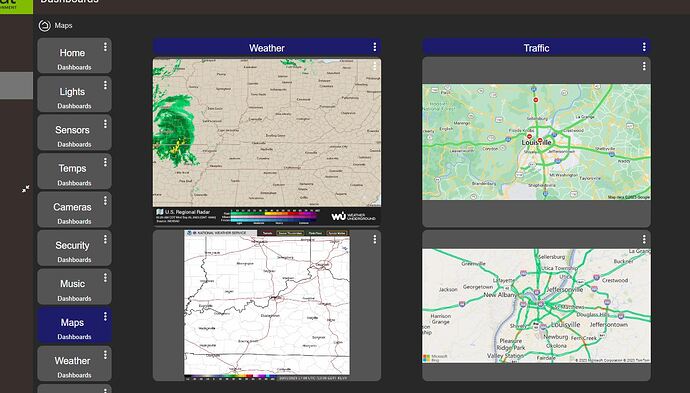
I'm sure this has been done in the past; but after a quick search here I did not see anything, so I figured I would share (again?) for posterity.
This was super quick to set up, free of charge (with a usage limit), no credit card, and looks great. I still have yet to test it's accuracy.. but I do like the visual.
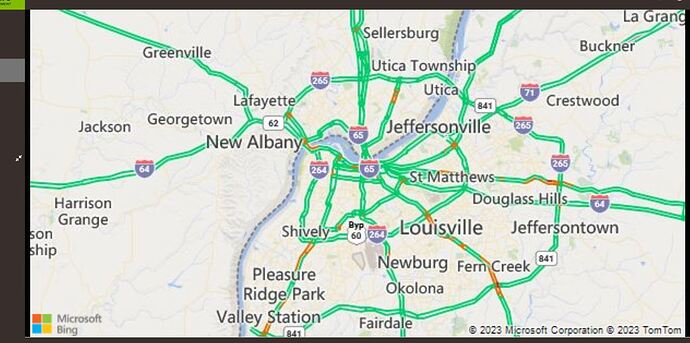
This is a live traffic map created from the Bing Maps API:
Credit
I took the idea from a SharpTools user HERE.
How to Create
-
Create a free Bing Maps API developer key. This can be done HERE.
-
Once logged in and verified, find the "Create a new Key" option.
-
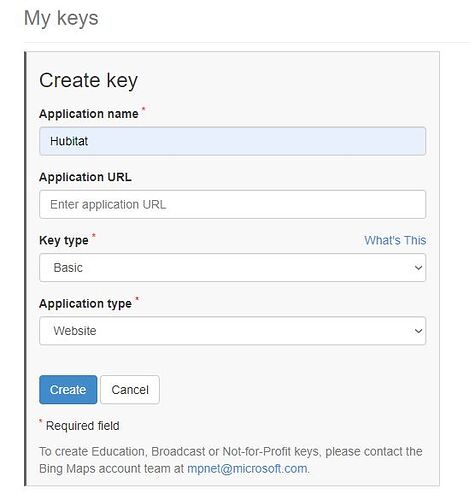
Fill in the key details:
- Application Name: I used "Hubitat"
- Application URL: (Leave Blank)
- Key Type: (Leave at "Basic")
- Application Type: Change to "Website"
-
The application will be added, and the key will be available on the next screen. Click "Show Key" and copy/paste the key for later use.
-
Now, open the Bing Maps Maker webpage.
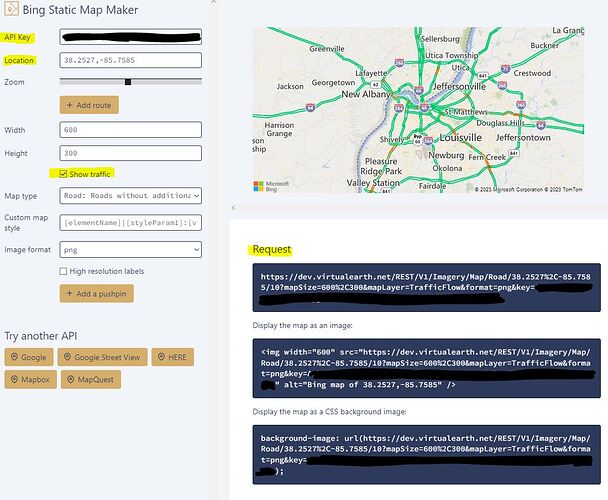
- Paste the API Key from step 4 into the "API Key" input field.
- Enter the latitude and longitude coordinates into the "Location" field.
- Easily find your desired latitude and longitude coordinates by using THIS TOOL.
- Adjust zoom, width and height as needed.
- BE SURE to enable the "Show Traffic" option. Otherwise.. what are we doing here??
- The "Map Type" can be altered using a few options. Play around and use what you like.
- Finally, copy the "Request" section of the code (the top one in the list).
-
Back in Hubitat, add a new tile, select the "image" template and paste the html copied from the last part of step 5 into the "Image URL" field. I recommend setting the "Refresh Interval" to 300 or higher (see below note).
NOTE REGARING USAGE:
The free developer API allows for 125K free calls per year.
There are 525,600 minutes in a year.
Dividing, we can make a call every 4.2 minutes and remain on the free plan.
I would suggest setting the "Refresh Interval" in the tile NO LOWER than 300 (five minutes).
This will update the tile every five minutes; while remaining under the usage limit.


