I have three spare brand new Fibaro Roller Shutter 3 (RS3) which I cannot use anywhere else.
Instead I would like to use them to activate a solenoid coil somewhat as a Fibaro Single Switch 2 or a Relay Switch.
I have seen a similar question asked before for RS2 which does not appear to have a conclusive answer.
However, my purpose is slightly different - I need to keep the solenoid coil activated for about 1 to 2 minutes only - not more than that. That is, it is not required to keep the switch in powered on condition as is normal in a Single Switch 2.
I have tested the RS3 in a bare condition and find that when I press the "Off" icon in the interface, the Q2 terminal is actiavted for about 2 seconds and then goes off. I would like to increase the activation time for any of the terminals - Q2 or Q1 to about 60 secs
In an actual roller shutter operation the time of activation of Q1 or Q2 is determined by the end positions of the shutter. Is there any way to simulate the end positions of the RS3 without the RS3 actually being connected to a Roller Shutter?
I am not a coding person but can tweek the driver if that can be done and if anyone can advise on which lines in the code can be modified and with what parameters so that these functions can be adjusted?. Or perhaps there is another way of achieving this Setting?
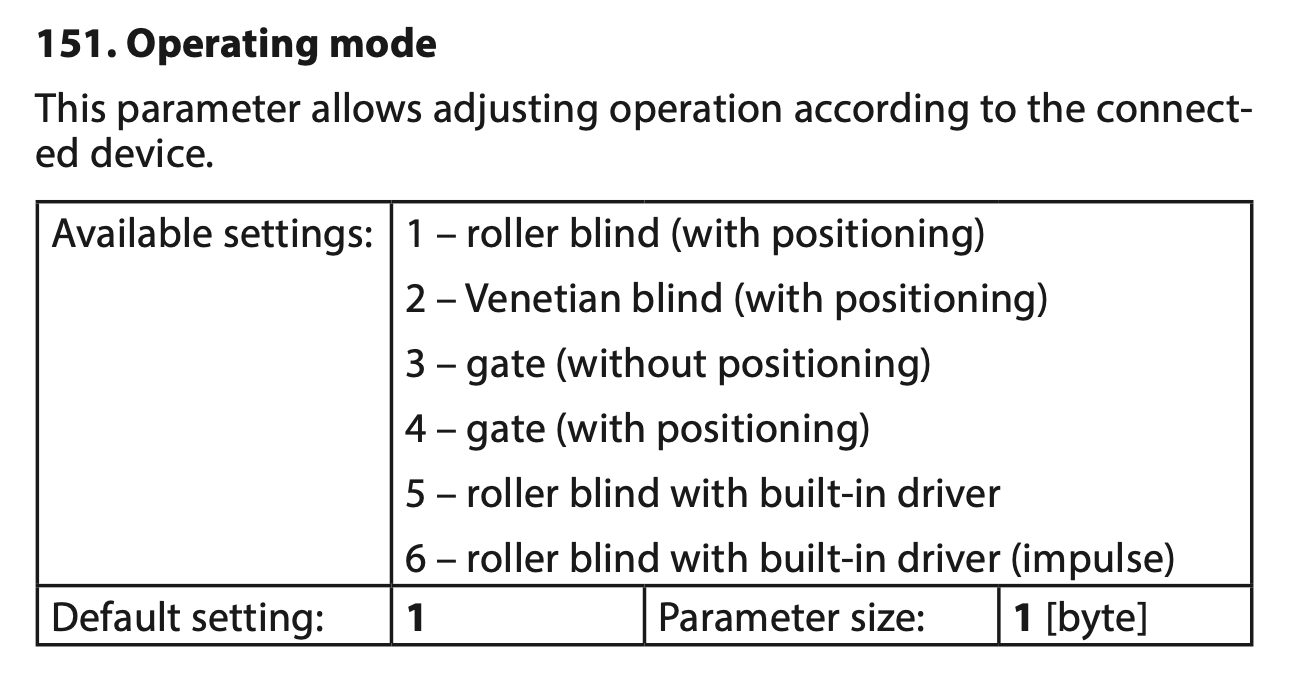
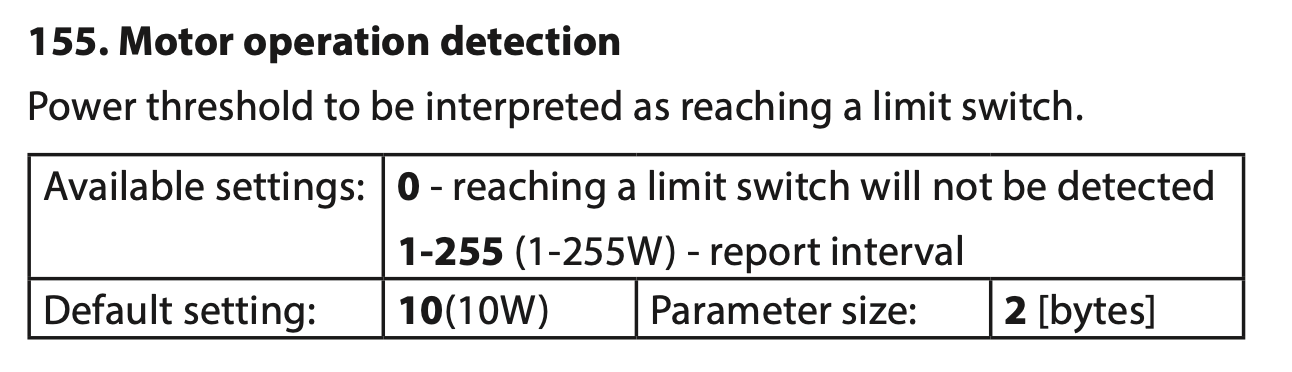
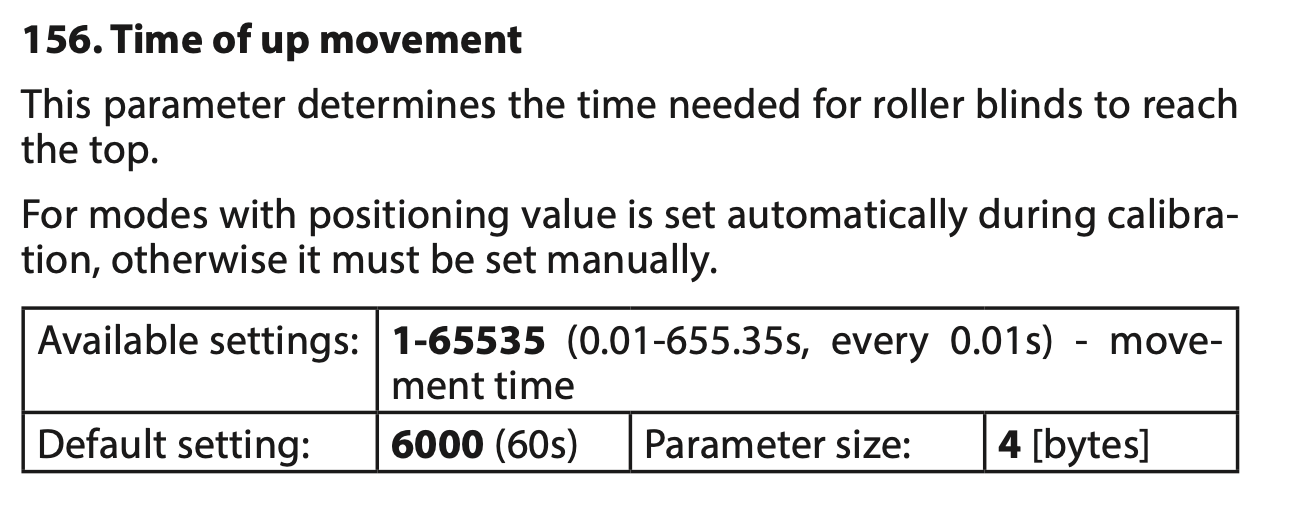
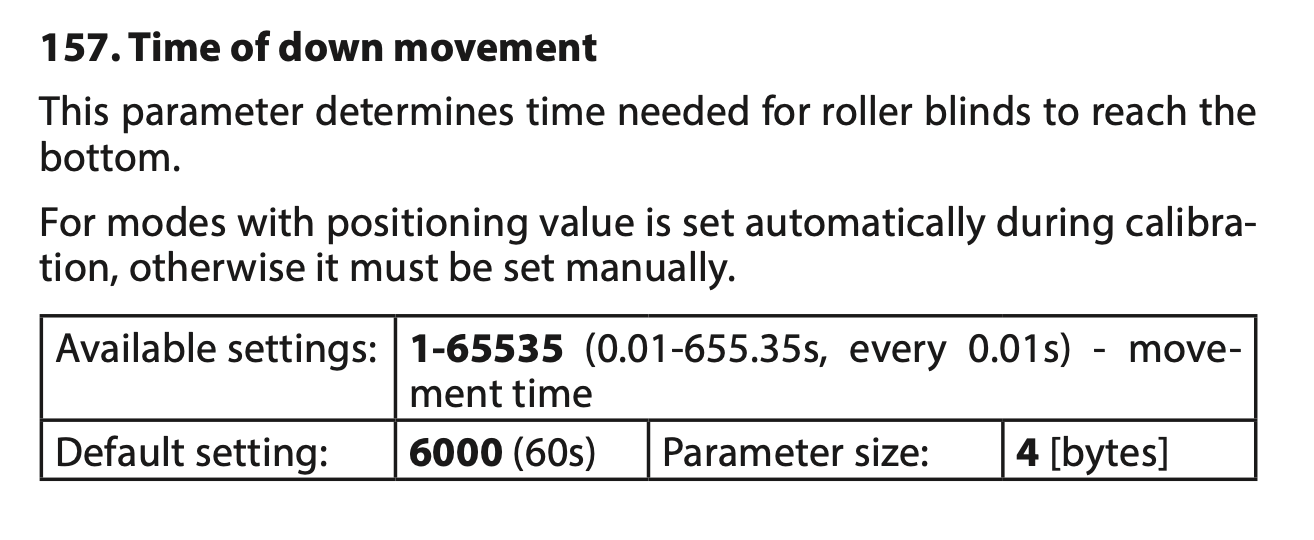
The open and close times that activate Q1 and Q2 as you say are determined during calibration by the end stops of the motor they're connected to. However that's only the case when the RS3 is connected to a motor that has stops. You're also available to set a mode that doesn't have limits in Parameter 151 - Operating Mode. With that done if you set Parameter 155 - Motor Operation Detection to 0 (so that it doesn't use load to detect a stop), then Parameters 156 & 157 - Time of Up Movement, Time of Down Movement can be set. They're in milliseconds so would be 6000 for 1 minute.
I guess that the above parameters will not be in the normal driver. You can just temporarily change the driver to Basic Z Wave Tool and manually send each parameter from there using it's parameter number, size and value (with a log page open in another browser tab so you can see what's going on). Once complete you just switch back to the normal driver.
Thank you so much for this response with a solution.
May I ask how you reach the Parameters 151, 155, 156, 157 etc in the Basic Z Wave tool ( Generic Z Wave Dimmer, for example) ?
In the meantime, although I have been able to operate the solenoid coil by actually connecting it to the RS3 and using one of the various buttons available such as Start Level Change or Off, I would still like to know how to reach the Parameters stated above in order to have a more definite operation.
UPDATE
I already 'discovered' the way to reach the Parameters 151 etc. Probably easier to reach them in the Fibaro Home Control Centre.
I still have to try reaching them in Hubitat Hub control. So will investigate.
You just switch to that Basic Z Wave Tool I mentioned and send them one by one. I'm fairly sure you would be unable to do it in Fibaro Home Center. You'd have to exclude it from Hubitat, include it to Home Center, make the changes then exclude it and include it again in Hubitat. The action of excluding it would reset the device parameters to its defaults so you would be in the same situation. Basic Z Wave tool is the best way to change those parameters when the device driver doesn't support the commands. I use it when setting up Fibaro Dimmer 2 and Fibaro Motion.