I'm working on my next project and I have a question for those of you that have done projects with these little boards?
When putting it all together in its final case how do you have the various boards mounted in the case?
I'll have 3 small boards in the single enclosure and don't want to leave them loose as I'm afraid that would be more of danger if they touch each other.
I've been looking at many videos, most of which talk about the programming or wiring, but can't find anything that shows the final setup/installation of the project in a box.
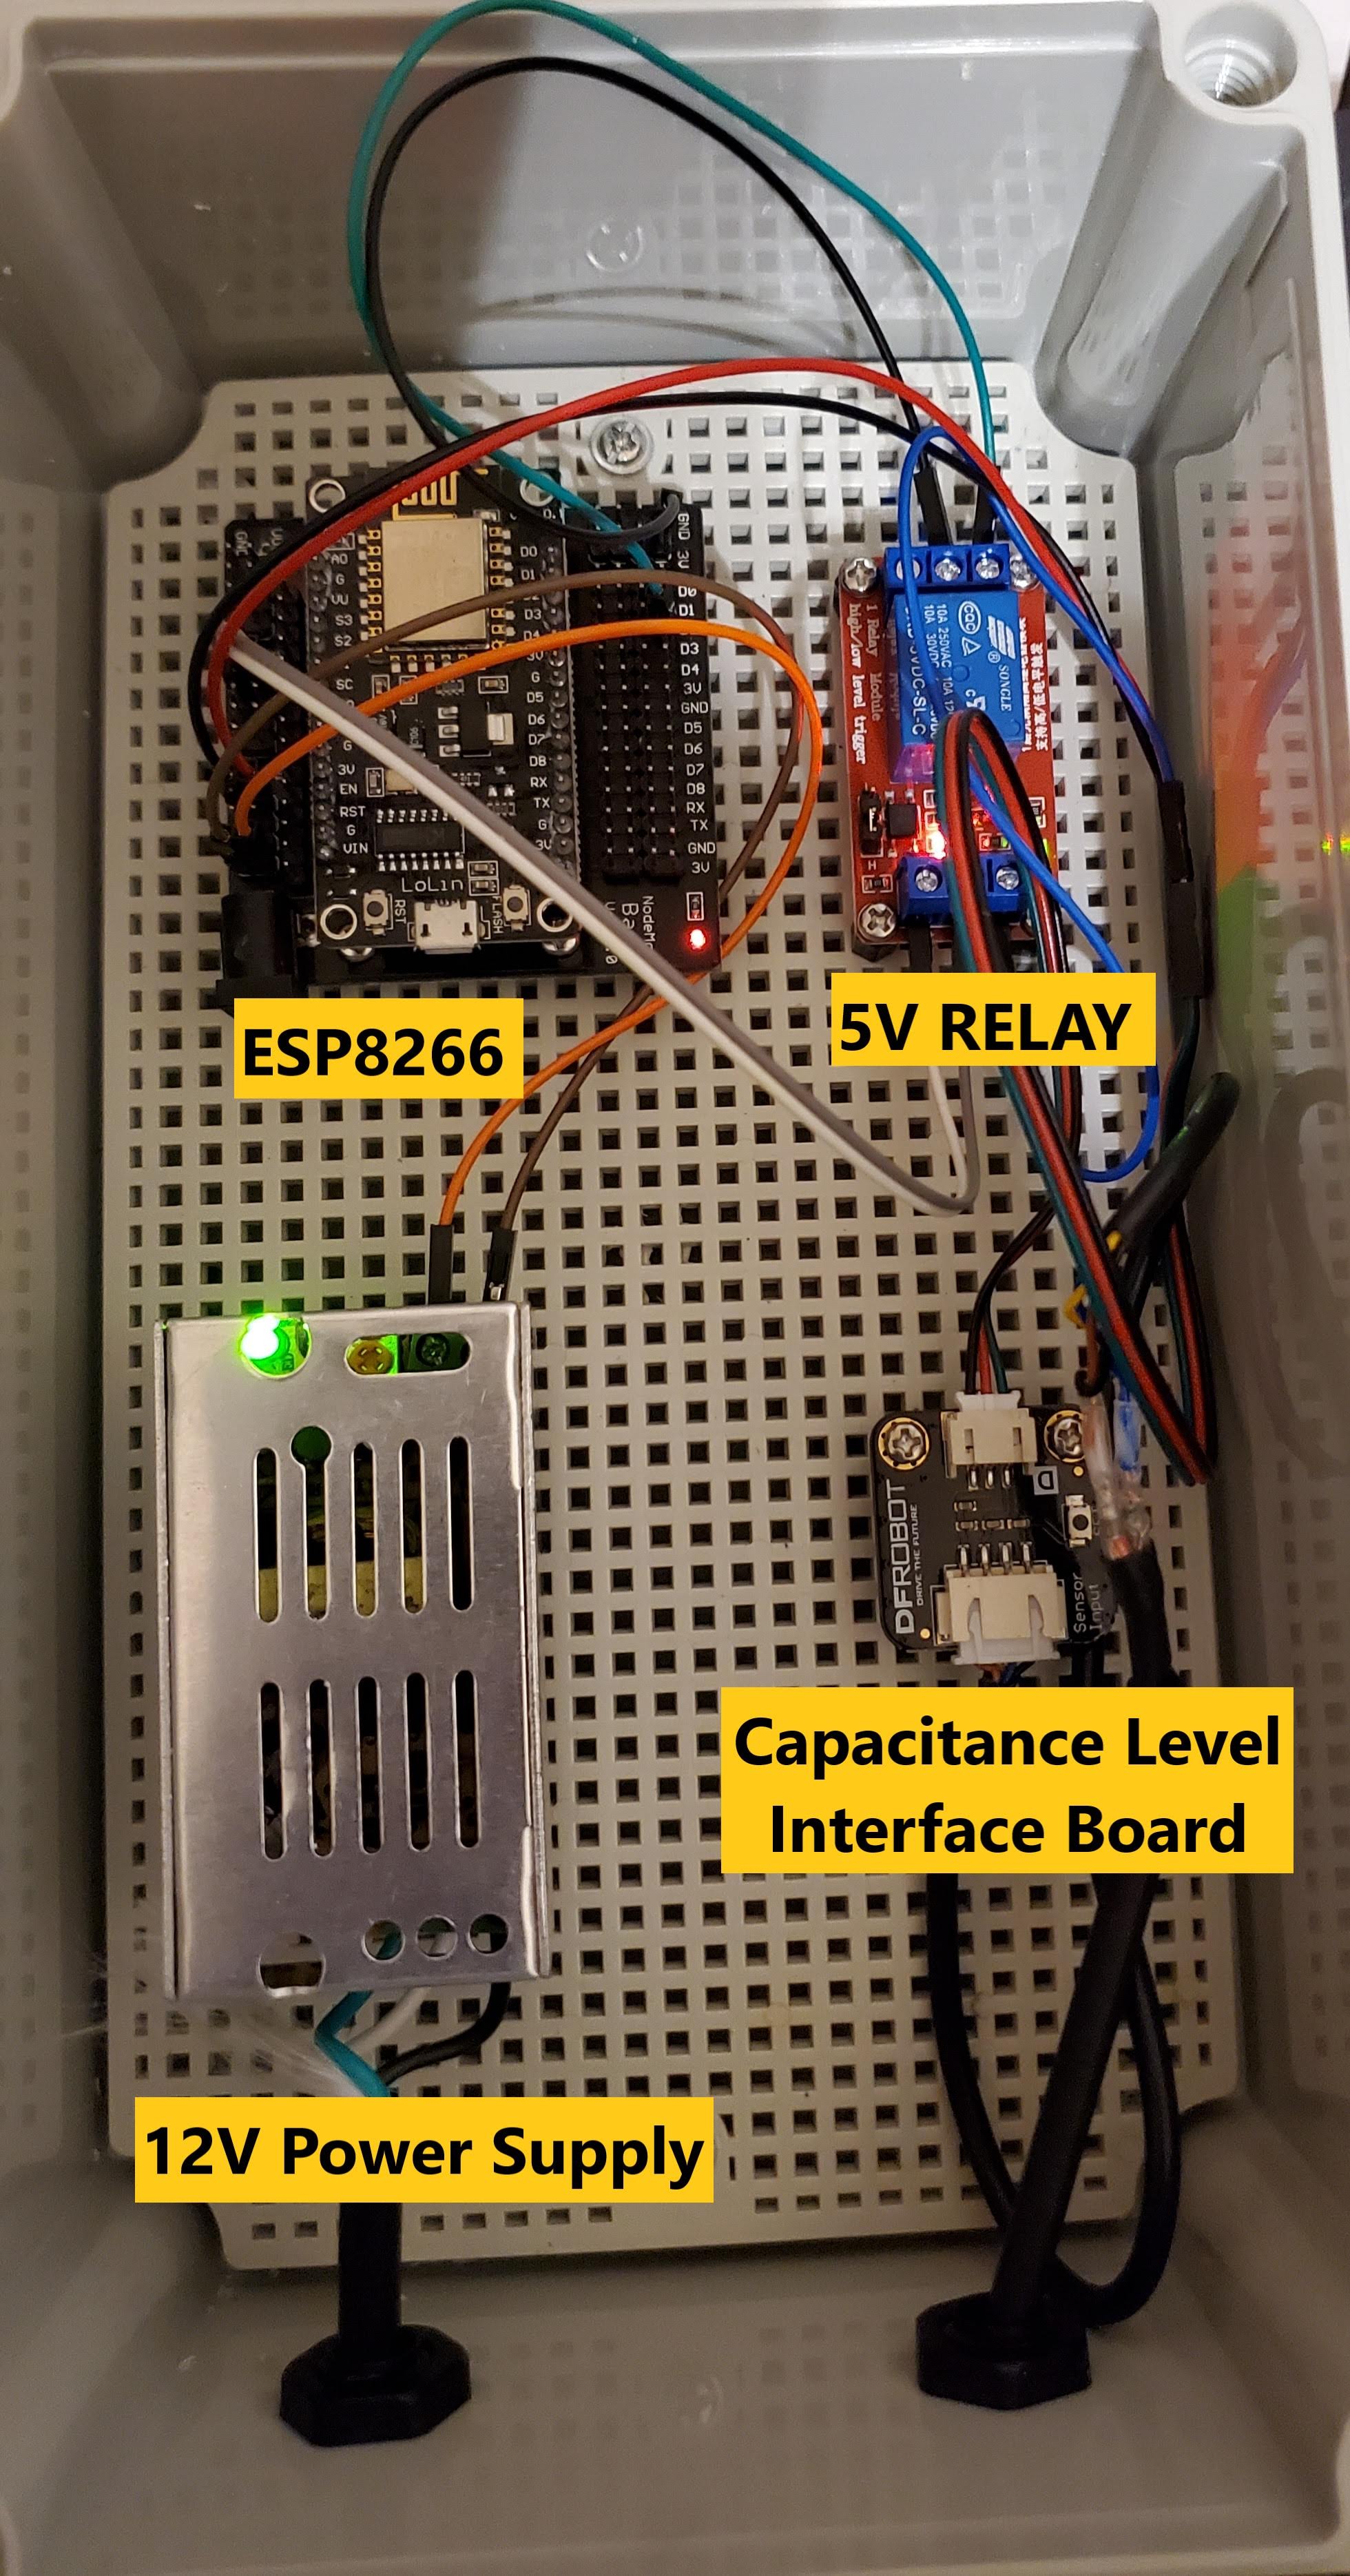
I use perf boards and mount Female header pins to them. That way I can wire everything permanently but still swap out the board if it dies or I want to change the firmware on it. For example, this is a board I built to control some addressable LEDs.
You can even get screw terminals if you want to get really fancy. I even have some bread/perf board comparable relays on the way so I don't have to use off-the-shelf relay boards anymore. I then use standoffs to attache the board to my enclosure. I've found this to be a lot more stable than using header wires for long-term placement. But it does require soldering.
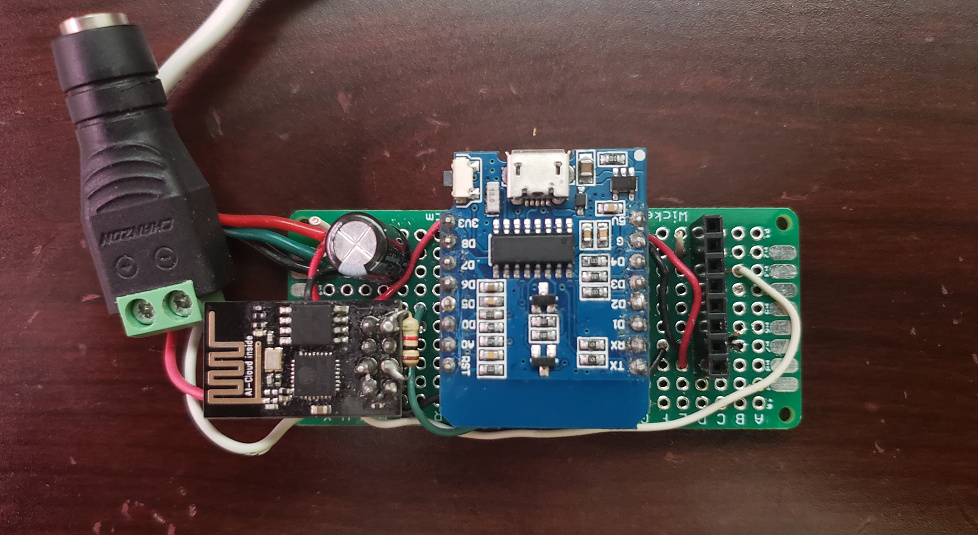
Like I said, it does require soldering, @JasonJoel's doesn't. But mine tolerates falling off a wall (since it was going to be mounted to a wall and anything I try to stick to a wall always falls off the first time). I also had to use some bare electrical components (a capacitor and on another board some transistors and diodes) so, the breadboard method wouldn't work for me. I also was able to make this small enough that it fit behind the headrail of my vertical blinds, so that it wouldn't be seen. I use these enclosures.
That's the standard nodemcu base. Search for that on Amazon - they are about $2.20/ea in qty 5.
The box was pretty pricey as I needed weatherproof (rubber gasket on lid seal, and no penetrations other than the ones I made myself) as it was mounted outside. But I just searched on Amazon for the size I needed and grid base, I think.
No problem. Space requirements often dictate how I do it. If I have space I always use the nodemcu bases. For $2 they save me a TON of time.
If I need the connections to be more rugged, then I will use pcb + surface mount screw terminals.
They do make baseboards with screw terminals instead of pins for some arduinos (and maybe esp8266... Not sure), but they are usually cost prohibitive (in my opinion).
That's nice. Do you find that it generates much heat when closing that equipment in and running outdoors? or did you have to cut/drill some holes to let it breath a bit? Reason I ask is I am thinking about a similar setup for an external LED setup.
No worries thanks for the feedback. I do have the ability to run it to a place further away but then completely protected from the weather so I will likely just do that. Cheers.
Got the parts ordered based on your recommendation. I wrote a quick web api on the arduino today and got it to respond to some commands for now until I get the other parts in. I love the concept of it, but I remember why I hate c/c++ programming so much now.
Side note, some of the newer NodeMCU are now ESP32 based instead of ESP8266 based. ESP32 is useful to me as it has a 12 bit ADC instead of 10 bit, and I use adc a lot. But.... They aren't very Arduino IDE friendly (at least last time I tried) so really need to use something else like micropython or lua.
There are issues with PWM in arduino but as long as you're not using a dimmer, you're fine. That said, unless you absolutely need one, the ESP32 isn't as reliable as the ESP8266 from what i have read.