My Scenario and Why (still a work in progress)
I have been tinkering in home automation for a couple years now. I am/was using GH mini's & Echo Dots to voice control. I use my home automation to mainly control Basic Sonoff wi-fi switches for my ceiling lights, lamps, fans, cords, etc.., but I also have and use other devices such as Broadlink RM Pro/Bean's, wifi robo-vacuum, multiple Nvidea Shield's, PC's and other android TV boxes for various things. I am also a long time user of XBMC/Kodi and always wanted to voice control it as well (and I have tried SO many different ways to get it to work, but nothing to my satisfaction usually due to my ISP. I have since created my own fork of Kodi (PSMC) and use it now to help me learn and Vox Commando is doing it better than anything I have tried.
My biggest problem with home automation has been my ISP. I live in a rural area and last year, my former ISP (which was slow DSL) decided to boot everyone on my road. My only decent option was to move to 4G-LTE. Problem with 4G is cell carriers stick you behind a NAT in their network that blocks most all web-hooks/web requests, running your own web servers and many other useful things like most of IFTTT, getting back into home camera systems or your local media server remotely, etc.. I knew right away that I was going to have to get everything I could, to run local without the need of the internet/cloud.
A few months back, I ordered a Hubitat, then I found & ordered a cheap Zigbee switch from China for testing. I think it's made by the same folks that make the Sonoff's, they are both recognized as eWeLink devices (You can find them on Ebay and Amazon now).

I hooked it up and with the help from the great folks here, I got the switch working with the Hubitat. I had between 20-30 Sonoffs to replace before moving forward. So the Hubitat has sat on my desk since (I'm on a limited budget raising a 5yr old grandchild). So I ordered and waited on my new switches to come. In the mean time, I started searching for a way to voice control the new setup without the internet. That is were Vox Commando came in. I really knew very little about my Hubitat. I had never heard of Vox Commando until a couple weeks ago.
So between the great folks here and the awesome folks their, I have managed to get it all working rather well and once I figured it out, got most of it going in a few hours. Now I have all the same devices that were working on Sonoffs working with the new Zigbee switches off the grid using my Hubitat, and yes, all of this still works great with Alexa/GH if you want it too, just so ya know, but no longer required. Maybe this will help some of you accomplish something similar. Sorry for the long post, but for me the easier the better!
What You Gonna Need:
- Hubitat hub
- Vox Commando Software installed on a PC
- A good PC microphone (I started with a $15 USB conference room mic and it was working decent, except for background noise, mainly a window air conditioner)
UPDATE on mic: I have since moved to a eMeet M2 Conference Room Mic/Speaker for testing, They are a bit pricey, but work pretty darn well. If you leave it plugged into a power source, the blue-tooth will seldom disconnect.
How To Do It:
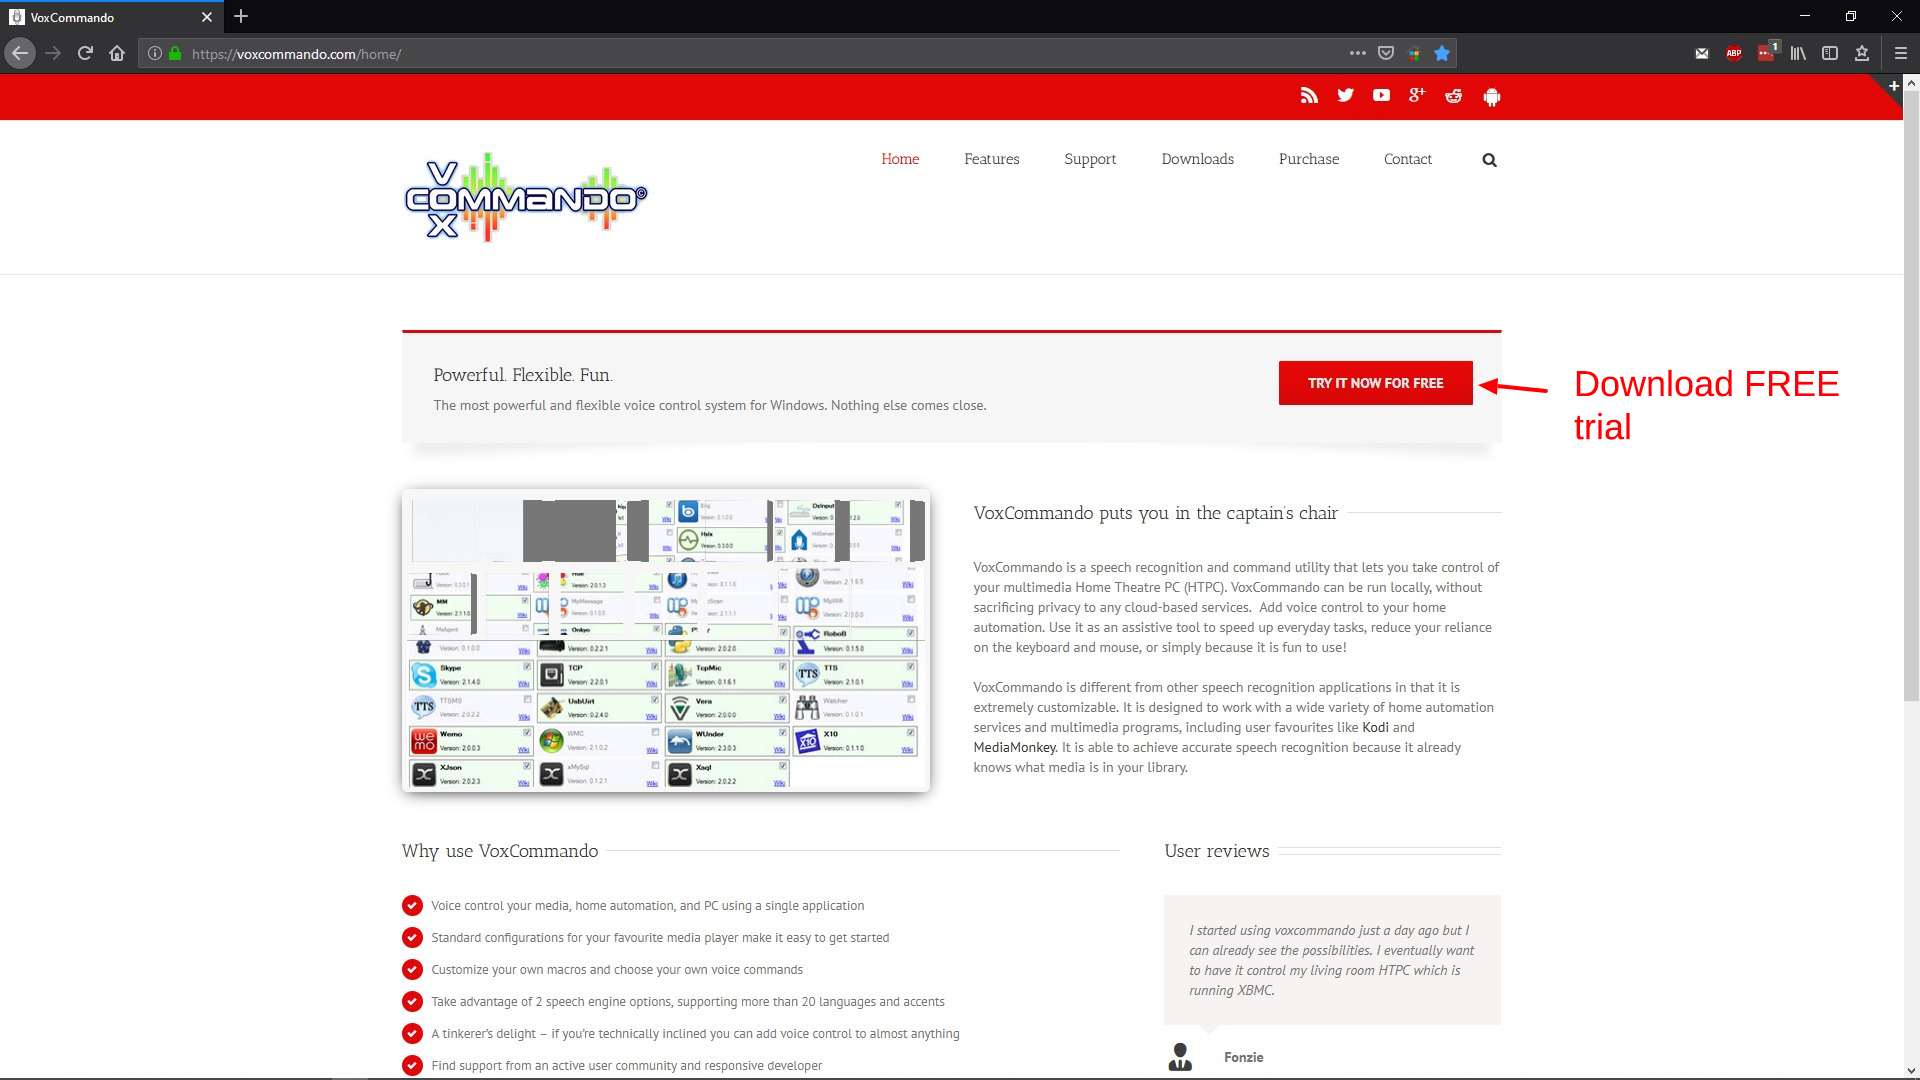
- Download Vox Commando (30 day free trial, so you have nothing to lose)
- Vox Commando is portable, so make a folder where ever you want it to live on your PC
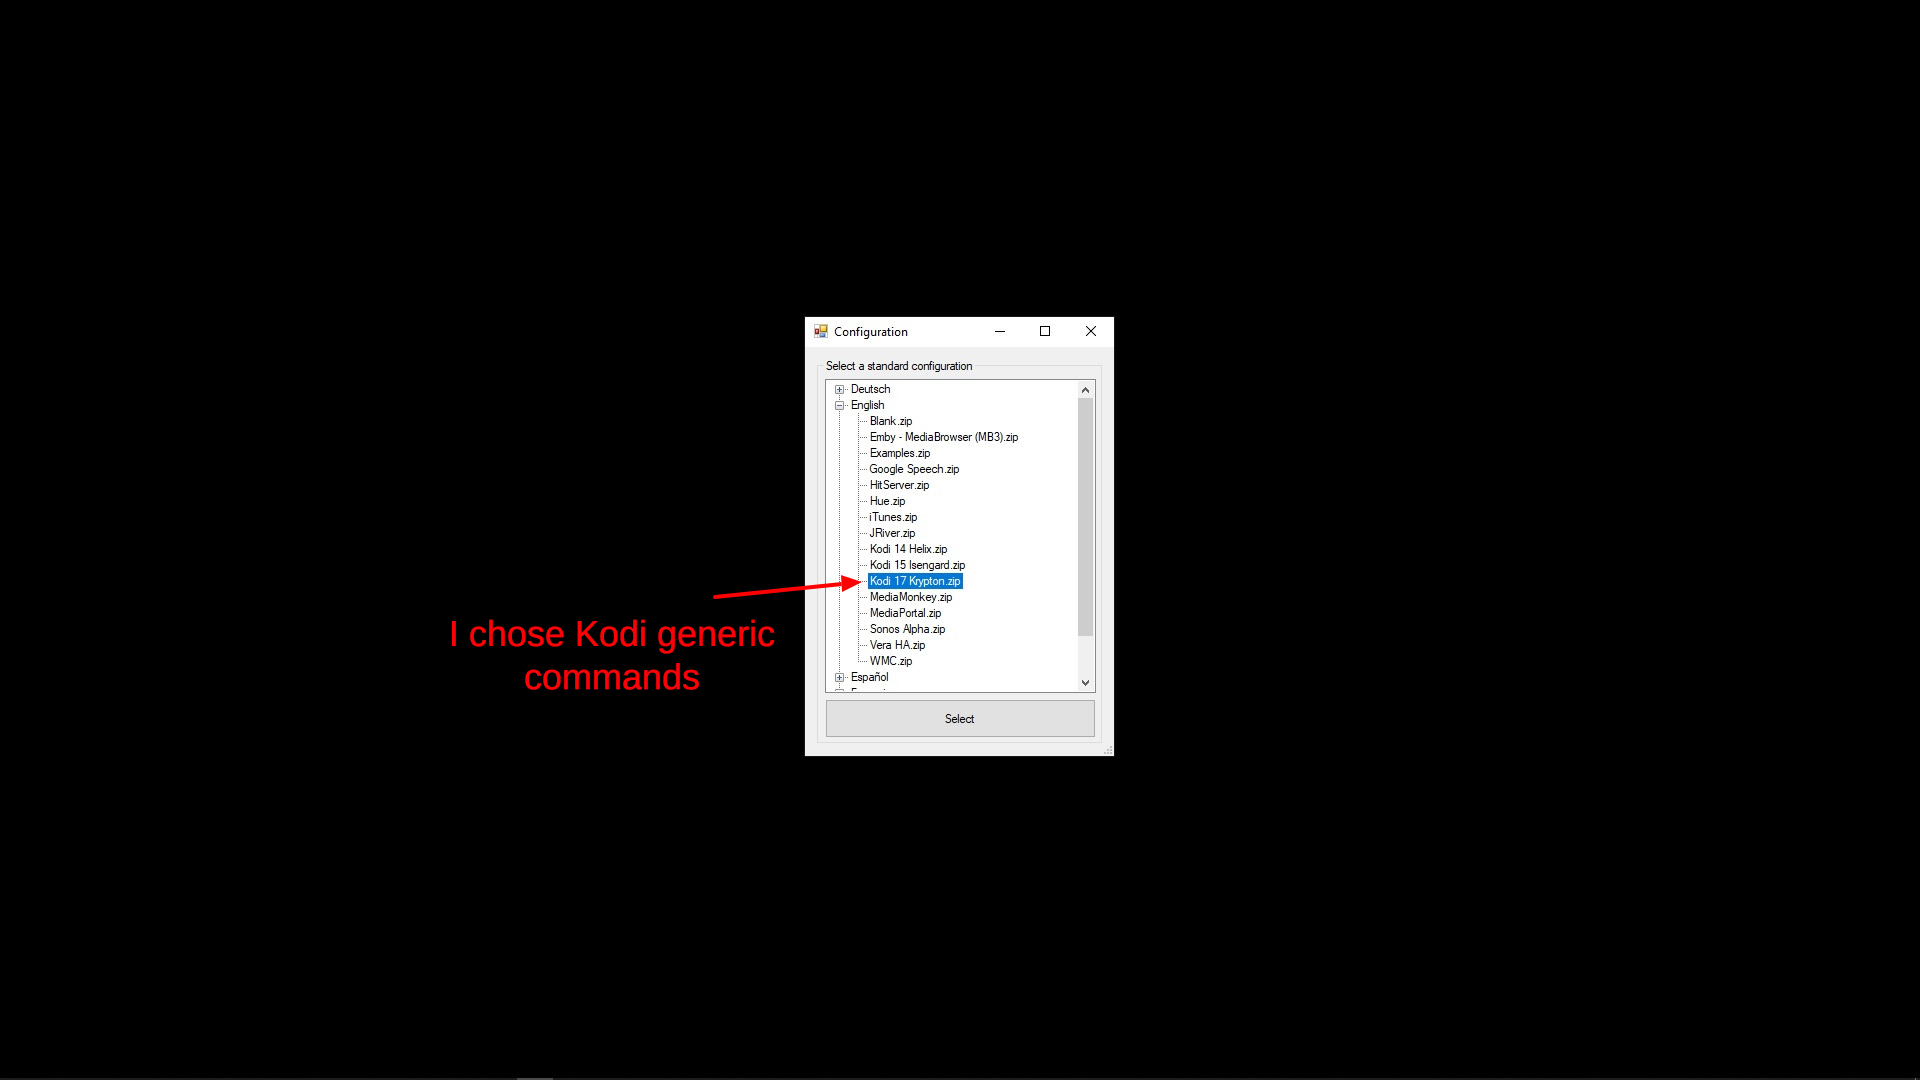
- Copy the downloaded setup file to the new folder you created and run it from there. When installing, you will come to where it asks you to choose a language, select your language. Then in the language tree, you will see more choices. These are various generic command sets of what you may want to use Vox Commando for, I chose XBMC/Kodi to help me learn the command structure of VC better since I know and use Kodi, any of them will work, because we will be adding new stuff anyway and can always add tons more to it later.
Now you need to switch to the Hubitat side for a bit.
-
Open a web browser and log into your Hubitat.
-
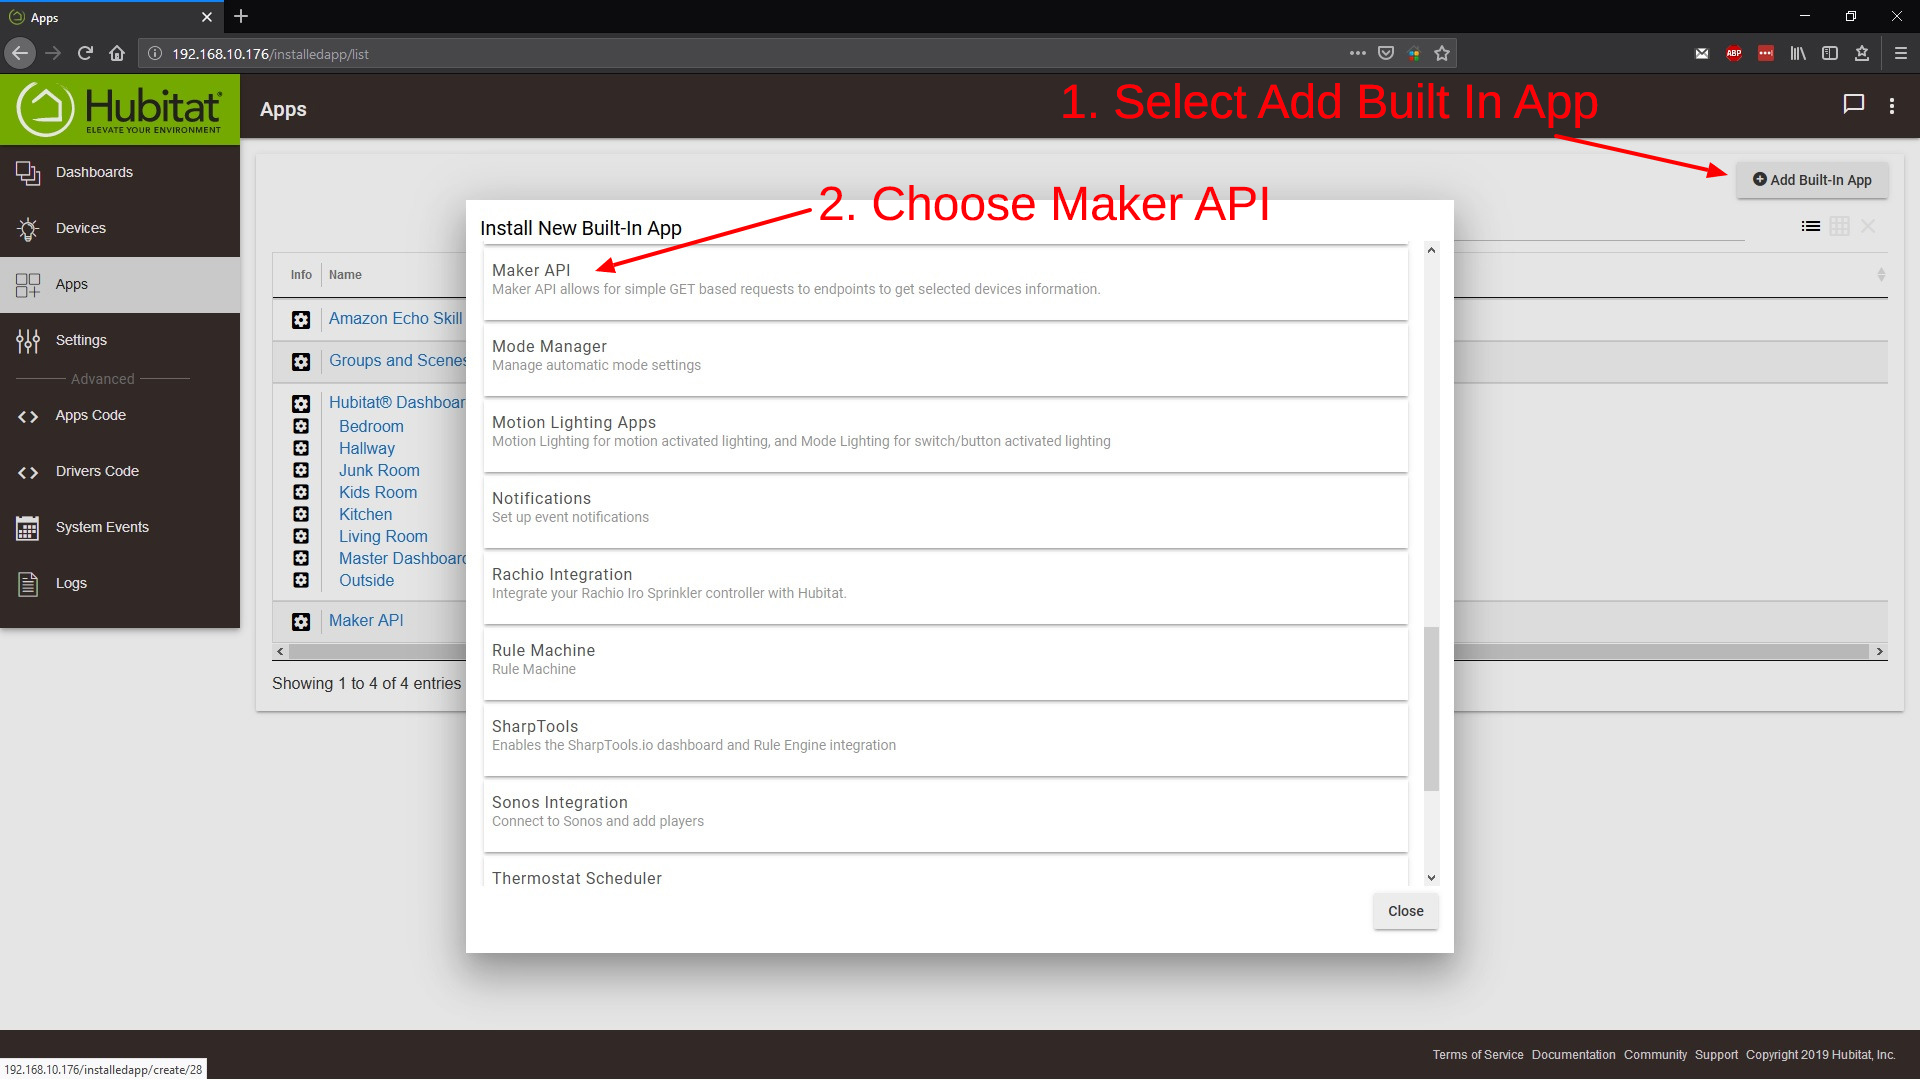
Go to Apps on the left.
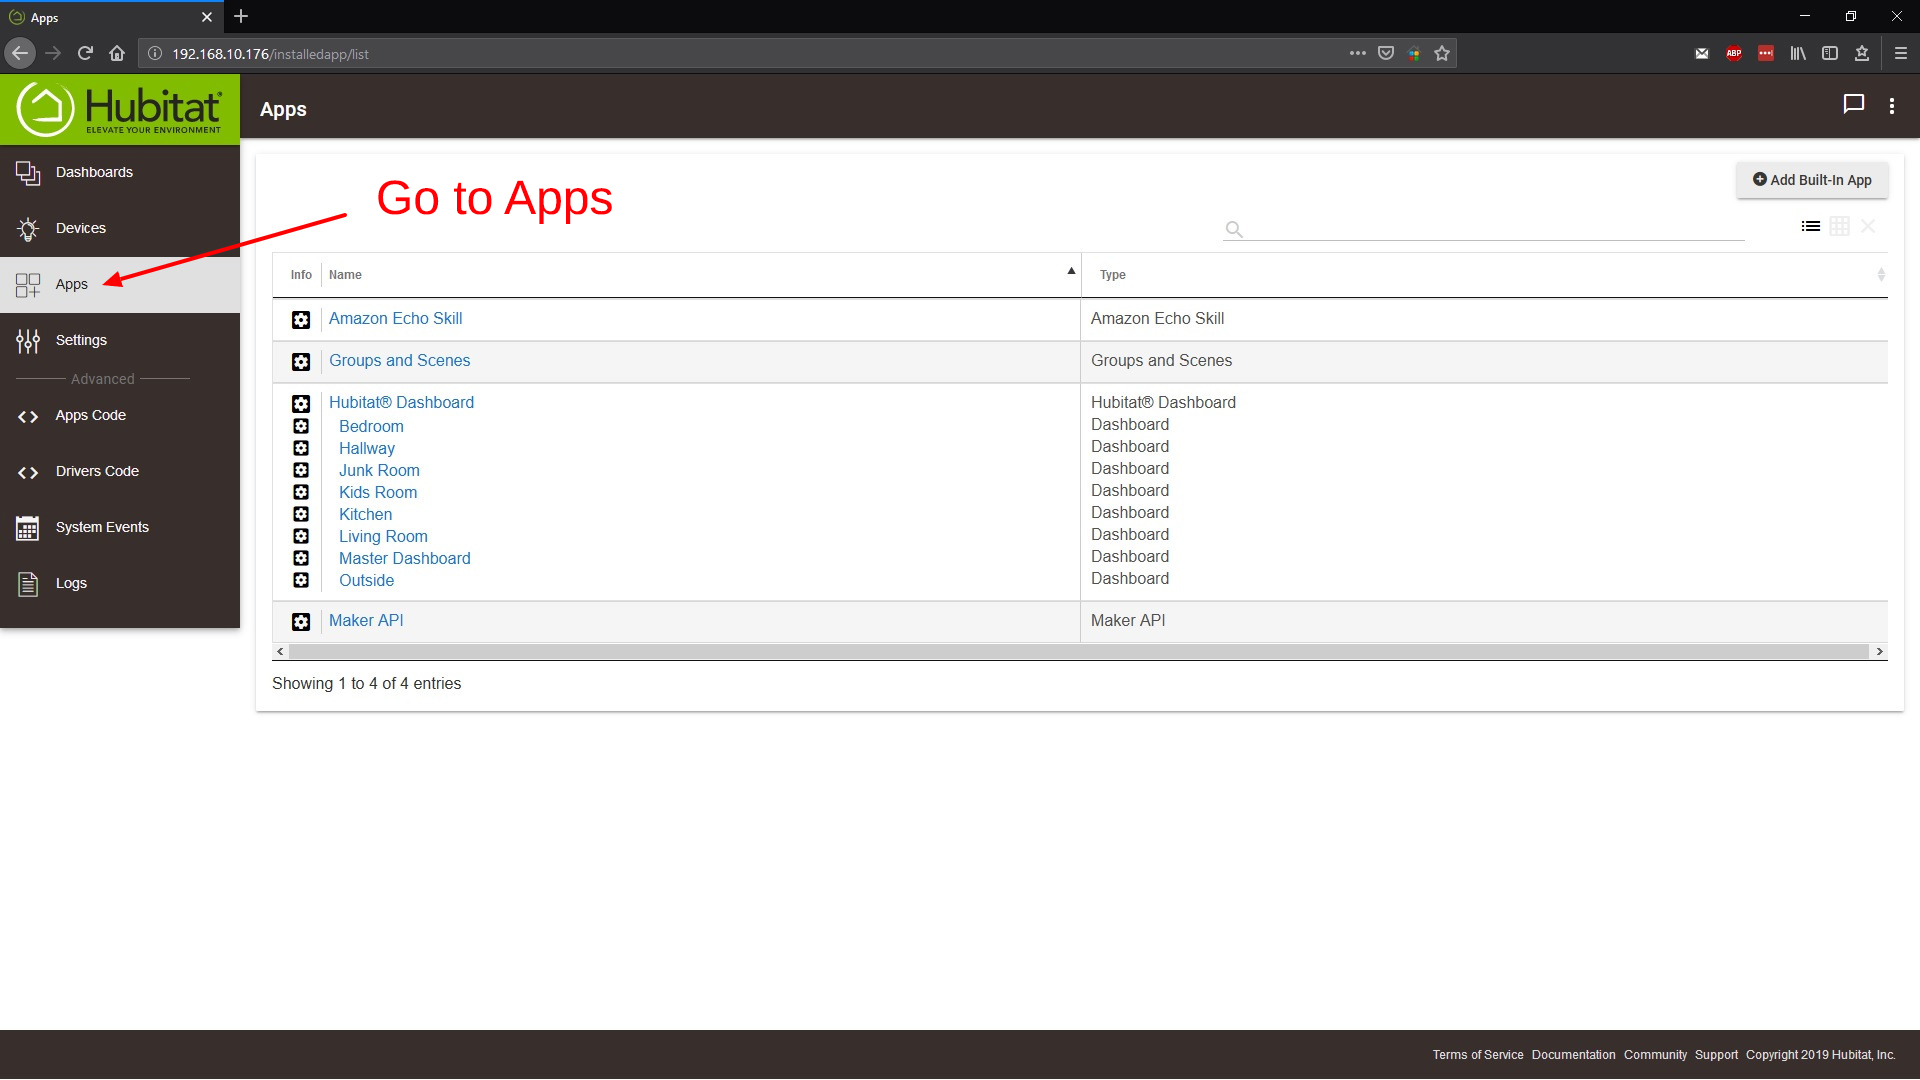
- Go to Add Built In Apps on top right and install the Maker API app.
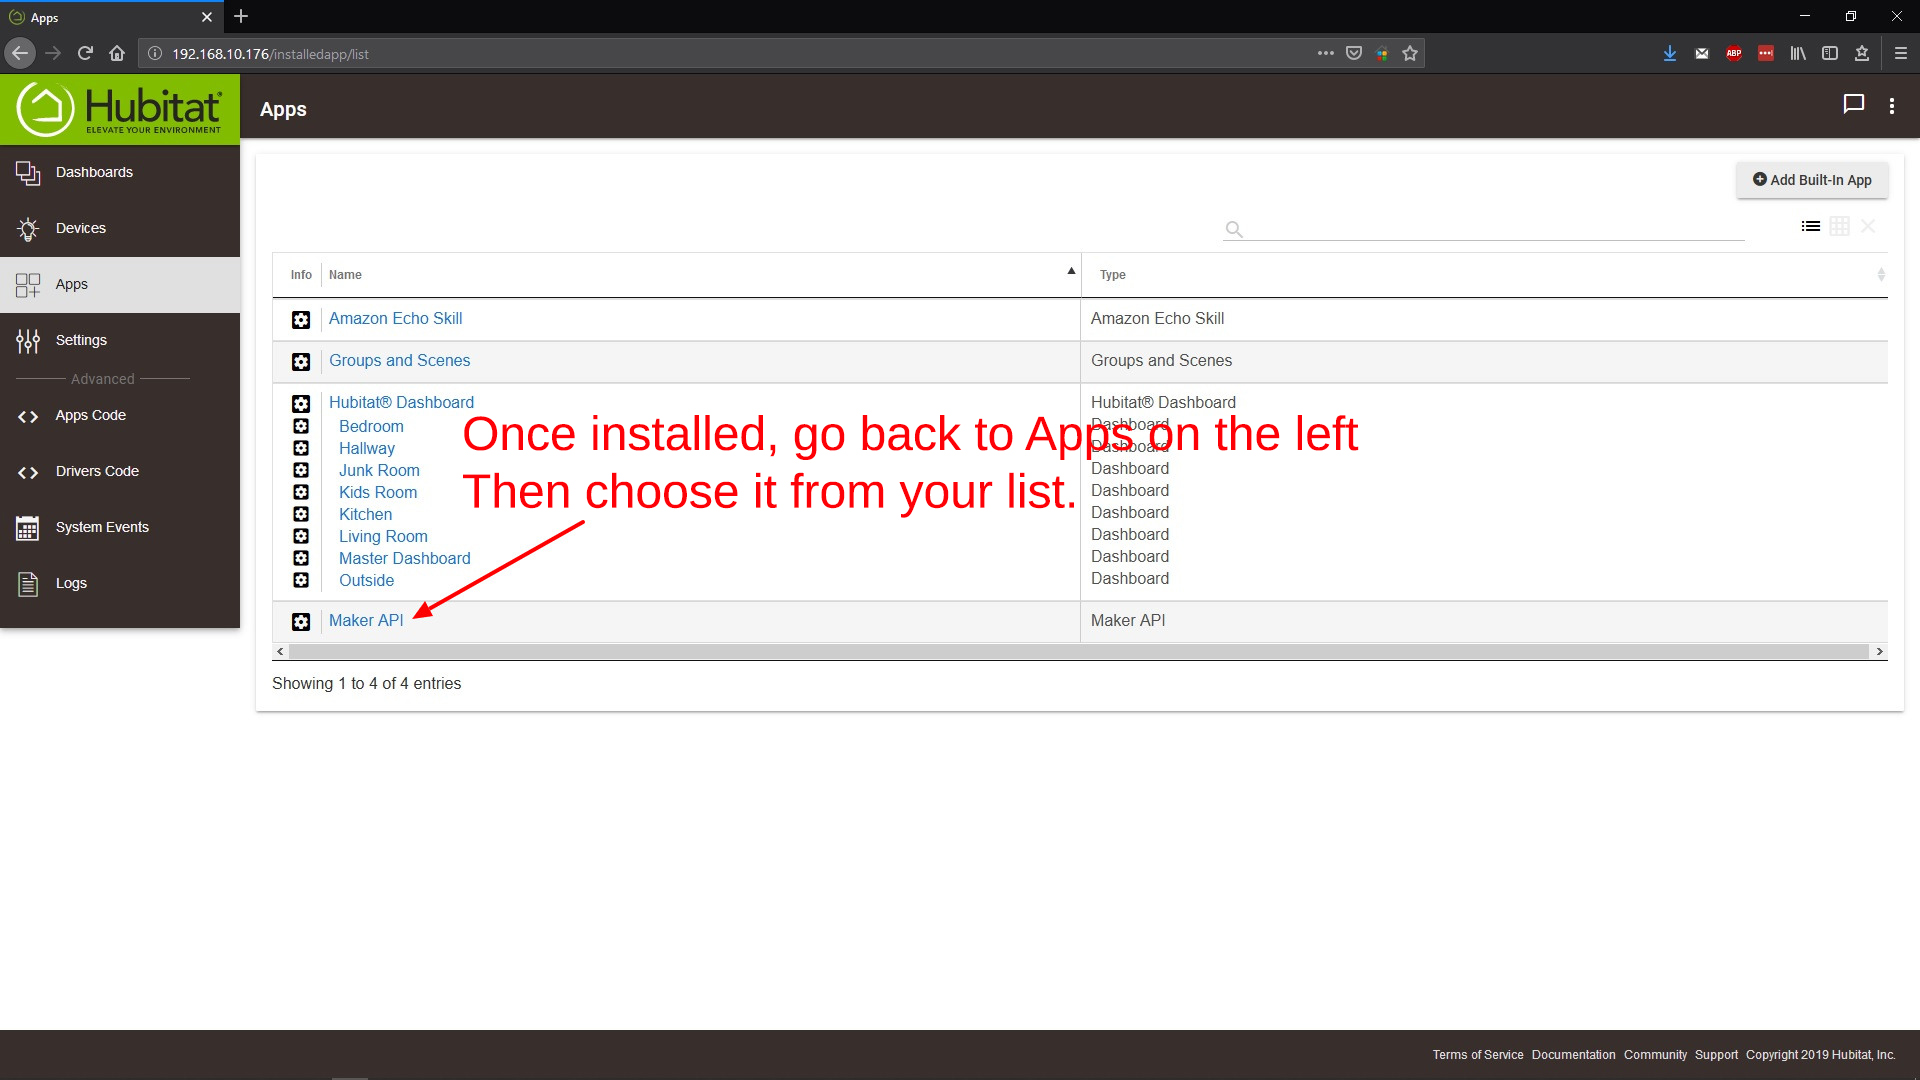
- After Maker API is installed, Go back to Apps on the left and then select Maker API
- Select the devices you wish to create voice commands for in Vox Commando
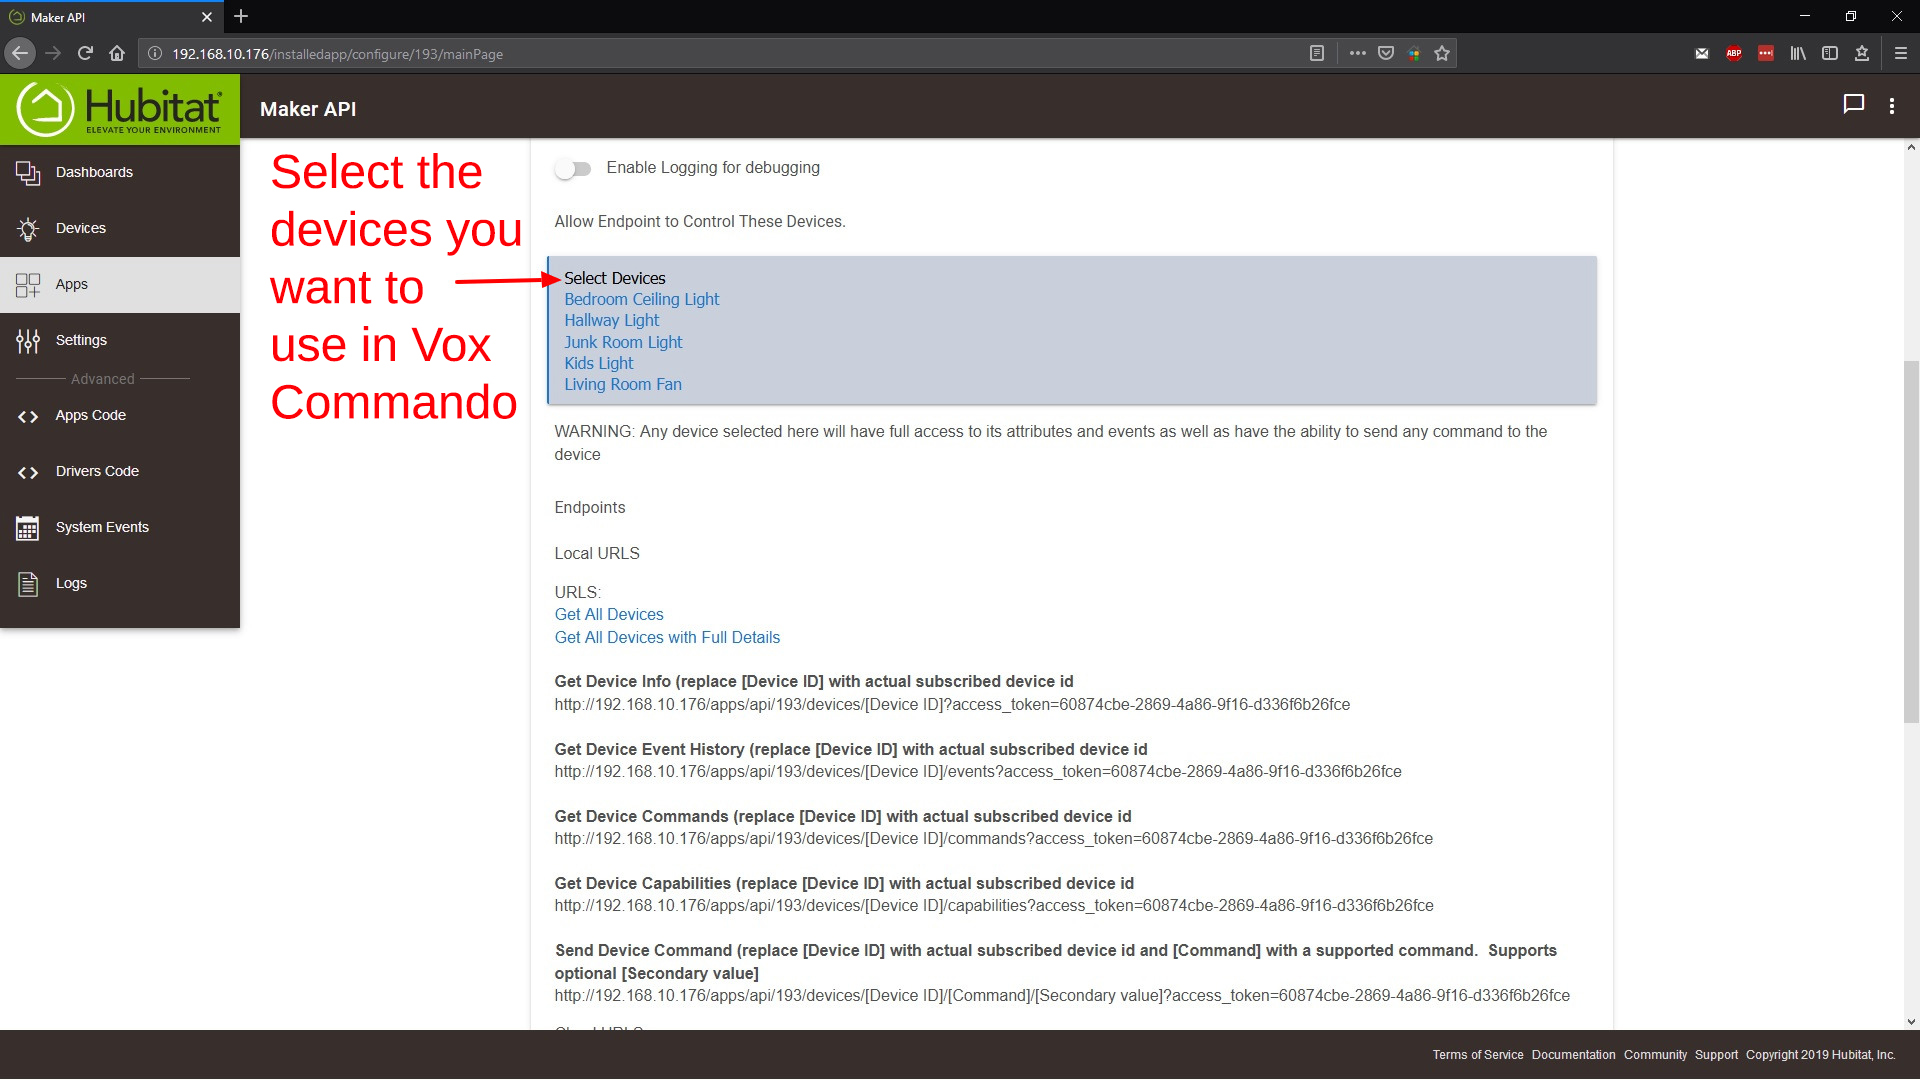
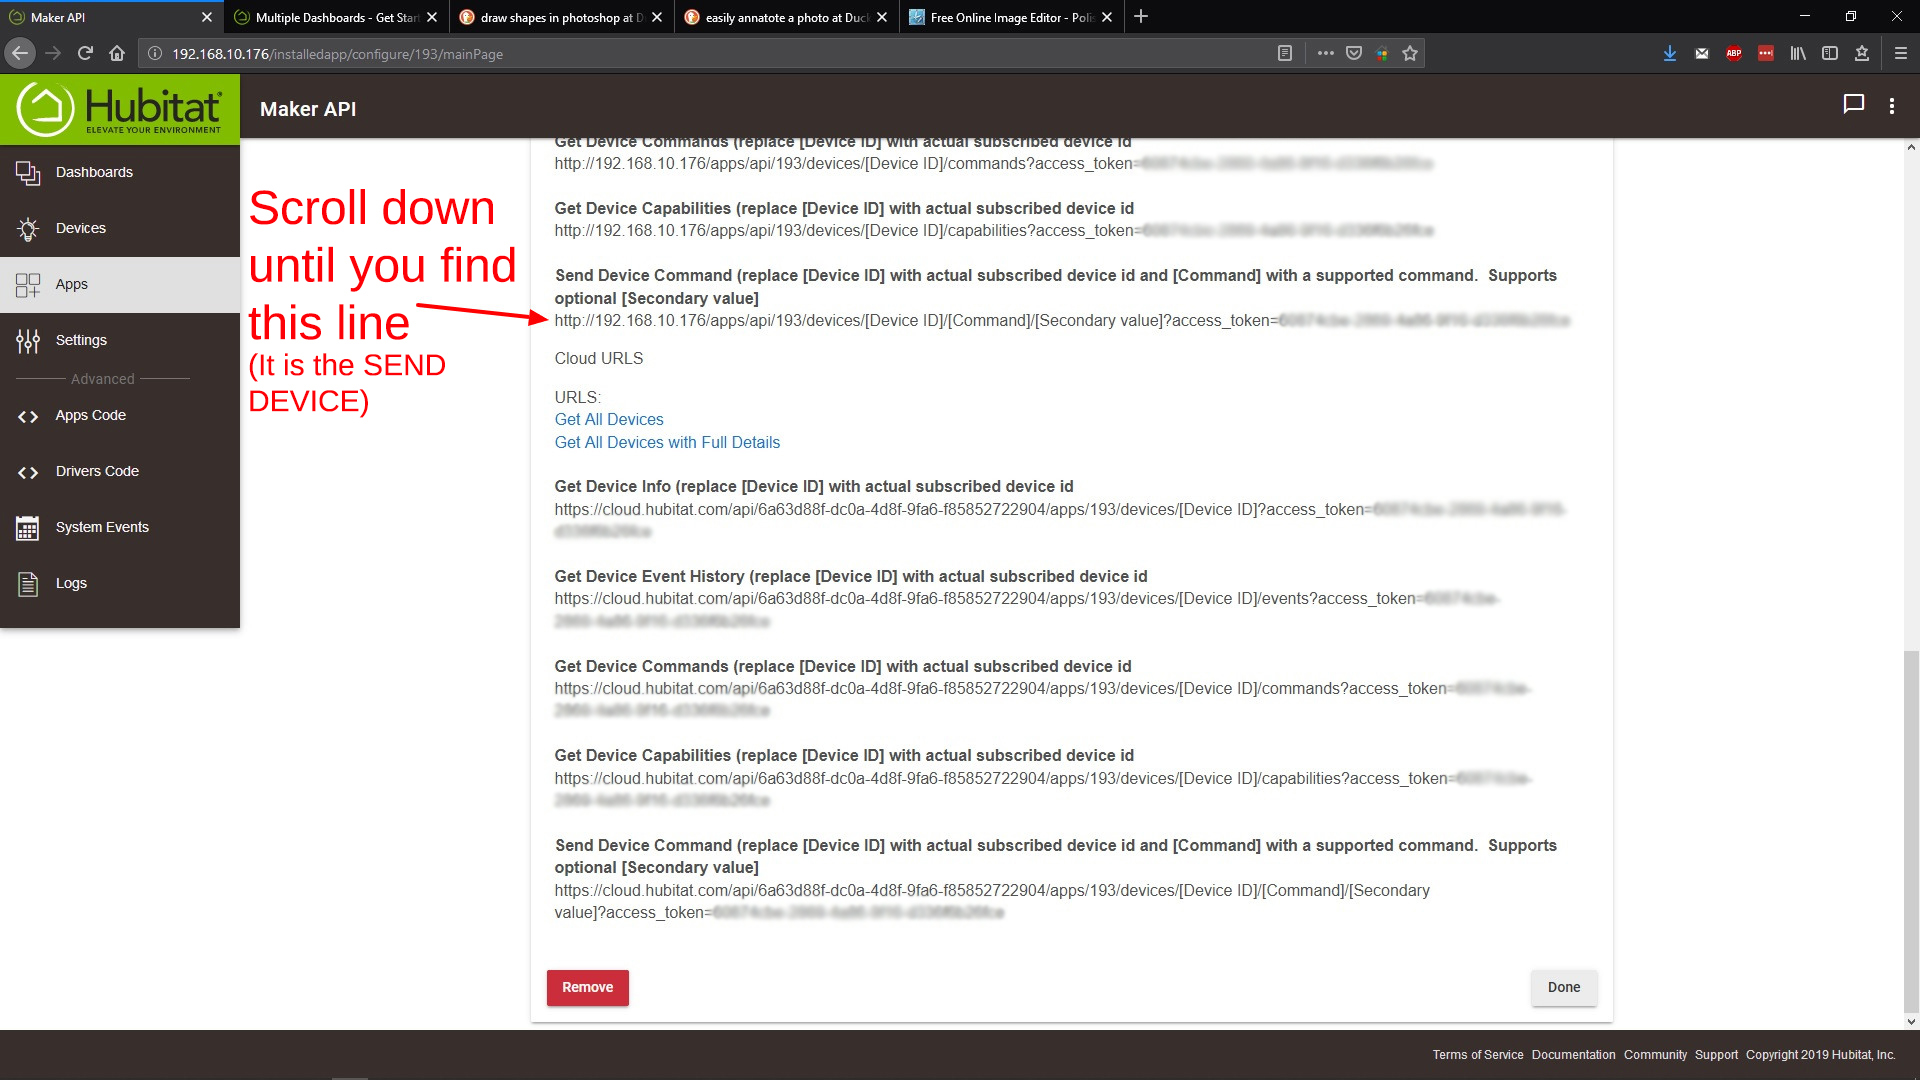
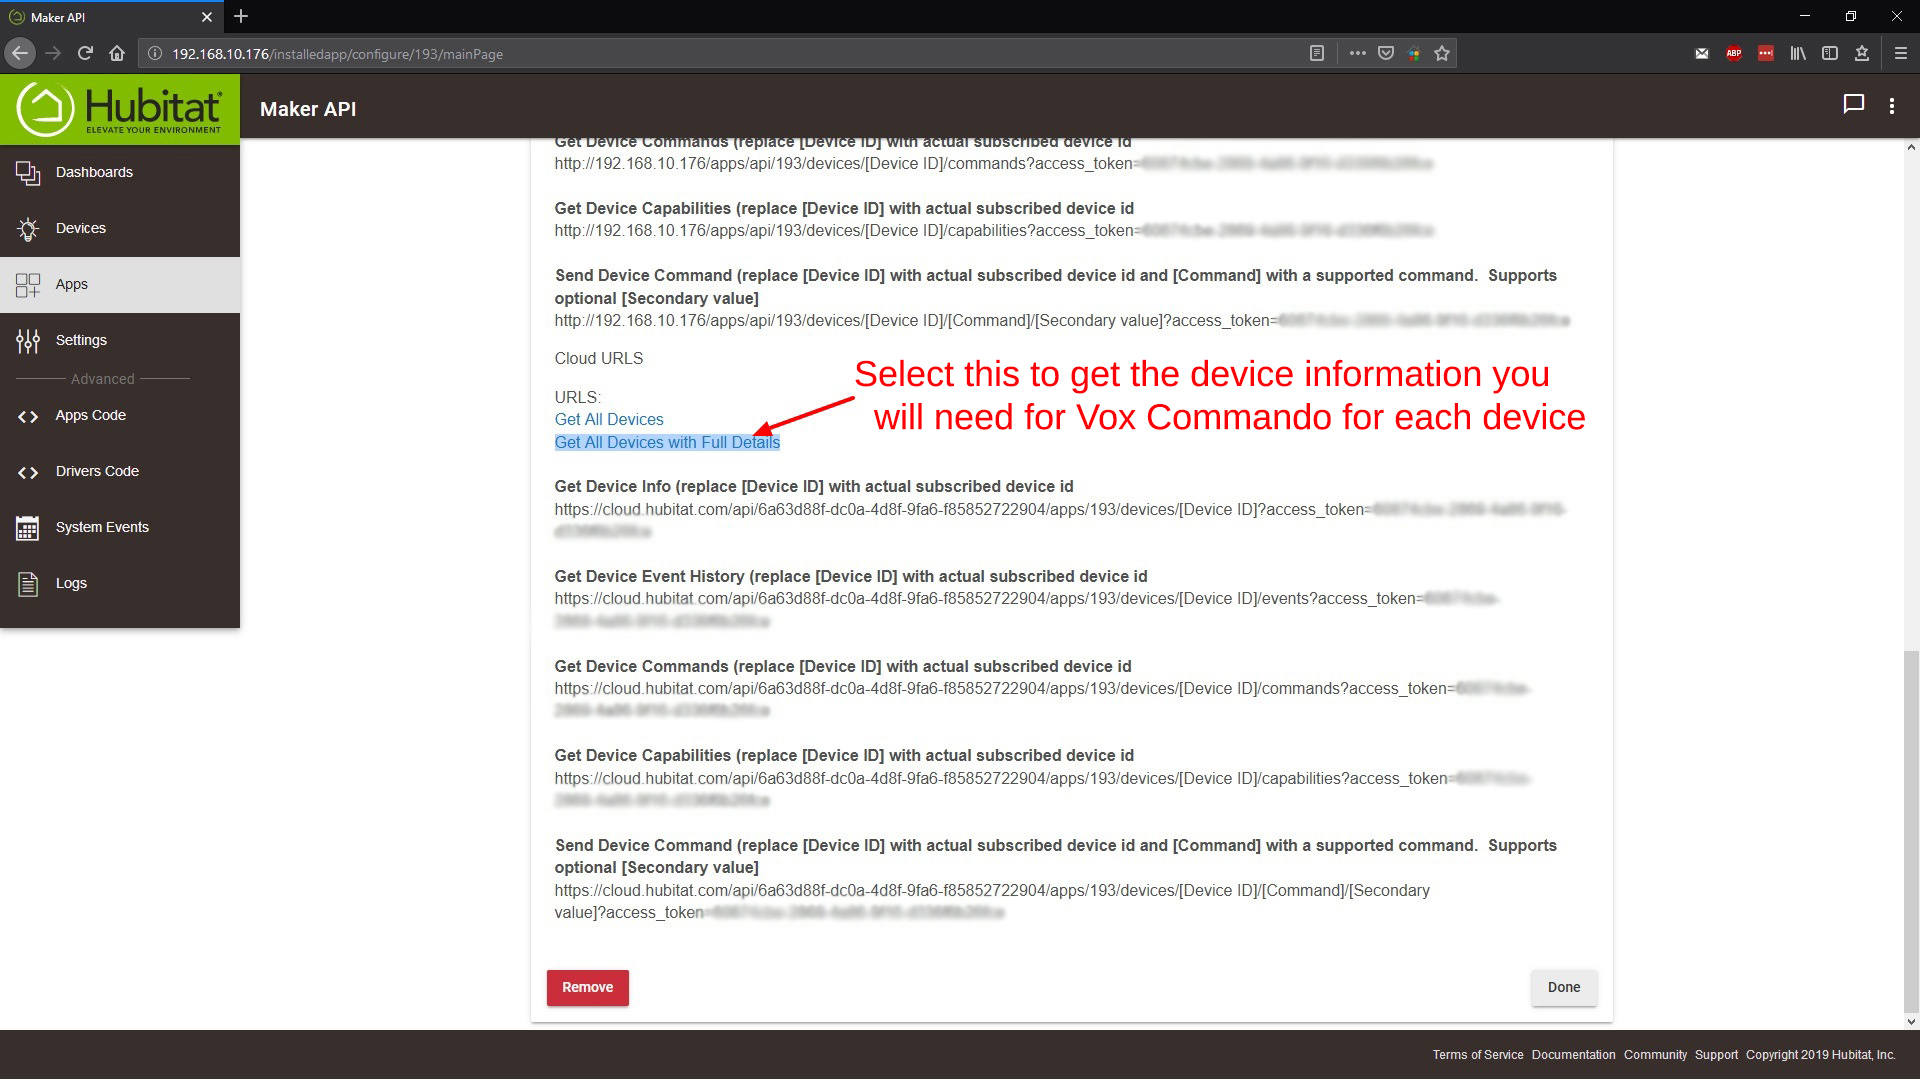
- Scroll down the page and find the following line:
"Send Device Command (replace [Device ID] with actual subscribed device id and [Command] with a supported command. Supports optional [Secondary value]"
"http://192.168.10.176/apps/api/193/devices/[Device ID]/[Command]/[Secondary value]?access_token=xxxxxxxx-xxxx-xxxx-xxxx-xxxxxxxxxxxx"
This is a sample URL from YOUR Hubitat device with your access token, notice the items in [], such as [Device ID] and [Command].You will be replacing them in your actual URL's that you will use in Vox Commando for each device.
- Just below that is a link called "Get All Devices with Full Details" Click on it.
On the new page that opens (image below), you will find the needed information for all your devices your selected in Step 8. Keep this page open as you will need it to prepare your URL's for Vox Commando. (I just took the sample URL and pasted it into Notepad++. Then changed the things in the brackets for each device.) If you look at the image below, the first thing in my list is Bedroom Ceiling Light, I will use that as the example:
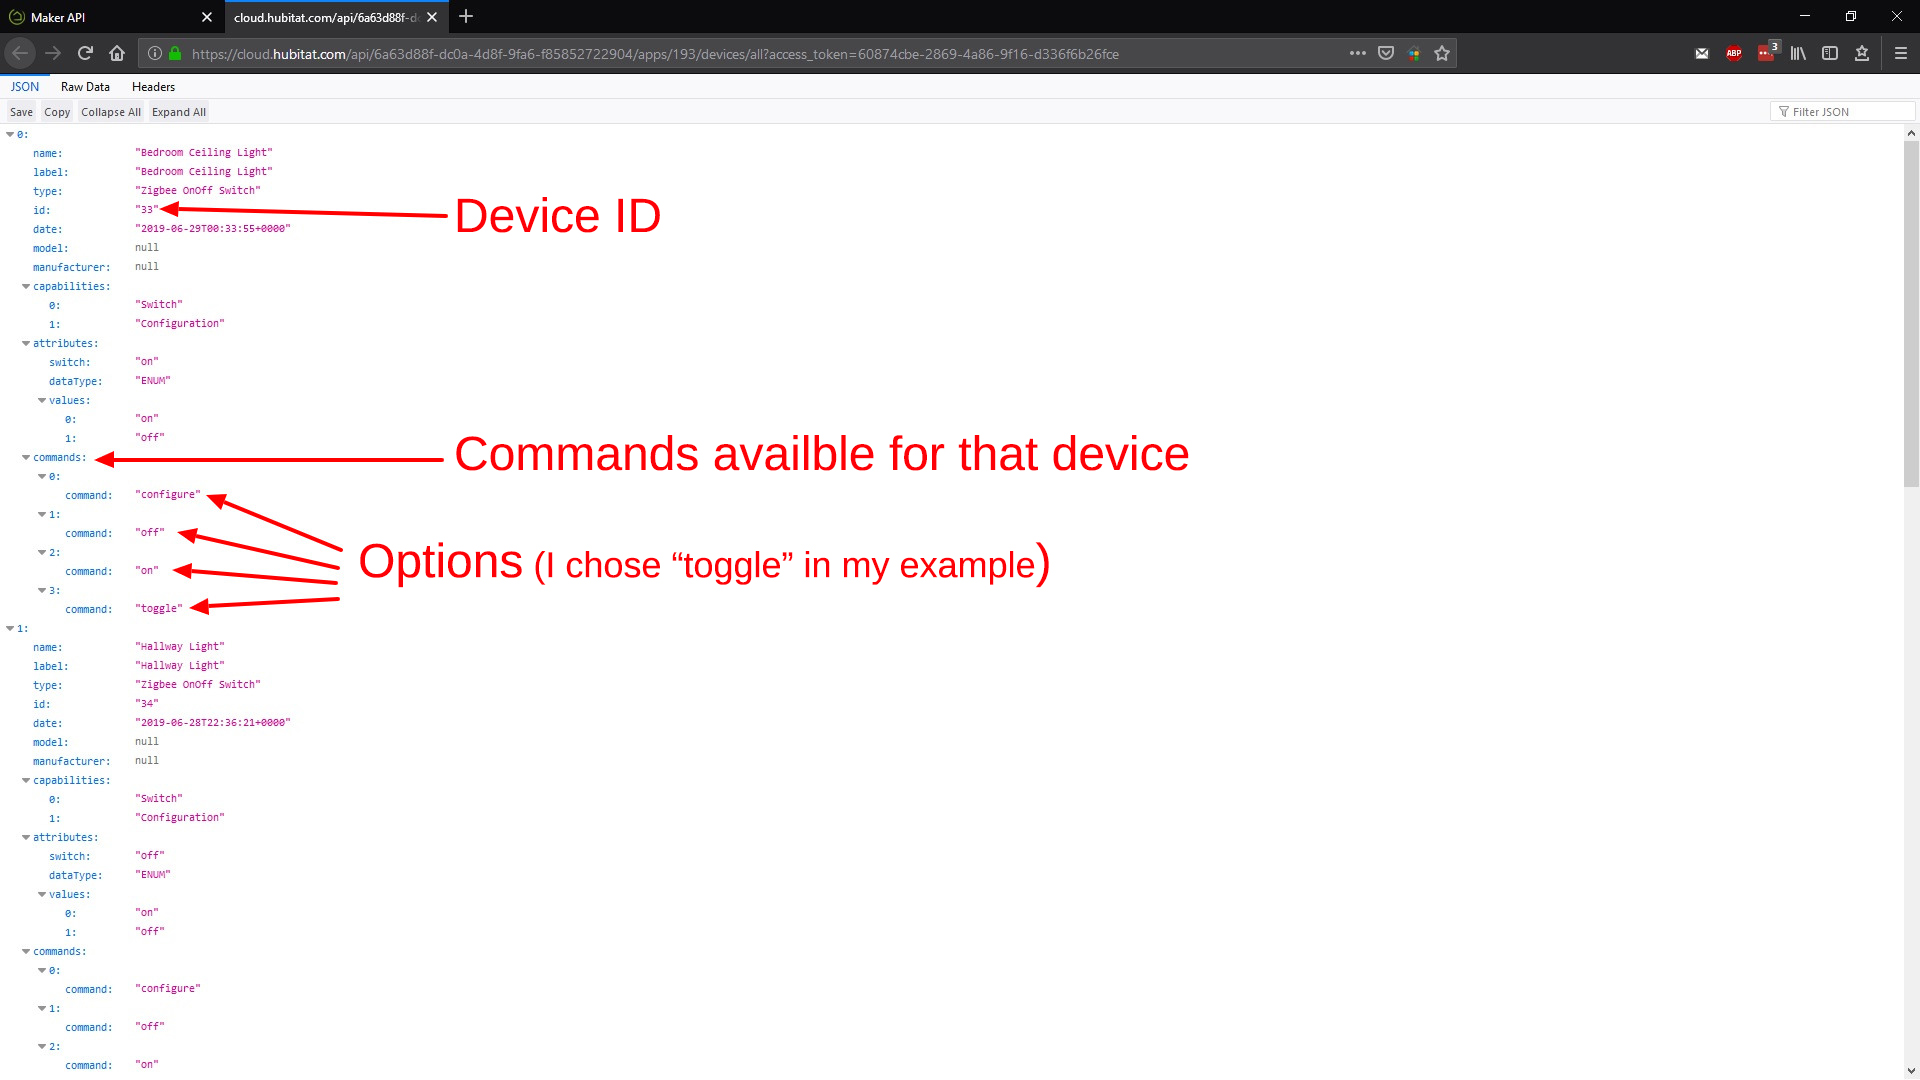
I replaced the [Device ID] with a "33" (dont use brackets), then I replaced the [Command] with "toggle". You can use any of the available commands that your device is showing.
I didn't need the [Secondary value] so I deleted that portion of the URL. So my actual URL looks like this to control my Bedroom Ceiling Light:
http://192.168.10.176/apps/api/193/devices/33/toggle?access_token=xxxxxxxx-xxxx-xxxx-xxxx-xxxxxxxxxxxx - (you can paste the URL in a browser window to test it)
Once I had one working URL, I pasted it over and over in Notepad++, then just changed the device id and command in each line. Then I was able to just copy-n-paste them into Vox Commando when I started setting up the voice commands for each device.
Now back to Vox Commando
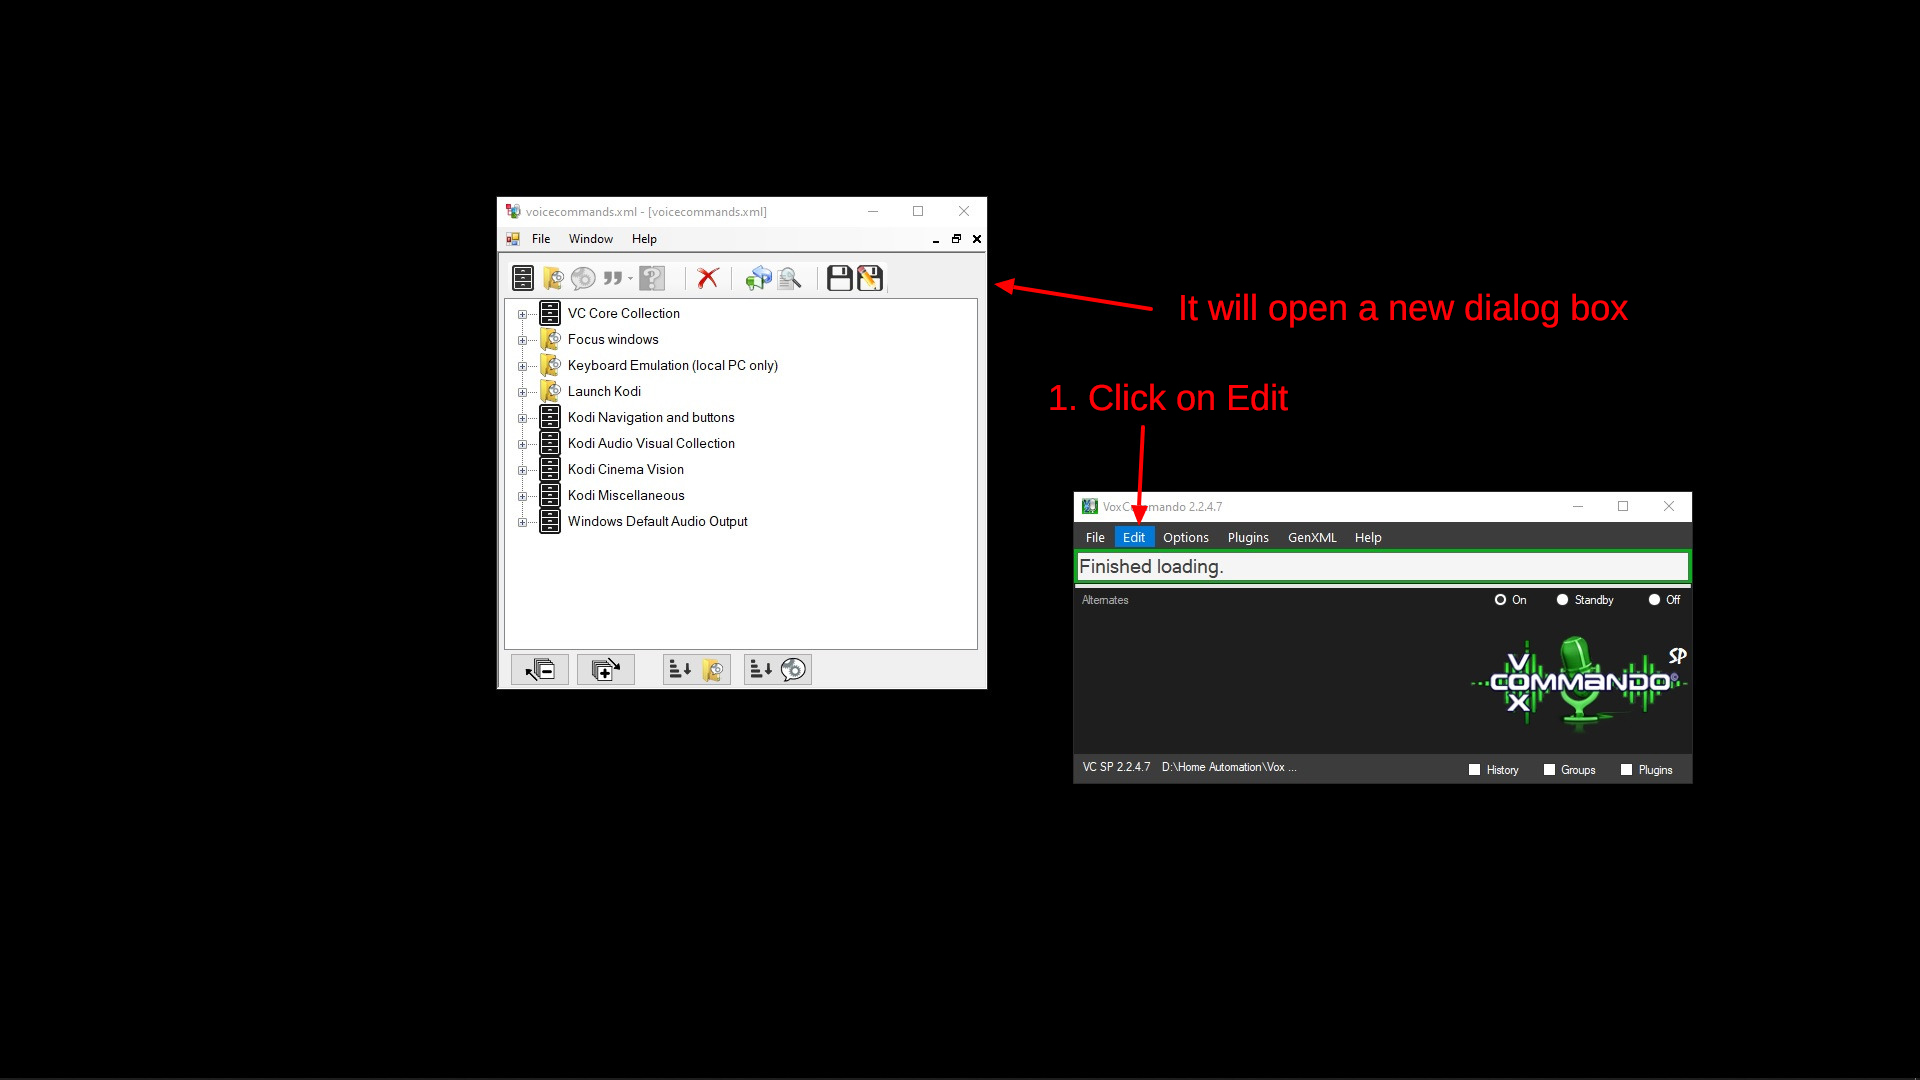
11. Open Vox Commando
12. Choose Edit from the menu
It will open a new dialog box and will vary in what it shows depending on what generic commands you selected when you installed it. (I had chosen Kodi so you will see Kodi in my command tree structure)
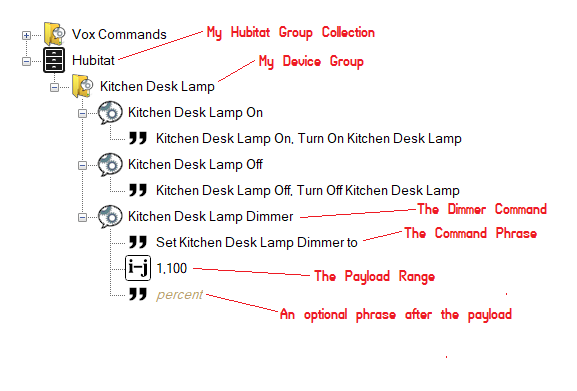
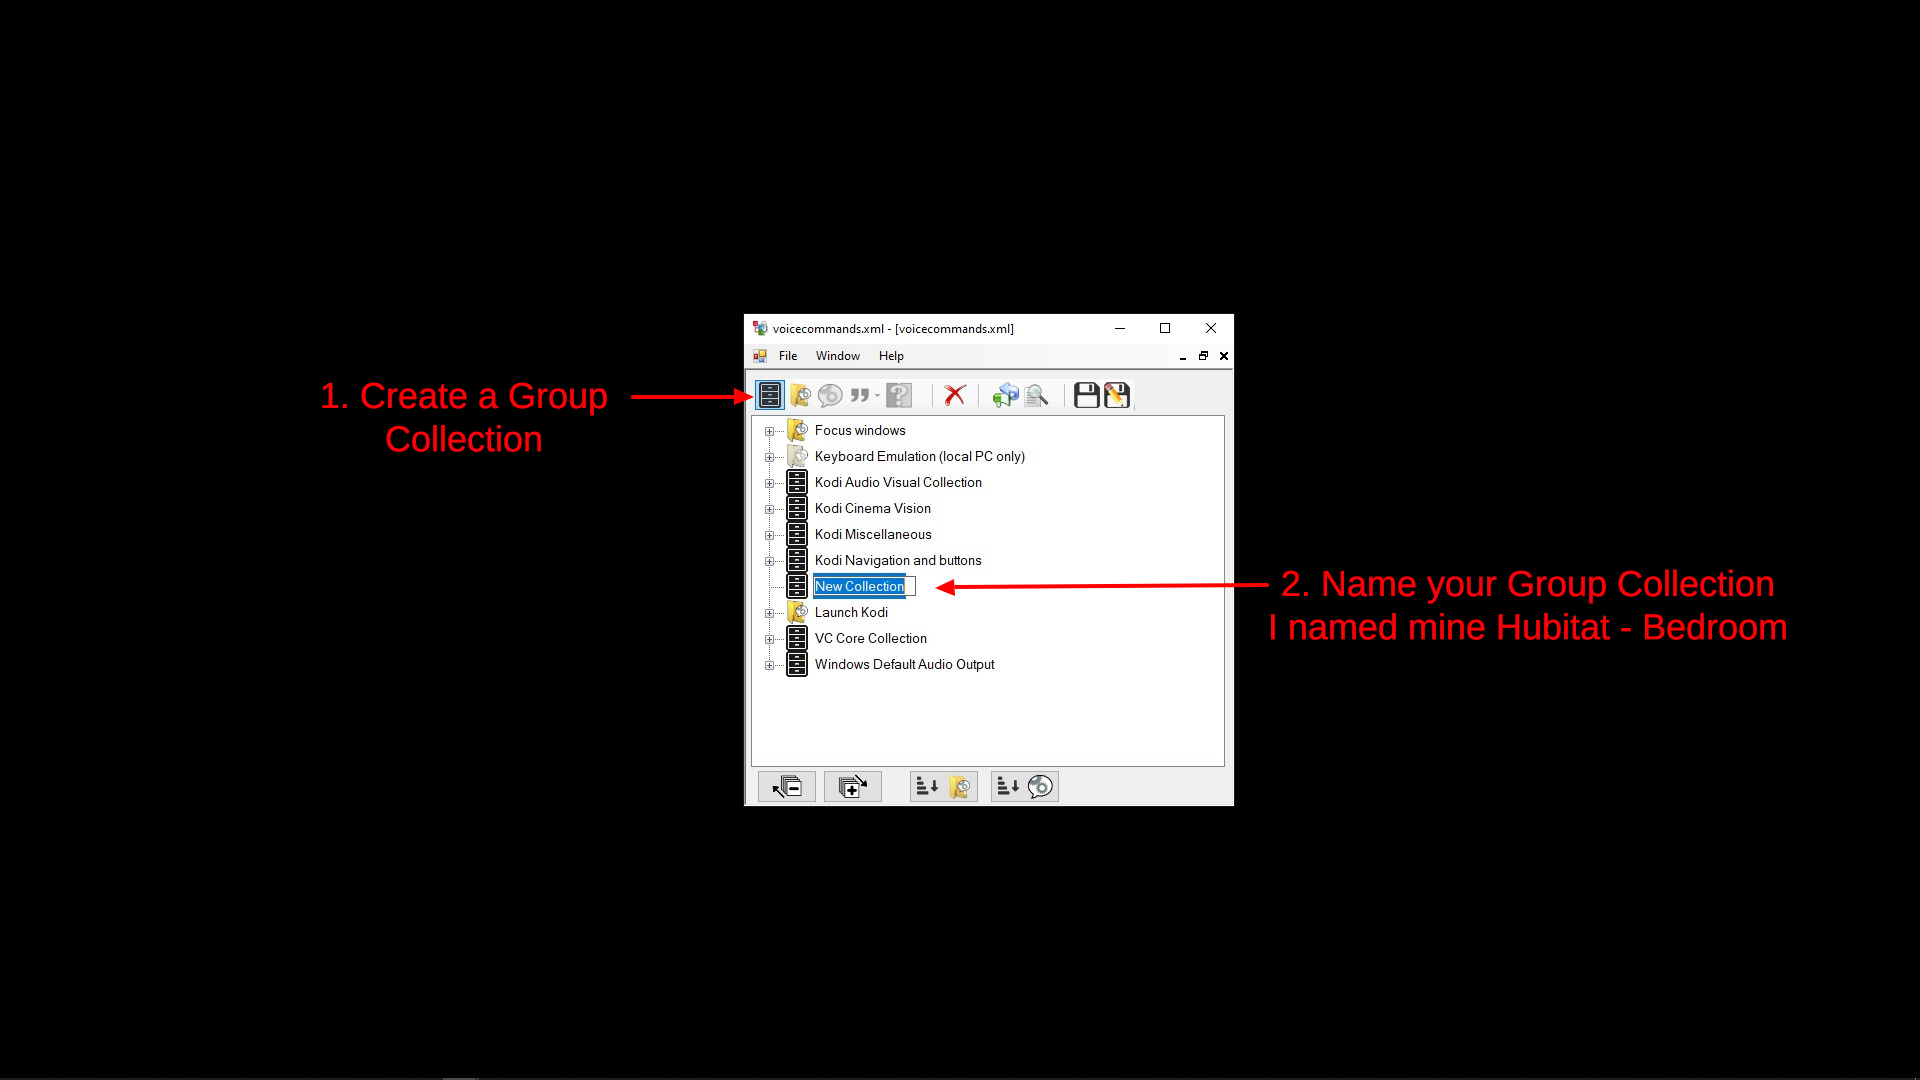
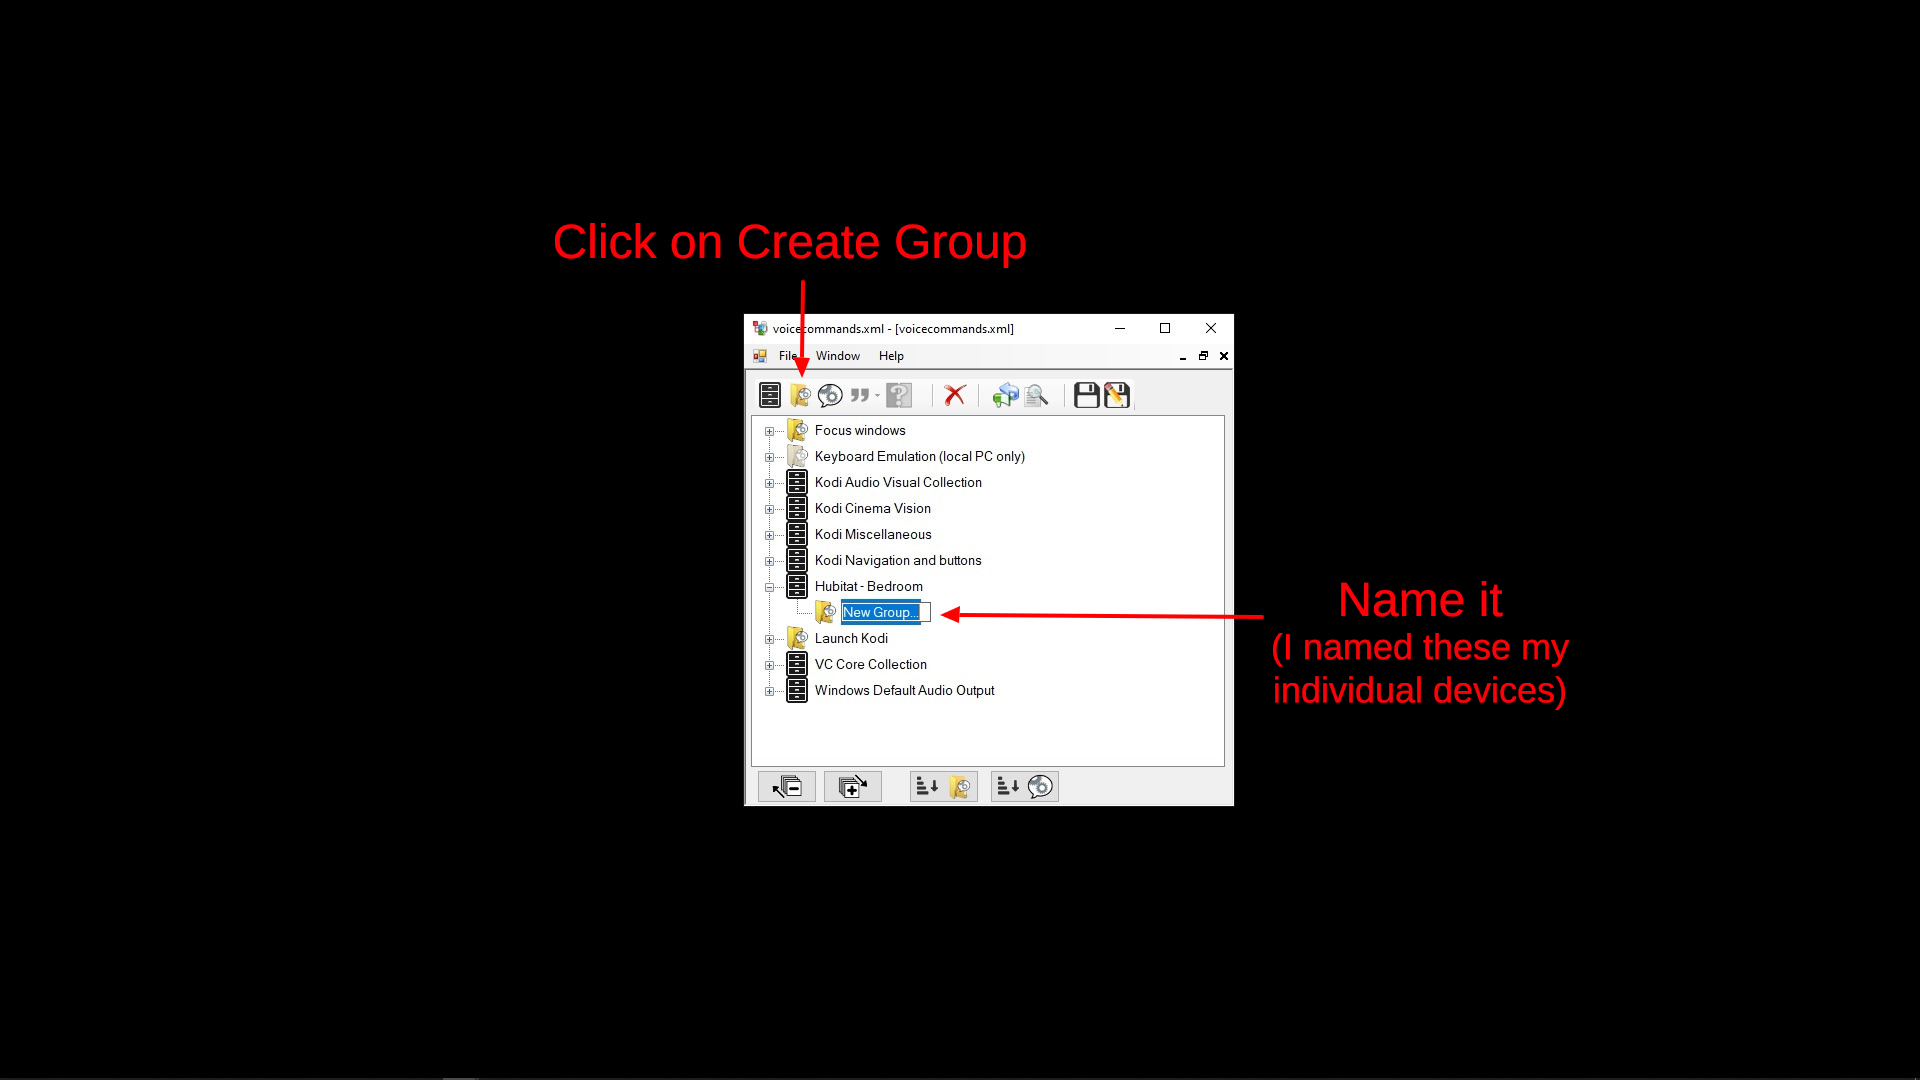
- Click on Create New Group Collection and name the new Group Collection anything you like, I started with Hubitat, but then decided to create a group for each room, so I wound up with "Hubitat - Bedroom", "Hubitat - Living Room", etc..
- Click on Create New Group and name the new Group the device you wish to add, in this example I will use "Bedroom Ceiling Light".
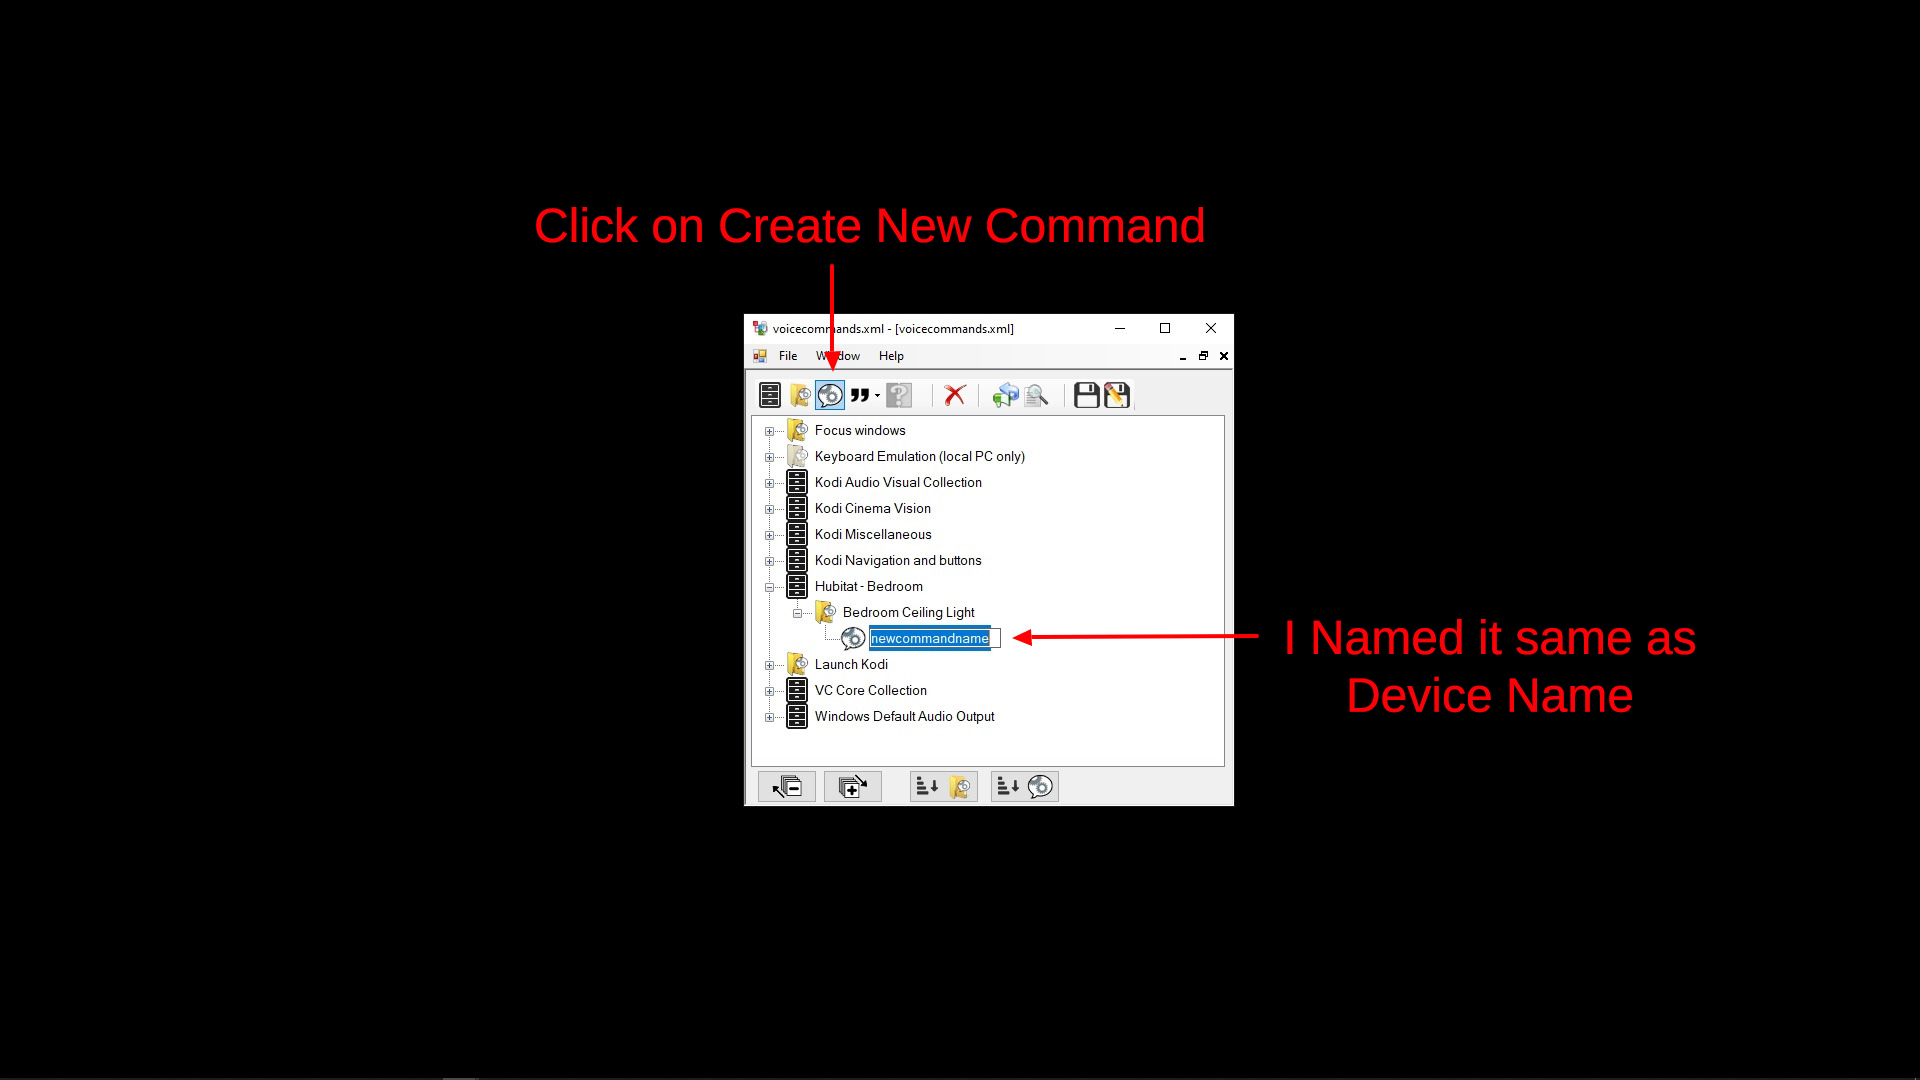
- Create a New Command. I named it same as the device name.
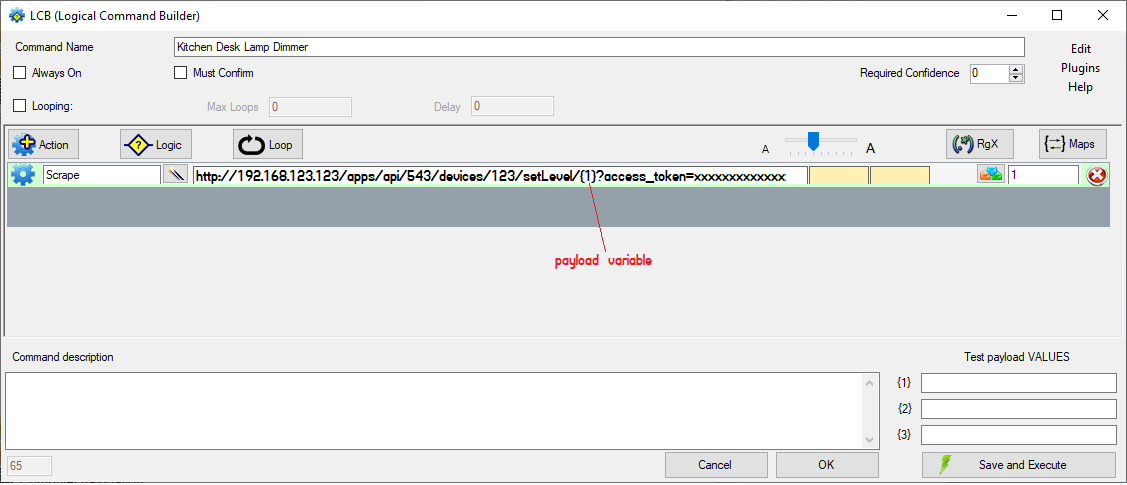
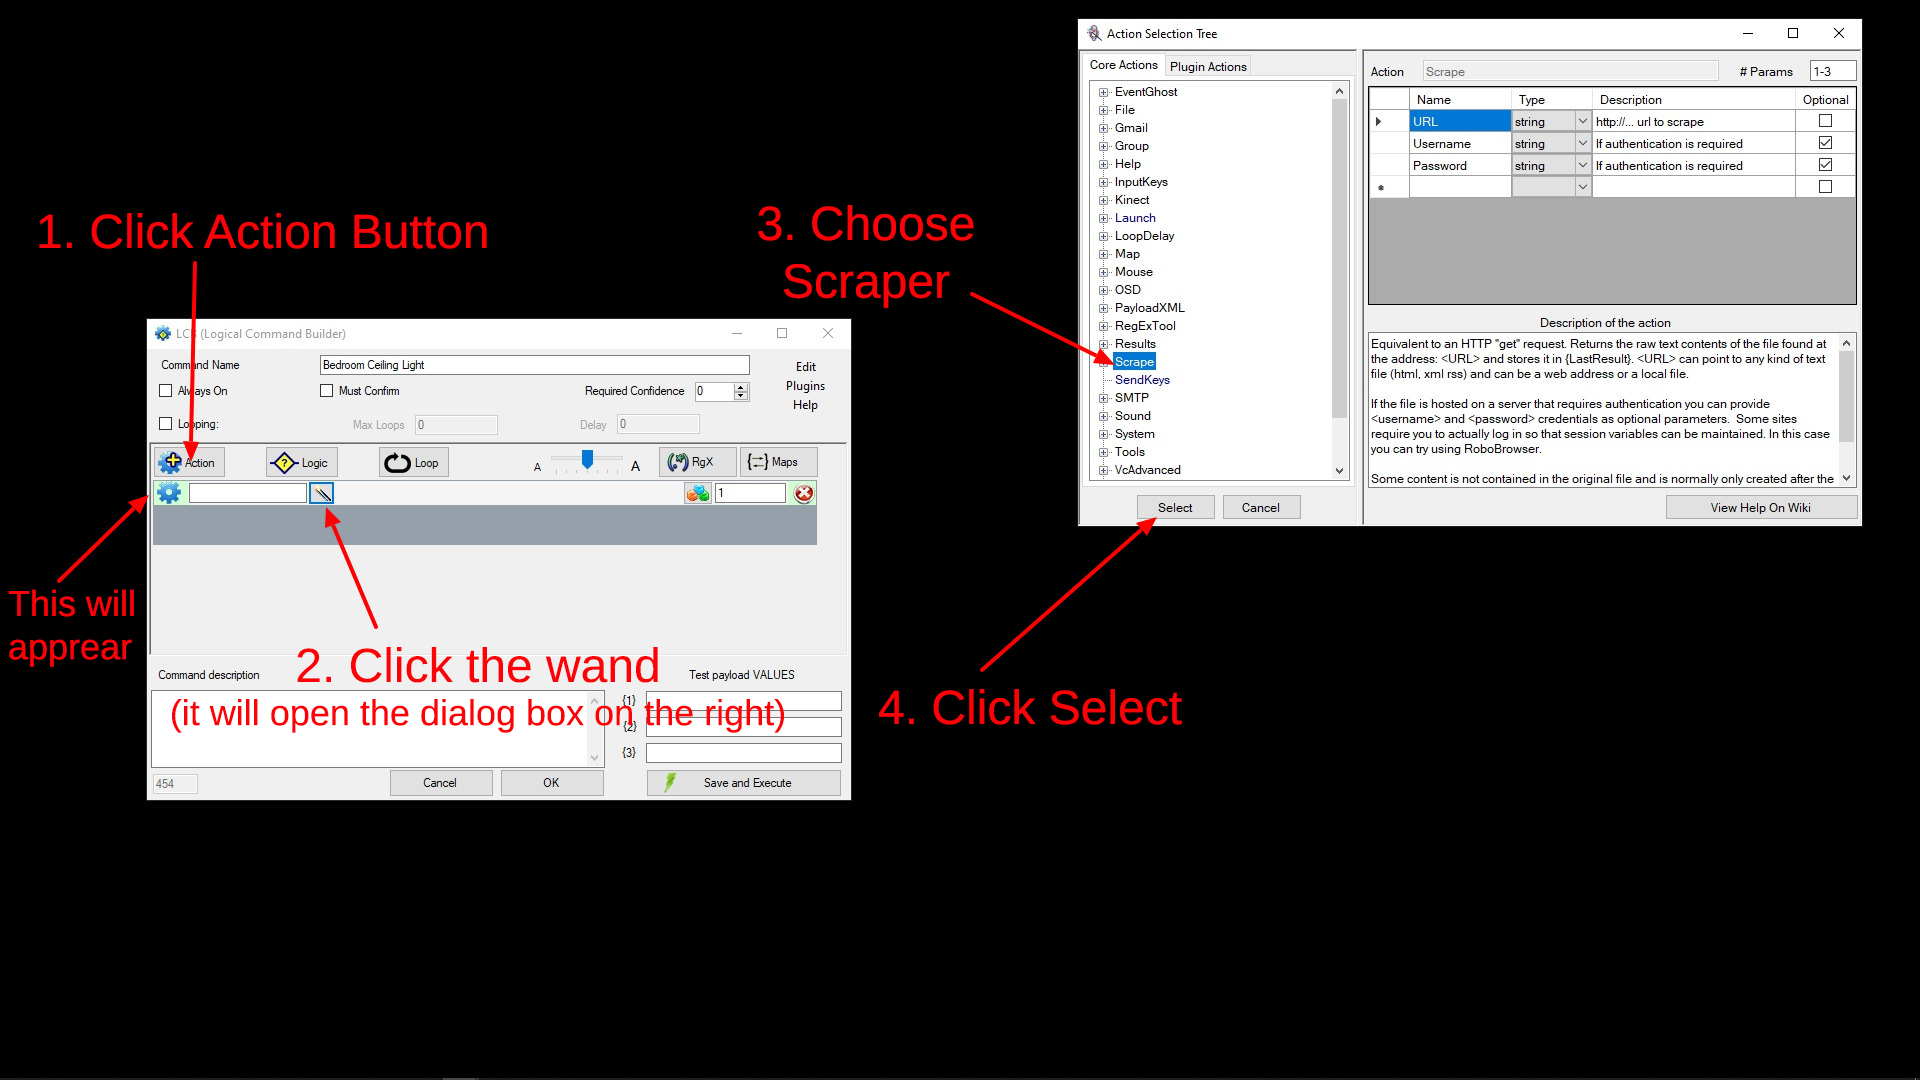
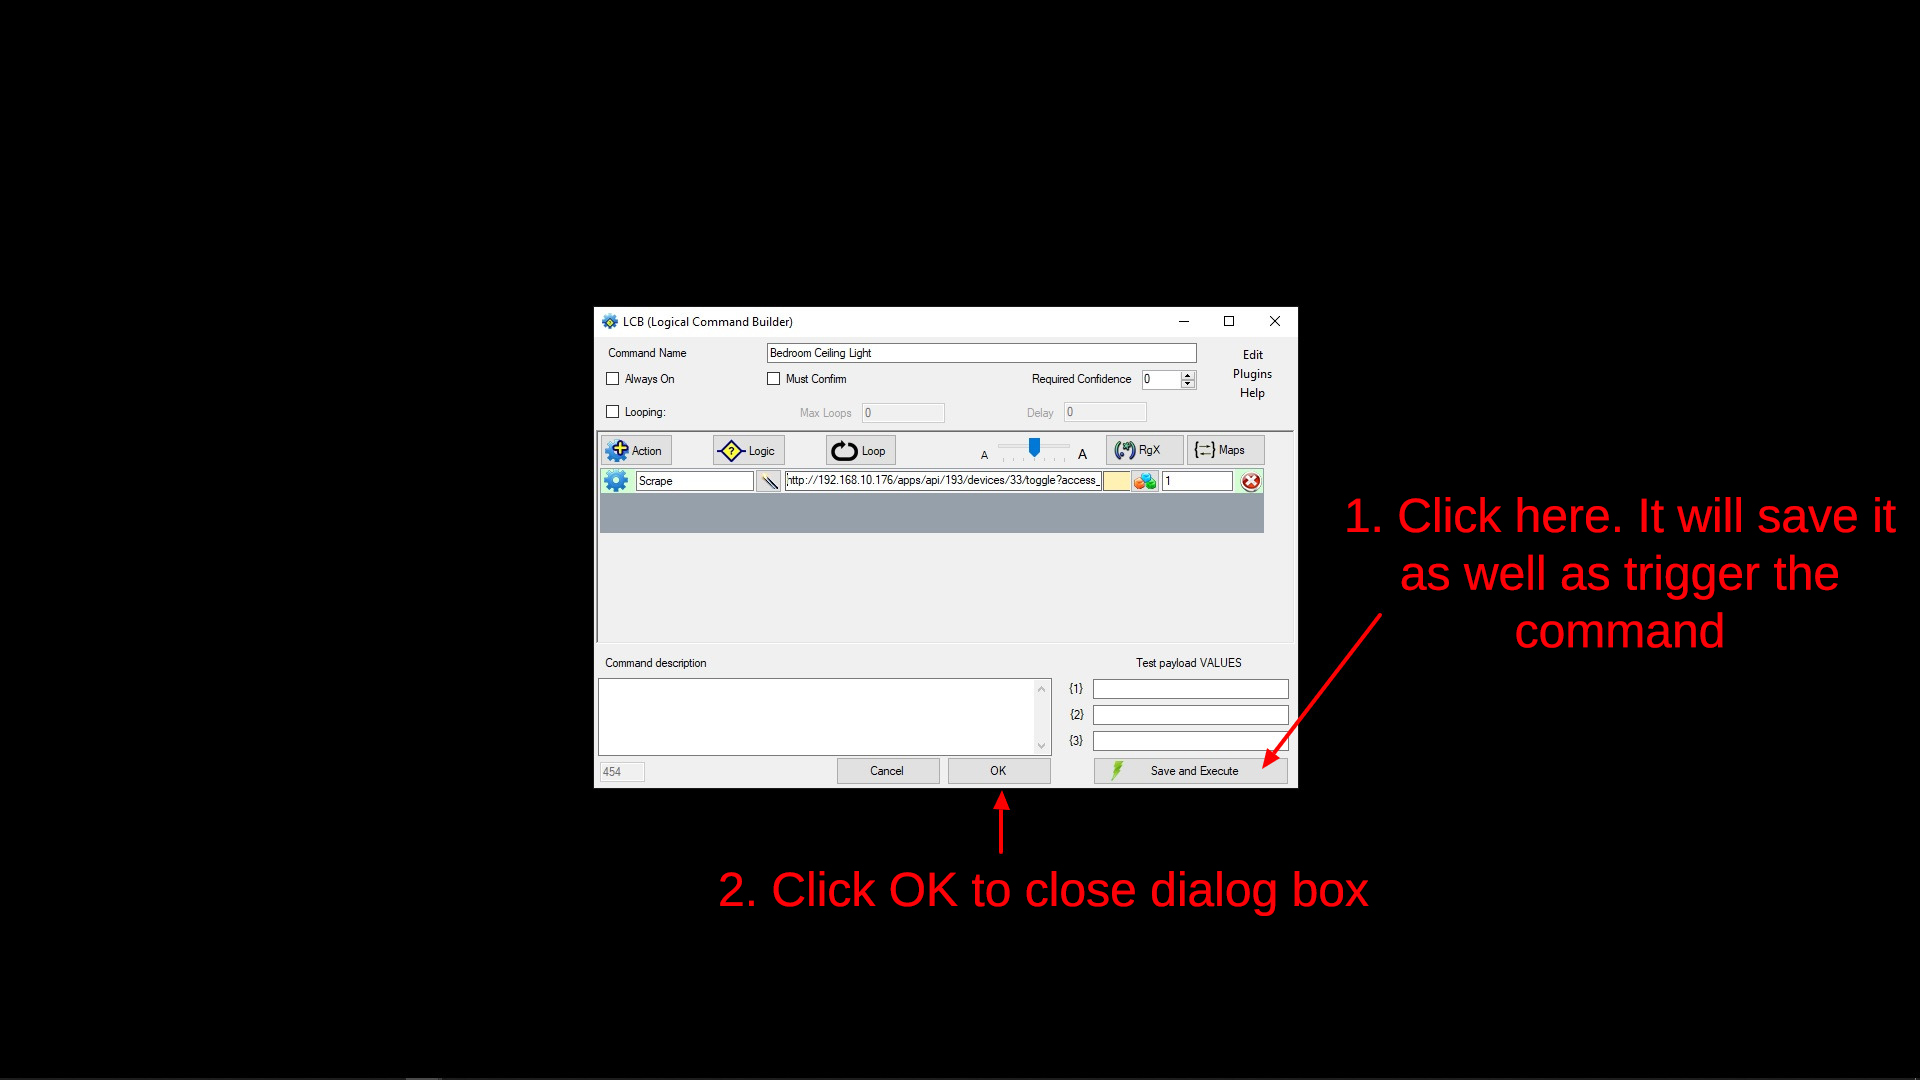
- Click on the little notepad to edit it.

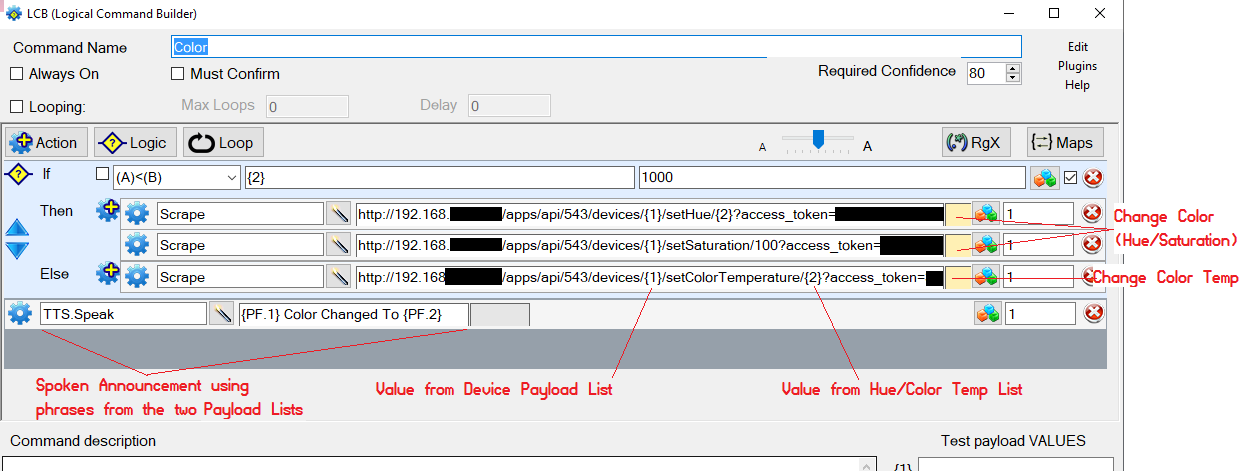
- Follow the 4 numbered steps in the image
- Paste the URL you created for this device.
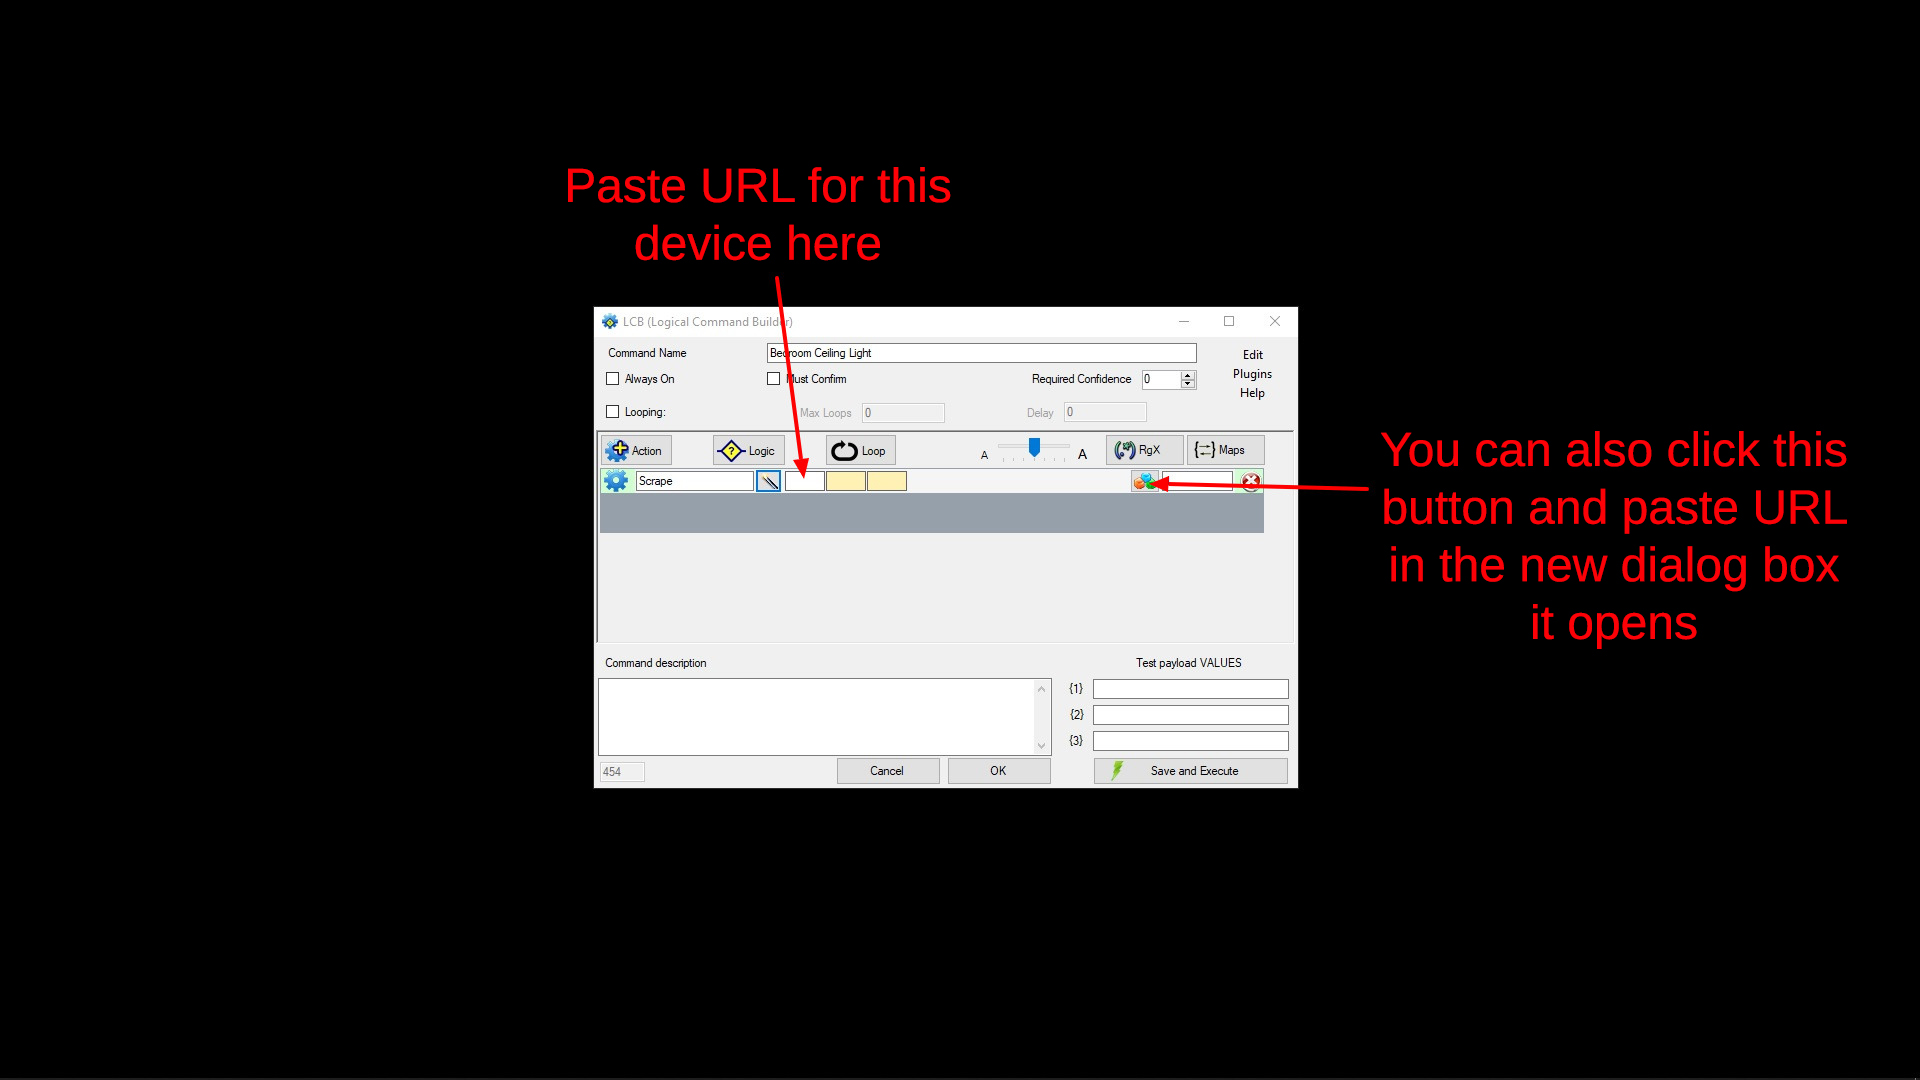
- Click on Save and Execute, this will test it, if it works, click on OK
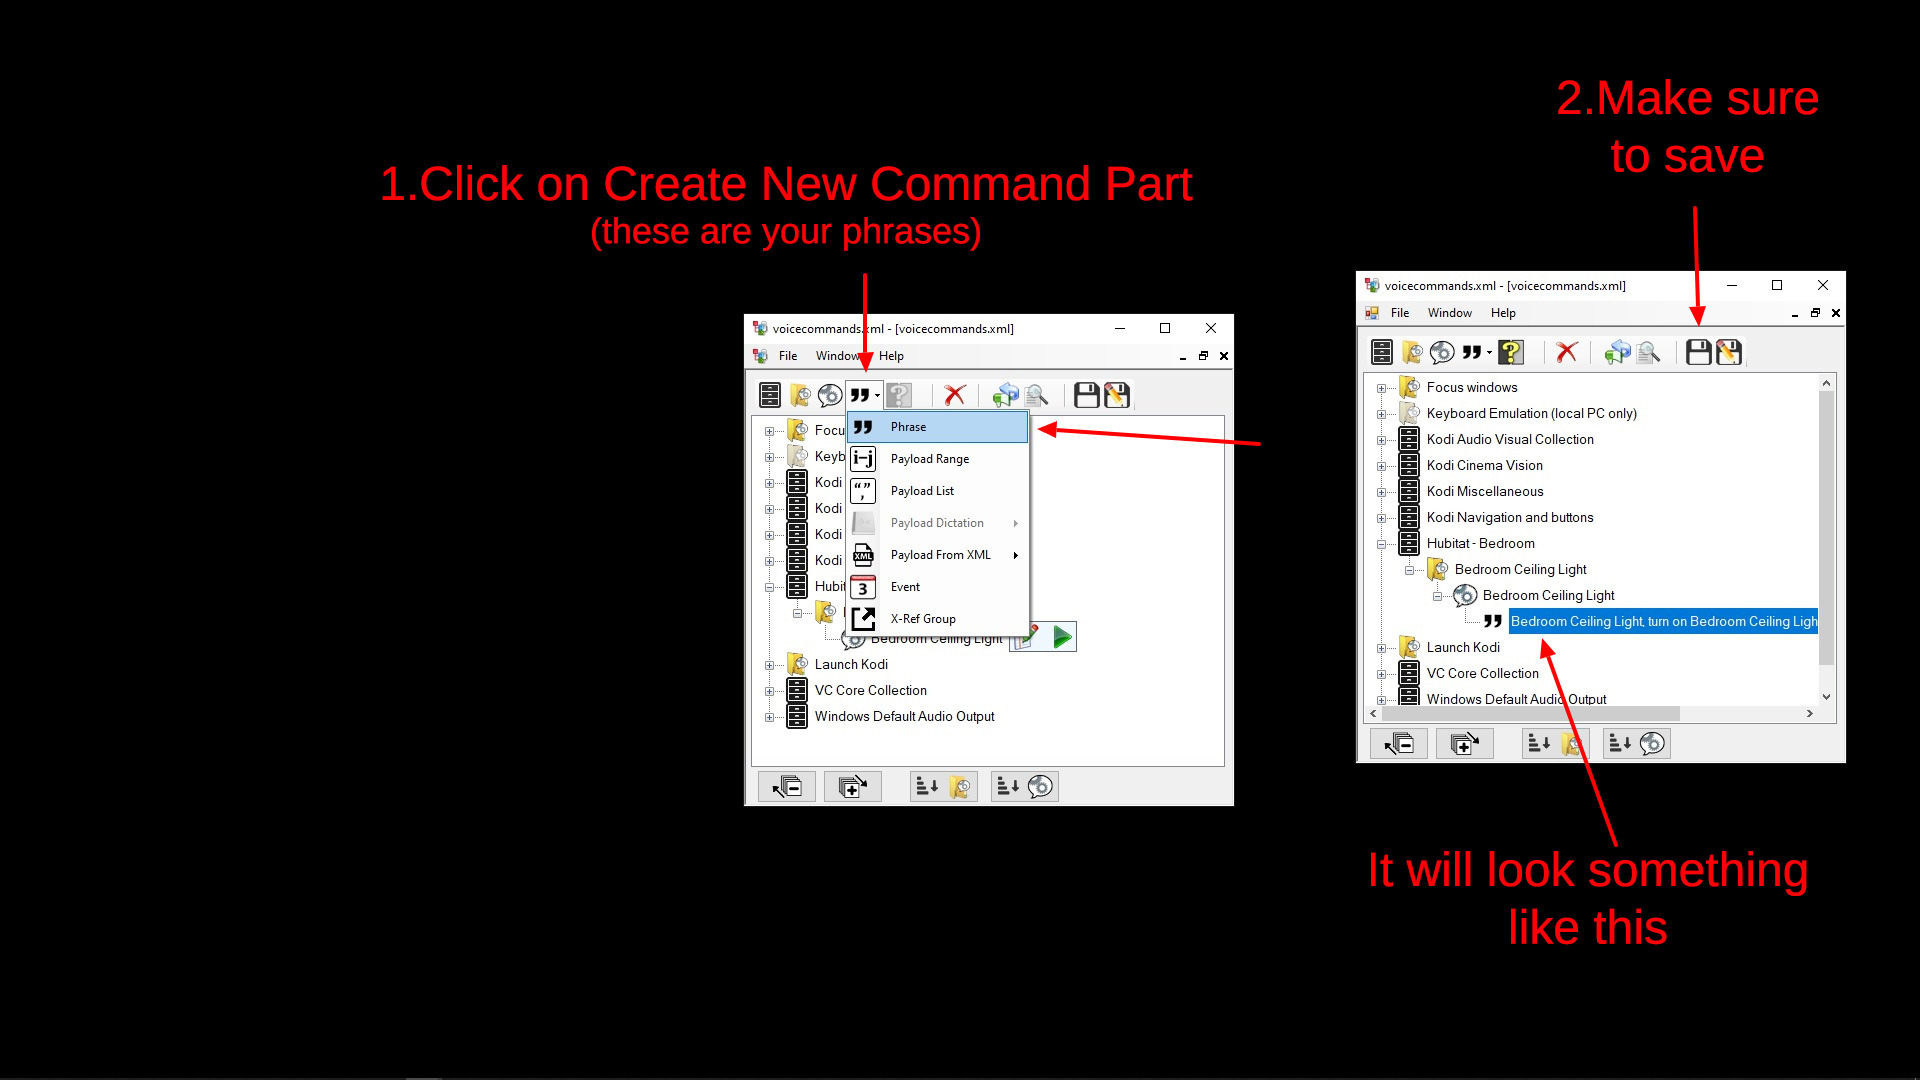
- Click on the Create New Command, this will be your phrases you will use for the device your working on, such as Bedroom Ceiling Light, Turn off Bedroom Ceiling Light, Turn on Bedroom Ceiling Light. Separate them with a comma.
Repeat steps for each Group and devices you want to control with VC. That's the just of it, oh yea, a cool feature in Vox Commando is you can right click on a group or command and copy it to a new one, then just edit them. Another cool feature is you can simply copy your install directory, play around all you want then rename the copy back once you figured out how to do what you are trying to accomplish
Check out their forums. They are great folks as well.
I am still learning all this and finding easier ways as I go, so if you discover a trick or tip to make it easier, please let us know. Hope this helps.
If anyone knows how to hack, mod, flash, etc. a GH mini or Echo Dot to work as a PC mic or know of a good BT conference room microphone that doesn't disconnect BT after 30 minutes-found, PLEASE let me know!!!
UPDATE: I have since updated the mic to a eMeet M2 Conference Mic/Speaker and it is about the closest I have found so far, and I no longer have to say "Hey Google" or "Alexa" any more! (but I still can if I want too).
And between HE and VC, you can create about any type of routine or scene.