In the 2.2.4 release notes I see “Shelly 1 using Shelly WiFi Switch” listed. Very cool.
Not finding installation or configuration instructions for the HE. Configured the device for my LAN at IP x.x.x.50. Tried the Devices —> Discover Devices —> LAN Devices and see a beautiful green bar spin in a circle forever.
Thanks @neonturbo. Pretty terse. I missed other references to the HE-supported method of configuring the device.
@jasonbalsor .... as I was searching .... looks like there was a community driver prior to 2.2.4. Judging from the release notes, this is the first HE-supported release of the Shelly 1.
This guide was written using the Hubitat Elevation, C-5, 2.2.4.147 and a Shelly 1 switch. It describes the ‘happy path” and should there be other challenges, refer to the Shelly documentation.
Configure the Shelly 1 onto your LAN
It is best to configure a static IP for the Shelly 1. With a dynamic IP, the Hubitat will lose the Shelly 1 when the DHCP lease expires.
1
Apply line and neutral to the Shelly 1.
2
With a laptop, or tablet, connect to a network that looks something like shelly1-35FA58.
3
Click the “internet & Security” button.
4
Supply your LAN SSID and PW
5
Select “Set static IP address” and provide the network values.
6
When the “SAVE” bar it selected, the device will connect to the LAN, at the supplied IP. Make sure the IP address is outside the range supplied by the DHCP server.
Create Hubitat Evolution Virtual Device
Create a virtual device that will control the Shelly 1.
1
Devices Add Virtual Device
2
Supply a “Device Name” and “Device Label”
3
From the “Type” dropdown, select “Shelly WiFi Switch”
4
Select the “Save Device” button.
5
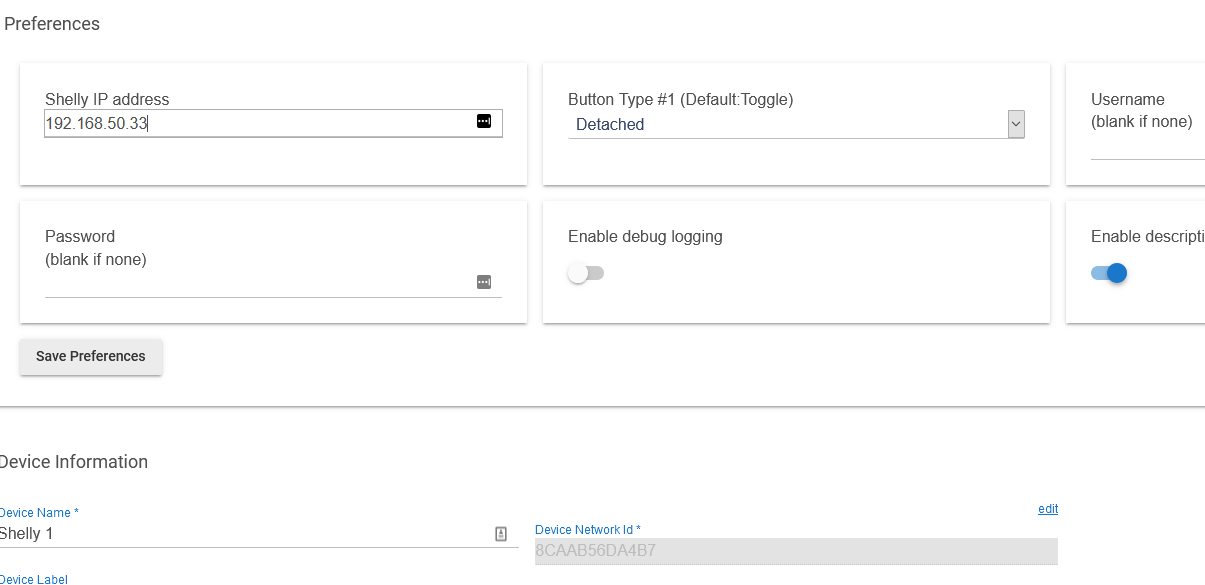
Supply the IP number in the “Shelly IP address” field
6
Select the “Save Preferences”
This creates a virtual device with a child device. If the virtual device is named “SH1” (from the Device Label field in step 2) the child device will be named “SH1 Channel 1”
Configure a HE Control
Create a tile on a dashboard. Select the child device in the “Pick A Device” dropdown and select “Switch” in the “Pick a template” dropdown.
I am also trying to get a Shelly 1 connected up to my Hubitat Elevation. I'd like to use the Shelly in the detached mode where I can independently write rules for the input switch vs the output relay/contacts. Currently, I can control the output manually under the device settings OR using automation rules. I can't seem to find any way to interface with the switch input of the shelly though. My logs don't show anything but the output changes.
Immediately I could see the shelly calling urls against the Hubitat webserver and hitting the logs. Under my rules, I did have to use the trigger type "Switches" vs "buttons" or similar like I usually use but it DOES work in detached mode.
Do you know if there's a way to make it work with restricted login? I'm assuming that for security reasons it's better to protect the Shelly web interface with username and password. However, after applying that in the Shelly web interface for my device (a Shelly Plug S), and configuring the same credentials on the virtual parent device, I can no longer turn the plug on or off through Hubitat. It still reads the status correctly, but I cannot control it.
Thanks for any pointers that might help a newbie
/J
Very welcome, and pleased that you find them useful. Wish I could help @wentzel, but I haven't tried setting up credentials. And, you make a good point and I thought the same. It really should not be left open and not requiring credentials. Completely agree.
Guess I'm just being a lazy S.O.B.! If ya get it working, let us know the secret sauce?
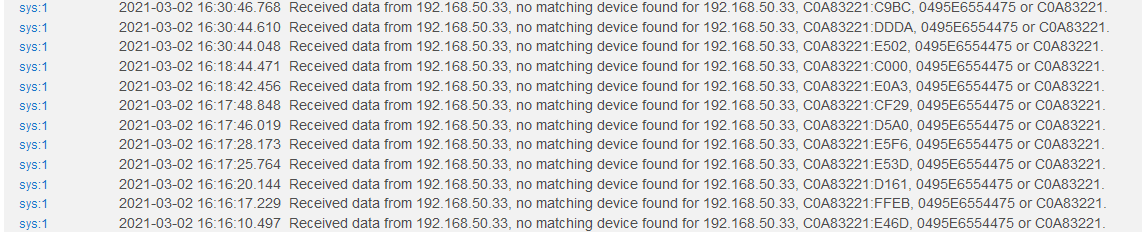
I'm very new to hubitat..... I'm trying to get the switch state into the hub, but I guess I don't quite understand how this is done. I see in my log that I get a message, but it says "Received data from (ip address of shelly 1), no matching device found for (ip address of shelly1), followed by some hex numbers.
I tried following the example of having the URLs hit, but I'm not sure where the port numbers came from, etc.