I sometimes get the following error on my aqara motion sensors:
![]()
That error is nothing to worry about, as it's caused by a message which serves no purpose, and the driver will simply continue working just fine with all the messages that are useful.
One of these days, when my life settles down a bit, I'll release an update to the driver that just ignores those occasional non-useful messages which cause the error.
2 Likes
The Konke motion sensor finally arrived yesterday. One of the longer wait times, but Banggood apparently didn't have them in stock for 15 days after my order, so actually not too bad.
The size is tiny. Not the nicest looking, but not bad. Same diameter as the Aqara and Mijia motion sensors, but half the height. Exact same battery as the Xiaomi.
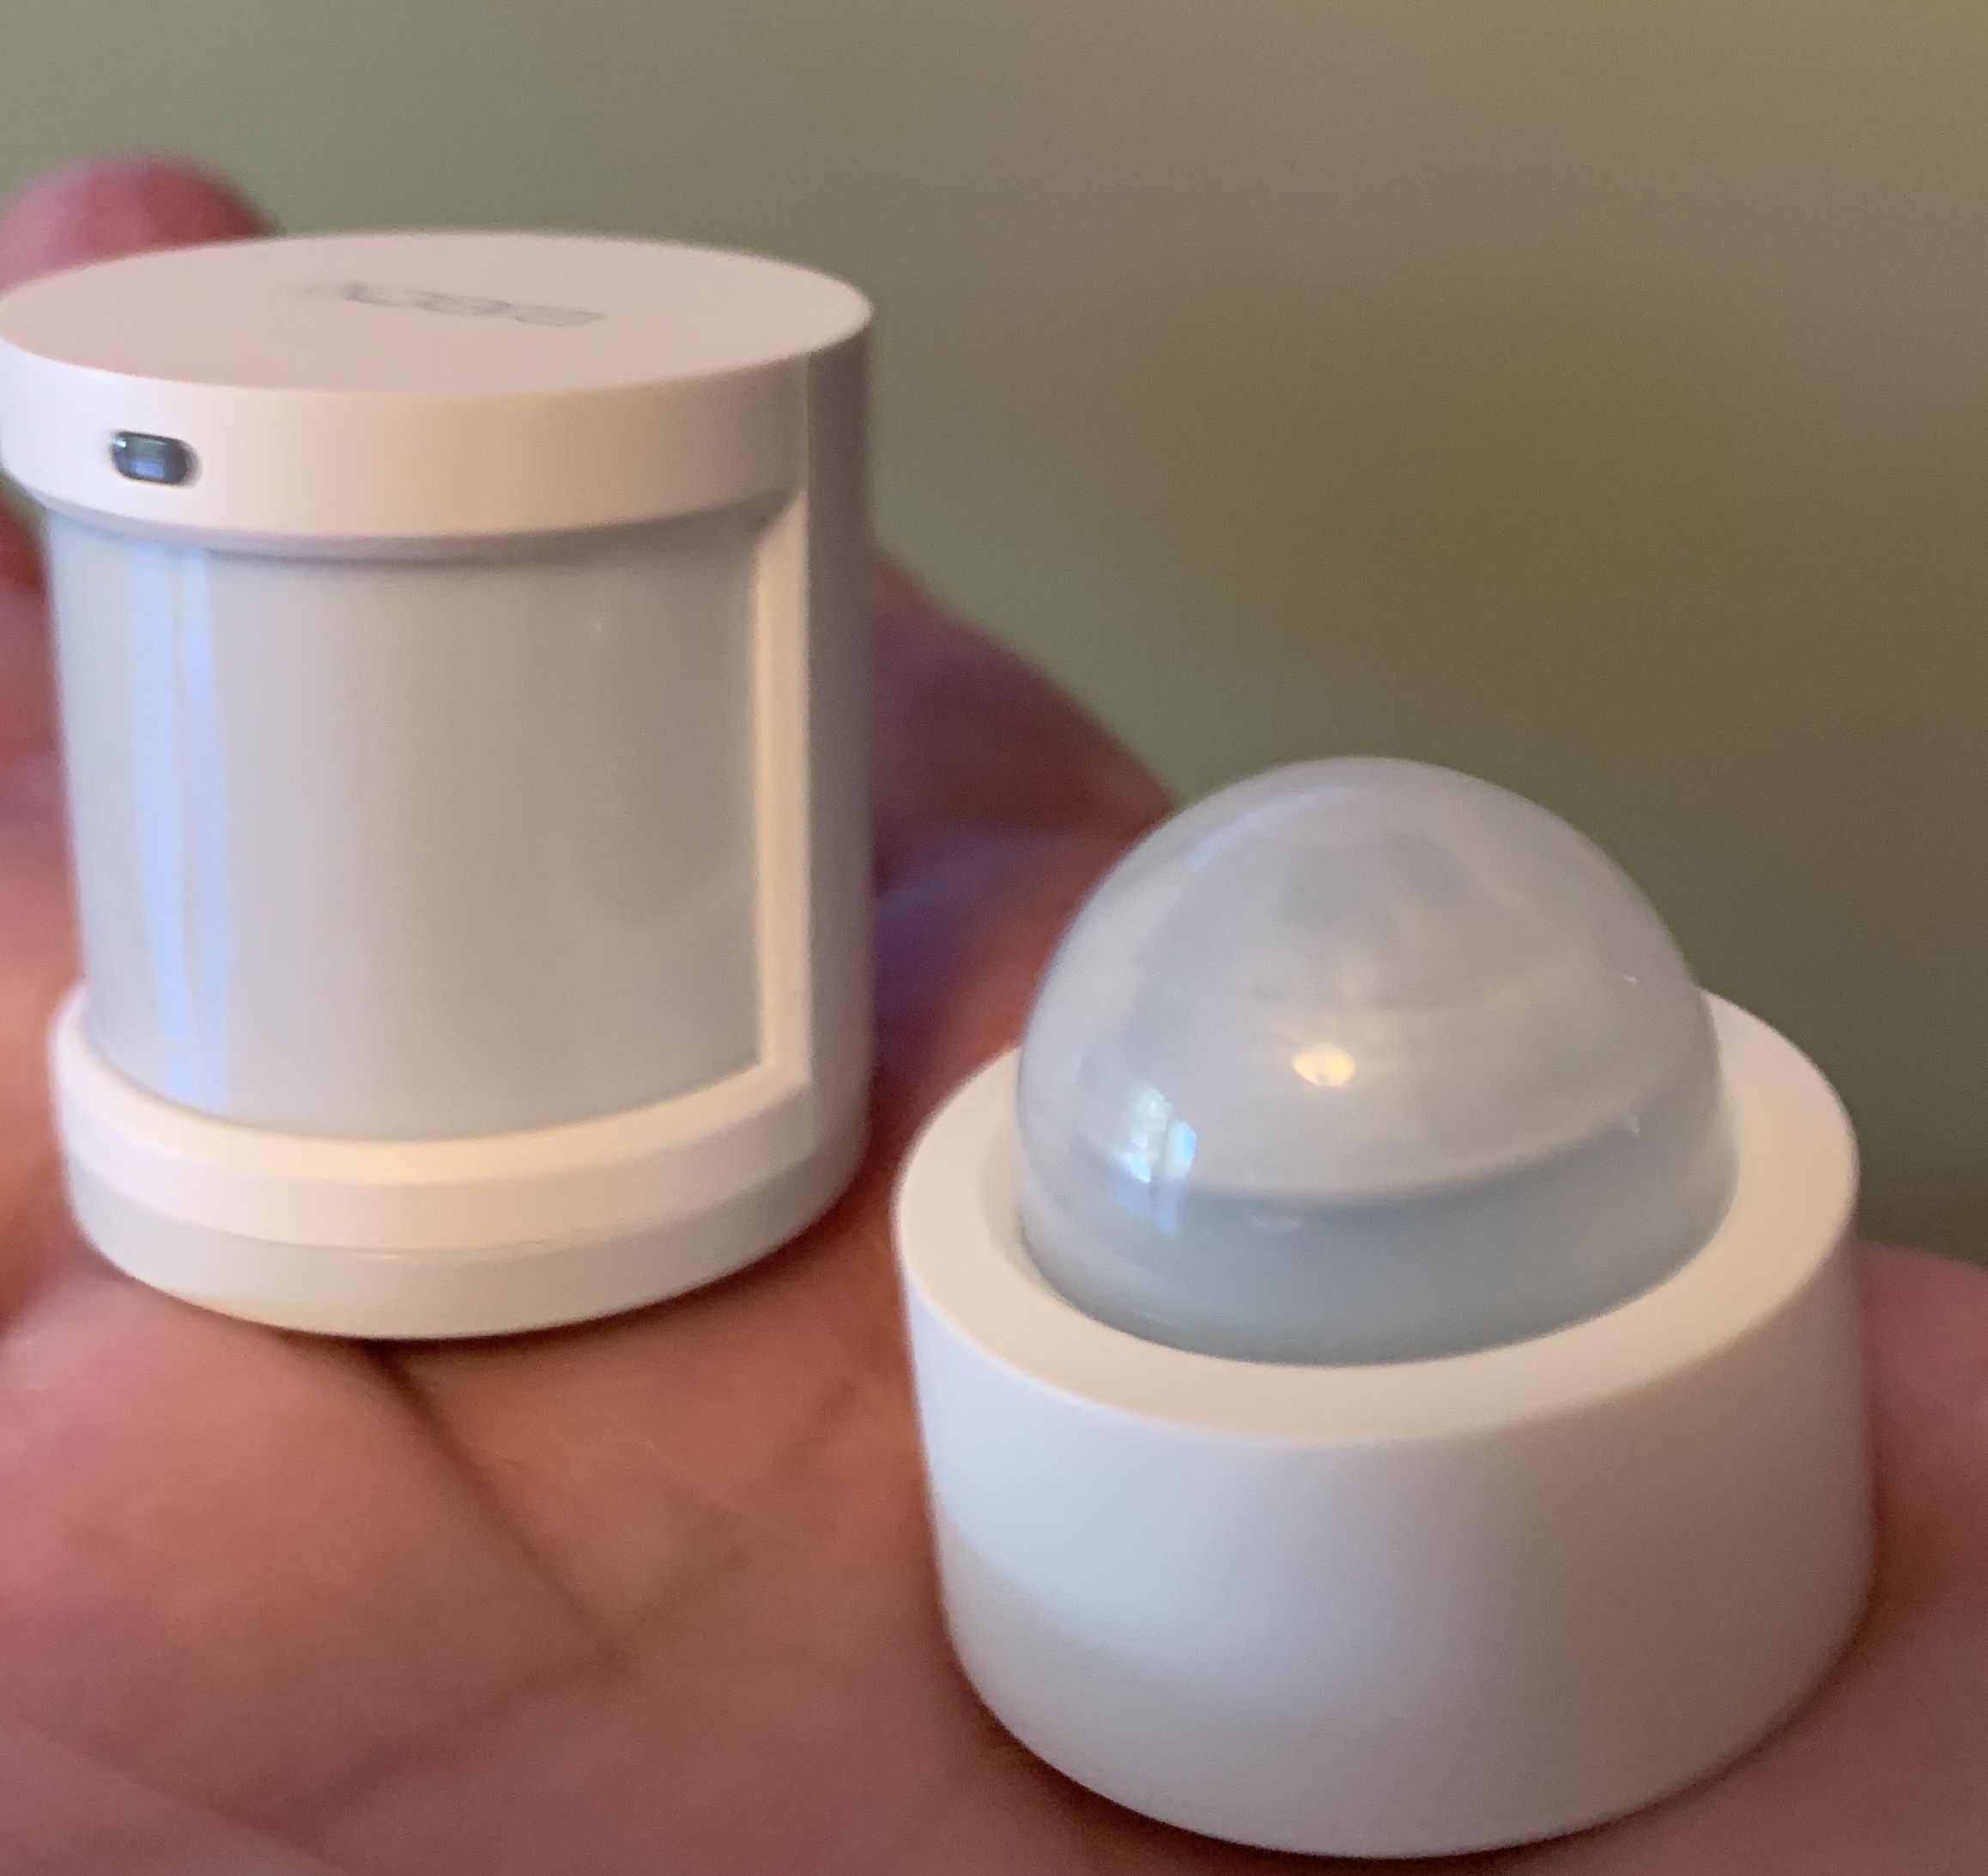
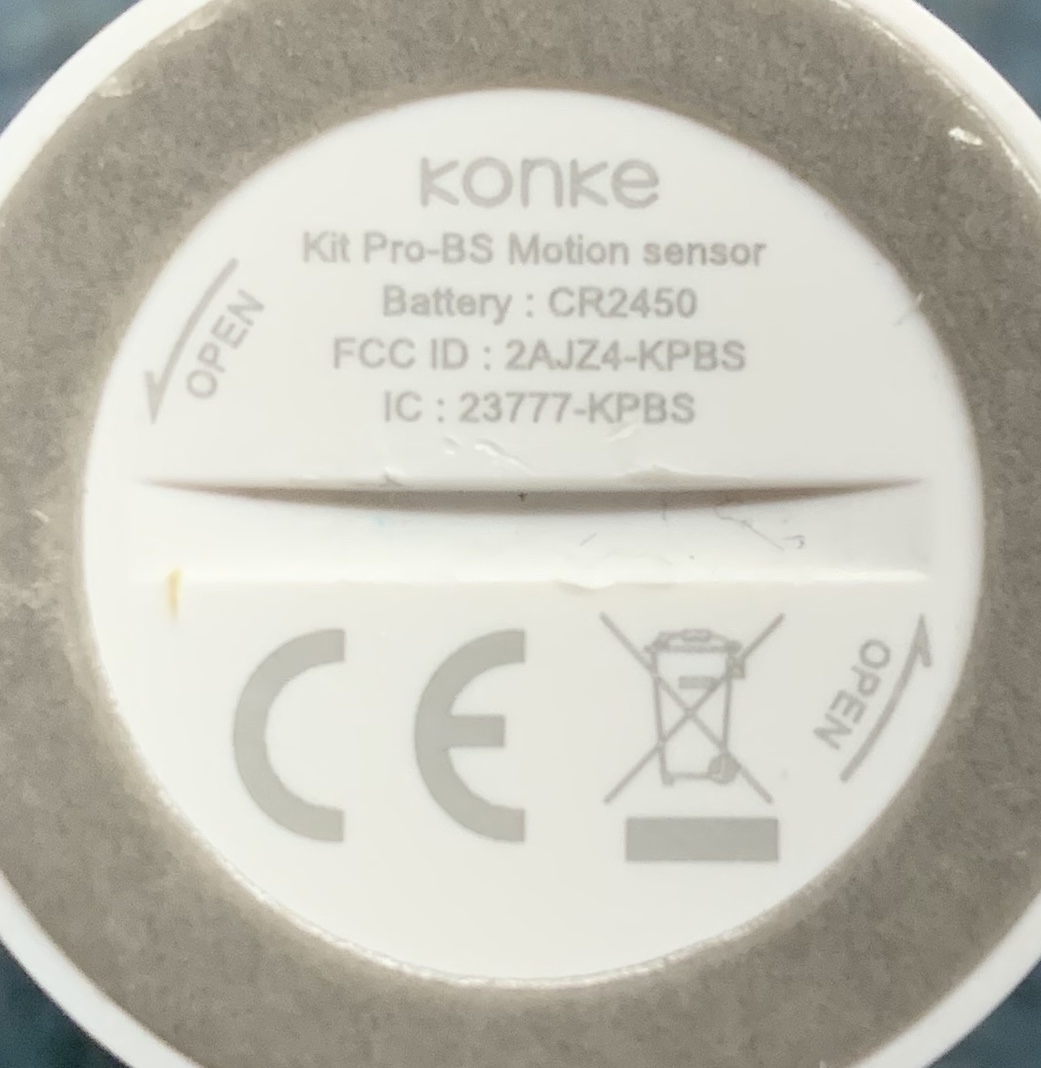
Battery had a pull tab and measures 100% on my ZTS MBT-1, so didn't have the low battery issue @bertabcd1234 experienced.
This does not pair with my Aqara Hub. I tried the Mi Home App and the Aqara Home app set to mainland China which shows the maximum devices available to the hub. Will not pair. Maybe a Mijia Gateway would  Also tried pairing to Wink Hub using Generic Zigbee. It pairs, but does nothing.
I have my main hub still at at 2.1.3.128 and it would not pair, but my Test Hub is on 2.1.5.117 and it pairs immediately. None of the repetitive pairing button press hoops you have to jump through with the Xiaomi sensors. I can also confirm that Generic Zigbee Motion Sensor only shows Active state, so maybe a driver that manually sets inactive after a timeout like you have done for the Aqara and Mijia sensors. I tried every Zigbee Motion and Multisensor driver in HE, along with the Xiaomi driver and only the Generic Zigbee Motion Sensor driver shows Active and battery status as Robert confirmed.
However, I do have this working. On a hunch, I tried "Samsung Zigbee Button" and that does work. You get a button 1 press, with motion. I can confirm that the timeout before active again is 20 seconds, but I will also confirm that indeed, there must not be motion for 20 seconds, otherwise the hardware does not re-arm, and you will never get another button 1 press if you have constant motion. For now, I simply wrote a rule that uses the button press as the trigger, then Activates a switch that turns itself off after 5 seconds. I noted that at one point during testing, it suddenly wouldn't give a button 1 press, but after I clicked refresh in the driver, it responded again. So I included a refresh of the sensor after 15 seconds in my rule. This seems to be working to keep it consistent.
This isn't a particularly sensitive device, but it does work as a ceiling mounted sensor. and that's where I have it now. It's actually pretty decent for my use. Small room and my ceilings are only 10 foot. A more sensitive motion sensor would be problematic every time we walked by the open door, so this works fairly well in this scenario, where you actually have to walk into the center of the room before it reacts.
A driver would be nice, especially if it's possible to gain control over the no-motion requirement before re-arming. For that reason, I wouldn't buy another one of these if there's no driver available. However, I'm still offering to help where I can if you want to take a crack at a driver for this one.
1 Like
It doesn't report inactivity? And it also doesn't periodically report if there is constant motion? Correct me if I'm wrong here but isn't inactivity like half of a motion sensor's job? This would never work in a high traffic area. You'd have lights turning off on people all over the place.
It's possible it just needs the right configuration sent to it to do that, but as both of us have discovered, no, it does not seem to. I have no idea what traffic it sends when used with the manufacturer's specified hub, so someone could probably figure out what's really happening if they did that. I'd hope it does, but who knows. I don't get any Zigbee message to parse in the driver when inactivity strikes, which I also discovered is around 20 seconds (but it needs inactivity before it will re-send activity).
I know it would make sense if it did do that (unlike most, the Xiaomi ones don't send inactivity but are predictably timed and re-send activity), but it doesn't. 
I can also test the Xiaomi smart outlet, I have two that were working with Shinjiang's drivers in ST, this is the DH: XiaomiSJ/devicetypes/shinjjang/xiaomi-plug-sj.src at master · shin4299/XiaomiSJ · GitHub
Anyone have any tips on getting Wireless Remote Switch two button to pair? I seem to always have to most problems with this one. Motion sensors and contact sensors no real problems but this one I spent almost hour now trying to pair it!
I assume there is no sign of the "-T" temperature/humidity sensors yet?
I looked around, but didn't find anywhere to order them, so I assume they haven't hit the retail channels yet (even the Chinese ones)?
They are still in beta testing. During which time, beta testers are supposed to use them with just the new Aqara M2 hub.
1 Like
Just a quick note of thanks for the Xiaomi motion sensor and button drivers. I purchased 4 of both of these based on the great experience I've had with the Xiaomi cube (which just stays connected all the time, no issues). I've found the exact same thing with these new devices. Completely reliable. I'm 'gob smacked' to be honest, given some of the stories from others. The job lot of Iris v2 motion sensors I bought off eBay have been a complete joke with over 50% of them getting stuck active on a regular basis or not triggering reliably. The Xiaomis' on the other hand are completely reliable in comparison so far (albeit ever so slightly slower to respond). The buttons are great with single press, double and long press all working fine and staying connected no problems. Now I'm finally managing to get motion based automation to work properly after weeks of frustration. I'm going to double down on the Xiaomi motion sensors I think, right around the house.
Thanks again for your hard work on these excellent drivers!
@veeceeoh
Hi Keith, I am using an Aqara Smart Curtain Motor - Zigbee Model: lumi.curtain in Hubitat with the SmarttThings driver from ShinJjang, and it works great. An error "java.lang.NullPointerException: Cannot invoke method endsWith() on null object" may appear on the logs, will try to update the device driver and debug this and I will post it in the forum.
.
In addition, it's worth noting that Xiaomi Aqara Smart Plug (lumi.plug) works well with Hubitat. I modified the bspranger's device driver from ST to avoid some errors that may appear in the logs, and my current version works fine without errors, but there is still a small glitch with the reported temperature (higher than it should be). Will post the modified device driver soon.
I've got an error when directly copying Shinjiang ST driver into Hubitat:
Value too long for column "PROFILE_ID VARCHAR(4)": "'0x0104' (6)"; SQL statement: INSERT INTO FINGERPRINT(DEVICE_TYPE_ID, PROFILE_ID, ENDPOINT_ID, IN_CLUSTERS, OUT_CLUSTERS, MANUFACTURER, MODEL, DEVICE_JOIN_NAME, DEVICE_ID, MFR, PROD, CONTROLLER_TYPE) VALUES(?, ?, ?, ?, ?, ?, ?, ?, ?, ?, ?, ?) [22001-197]
Have you made any modifications to his driver?
No, I posted the direct link to his Github account
Do Xiaomi outlets (either plug or wall) not work at all with Hubitat, or will the generic driver work, but it won't support all the features (like power-usage reporting)?
Edit: To answer my own question - Generic Zigbee Driver outlet works, but it doesn't handle power reporting. I see entries in the log when I turn device connected to the outlet on, as expected, but nothing is shown in device's event list.
I have another question - how do you go about showing the pressure reading from Aqara Temperature Sensor?
I know there was a SuperTile app from Cobra, but it's now pulled from github, so are there any other options?
You can show any attribute from a device by selecting the Attribute tile and then picking the attribute.
I managed to get it done that way, thanks!
I tried it earlier, but attributes I got in the list didn't correspond to the Temperature sensor for some reason.
You have to make sure you've picked the right device first.
This version will indeed provide power-usage reporting/
"
/**
- Xiaomi Smart Plug - model ZNCZ02LM
- Device Handler for SmartThings
- Version 1.2
- Licensed under the Apache License, Version 2.0 (the "License"); you may not use this file except
- in compliance with the License. You may obtain a copy of the License at:
-
http://www.apache.org/licenses/LICENSE-2.0 - Unless required by applicable law or agreed to in writing, software distributed under the License is distributed
- on an "AS IS" BASIS, WITHOUT WARRANTIES OR CONDITIONS OF ANY KIND, either express or implied. See the License
- for the specific language governing permissions and limitations under the License.
- Based on original device handler by Lazcad / RaveTam
- Updates and contributions to code by a4refillpad, bspranger, marcos-mvs, mike-debney, Tiago_Goncalves, and veeceeoh
- Modified by Pablo to work under Hubitat --- REVERSE HEX ORDER!!!
*/
metadata {
definition (name: "Xiaomi Zigbee Outlet", namespace: "bspranger", author: "bspranger") {
capability "Actuator"
capability "Configuration"
capability "Refresh"
capability "Switch"
capability "Temperature Measurement"
capability "Sensor"
capability "Power Meter"
capability "Energy Meter"
	attribute "lastCheckin", "string"
	attribute "lastCheckinDate", "String"
}

// simulator metadata
simulator {
	// status messages
	status "on": "on/off: 1"
	status "off": "on/off: 0"
	// reply messages
	reply "zcl on-off on": "on/off: 1"
	reply "zcl on-off off": "on/off: 0"
}

tiles(scale: 2) {
	multiAttributeTile(name:"switch", type: "lighting", width: 6, height: 4, canChangeIcon: true){
		tileAttribute ("device.switch", key: "PRIMARY_CONTROL") {
			attributeState "on", label:'${name}', action:"switch.off", icon:"st.switches.light.on", backgroundColor:"#00a0dc", nextState:"turningOff"
			attributeState "off", label:'${name}', action:"switch.on", icon:"st.switches.light.off", backgroundColor:"#ffffff", nextState:"turningOn"
			attributeState "turningOn", label:'${name}', action:"switch.off", icon:"st.switches.light.on", backgroundColor:"#00a0dc", nextState:"turningOff"
			attributeState "turningOff", label:'${name}', action:"switch.on", icon:"st.switches.light.off", backgroundColor:"#ffffff", nextState:"turningOn"
		}
		tileAttribute("device.lastCheckin", key: "SECONDARY_CONTROL") {
			attributeState("default", label:'Last Update:\n ${currentValue}',icon: "st.Health & Wellness.health9")
		}
	}
	valueTile("temperature", "device.temperature", width: 2, height: 2) {
		state("temperature", label:'${currentValue}°',
			backgroundColors:[
				[value: 31, color: "#153591"],
				[value: 44, color: "#1e9cbb"],
				[value: 59, color: "#90d2a7"],
				[value: 74, color: "#44b621"],
				[value: 84, color: "#f1d801"],
				[value: 95, color: "#d04e00"],
				[value: 96, color: "#bc2323"]
			]
		)
	}
	valueTile("power", "device.power", width: 2, height: 2) {
		state("power", label:'${currentValue}W', backgroundColors:[
			[value: 0, color: "#ffffff"],
			[value: 1, color: "#00a0dc"]
		])
	}
	valueTile("energy", "device.energy", width: 2, height: 2) {
		state("energy", label:'${currentValue}kWh')
	}
	standardTile("refresh", "device.refresh", inactiveLabel: false, decoration: "flat", width: 2, height: 2) {
		state "default", label:"", action:"refresh.refresh", icon:"st.secondary.refresh"
	}
	main (["switch", "power"])
		details(["switch", "power", "energy", "temperature", "refresh"])
}

preferences {
	//Temp Offset Config
	input description: "", type: "paragraph", element: "paragraph", title: "OFFSETS & UNITS"
	input "tempOffset", "decimal", title:"Temperature Offset", description:"Adjust temperature by this many degrees", range:"*..*"
	//Date & Time Config
	input description: "", type: "paragraph", element: "paragraph", title: "DATE & CLOCK"
	input name: "dateformat", type: "enum", title: "Set Date Format\n US (MDY) - UK (DMY) - Other (YMD)", description: "Date Format", options:["US","UK","Other"]
	input name: "clockformat", type: "bool", title: "Use 24 hour clock?"
}
}
// Parse incoming device messages to generate events
def parse(String description) {
log.debug "${device.displayName}: Parsing message: '${description}'"
def value = zigbee.parse(description)?.text
log.debug "${device.displayName}: Zigbee parse value: $value"
Map map = [:]
// Determine current time and date in the user-selected date format and clock style
def now = formatDate()
def nowDate = new Date(now).getTime()

// The receipt of any message results in a lastCheckin (heartbeat) event
sendEvent(name: "lastCheckin", value: now, displayed: false)
sendEvent(name: "lastCheckinDate", value: nowDate, displayed: false)

if (description?.startsWith('catchall:')) {
	map = parseCatchAllMessage(description)
}
else if (description?.startsWith('read attr -')) {
	map = parseReportAttributeMessage(description)
}
else if (description?.startsWith('on/off: ')){
	map = parseCustomMessage(description)
}

if (map) {
	log.debug "${device.displayName}: Creating event ${map}"
	return createEvent(map)
} else
	return [:]
}
private Map parseCatchAllMessage(String description) {
Map resultMap = [:]
def zigbeeParse = zigbee.parse(description)
log.debug "${device.displayName}: Catchall parsed as $cluster"
if (zigbeeParse.clusterId == 0x0006 && zigbeeParse.command == 0x01){
	def onoff = zigbeeParse.data[-1]
	if (onoff == 1)
		resultMap = createEvent(name: "switch", value: "on")
	else if (onoff == 0)
		resultMap = createEvent(name: "switch", value: "off")
}
return resultMap
}
private Map parseReportAttributeMessage(String description) {
Map descMap = (description - "read attr - ").split(",").inject([:]) {
map, param ->
def nameAndValue = param.split(":")
map += [(nameAndValue[0].trim()):nameAndValue[1].trim()]
}
Map resultMap = [:]

if (descMap.cluster == "0001" && descMap.attrId == "0020") {
	resultMap = getBatteryResult(convertHexToInt(descMap.value / 2))
}
if (descMap.cluster == "0002" && descMap.attrId == "0000") {
	log.debug "${device.displayName}: description is  ${description}"
    def tempScale = getTemperatureScale()
    log.debug "${device.displayName}: argument HEX is ${descMap.value}"
    def revtemp = reverseHexString (descMap.value)
    log.debug "${device.displayName}: argument HEX (rev) is ${revtemp}"
    log.debug "${device.displayName}: calculo original INT /2 is ${convertHexToInt(descMap.value) / 2}"
    log.debug "${device.displayName}: calculo bigendian argument INT (rev) /2 is ${convertHexToInt(revtemp) / 2}"
    def tempValue = convertHexToInt(revtemp) / 2 + (tempOffset ? tempOffset : 0)

	//def tempValue = zigbee.parseHATemperatureValue("temperature: " + (convertHexToInt(descMap.value) / 2), "temperature: ", tempScale) + (tempOffset ? tempOffset : 0)
    log.debug "${device.displayName}: description is  ${description}"
    //def value = ((description - "temperature: ").trim()) as Float
	resultMap = createEvent(name: "temperature", value: tempValue, unit: tempScale, translatable: true)
	log.debug "${device.displayName}: Reported temperature is ${resultMap.value}°$tempScale"
}
else if (descMap.cluster == "0008" && descMap.attrId == "0000") {
	resultMap = createEvent(name: "switch", value: "off")
}
else if (descMap.cluster == "000C" && descMap.attrId == "0055" && descMap.endpoint == "02") {
    def rev = reverseHexString (descMap.value)
    //log.debug "${device.displayName}: HEX value reversed is ${rev}"
    //def wattage_int = Long.parseLong(descMap.value, 16)
    def wattage_int = Long.parseLong(rev, 16)
	def wattage = Float.intBitsToFloat(wattage_int.intValue())
	wattage = Math.round(wattage * 10) * 0.1
	resultMap = createEvent(name: "power", value: wattage, unit: 'W')
	log.debug "${device.displayName}: Reported power use is ${wattage}W"
}
else if (descMap.cluster == "000C" && descMap.attrId == "0055" && descMap.endpoint == "03") {

    def revener = reverseHexString (descMap.value)
    def energy_int = Long.parseLong(revener, 16)
	def energy = Float.intBitsToFloat(energy_int.intValue())
	energy = Math.round(energy * 100) * 0.0001
	resultMap = createEvent(name: "energy", value: energy, unit: 'kWh')
	log.debug "${device.displayName}: Reported energy usage is ${energy}kWh"
}
return resultMap
}
def off() {
log.debug "${device.displayName}: Turning switch off"
sendEvent(name: "switch", value: "off")
"st cmd 0x${device.deviceNetworkId} 1 6 0 {}"
}
def on() {
log.debug "${device.displayName}: Turning switch on"
sendEvent(name: "switch", value: "on")
"st cmd 0x${device.deviceNetworkId} 1 6 1 {}"
}
def refresh() {
log.debug "${device.displayName}: Attempting to refresh all values"
def refreshCmds = [
"st rattr 0x${device.deviceNetworkId} 1 6 0", "delay 500",
"st rattr 0x${device.deviceNetworkId} 1 6 0", "delay 250",
"st rattr 0x${device.deviceNetworkId} 1 2 0", "delay 250",
"st rattr 0x${device.deviceNetworkId} 1 1 0", "delay 250",
"st rattr 0x${device.deviceNetworkId} 1 0 0", "delay 250",
"st rattr 0x${device.deviceNetworkId} 2 0x000C 0x0055",
"delay 250",
"st rattr 0x${device.deviceNetworkId} 3 0x000C 0x0055"
]
return refreshCmds
}
private Map parseCustomMessage(String description) {
def result
if (description?.startsWith('on/off: ')) {
if (description == 'on/off: 0')
result = createEvent(name: "switch", value: "off")
else if (description == 'on/off: 1')
result = createEvent(name: "switch", value: "on")
}
return result
}
private Integer convertHexToInt(hex) {
Integer.parseInt(hex,16)
}
// Reverses order of bytes in hex string
def reverseHexString(hexString) {
def reversed = ""
for (int i = hexString.length(); i > 0; i -= 2) {
reversed += hexString.substring(i - 2, i )
}
return reversed
}
def formatDate() {
def correctedTimezone = ""
def timeString = clockformat ? "HH:mm:ss" : "h:mm:ss aa"
// If user's hub timezone is not set, display error messages in log and events log, and set timezone to GMT to avoid errors
if (!(location.timeZone)) {
	correctedTimezone = TimeZone.getTimeZone("GMT")
	log.error "${device.displayName}: Time Zone not set, so GMT was used. Please set up your location in the SmartThings mobile app."
	sendEvent(name: "error", value: "", descriptionText: "ERROR: Time Zone not set, so GMT was used. Please set up your location in the SmartThings mobile app.")
}
else {
	correctedTimezone = location.timeZone
}
if (dateformat == "US" || dateformat == "" || dateformat == null) {
	return new Date().format("EEE MMM dd yyyy ${timeString}", correctedTimezone)
}
else if (dateformat == "UK") {
	return new Date().format("EEE dd MMM yyyy ${timeString}", correctedTimezone)
}
else {
	return new Date().format("EEE yyyy MMM dd ${timeString}", correctedTimezone)
}
}
"
2 Likes

