The introduction needs few words. This addition to the driver will allow you to use the "Bulb" and "Socket" buttons on your Harmony Elite/950/Companion. All you would need to do essentially is log onto a SmartThings account (you don't even need a hub anymore) and create four virtual devices and assign them to the harmony.
Let's begin:
-
Open a Smartthings account if you don't have one
-
Log into ide.smartthings.com
-
Go to "My Devices"
-
Add a Device
-
Give your first Virtual Dimmer a name
-
In device type, put "virtual dimmer"
-
Repeat this 3 more times for the total of 4 virtual dimmers.
-
Log into the Hamony app
-
Choose "SmartThings" in Devices and after you authenticate, it will ask you which devices you want to use.
-
Put check marks into your 4 Virtual Dimmers that you created
-
Press "Authorize" at the end of the page
-
Make sure to press the "Click Here" when it allows you to.
It may take a while depending on the size of your SmartThings device list but once it finishes, go back to the main menu.
- Remote and Hub
- Button Customization
- Customize Buttons
- Home Control Buttons
- For each button, select your virtual dimmer 1 through four) until all four buttons are populated with all the dimmers you created.
Press Save as many and forward to make sure that the remote screen comes back up
Sync your remote
Install the latest version of this driver.
Add the IP address and save.
Go back into the same device when the child devices are populated.
Click on "Debug" and save customizations.
Open a separate window to the Hubitat log.
Click on the parent device and then press one of the bulb or socket buttons.
You'll see a very large ID number for each button pressed.. Copy JUST the numbers/letters, no quotes or other words.
It will look like this:
Unhandled data from Harmony Hub. json = {"type":"automation.state?notify","data":{"24f7da4c-054b-4ab4-be2f-3fec85a8bb5c":{"status":0,"brightness":256.56565656566,"on":true}}}"
You want to copy 24f7da4c-054b-4ab4-be2f-3fec85a8bb5c
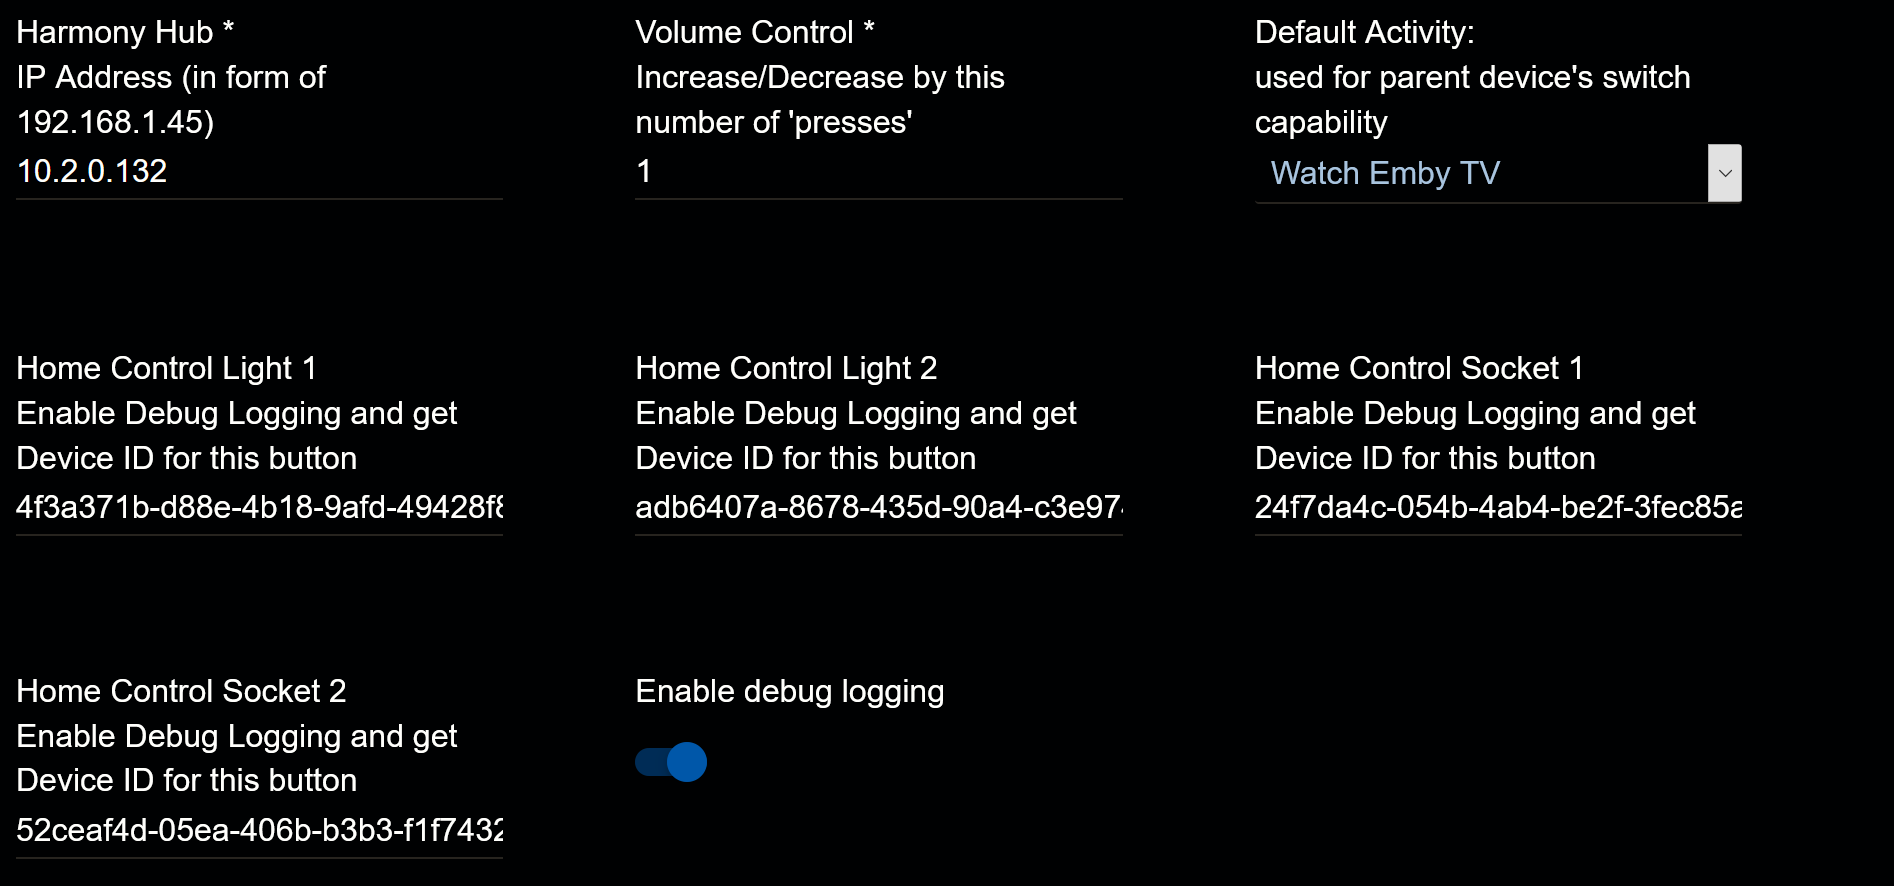
Then paste that to the proper zone in here:
So, if you pressed the top bulb socket, paste it into "Light 1"
Do this for the remaining buttons that you want to program.
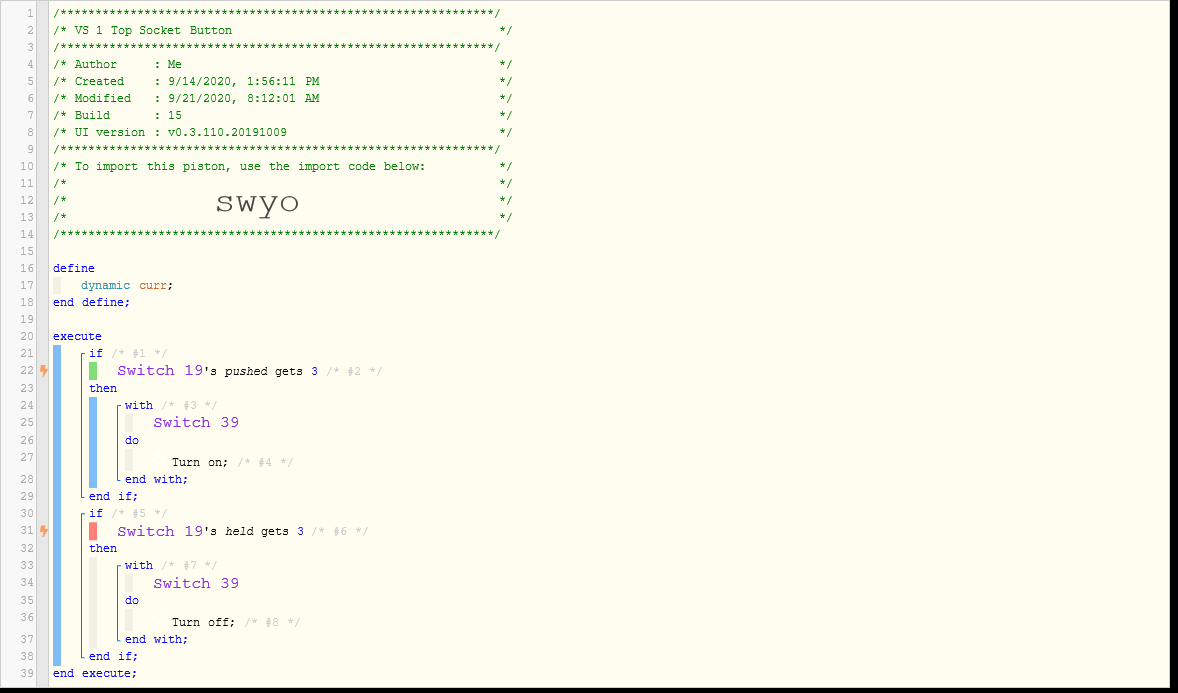
If you want to use Webcore, make sure to add your Harmony Parent to "pushable button" and "holdable button" and and create a piston like this:
That is it!
Enjoy your new functions. If I missed anything, let me know, I'll add it to these instructions.