The procedure is not for the faint of heart. I'll give you a quick guide.
-
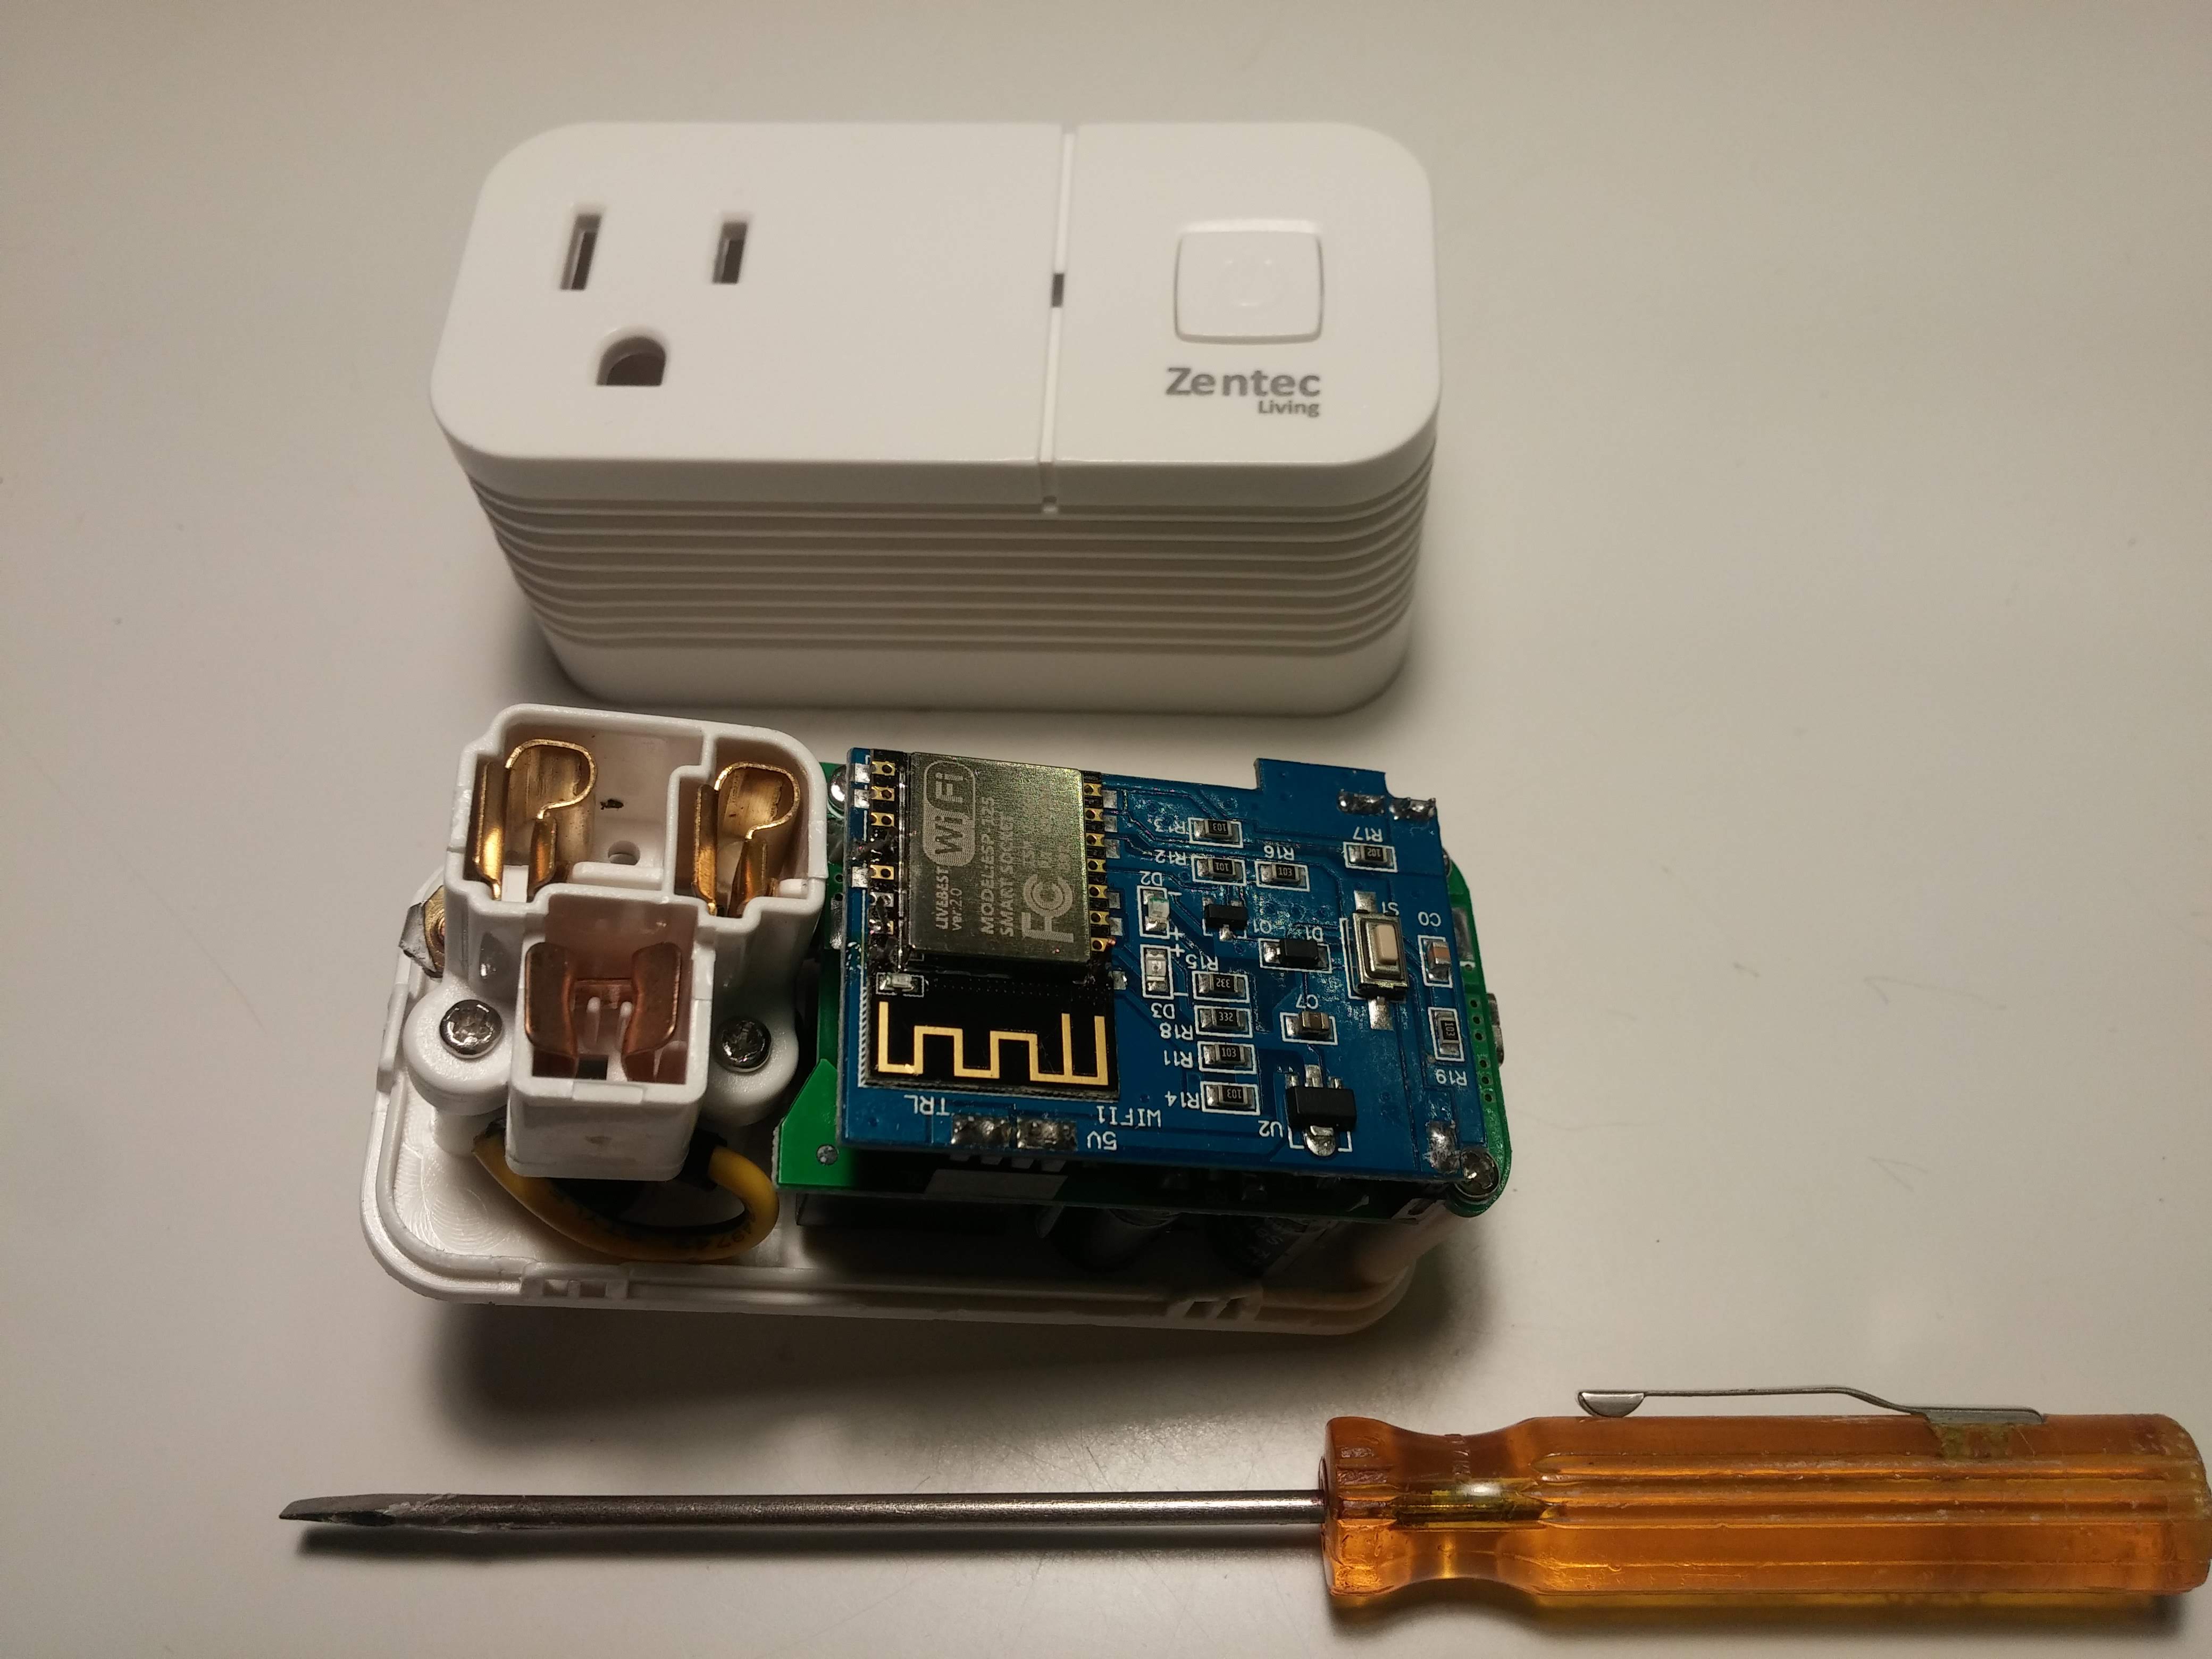
You need to pry the case open with a couple of small screwdrivers (like precision screwdrivers). I start at the side where the USB port is. It can be done without damaging the case but it may get a little marred on the backside.
-
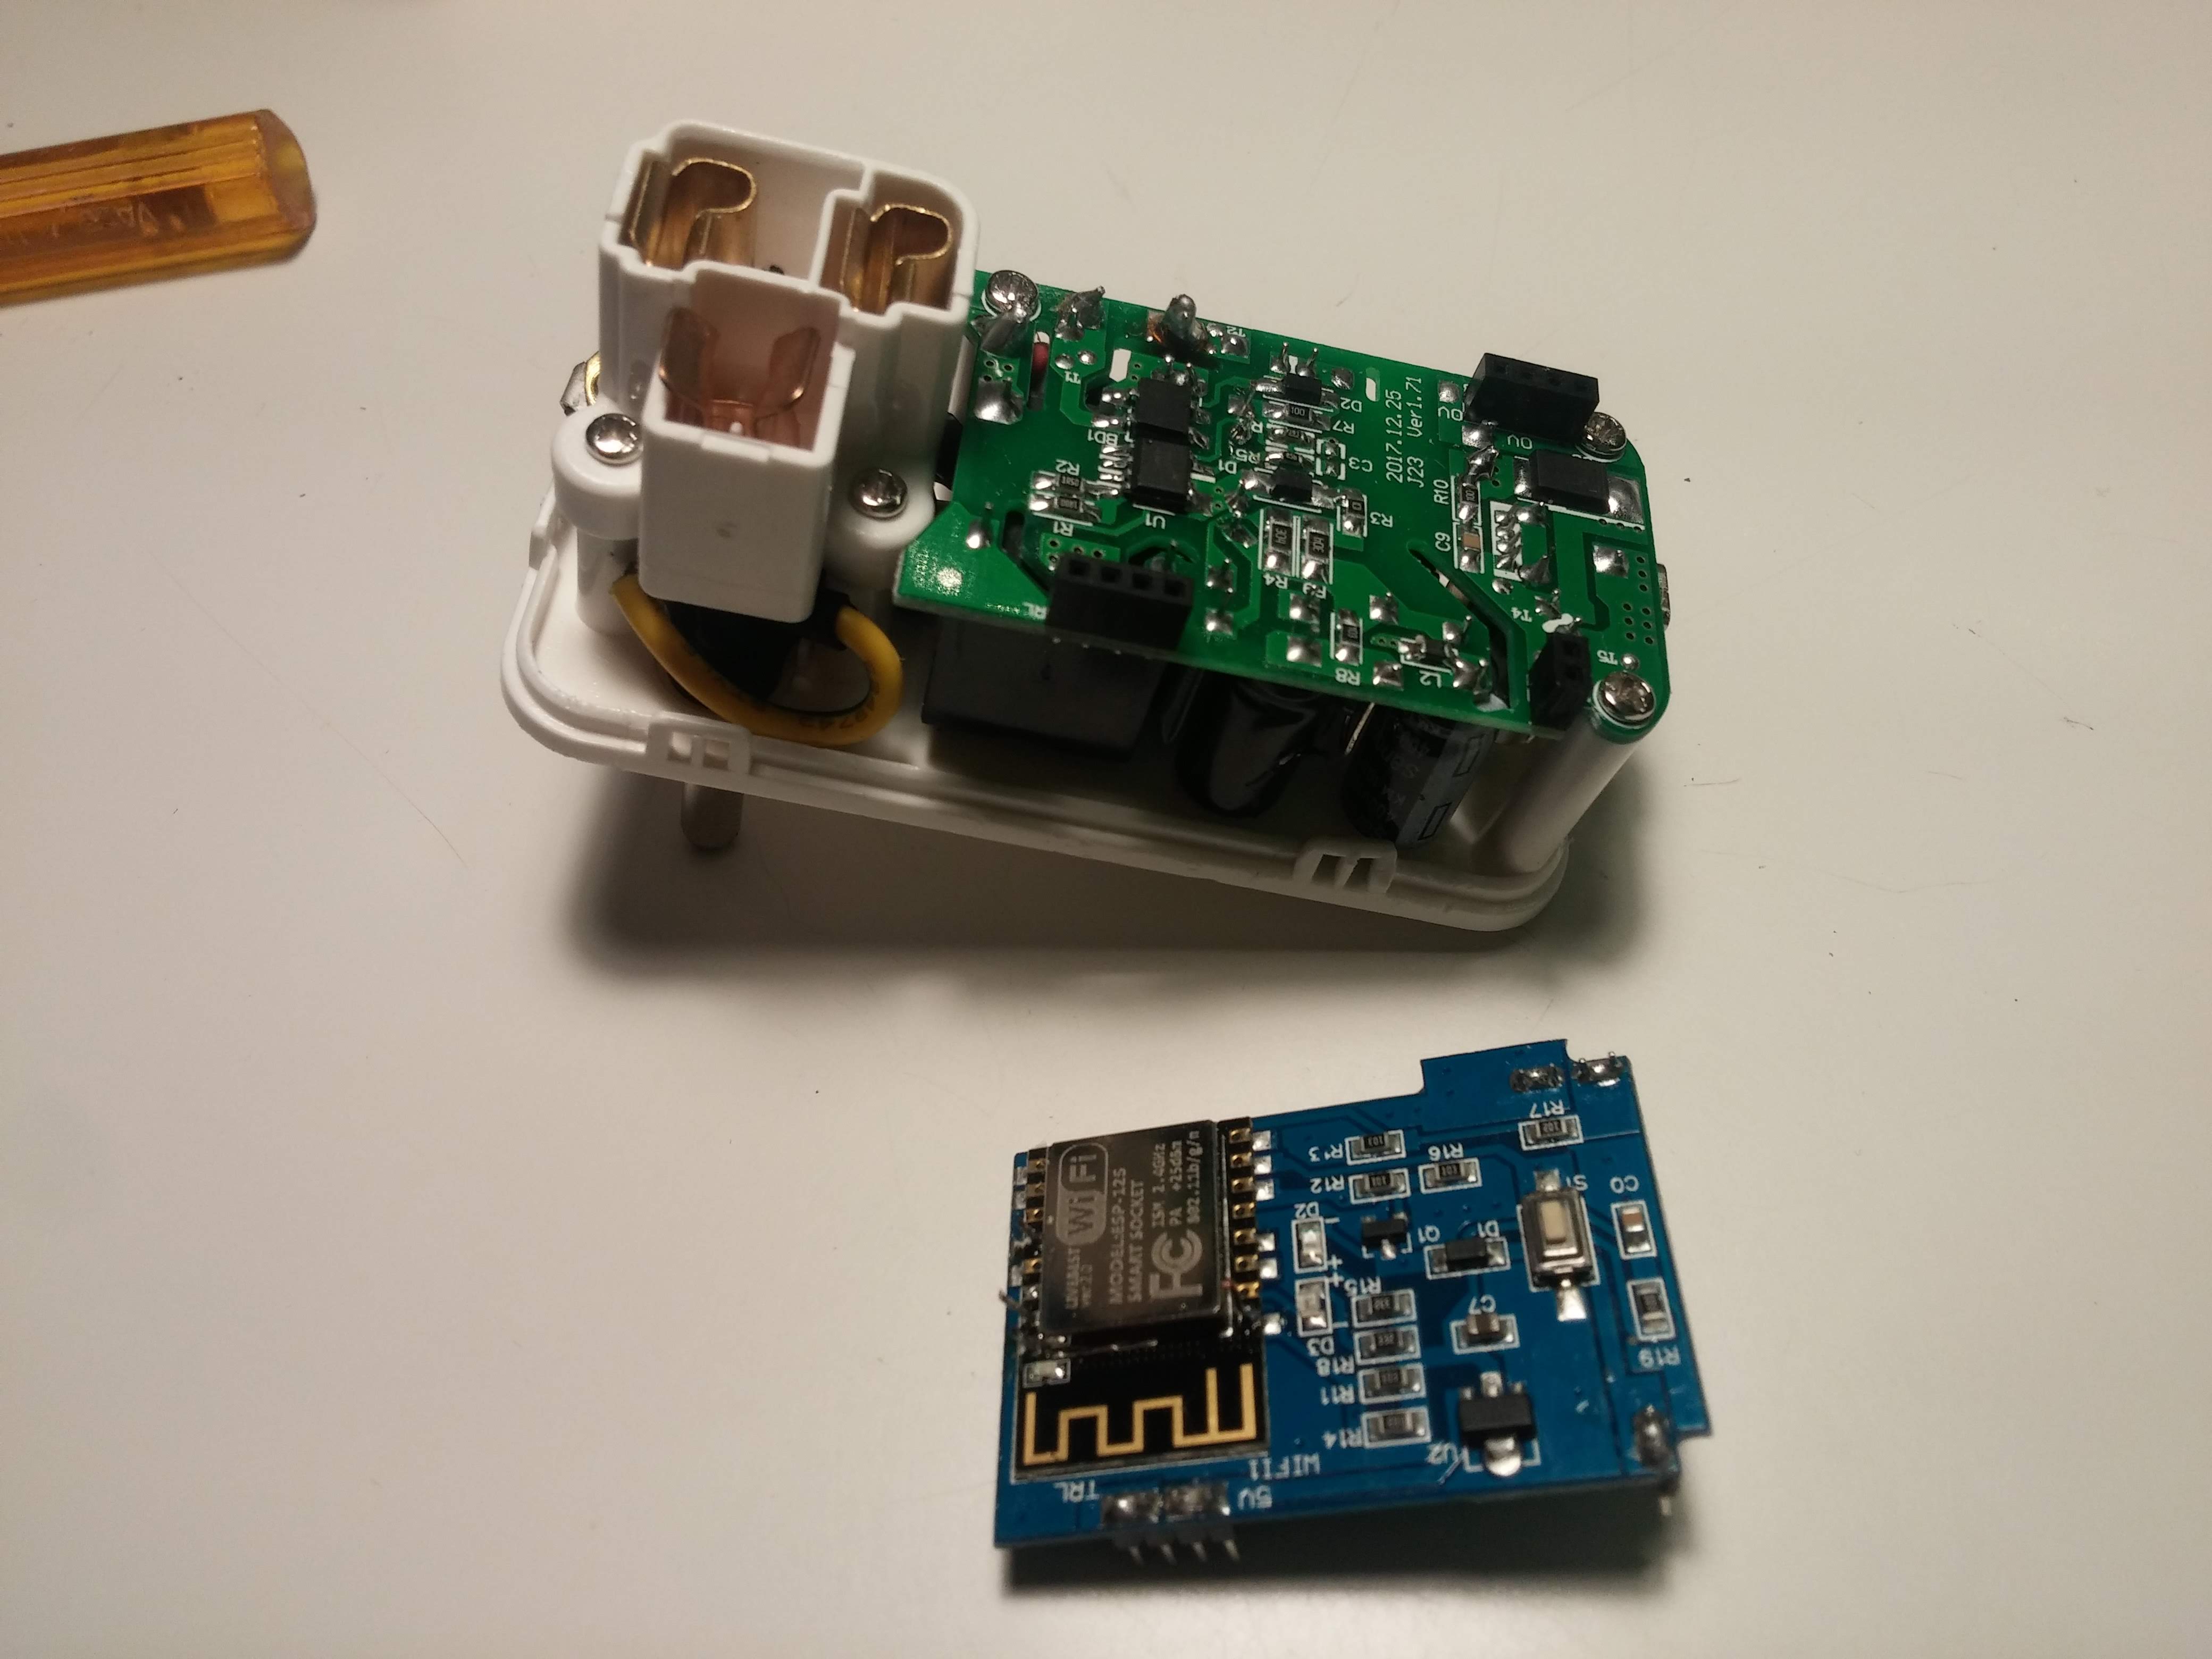
Inside you'll find a nice little ESP-12 module sitting on a circuit board that plugs into the main board which can be unplugged, and powered with a 5v supply and flashed with a usb to ttl module as linked to earlier. You will also need some 26 or 28 gauge solid wire, (I used some cat5 wire), and 2 momentary pushbutton switches, a small breadboard helps too.
-
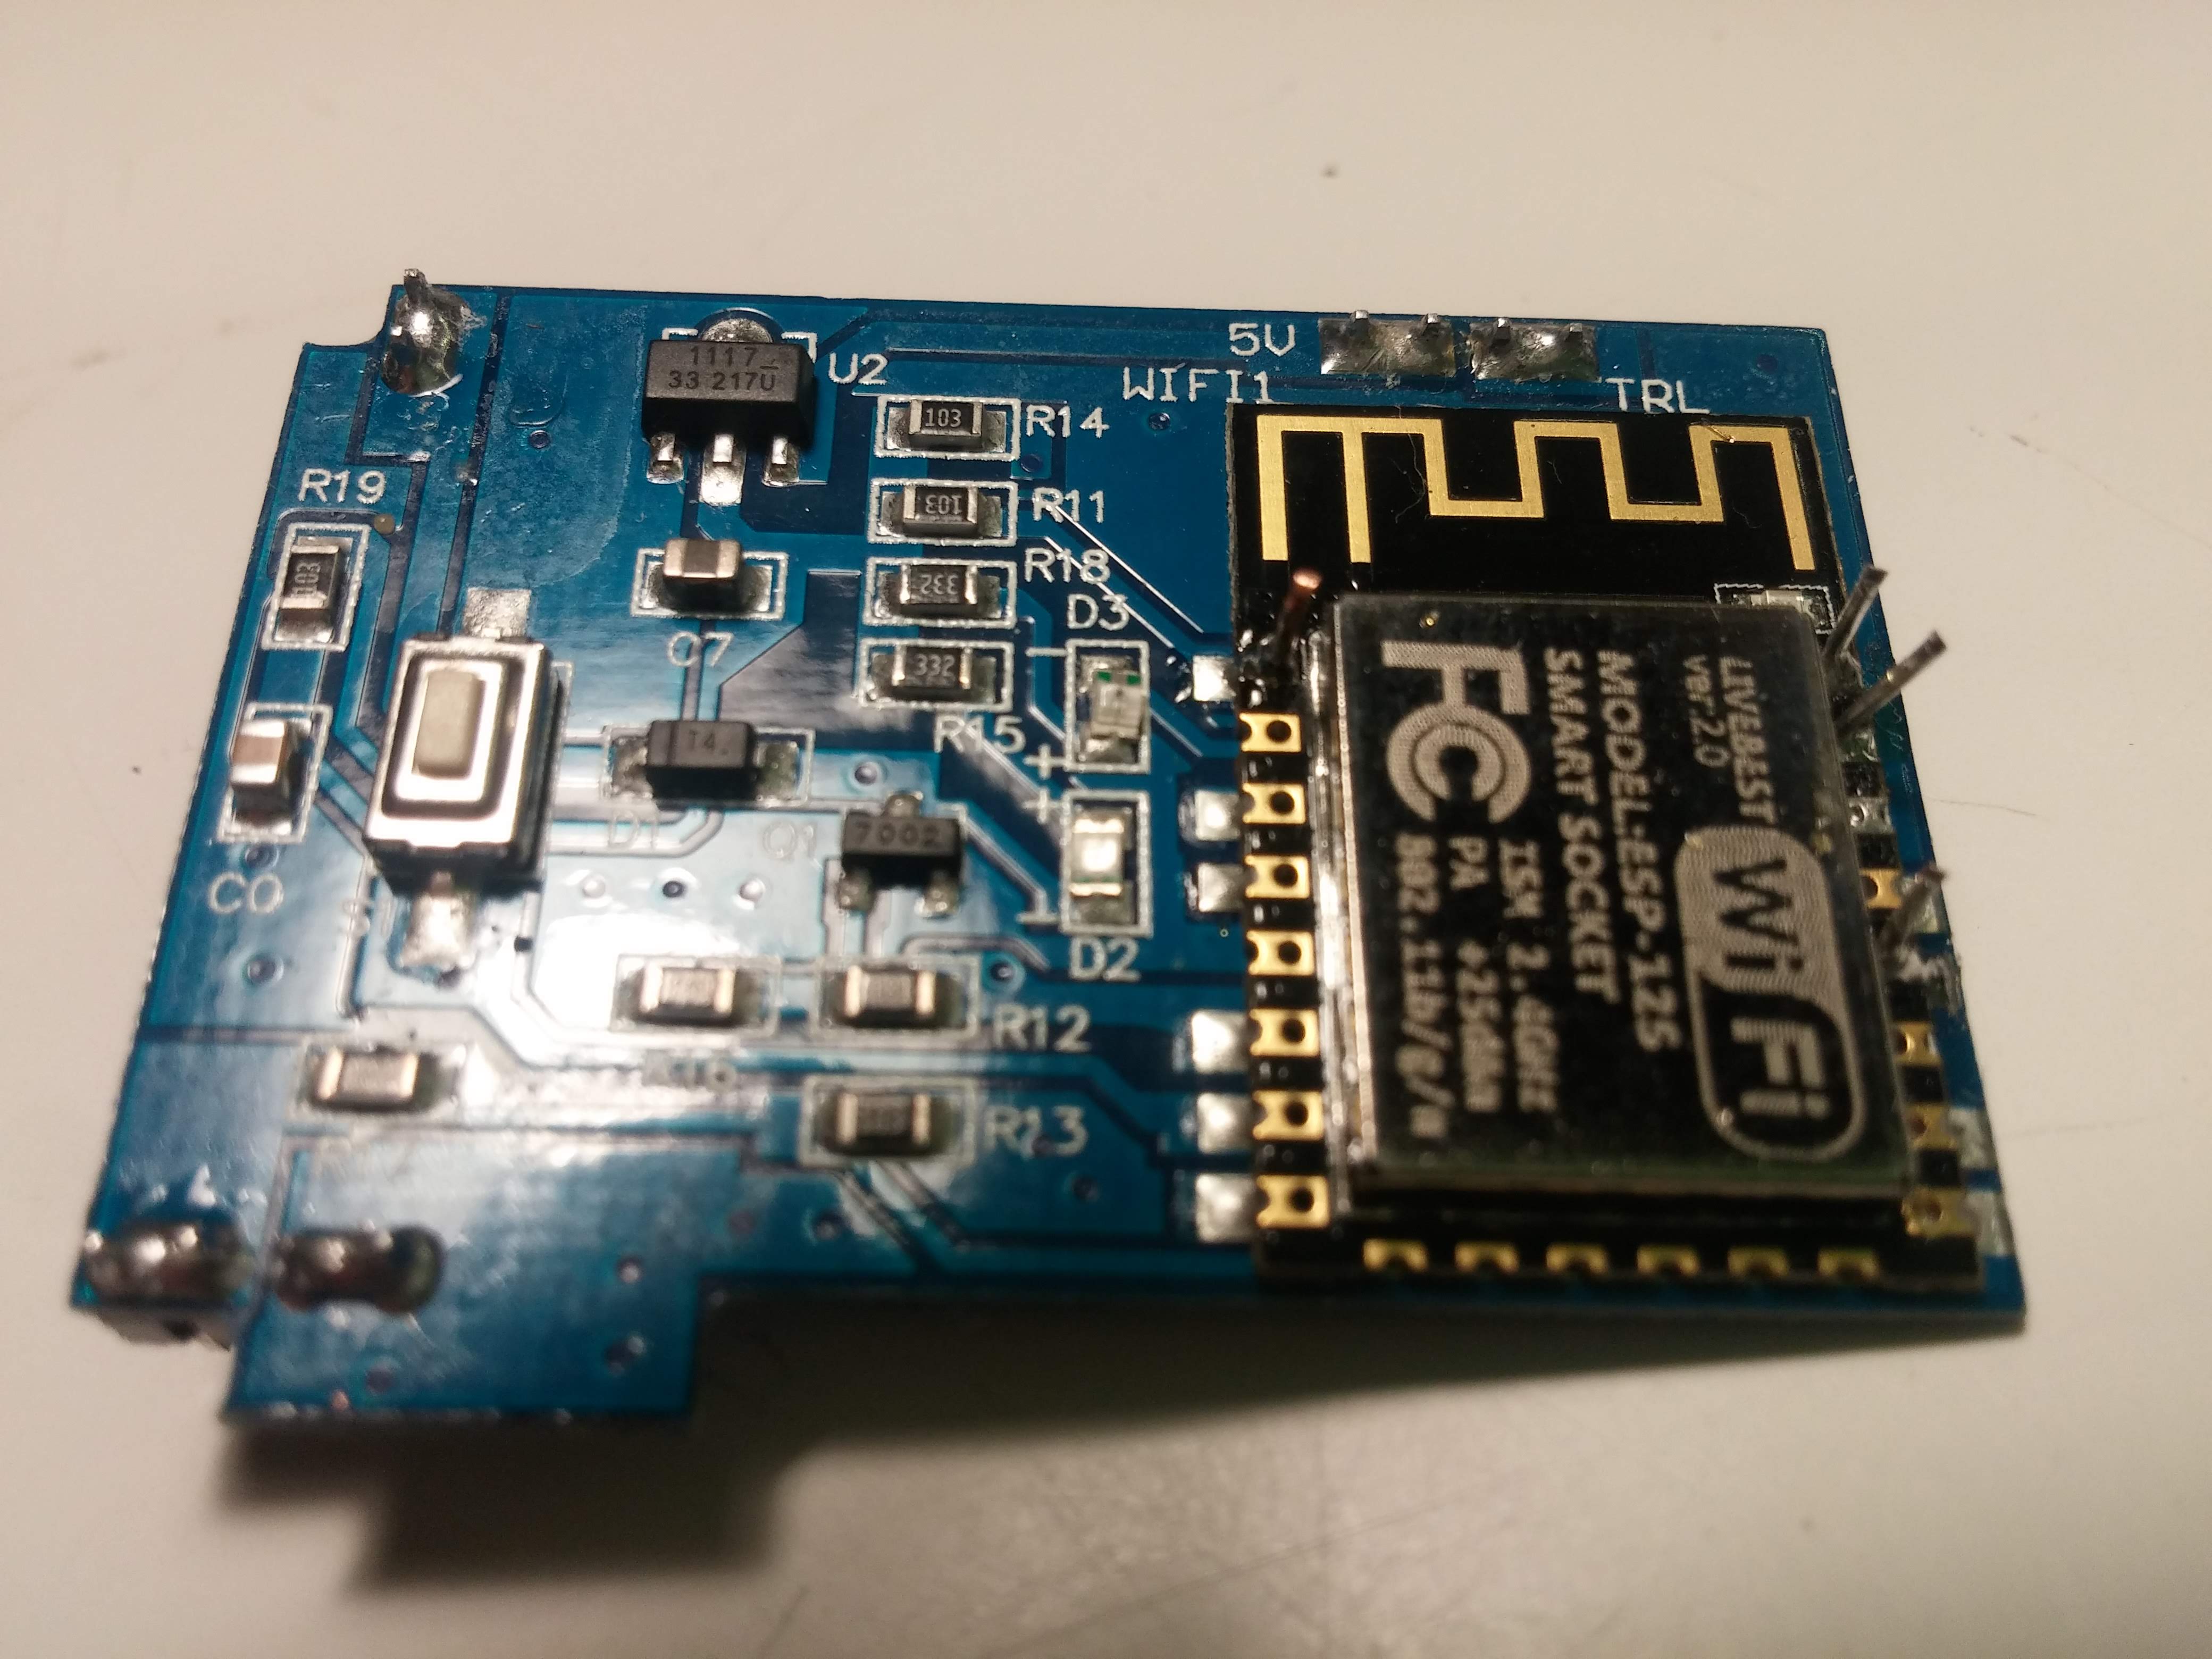
The ESP module on the removable board follows the standard pin outs. If you orient the board with the esp module to the right with the pcb antenna on the top. the pins are as follows: Top left = reset, top right = TX, right side next pin down = RX, right side 5th down, gpio0 hold low during reset to enable flash. There are small holes that the the cat5 wire will fit into (then solder in place, you can see them in 3rd picture) that will enable you to use test clips to connect to the pushbuttons, and usb/ttl module to enable to to reset and flash the chip. Make sure you get a usb/ttl module that is 3.3v compatible. I used this exact one: https://www.amazon.com/gp/product/B075N82CDL
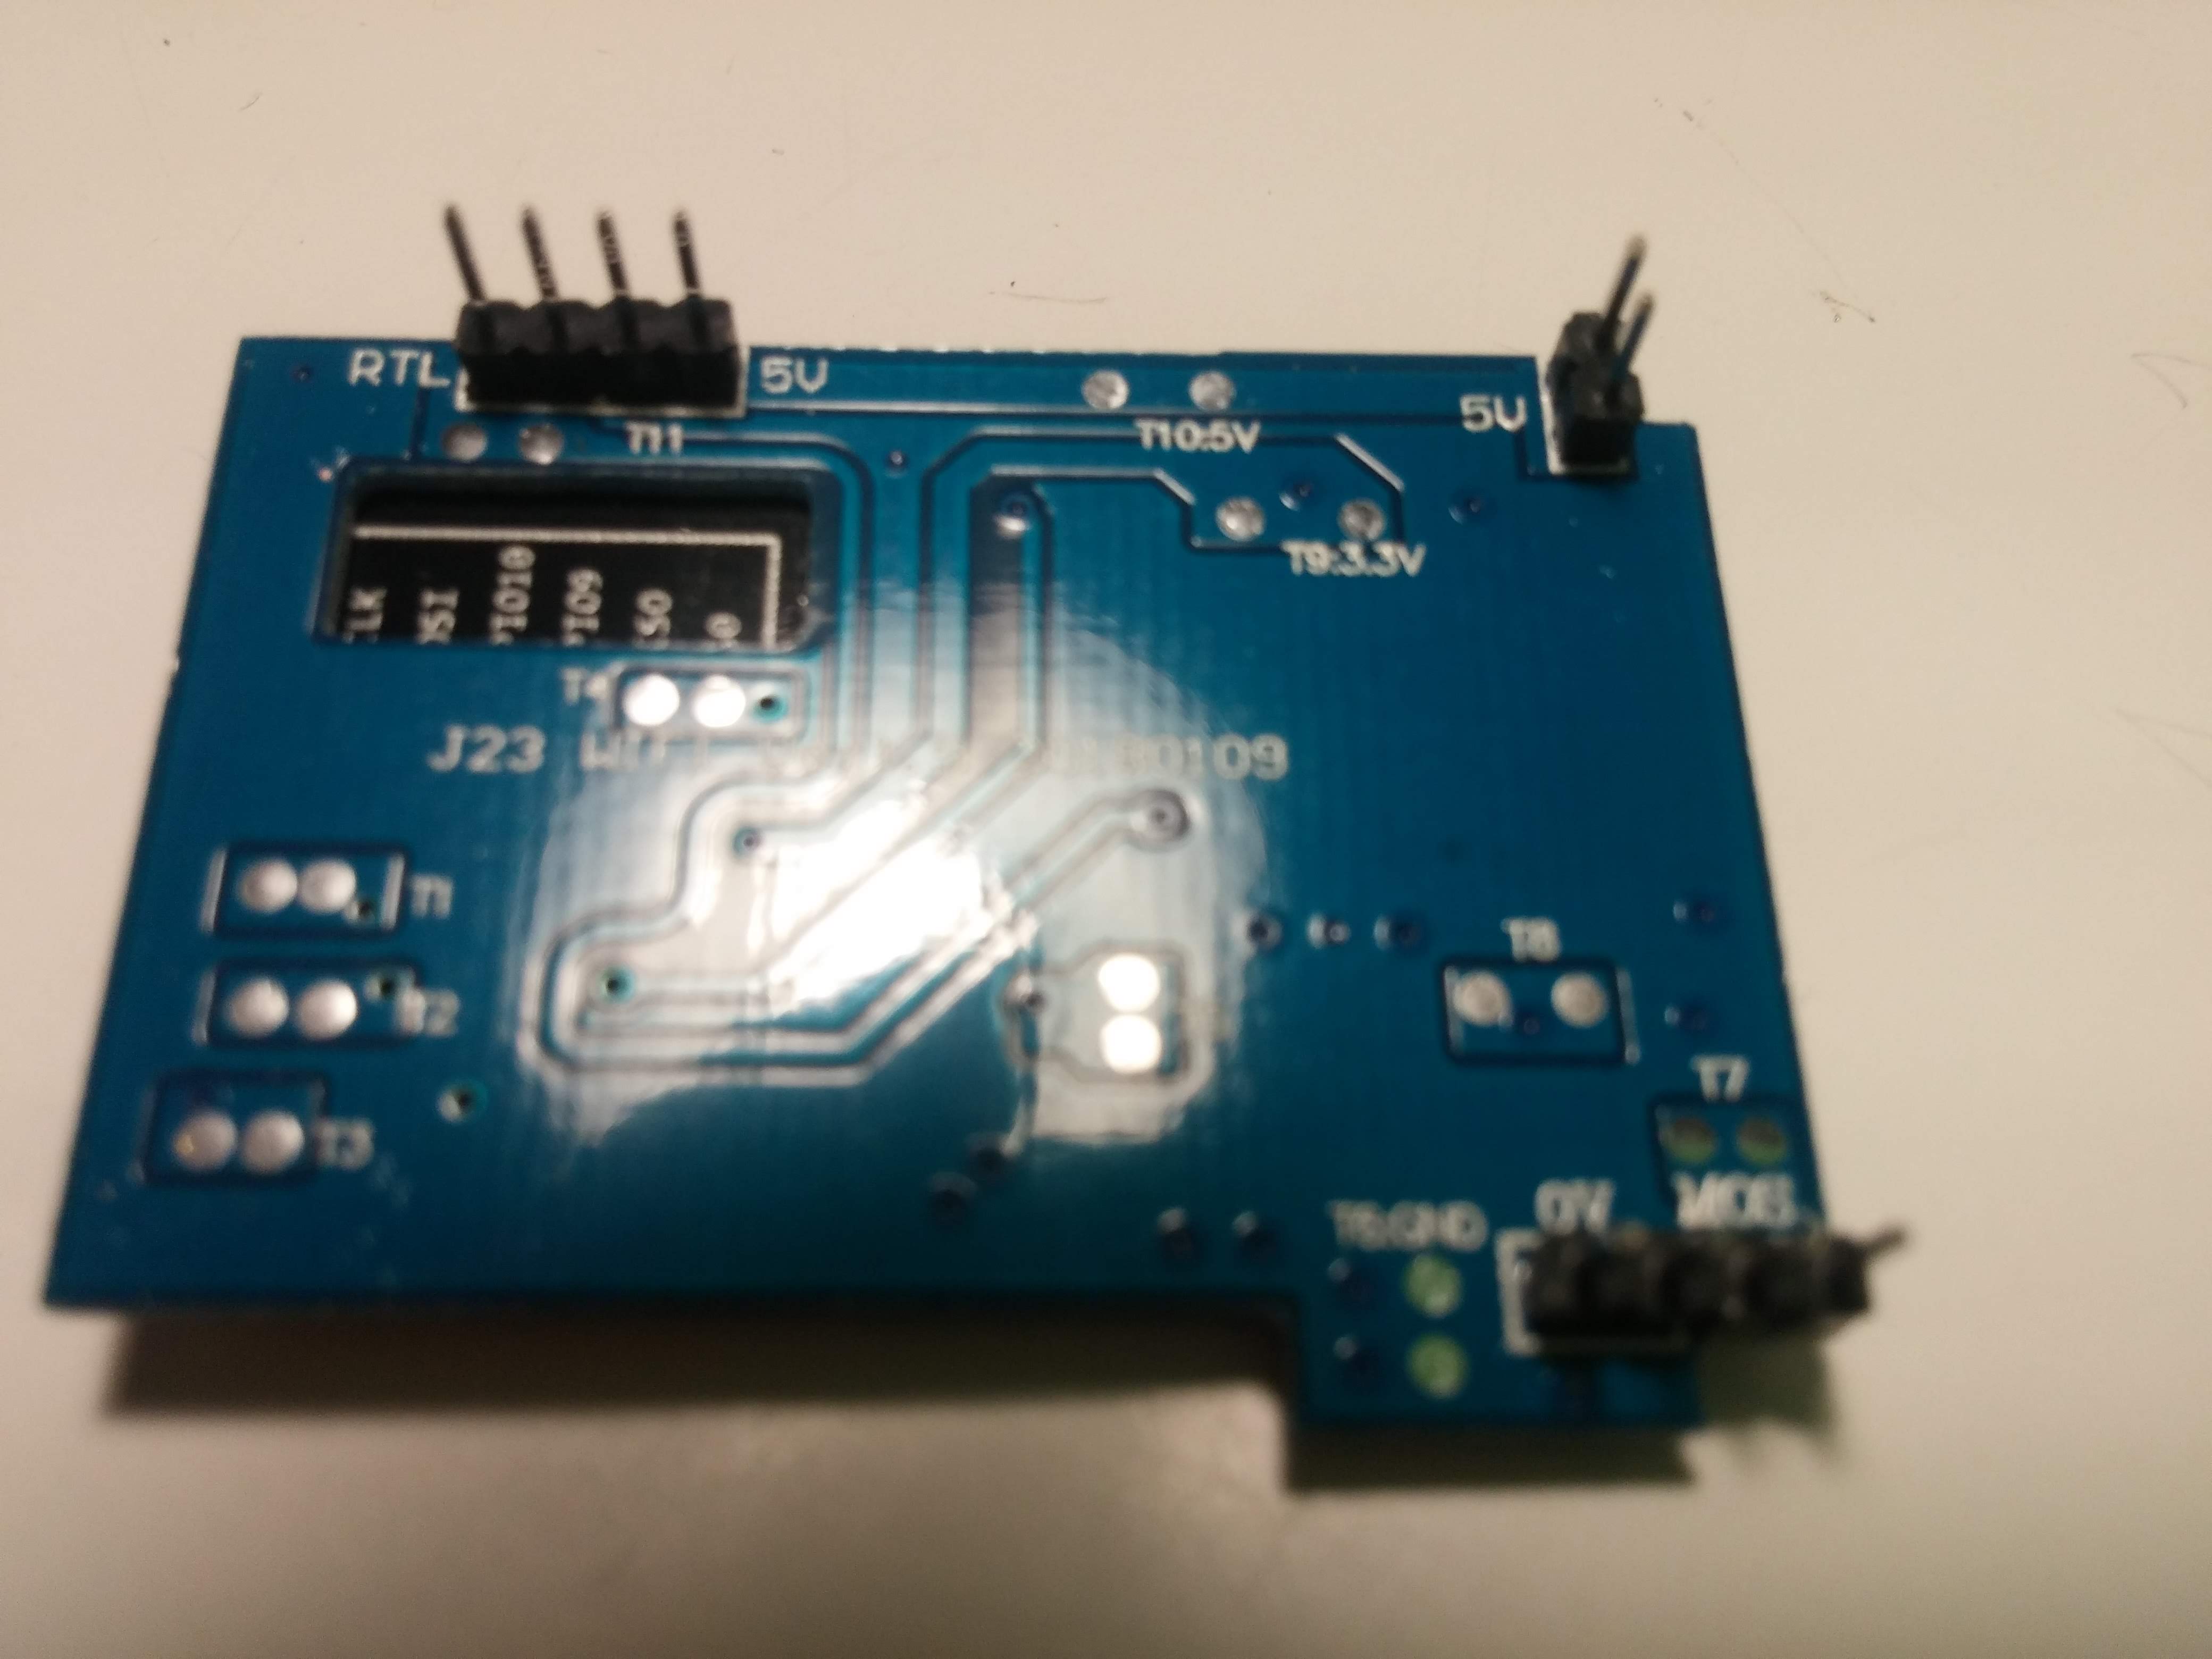
On the back of the module you'll find two headers one labeled "5v" (5v positive) (top right last picture) and one labeled MOS (ground) (bottom right last picture). These can be used to power the device during programming. The other header (top left) connects to the relay.
To flash the esp you have to connect gpio to ground (through pushbutton) then connect reset to ground (through pushbutton) then release reset while still hold the flash button for a few seconds. You should be then able to upload the code from the Arduino IDE. You have to set the IDE to "generic esp8266" and the flash size to 1M.
Heres the clips: https://www.amazon.com/JIUWU-Test-Ideal-Electronic-Experiment/dp/B00NHG8Q5U
The relay is on GPIO12 "low" is off, the button on the outlet is on GPIO13.
I have 6 of these running now with 4 more on the way. NOTE: The first 6 were the Zentec brand (insides pictured in this post).
The ones i linked to above are en route but the case looks identical so as with most chinese stuff they should be identical inside.
I also added a DHT22 temp/humidity module to one of the switches. My basement dehumidifier is connected to it. I doesn't look glamorous but it does the job.
Here's some inside pictures: