The app has to decide to use local mode vs cloud mode. There's probably a few ways to do this.. originally I had a manual toggle but that wasn't very user friendly for someone who's coming and going. The way it works now is to compare your current WIFI AP to the one you originally logged in with. That doesn't take any time to do so it's super fast. Another way would be to just try to connect to a local IP and if that fails change to cloud mode.. but, that's slow as I need to keep re-trying the local IP to know if you're back home again.
I also like how the app will pretty much auto discover everything it needs to work without any typing - and that only works locally. I can add an option to login remotely - but it'll require both the cloud token and the local app token which would be a pain to enter.
add ONVIF discovery to 'add video' tile to auto discover RTSP video camera streams
add setting to view app fullscreen
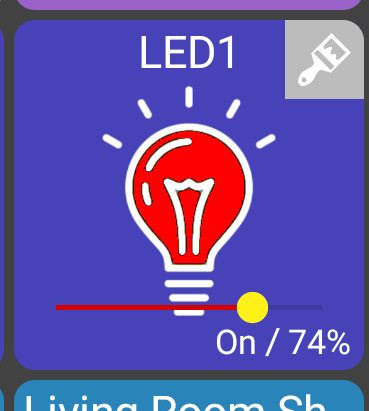
Some changes for lights that support colors:
I'm testing dynamically changing the color inside of the light for lights to the current color
I also changed the paint brush icon (direct color selection popup) a little.. having the grey background will keep it visible even for longer device names
However, you can now toggle the popup option so it's not displayed on the tile
If you have a camera that supports ONVIF you'll like this change. When adding a new video tile there's an option to 'discover devices'. See the screenshots below to see how this looks. Ultimately, it let me enter the video URL w/out typing!
NOTE: I've only tested this on a single device - a phone running IP Webcam (which supports both MJPG and RTSP streams).
Lastly, there's a new setting (nav drawer -> more -> show fullscreen); When unchecked, the app won't use fullscreen which can be better to use on phones
This is similar to the behavior I'm seeing with copied device tiles-- the temp display on the copied tile is out of sync with what is displayed on the copied tile's details view.
As an alternative to running an Android emulator on Windows 10, if your phone supports "Link to Windows" you can operate an instance of Hubitat Dashboard on your desktop (which is actually running on your phone) over your LAN using the "Your Phone" Win 10 built-in app. It appears to fully support most recent Samsung phones (and with Android 11, multiple phone apps can appear concurrently on your Win 10 desktop). See Connect on a new level with Link to Windows
I just tried it out; it's simple to set up and seems to work quite well, though it does require your phone to be operating on the same wifi network as your PC. Seems like a nice alternative to being saddled with the stock HE Dashboard in a browser on your PC.
I just installed the app a few hours ago and I'm really impressed with it.
I never understood why people choose other cloud based dashboards when the main reason to use Hubitat is so that you're not dependent on the internet.
I've noticed 2 small quirks with my setup that I'm looking for advice or if at all possible to add support for my setup.
First of all I have a Sonoff switch connected to a lamp and it comes into the dashboard as a switch. As far as I understand that's because of the way the driver is configured and doesn't report it as a light.
My issue is that when I change the icons to use a lightbulb icon when the Dark Grey/ Blue Icons all the icons are blue when off and filled blue when on. Apart from the sonoff device which uses the default white icon for off and yellow for on.
When I change from the default icon the ability to change the icon color disappears.
So I'm wondering is it possible for a device that reports itself as a switch for me to be able to set it as light? Or when using custom icons is it possible to change the icon color?
The second small issue I'm seeing is that I have a contact sensor on a shower door that is kept open most of the time unless someone is in the shower (Using it to keep the lights on in the shower longer). However when I have the sensor in a folder it throws up a yellow circle to warn me about the sensor. This is great for normal sensors but it would be great if I could configure that sensor to say that open is a condition that I don't need to be warned about, or perhaps reverse the logic to say that open is ok and closed is a "warning"
Thanks very much, even without those 2 small issues above solved it's a great app and I'll buy a few cheap tablets for around the house
There's not a light device type in Hubitat - the devices I have report as a switch but if they have "light" in the name I use the light device type (vs the switch). Interestingly, I see there is a "light" capability that Hubitat has defined but I don't think any of my devices use it - so either it's new or just not well supported. But, FWIW I will look for this capability in a future update in case it is used.
When I change from the default icon the ability to change the icon color disappears.
Yeah, I can see that being an issue. The logic I'm using to change the icon color works by changing the entire image to a single color. It works pretty well for single-color icons like the default white ones but not so good for custom images -- so that's why I'm not applying it to custom icons. I could - and some icons might look fine.
Another option I could use is just replace white with the custom color.. so if you picked a custom image that was all/mostly white it would change but other colors wouldn't.. anyway, I'm not sure there's a perfect answer but I can try out a few options
or perhaps reverse the logic to say that open is ok and closed is a "warning"
I'll have to think about that one.. it could get tricky to manage. A work-around at least would be to create a virtual contact sensor in Hubitat which is open when your real contact sensor is closed.. Then, include that device in MakerAPI instead of the real sensor.
Ok I understand, I thought there were specific light capabilities hence why my device was showing up as a switch because it doesn't have that capability.
Is there any chance then that other than the keyword "light" you could also add "lamp". There might be other keywords too but can't think of any more at the moment.
I like the virtual contact sensor option. I'll have to figure out which app I can use to invert the state. Not sure if simple automation could do it or if I have to go to rule machine.
I can't seem to be able to login to my hub. Keep getting"unable to connect to server" from the initial screen of your app. Anything I to check. Sorry a hubitat noon.
I did install the maker API and put on local and cloud accesse
Just an update. I have also tried a backup from my home windows pc bluestacks and restored it at work but the cloud token did not transfer and or work outside of the lan.
Sorry the app isn't just logging in automatically! That's how it works for me and what I'm aiming for -- I wanted to make logging in as seamless as possible. I don't have a complete FAQ or troubleshooting guide anywhere (yet.. I'm slowing working on one here).
For now, I'll try to list out everything I can in this post so I can link others to it as well if they have trouble logging in.
Login Steps
You need to be on the same network as your Hubitat Hub to login initially.
Once you login, if you enable cloud support (more on that below) you'll be able to use the app from anywhere. But, the initial login needs to be local today.
You need to add the Maker API app to Hubitat and configure it for local access
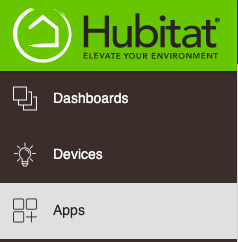
View APPS section in Hubitat webpage:
Click "Add Built-In App" -> click on Maker API
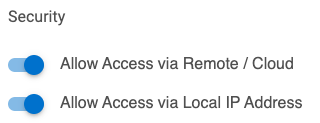
In Maker API Settings, make sure "Allow Access" via Local IP is enabled. The "Remote/Cloud" setting is optional
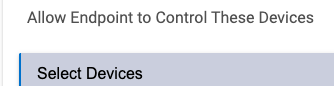
Select all devices you want to see in the app
In the Hubitat Dashboard app, click on "Discover Hub" button and if all goes well - you'll be logged in and will see all of your devices!
On initial login, IF you selected "Remote/Cloud" Maker API setting the app will prompt you to enable cloud mode detection. Selecting YES here will prompt you to enable location permission for the app. This is necessary and explained more in this post
Troubleshooting Logging In
If the above login process doesn't work for you, here's some troubleshooting steps
The "Discover Hub" button uses UPnP to discover your hub on the network. UPnP isn't enabled on all networks and the app only waits a few seconds to discover the hub before timing-out and showing the IP address field. You can show it at any time by hitting the "Manual Entry" button. Enter your Hubitat Hub's IP address here and hit Login
fetch the apps list page: http://HUB.IP/installedapp/list and look for "Maker API" app ID
fetch the Maker API settings page: http://HUB.IP/installedapp/configure/APP.ID/mainPage and look for access token ?access_token=ACCESS_TOKEN and cloud token https://cloud.hubitat.com/api/CLOUD.TOKEN/apps
As a last-resort, you can enter these values manually. Click on Login Help button and then Advanced button to display more login fields
For security reasons, I didn't backup and restore any login details like the IP, cloud token or access token. I didn't think about the use case you're trying - logging in from outside of the network. I will definitely figure out a way so you can login remotely though
Hi, sorry if this has been asked before, but I have some Hue Lights that are CT only, but Hubitat has in their drivers both CT and RGB. This usually isn't a problem.
However, in your app, I see no way of adjusting the colour temperature easily, it only lets me select the colour from that slider, which doesn't work on this case.
Maybe adding a device type CT bulb?
Thank you so much!
I'm having an issue with light tiles on the left column on my phone. When trying to move the slider to zero or from zero, the menu shows up, preventing me adjusting the light. I suppose I could move all the lights away from the the left side.
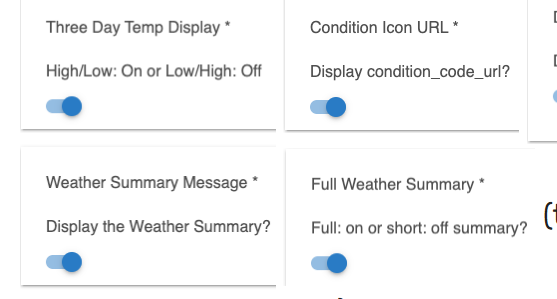
I trying to add the weather to my tablet and unable to do so. I when back thru the instruction and check all of the boxes. I'm still unable to add the weather and it tell me that I need to go to Hubitat and do a 3 day forecast, which is done? I create a virtual device and added Openweather and made sure all of the field were click on? I'm sure that I'm missing something. Thanks
Hey, I've been playing more and more with your app and I'm loving it more and more. It looks very simple and yet it's does the majority of the things that a dashboard needs to do.
And in my opinion it looks better than the official web based dasboard.
I got sorted with the earlier request for inverting the state of a contact sensor by the way using a simple rule in Rule machine and after doing it that way I agree implementing in the dashboard app isn't worth the extra complexity it would bring.
I'd also like to say I'd be interested in the support for webview for the purpose of displaying Hubigraphs. Just in case that gets it higher up the todo list
Edit: nevermind, I'm a dope, just saw that you did add it a few days later after the initial request
Hi, that makes sense - I only tested using RGB lights. I'll add it to my TODO list. Do you have some examples of how this should look in the UI? I'm not sure I'll be able to test it
Edit: I see my lights support CT as well.. next question - are there common CT values that are used or should the full range be available? What range is supported? For flexibility, I could make it a slider from the lowest to highest value.. but wondering if it'd be a better user experience to just list a few common values (ie: warm, cool, daylight)
Yeah, that's a tricky one.. swipes left -> right from the left side of the screen will open the nav drawer. You could use the circular light UI instead of the slider.. while it also works by dragging side to side you can start from anywhere and it's a much larger touch area. You could also press and hold the light to open up a dialog with the slider in the middle of the screen (but not as quick to do I realize). I'll have to think about any other ways to do this.. can't use up/down since that's for scrolling..