Your Insteon hub is not junk and you don't have to trash all your devices.
** See this post and the end of this post for information about how to manually add and remove devices from your Insteon hub. You can also add and remove them from Insteon scenes. You DO NOT have to have the Insteon app or their cloud server to do it. Local addition and removal of Insteon devices to the hub and Insteon groups is possible with just a little more effort than before.
For information on how to control your Insteon hub via Hubitat Elevation or other systems, see below.
ATTENTION - This driver needs a node.js server to communicate and get status updates from an Insteon hub. If you've come here looking for a way to control your Insteon devices now that Insteon servers are offline, you can do it with Hubitat, this driver and two Node.js apps. However, you cannot add devices to an Insteon hub with this integration. If you need to add devices, you'll need to hold the button on the Insteon hub until it beeps and the led on the hub flashes, then hold the sync button on your Insteon device. See your Insteon manual for more detail. You can actually control your Insteon devices with Home Assistant, but that integration tends to be slow and sometimes will miss a command. This integration is fast and never misses a command in my experience with it over the last 3+years.
Another option is Insteon to MQTT (Also a Home Assistant integration). That will give you more control over configuring an Insteon hub or PLM, and you'll be able to edit and create Insteon scenes. But don't expect an Insteon app type experience. Configuring will now be harder than you might be used to.
If you just need to configure the hub, an even more difficult to use, but still possible solution is to use Insteon Terminal
A lot of people want to use this now that Insteon servers have shut down, and most want to use a Raspberry Pi. To help make this as easy as possible, I've updated the instructions with some additional help for those that are not familiar with setting up a Raspberry Pi. I do want to be clear that these are not Raspberry Pi help instructions. If you need instruction on the finer points of configuring and using a Raspberry Pi, then google search is your friend.
[NOTE] *The developer of this driver is offering it on an AS-IS basis. If you're a cleaver developer and you want to improve on it, please feel free to create a fork . If you don't need to use Insteon Keypads, the code for insteonserver.js and the WS Parent driver pasted below should work just fine. I've included the two versions in my forked repo. Just use one or the other though, not both. In my own home I have been using this node.js server for more than three years. I cannot offer the time of others to fix any current issues it may have, but nothing here cannot be taken up by another user that wants to carry the baton forward and improve on the code.
insteonserver.js (without support for Insteon Keypads) - Located in usr/local/lib/node_modules/insteon-server
'use strict'
var Insteon = require('home-controller').Insteon
var hub = new Insteon()
var express = require('express')
var app = express()
var fs = require('fs')
var _ = require('underscore')

var websocket = require('ws')
var wss = new websocket.Server({port: 8080})

var configFile = fs.readFileSync('./config.json')
var configJSON = JSON.parse(configFile)
var platformIndex = configJSON.platforms.findIndex(function(item){return item.platform =='InsteonLocal'})
var config = configJSON.platforms[platformIndex]

InsteonServer()

function InsteonServer() {
	var devices = config.devices
	var deviceIDs = []
	var deviceJSON = []

	devices.forEach(function(device){
		deviceIDs.push(device.deviceID)
	})

	devices.forEach(function(device){
		var devJSON = {name: device.name, deviceID: device.deviceID, dimmable: device.dimmable, deviceType: device.deviceType}
		deviceJSON.push(devJSON)
	})

	var host = config.host
	var port = config.port
	var user = config.user
	var pass = config.pass
	var model = config.model
	var server_port = config.server_port || 3000

	var hubConfig = {
		host: host,
		port: port,
		user: user,
		password: pass
	}

	connectToHub()
	init()

	app.get('/light/:id/on', function(req, res) {
		var id = req.params.id.toUpperCase()
		hub.light(id).turnOn().then(function(status) {
			if (status.response) {
				res.sendStatus(200)

			} else {
				res.sendStatus(404)
			}
		})
	})

	app.get('/light/:id/off', function(req, res) {
		var id = req.params.id.toUpperCase()
		hub.light(id).turnOff().then(function(status) {
			if (status.response) {
				res.sendStatus(200)

			} else {
				res.sendStatus(404)
			}
		})
	})

	app.get('/light/:id/faston', function(req, res) {
		var id = req.params.id.toUpperCase()
		hub.light(id).turnOnFast().then(function(status) {
			if (status.response) {
				res.sendStatus(200)

			} else {
				res.sendStatus(404)
			}
		})
	})

	app.get('/light/:id/fastoff', function(req, res) {
		var id = req.params.id.toUpperCase()
		hub.light(id).turnOffFast().then(function(status) {
			if (status.response) {
				res.sendStatus(200)

			} else {
				res.sendStatus(404)
			}
		})
	})

	app.get('/light/:id/status', function(req, res) {
		var id = req.params.id
		hub.light(id).level(function(err, level) {
			res.json({
				'level': level
			})
		})
	})

	app.get('/light/:id/level/:targetLevel', function(req, res) {
		var id = req.params.id
		var targetLevel = req.params.targetLevel

		hub.light(id).level(targetLevel).then(function(status) {
			if (status.response) {
				res.sendStatus(200)

			} else {
				res.sendStatus(404)
			}
		})
	})

	app.get('/scene/:group/on', function(req, res) {
		var group = parseInt(req.params.group)
		hub.sceneOn(group).then(function(status) {
			if (status.aborted) {
				res.sendStatus(404)
			}
			if (status.completed) {
				res.sendStatus(200)

			} else {
				res.sendStatus(404)
			}
		})
	})

	app.get('/scene/:group/off', function(req, res) {
		var group = parseInt(req.params.group)
		hub.sceneOff(group).then(function(status) {
			if (status.aborted) {
				res.sendStatus(404)
			}
			if (status.completed) {
				res.sendStatus(200)

			} else {
				res.sendStatus(404)
			}
		})
	})

	app.get('/links', function(req, res) {
		hub.links(function(err, links) {
			res.json(links)
		})
	})

	app.get('/links/:id', function(req, res) {
		var id = req.params.id
		hub.links(id, function(err, links) {
			res.json(links)
		})
	})

	app.get('/info/:id', function(req, res) {
		var id = req.params.id
		hub.info(id, function(err, info) {
			res.json(info)
		})
	})

	app.get('/iolinc/:id/relay_on', function(req, res) {
		var id = req.params.id
		hub.ioLinc(id).relayOn().then(function(status) {
			if (status.response) {
				res.sendStatus(200)

			} else {
				res.sendStatus(404)
			}
		})
	})

	app.get('/iolinc/:id/relay_off', function(req, res) {
		var id = req.params.id
		hub.ioLinc(id).relayOff().then(function(status) {
			if (status.response) {
				res.sendStatus(200)

			} else {
				res.sendStatus(404)
			}
		})
	})

	app.get('/iolinc/:id/sensor_status', function(req, res) {
		var id = req.params.id
		hub.ioLinc(id).status(function(err, status) {
			res.json(status.sensor)
		})
	})

	app.get('/iolinc/:id/relay_status', function(req, res) {
		var id = req.params.id
		hub.ioLinc(id).status(function(err, status) {
			res.json(status.relay)
		})
	})

	app.listen(server_port)

	function connectToHub() {
		console.log('Model: ' + model)

		if (model == '2245') {
			console.log('Connecting to Insteon Model 2245 Hub...')
			hub.httpClient(hubConfig, function() {
				console.log('Connected to Insteon Model 2245 Hub...')
				connectedToHub = true
			})
		} else if (model == '2243') {
			console.log('Connecting to Insteon "Hub Pro" Hub...')
			connectingToHub = true
			hub.serial('/dev/ttyS4',{baudRate:19200}, function() {
				console.log('Connected to Insteon "Hub Pro" Hub...')
				connectedToHub = true

			})
		} else if (model == '2242') {
			console.log('Connecting to Insteon Model 2242 Hub...')
			hub.connect(host, function() {
				console.log('Connected to Insteon Model 2242 Hub...')
				connectedToHub = true
			})
		} else {
			console.log('Connecting to Insteon PLM...')
			hub.serial(host,{baudRate:19200}, function() {
				console.log('Connected to Insteon PLM...')
				connectedToHub = true
			})
		}
	}

	function init() {
		console.log('Initiating websocket...')
		var message

		wss.on('connection', function (ws) {
			console.log('Client connected to websocket')
			ws.isAlive = true

			ws.on('close', function(){
				console.log('Websocket closed by client')
				ws.isAlive = false
			})

			ws.send('Connected to Insteon Server')

			ws.on('message', function (message) {
				if(message == 'getDevices'){
					console.log(deviceJSON)
					if(ws.isAlive){ws.send(JSON.stringify(deviceJSON))}
				}
			})

			devices.forEach(function(device){
				switch (device.deviceType) {
				case 'doorsensor':
				case 'windowsensor':
				case 'contactsensor':


					device.door = hub.door(device.deviceID)

					device.door.on('opened', function(){
						console.log('Got open for ' + device.name)
						message = {name: device.name, id: device.deviceID, deviceType: device.deviceType, state: 'open'}
						if(ws.isAlive){ws.send(JSON.stringify(message))}
					})

					device.door.on('closed', function(){
						console.log('Got closed for ' + device.name)
						message = {name: device.name, id: device.deviceID, deviceType: device.deviceType, state: 'closed'}
						if(ws.isAlive){ws.send(JSON.stringify(message))}
					})

					break

					case 'leaksensor':
					device.leak = hub.leak(device.deviceID)

					device.leak.on('dry', function(){
						console.log('Got dry for ' + device.name)
						message = {name: device.name, id: device.deviceID, deviceType: device.deviceType, state: 'dry'}
						if(ws.isAlive){ws.send(JSON.stringify(message))}
					})

					device.leak.on('wet', function(){
						console.log('Got wet for ' + device.name)
						message = {name: device.name, id: device.deviceID, deviceType: device.deviceType, state: 'wet'}
						if(ws.isAlive){ws.send(JSON.stringify(message))}
					})

					break

				case 'switch':
					device.light = hub.light(device.deviceID)

					device.light.on('turnOn', function (group, level) {
						console.log(device.name + ' turned on')
						message = {name: device.name, id: device.deviceID, deviceType: device.deviceType, state: level}
						if(ws.isAlive){ws.send(JSON.stringify(message))}
					})

					device.light.on('turnOff', function () {
						console.log(device.name + ' turned off')
						message = {name: device.name, id: device.deviceID, deviceType: device.deviceType, state: 0}
						if(ws.isAlive){ws.send(JSON.stringify(message))}
					})

					break

				case 'lightbulb':
				case 'dimmer':
					device.light = hub.light(device.deviceID)
					device.light.level().then(function(level) {
						message = {name: device.name, id: device.deviceID, deviceType: device.deviceType, state: level}
						if(ws.isAlive){ws.send(JSON.stringify(message))}
					})
					break
				}
			})

			eventListener()

			function eventListener() {
				console.log('Insteon event listener started...')

				hub.on('command', function(data) {

					if (typeof data.standard !== 'undefined') {
						//console.log('Received command for ' + data.standard.id)

						var info = JSON.stringify(data)
						var id = data.standard.id.toUpperCase()
						var command1 = data.standard.command1
						var command2 = data.standard.command2
						var messageType = data.standard.messageType

						var isDevice = _.contains(deviceIDs, id, 0)
						var message

						if (isDevice) {
							var foundDevices = devices.filter(function(item) {
								return item.deviceID == id
							})

							console.log('Found ' + foundDevices.length + ' accessories matching ' + id)
							console.log('Hub command: ' + info)

							for (var i = 0, len = foundDevices.length; i < len; i++) {
								var foundDevice = foundDevices[i]
								console.log('Got event for ' + foundDevice.name + ' (' + foundDevice.deviceID + ')')

								switch (foundDevice.deviceType) {
								case 'lightbulb':
								case 'dimmer':
									if (command1 == '19' || command1 == '03' || command1 == '04' || (command1 == '00' && command2 != '00') || (command1 == '06' && messageType == '1')) { //19 = status
										var level_int = parseInt(command2, 16) * (100 / 255)
										var level = Math.ceil(level_int)

										console.log('Got updated status for ' + foundDevice.name)
										message = {name: foundDevice.name, id: foundDevice.deviceID, deviceType: foundDevice.deviceType, state: level}
										if(ws.isAlive){ws.send(JSON.stringify(message))}
									}

									if (command1 == 11) { //11 = on
										var level_int = parseInt(command2, 16)*(100/255)
										var level = Math.ceil(level_int)

										console.log('Got on event for ' + foundDevice.name)
										message = {name: foundDevice.name, id: foundDevice.deviceID, deviceType: foundDevice.deviceType, state: level}
										if(ws.isAlive){ws.send(JSON.stringify(message))}
									}

									if (command1 == 12) { //fast on
										console.log('Got fast on event for ' + foundDevice.name)
										message = {name: foundDevice.name, id: foundDevice.deviceID, deviceType: foundDevice.deviceType, state: 100}
										if(ws.isAlive){ws.send(JSON.stringify(message))}
									}

									if (command1 == 13 || command1 == 14) { //13 = off, 14= fast off
										if (command1 == 13) {
											console.log('Got off event for ' + foundDevice.name)
										} else {console.log('Got fast off event for ' + foundDevice.name)}
										message = {name: foundDevice.name, id: foundDevice.deviceID, deviceType: foundDevice.deviceType, state: 0}
										if(ws.isAlive){ws.send(JSON.stringify(message))}
									}

									if (command1 == 18) { //stop dimming
										console.log('Got dim event for ' + foundDevice.name)
										foundDevice.light.level().then(function(level) {
											message = {name: foundDevice.name, id: foundDevice.deviceID, deviceType: foundDevice.deviceType, state: level}
											if(ws.isAlive){ws.send(JSON.stringify(message))}
										})
									}

									break
								}
							}
						}
					}
				})
			}
		}
		)}
}
WS Parent (without support for Insteon Keypads)
/**
 *  Insteon WS Parent
 *
 *  Copyright 2019 Chris Wilson
 *
 *  Licensed under the Apache License, Version 2.0 (the "License"); you may not use this file except
 *  in compliance with the License. You may obtain a copy of the License at:
 *
 *      http://www.apache.org/licenses/LICENSE-2.0
 *
 *  Unless required by applicable law or agreed to in writing, software distributed under the License is distributed
 *  on an "AS IS" BASIS, WITHOUT WARRANTIES OR CONDITIONS OF ANY KIND, either express or implied. See the License
 *  for the specific language governing permissions and limitations under the License.
 *
 *
 *
 *
 *  Original Author     : ethomasii@gmail.com
 *  Creation Date       : 2013-12-08
 *
 *  Rewritten by        : idealerror
 *  Last Modified Date  : 2016-12-13
 *
 *  Rewritten by        : kuestess
I'm pleased to share news of the latest Insteon HTTP driver with web socket support by Chris Wilson - @cwwilson08.
This latest driver utilizes an updated version of Scott Kuester's Insteon Server Node.js application, which now supports Web Sockets. This new capability allows the use of Insteon door/window contact sensors, motion sensors and leak sensors, as well as instant device status updates. Insteon 8 button keypads are also now supported, and may be used to trigger HE rules, devices and scenes, in addition to Insteon devices and scenes.
Features
• Ramp Rate - The Insteon device hardware Ramp Rates are supported, but user definable Ramp Rates via the driver are not. Therefore, the Duration field in the driver does not serve any purpose and must be left blank. However, by activating and deactivating Insteon Scenes, you can control ramp rate. Insteon scene can be controlled via any Insteon devices, and any device or rule on Hubitat Elevation.
• Instant device status
• Insteon Scene Control via HTTP Get from Button Controller or Rule Machine
• Automated Child device creation and Insteon Device ID capture
• Organized Parent/Child device structure
Compatible device types
Dimming Micro Modules
Door/Window contact sensors
IOLinc
In-wall dimmers
In-wall switches
Keypads
Leak sensors
Motion sensors
On/Off Micro Modules
Outlets
Plug-in dimmers
Plug-in switches
Minimum requirements
- Insteon 2245-222 Hub (The previous 2242-222 and the newer 2243-222 HomeKit hubs are untested)
- Dedicated computer or Raspberry Pi with Node.js installed to run the insteonserver.js and the client.js event listener applications.
- Insteon devices
Installation
Insteon Server Node.js application
The insteon-server has been forked to make changes in some of files to support Hubitat Elevation, and additional features. Please use files found here, rather than those from Scott Kuester's GitHub repository.
Raspberry Pi specific instructions.
I don't use monitors with a Raspberry Pi. Never have, and never intended to. So my instructions are all how to set this up via ssh. However, if you want to run headless, you'll need further instruction then I'm providing here because the shell windows have to otherwise remain open.
Step 1 Install Raspbian Buster. If you use the latest Raspbian OS, they have removed the default pi account, so you won't be able to set this up via ssh without first attaching a monitor and keyboard to create an account to log into ssh. And then if you're doing that, well then what's the point in using ssh to do this, right?
Step 2 Most sd card imaging software will automatically eject the miroSD card after writing, so remove the card from the reader and then pop it back in so it’s available to your system again. You will not see the whole volume, but you will be able to access the boot directory.
Step 3 If you’re using a Raspberry Pi with built-in Ethernet, you don’t need to do anything to add WiFi support and you can skip to Step 5. If you’re not (e.g. A Raspberry Pi ZeroW), then you’ll need to add a wpa_supplicant.conf file. This is just a text file you create with nothing more than the text below in the file. The easiest way to do this is with Atom text editor. Just create a new file and paste the text below into it, modifying the ssid with your actual WiFi name you want the Raspberry Pi to connect to, and the psk with your WiFi password.
ctrl_interface=DIR=/var/run/wpa_supplicant GROUP=netdev

network={

ssid="YOUR_NETWORK_NAME"

psk="YOUR_PASSWORD"

key_mgmt=WPA-PSK

}
Step 4 Save the text file as “wpa_supplicant.conf” to the root level of the Boot directory. It will be automatically moved to the required directory when the Raspberry Pi boots.
Step 5 Add ssh capability by creating an empty file with no extension. Again you can use Atom text editor to save an empty text file named “ssh” to the root level of the boot directory on the microSD card. Another way to do this is to open a terminal app and type
cd /volumes/boot
then type
touch ssh
Same result. An empty file named ssh with no extension.
Step 6 Download the Insteon server file and unzip it.
If you will not be using Insteon keypad, then delete the file “insteonserver.js” and instead use the file that is located in the directory labelled “insteonserver.js without Keypad support”.
If you do need Insteon Keypad support, then delete the folder labelled “Insteonserver.js without Keypad support”.
Do not keep both files!
Step 7 Rename the folder “Insteon-server-master” to “Insteon-server” and then zip compress it again.
Step 8 Copy the file “Insteon-server.zip” to the root level of the microSD card.
Step 9 Close the terminal and any text editors that you have been using to add files to the microSD card, and then eject it from your computer.
Step 10 Install the micro SD card in your Raspberry Pi and plug it in.
Step 11 Ssh into the Pi
ssh pi@192.168.x.x
Enter the default password
raspberry
NOTE: It is highly recommended that you change the default password for the pi account. To do this type
passwd
But, don't forget to write down the new password, or you'll have to start over from the beginning.
Step 12 Change to the lib directory
cd usr/local/lib
Step 13 Download node.js
curl -sL https://deb.nodesource.com/setup_10.x | sudo bash -
Step 14 Install node.js
sudo apt install nodejs
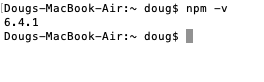
Step 15 Check that node is installed and you have the version expected.
node -v
Step 16 Create the directory node_modules
sudo mkdir node_modules
Step 17 Copy the Insteon-server file you saved in the boot directory to the node_modules directory
sudo cp /boot/insteon-server.zip /usr/local/lib/node_modules
Step 18 Change to the node_modules directory
cd node_modules
TIP: If you get lost along the way, you can check what directory level you’re currently in with
pwd
To see what’s in the current directory, use
ls
Step 19 Unzip the Insteon-server archive
sudo unzip Insteon-server.zip
Step 20 Take a moment to do some clean-up and remove the .zip file you no longer need
sudo rm -R Insteon-server.zip
Step 21 Change to the Insteon-server directory
cd Insteon-server
Step 22 Install the Insteon server app
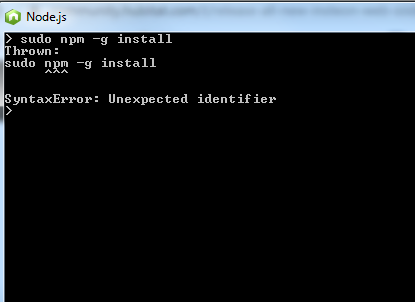
sudo npm -g install
Step 23 Install the dependencies
sudo npm install -g home-controller
sudo npm install -g express
sudo npm install -g ws
Step 24 Edit the config-example.json file
sudo nano config-example.json
Example: (Scroll in the window below to view the entire config.json example)
{
    "description": "Hubitat Insteon Integration",
    "accessories": [],
    "platforms": [
        {
        "platform": "InsteonLocal",
        "name": "Insteon Server",
        "user": "Banana6",
        "pass": "45QtSRC4",
        "host": "192.168.1.55",
        "port": "25105",
        "model": "2245",
        "server_port": "3000",
        "devices": [
          {
            "name": "Kitchen Light",
            "deviceID": "45ED1C",
            "dimmable": "no",
            "deviceType": "lightbulb"
          },
          {
            "name": "Dining Room Light",
            "deviceID": "3DED8F",
            "dimmable": "yes",
            "deviceType": "lightbulb"
          },
          {
            "name": "Front Door Sensor",
            "deviceID": "FG34E7",
            "deviceType": "contactsensor"
          },
         {
            "name": "Keypad",
            "deviceID": "[Insteon Device ID]",
            "dimmable": "yes",
            "deviceType": "scene"
         }
      ]
   }
]
 }
IMPORTANT: The Insteon hub port in the config.js file must be 25105, but the node.js server port, which is labelled "server_port" in the config.js file, can be any open port you need it to be. What's important is that the node.js "server_port" specified in the config.js file must match the server port specified in the insteonserver.js file.
When editing the config.json file, remove any devices you do not own. The username and password from your insteon hub must replace [Insteon Hub Username] and [Insteon Hub Password] in the config.json file.
Name the devices the way you would like them to appear in your Hubitat Elevation hub. Replace all the [Insteon Device ID] in the config.json file with the actual device ID from your Insteon mobile app (Letters and Numbers only. Do not add periods or colons) It is important to properly enter your Insteon Device ID numbers, as this is how the child devices will be created on the Hubitat Elevation hub. If you do not enter the Insteon Device ID for each of your devices in the config.json file, its corresponding child device will not be created on your HE hub.
For Keypads, the device type should be "scene"
NOTE: There is no need to change the device type from "lightbulb". I've been controlling multiple Instoen dimmers for years with the config.json file using "lightbulb" instead of "dimmer" regardless of whether or not it is actually a lightbulb, dimmer or switch. However, you must set "dimmable": no in the config.json file if the device type is a switch, a non-dimmable outlet, ON/OFF Micro Module, or an IOLinc.
Step 25 Save the config.json file
Press ctrl-o
Step 26 Change the name from config-example.json to config.json
Press enter to confirm the name change. Nano will prompt you, asking if you want to save the file under a different name. You do, so just press
y
Step 27 Exit nano
Press ctrl-x
Step 28 Start the server and client listener
Open a shell window (Raspbian) or terminal window (Mac OS), and type
/usr/local/lib/node_modules/insteon-server/
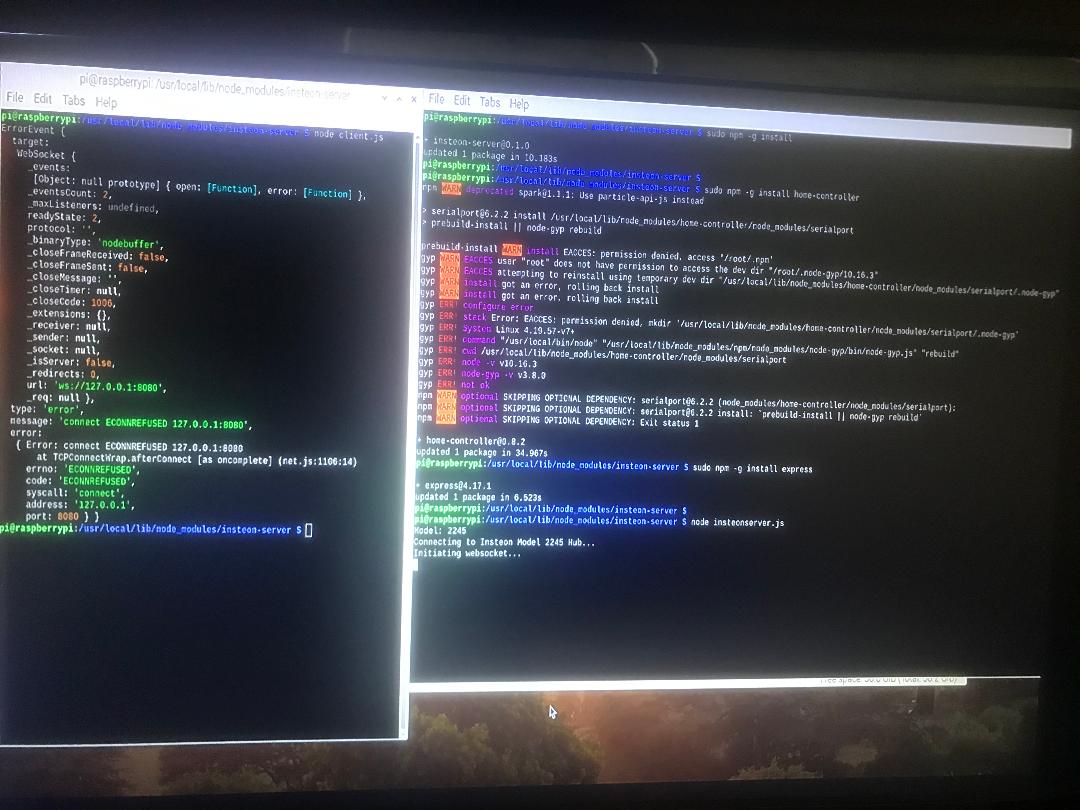
Start the Insteon Server node.js application by typing
node insteonserver.js
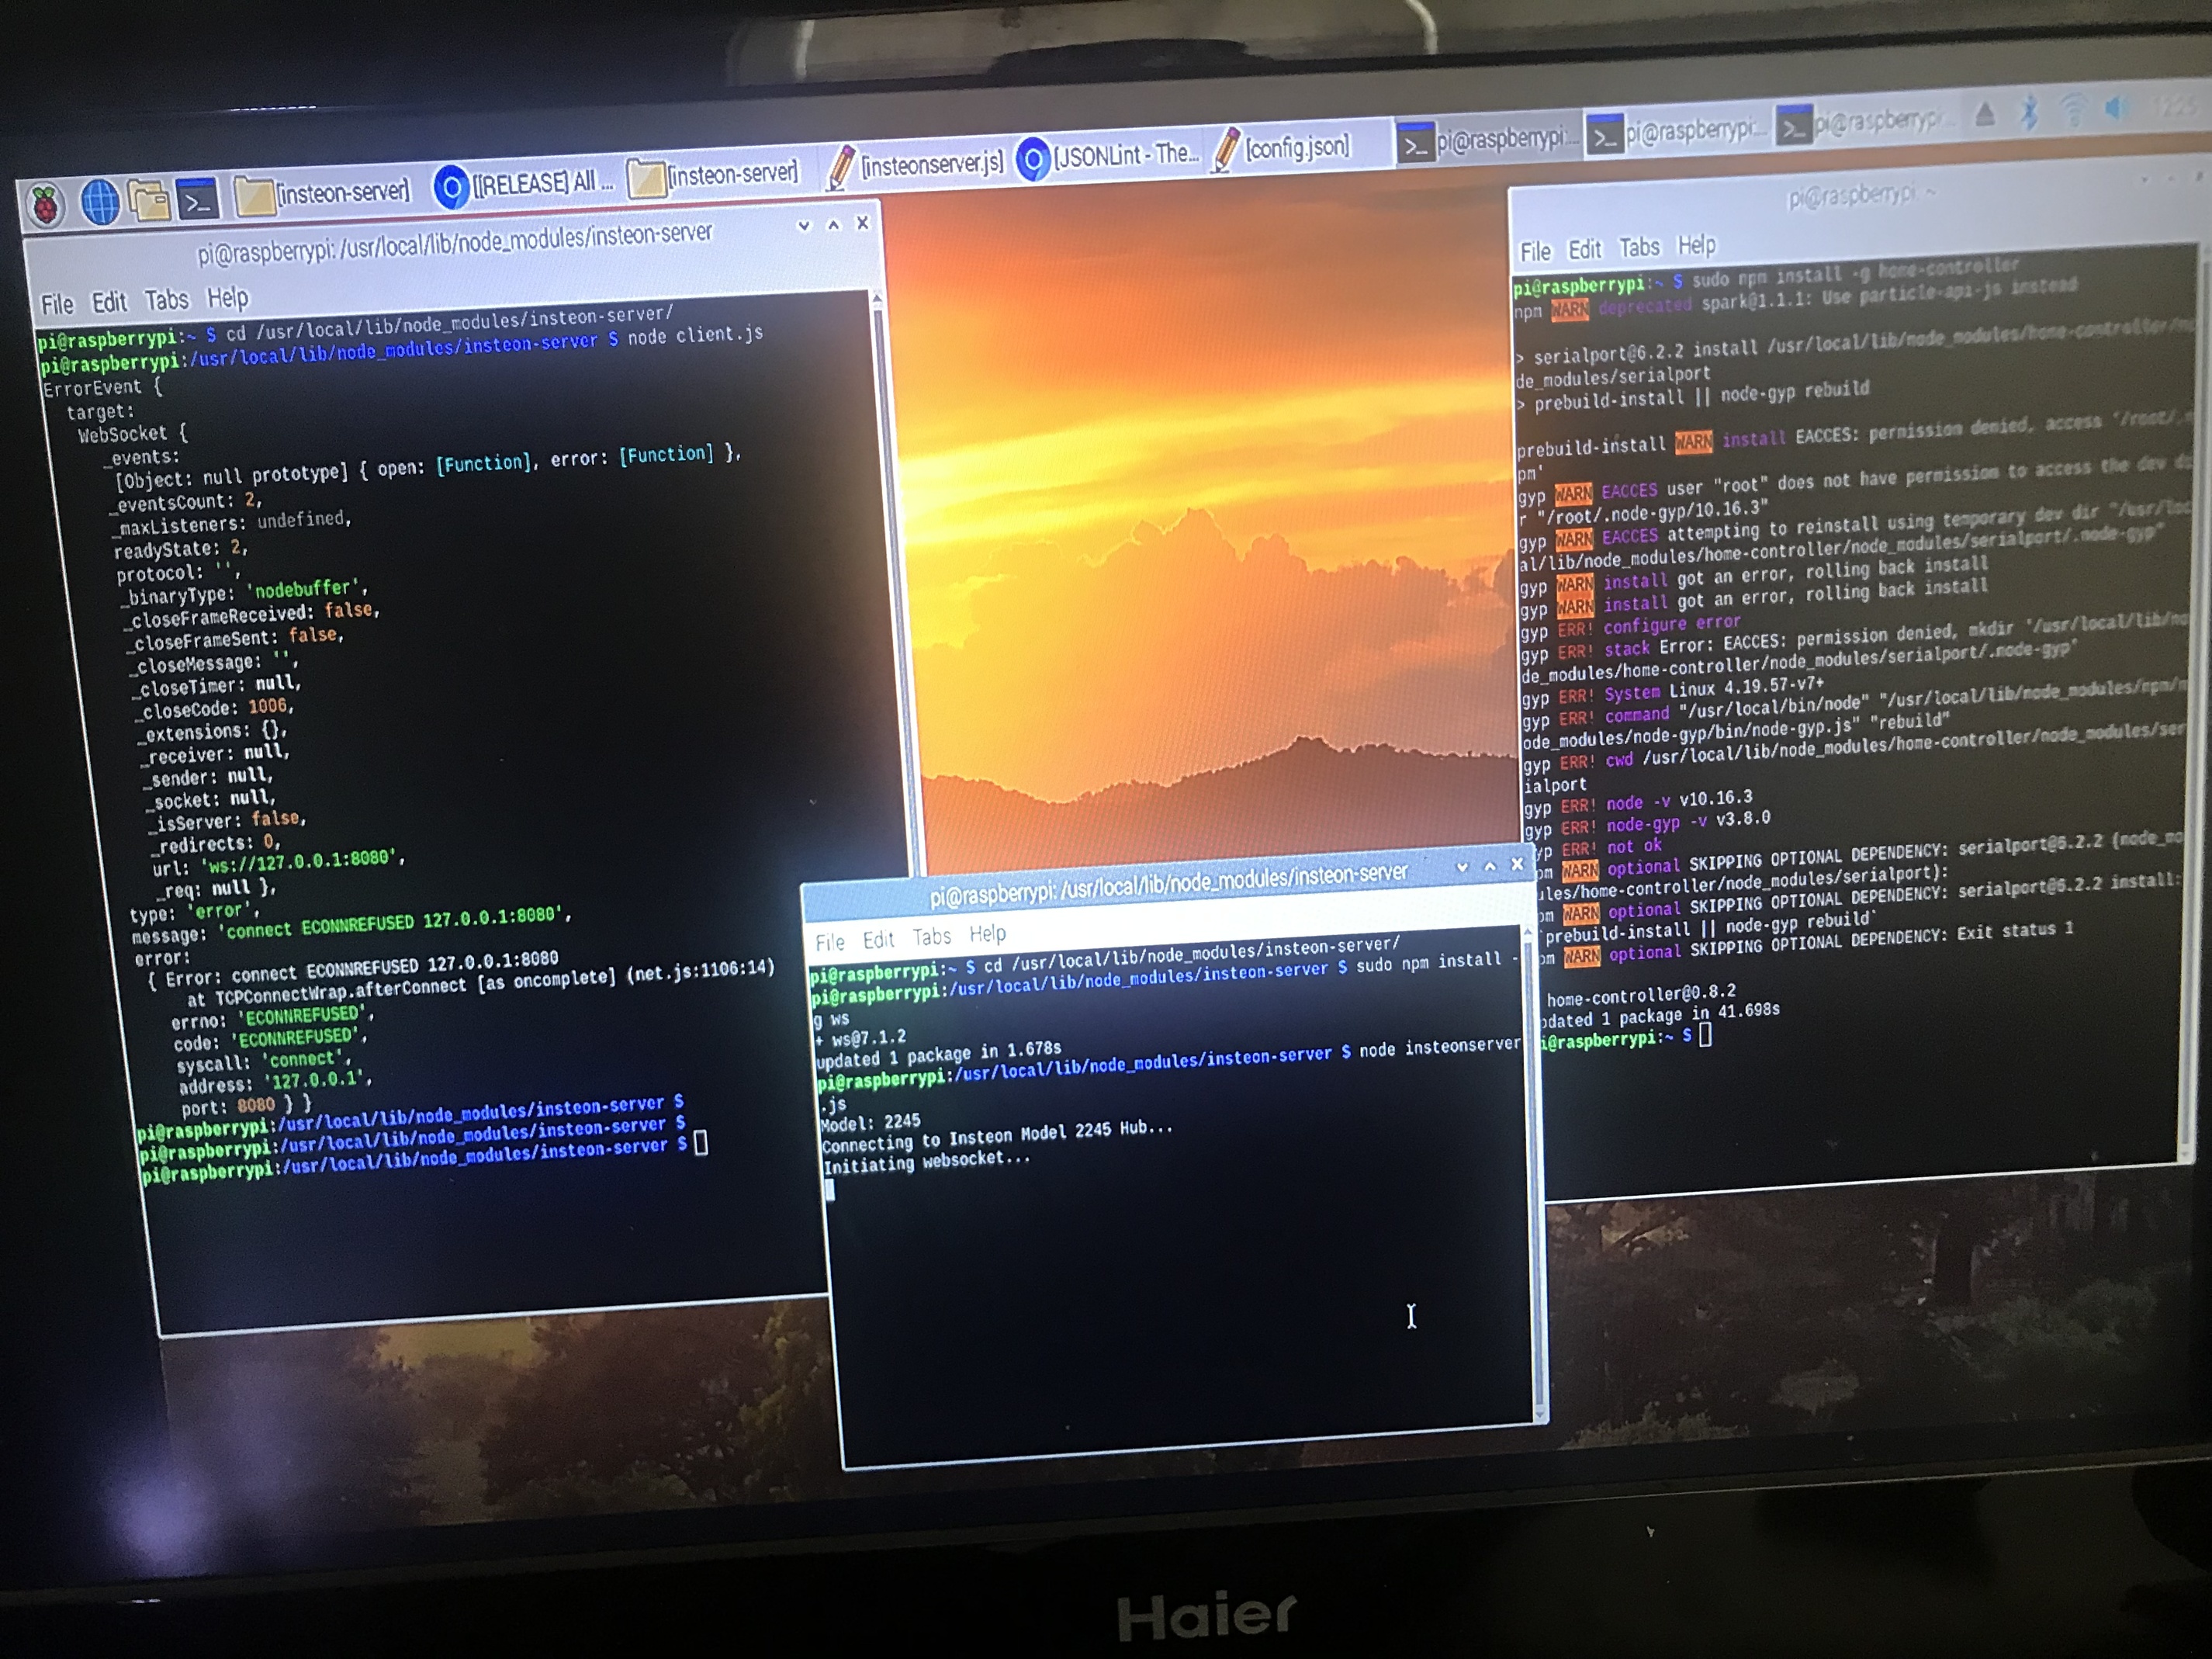
You should see the following in your shell or terminal window:
Connecting to Insteon Model 2245 Hub... Initiating websocket... Connected to Insteon Model 2245 Hub...
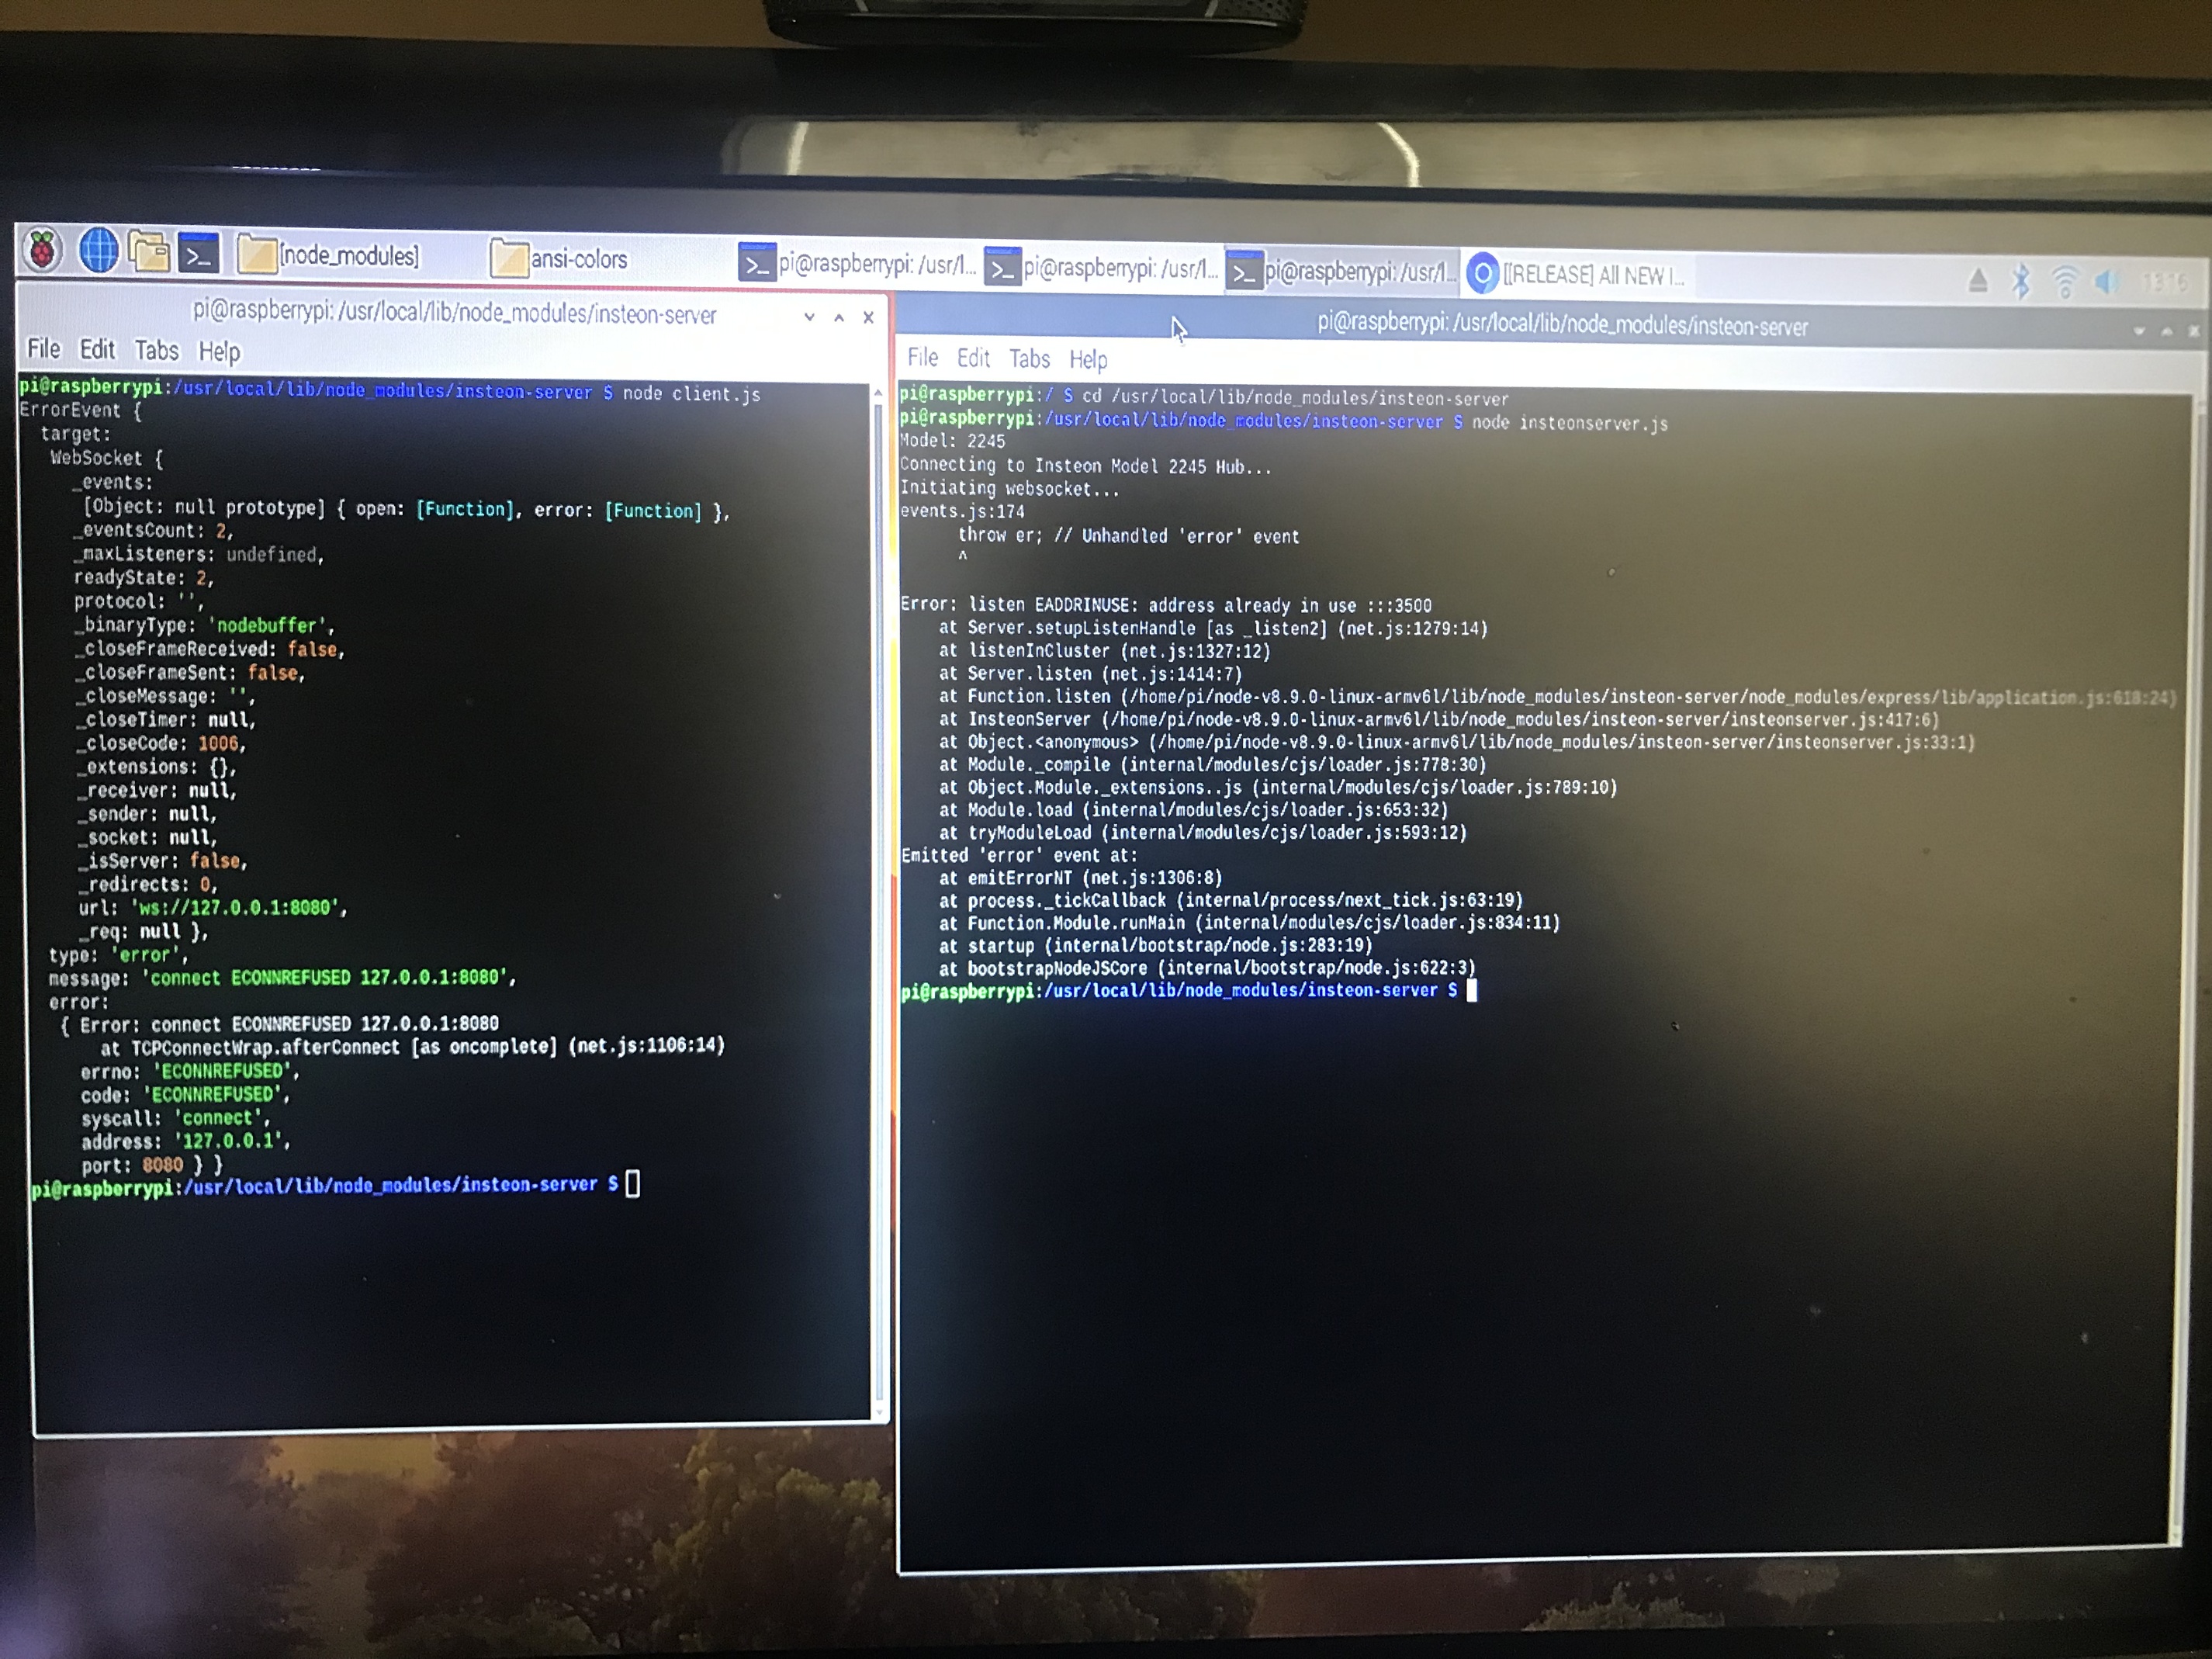
Step 29 Open a second shell window (Raspbian) or terminal window (Mac OS), and again type
cd /usr/local/lib/node_modules/insteon-server/
Start the Insteon client listener by typing
node client.js
You should see the following in the client.js shell or terminal window:
Connected to Insteon Server
WARNING: If you don't start the client.js application, you won't be able to generate the child devices, get device status updates, or use Insteon motion, contact and leak sensors.
Installing the Insteon WS Parent and Child device drivers on your Hubitat Elevation hub
Download the groovy code for Hubitat Elevation from here
Through the use of web sockets, this new driver will update status immediately, and will capture the status of Insteon input devices such as contact, motion, and leak sensors. Any periodic refresh rules used with the previous driver should be removed.
Adding the Insteon driver code to Hubitat Elevation
Choose Select All on the RAW code window, then copy and paste the code into a new driver code window in Hubitat Elevation and press SAVE Repeat until you have added the parent and each of the child device drivers.
Step 1 Copy the parent driver by pressing the RAW button at the top right and paste it into a new driver window on Hubitat Elevation. Refer to the Hubitat docs for to to install devices drivers if you have never done this before. Be sure that after you select the link for the parent driver code, you then press the RAW button at the top right of the driver code window. This will ensure you have all the correct code, without any missing elements or accidentally included special characters.
Step 2 Copy each of the child device driver code files, creating a new driver file for each on your Hubitat Elevation hub. Be sure that after you select the link for the child driver, you then press the RAW button at the top right of the driver code window. This will ensure you have all the correct code, without any missing elements or accidentally included special characters.
Installing the Insteon WS Parent driver on your Hubitat Elevation hub
Step 1 Refer to the Hubitat Elevation device driver documentation if you have never installed a device driver before.
Step 2 Name your Parent device driver, and set the type to Insteon WS Parent
Step 3 Press the Save Device button
Step 4 Configure the driver as follows:
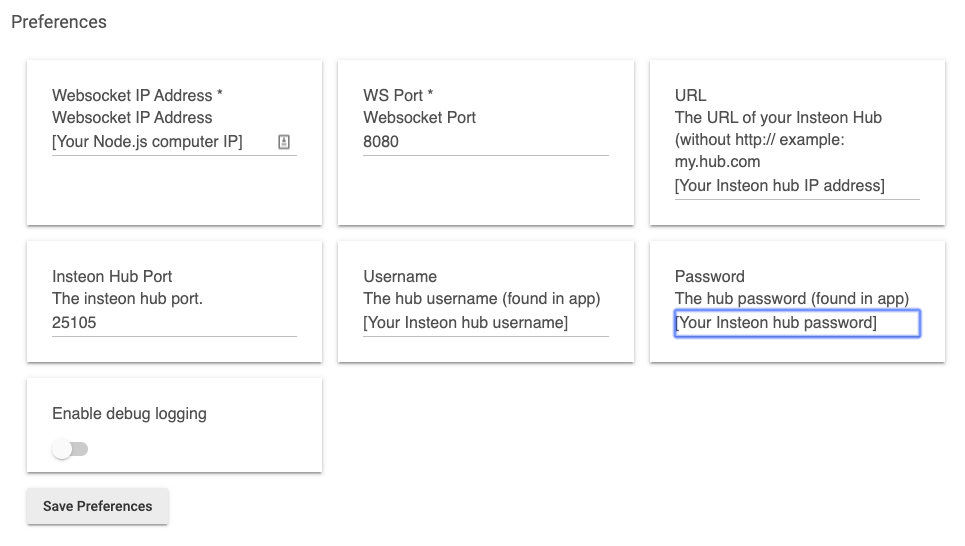
Step 5 Turn off "Enable debug logging". When you create a new device, debug logging is enabled by default. Some users have said that when debug logging was enabled in the parent device, the child devices were not created after completing the next steps.
Step 6 Press the Save Preferences button, then scroll down and select the Save Device button again.
Step 7 Press the Initialize button. You should see connected under the Current States field. If you do not see connected. ensure that both the insteonserver.js application and client.js applications have been started on your node.js server.
Your child device ID numbers (Insteon Device ID numbers) should all show up in the State Variables field. In your Hubitat Elevation devices list, you should see the Insteon WS Parent app with the name you gave it, and all of your Insteon devices with the names you assigned to each device in the config.json file. You may now include your Insteon devices in Hubitat Elevation automations. I have personally been running this new driver with all my Insteon devices since late June of 2019, and it continues to perform perfectly. Very fast with no issues or conflicts of any kind.
Controlling Insteon Scenes
This can be done by sending HTTP request directly to the Insteon hub. With this, you can control the ramp rate of Insteon devices per button, rule action, switch, mode change, etc.
Example:
ON group 11 (scene 1)
http://[username]:[password]@[insteon hub IP]:25105/0?1111=I=0
OFF group 11 (scene 1)
http://[username]:[password]@[insteon hub IP]:25105/0?1311=I=0
Once you have the credentials and Insteon hub IP info, it's just copy past from then on. It's only the last four digits before =I=0 that change depending on the state or the scene group ID number. So in the above example, 1111 is ON for Group ID 11 and 1311 is OFF for Group ID 11
Currently untested
2242-222 Hub
2243-222 Hub (HomeKit Edition)
6 button dimming keypad
6 button on/off keypad
Ceiling fan/light module
Mini remotes 1, 4 & 8 scene
Siren
Smoke bridge
Thermostat
Controlling Insteon Scenes
This can be done by sending HTTP request directly to the Insteon hub. With this, you can control the ramp rate of Insteon devices per button, rule action, switch, mode change, etc.
Example:
ON group 11 (scene 1) http://[username]:[password]@[insteon hub IP]:25105/0?1111=I=0 OFF group 11 (scene 1) http://[username]:[password]@[insteon hub IP]:25105/0?1311=I=0 Once you have the credentials and Insteon hub IP info, it's just copy past from then on. It's only the last four digits before =I=0 that change depending on the state or the scene group ID number. So in the above example, 1111 is ON for Group ID 11 and 1311 is OFF for Group ID 11
Untested
2242-222 Hub 2243-222 Hub (HomeKit Edition) 6 button dimming keypad 6 button on/off keypad Ceiling fan/light module Mini remotes 1, 4 & 8 scene Siren Smoke bridge Thermostat
How to add and remove devices from your Insteon 2245-222 hub
Now that the ability to use the Insteon app is gone, you will need to manually add devices to the hub. There are ways to do this with open source software, but you can also do this by using the Link button on the 2245 hub, or by using the following HTTP commands. Even if you accidentally reset your Insteon hub, you should be able to re-link devices by using the buttons on the hub and the link method on the device, or recreate groups using the HTTP method below. If you need to configure embedded devices, or if just want a convenient configuraiton tool for you devices, I suggest Insteon Control Panel for Home Assistant by Tom Harris (which will soon be included with the Home Assistant Insteon driver) - Insteon configuration panel - #41 by teharris1 - Dashboards & Frontend - Home Assistant Community
NOTE: You will need to find your Insteon hub IP address by looking at the DCHP address table, or the MAC address table of your router. Every router will be different. Consult your router manual by downloading it from the manufacturer's website or do some searching online for answers using your router's brand and model number if a manual isn't available. If your hub has never been named, it will probably show up in a DHCP table as "Smarthome". But if your router doesn't display device names in the DHCP table, look for the matching MAC Address to the one shown on the bottom of your 2245-222 hub.
Example of an Insteon MAC Address
00:0E:F3:x:x:x (where the x will be two HEX values unique to your particular Insteon hub).
Before you start, it’s important to understand some basics around how to form the URL to enable linking. Since you can join devices by Group (Scene) you will have the ability to add devices to your hub and to a particular Insteon Scene. You don’t have to use Insteon Scenes, but without their use you will either get a popcorn effect from your lights when you try to control several of them at once with a non-Insteon group, or some of the Insteon devices may not respond at all if you're trying to use a non-Insteon group to control multiple at once. Insteon Scenes will send out a single group message, where all Insteon devices in that Insteon Group (Scene) will respond simultaneously, with no popcorn effect, and no missed commands by any Insteon device that is a member of that group.
The following are HTTP commands from the Insteon Developer Guide. You should probably download this for reference while you still can. The guide is from the 2242-222 hub, but the commands are the same for the 2245-222 hub.

The remainder of the URL contains the commands for linking/unlinking, together with the group you want to add the device to, or the group you want to removed the device from.
Enter Linking Mode to group 10
/0?0910=I=0
Enter Unlinking Mode from Group 10
/0?0A10=I=0
Cancel Linking or Unlinking Mode
/0?08=I=0
Examples:
Set the hub into Linking mode to add a device to Group (Scene) 10 Here 09 is the HEX command to put the Insteon hub into Linking mode, and 10 is the Insteon Group it will join.
http://Annie:ytyYUbva@192.168.0.146:25105/0?**0910**=I=0 Set the hub into Unlinking mode to remove a device from Group (Scene) 10 Here 0A is the HEX command to put the Insteon hub into Unlinking mode, and 10 is the Insteon Group it will leave.
http://Annie:ytyYUbva@192.168.0.146:25105/0?**0A10**=I=0 Cancel Linking or Unlinking Mode (Group number doesn’t have to be included and will be ignored if it is included together with the Cancel Linking/Unlinking command). Here 08 is the HEX command to Cancel linking or unlinking mode, and even though 10 for the Group is still included in the URL, it is unnecessary for a Cancel command. However it can safely be left included if you just want to change the HEX value before the Group number in the URL. It will be ignored in this case.
http://Annie:ytyYUbva@192.168.0.146:25105/0?0810=I=0` Turn OFF Group (Scene) 10 Here 11 is the HEX command to turn OFF the devices in Group 10
http://Annie:ytyYUbva@192.168.0.146:25105/0?**1110**=I=0 Turn ON Group (Scene) 10 Here 12 is the HEX command to turn ON the devices in Group 10
- To use the HTTP commands, first send your constructed URL via a web browser by entering it in the address bar. You must include the Hub user name and password in your URL. Nothing will happen if you don't.
- After entering the URL in your browser address bar, you may need to press enter twice to get a response from the hub. Once the light is flashing on the hub, press and hold the link button on your device until you hear a quick double-beep and its light stops flashing. It should instantly join. Repeat the process for each device you want to add to a particular Group on your Insteon hub.
- Use the ON and OFF URL examples above to test your devices are added to the group you intended and are all responding as expected.
How to control groups from Hubitat
You can control Insteon groups from a Hubitat Elevation hub without installing any drivers or software by sending an HTTP command using GET with Hubitat Rule Machine or Button Controller.

Example:
Send GET to: http://Annie:ytyYUbva@192.168.0.146:25105/0?1110=I=0
Thanks go to Chris Wilson - @cwwilson08 for the tremendous amount of work and dedication to putting this new driver together, and a special thanks to Scott Kuester for creating the Insteon-Server app and adding the support for web sockets.
 It's called Buster now! I get it. Sorry, haven't loaded up Raspbian on a Pi for quite some time. It was Stretch last time I used it. No matter. Should work just the same. I do use the lite version though. I typically download elsewhere and then copy to the SD card directly. Much easier when you can't remember how to do it.