[Update] This is an old concept for connection of Insteon. There wasn’t any better at the time, but there is a much better way now using web sockets - [Release] All NEW Insteon web socket driver
Previous method. Please use the updated drivers and stand-alone Insteon Server
Too late. 
I was already putting something together for you. It's fairly complete. Just no screen shots of HomeKit automations, but that's not too hard to figure out.
Hubitat <> Homebridge <> Insteon setup
Basics you need:
- Homebridge:
RPi is the most popular way, but I had an old Macbook laptop available. I prefer it because of the greater processing power vs an RPi for Homebridge, plus it's very simple to use the built-in screen sharing from my other Mac to access it. You need one that will run at least El Capitan 10.11, as you'll need to install XCode for Node.js
Note
If the Mac you’re using can’t go beyond MacOS 10.11, then you’re going to need to download Xcode 8.2.1, since you must have Mac OS 10.12 Sierra or higher to run later versions of Xcode.
Additional Important Note
If you choose to use an old Mac laptop like I did, you need a way to keep it awake if you don't want to add an external monitor to it.
Keeping a Mac laptop awake when the lid is closed
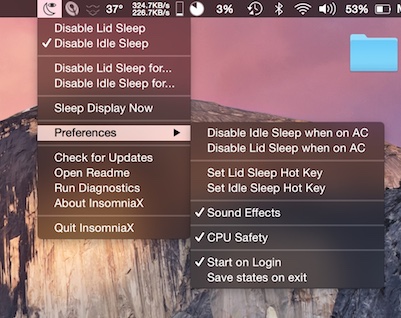
While an old Mac laptop is a convenient choice for a Node.js server, it’s not convenient to have to keep the lid open all the time when there isn’t an external monitor attached. MacOS has no built-in means to accomplish this task, so you’ll need an app called InsomniaX. You can find the installer here.
As this app is no longer under development, your mileage may vary. I do recommend you at least install the patch for a security vulnerability that was discovered. More details and instructions are found here.
Known Issues
InsomniaX has a convenient setting in the preferences to disable lid sleep automatically when on AC. Unfortunately I found this setting does not always function correctly, so if you open your Mac laptop to make a modification to the Node.js server, and you also remove the power adapter, you’ll want to attached the power adapter, then quit and restart InsomniaX before closing the lid again.
- The Insteonlocal plugin for Homebridge
config.js example for the Insteonlocal Homebridge plugin
{
"platform": "InsteonLocal",
"name": "Insteon Local Platform",
"user": "[Insteon hub username]",
"pass": "[Insteon hub password]",
"host": "192.168.0.20",
"port": "25105",
"model": "2245",
"refresh": "600",
"use_express": "false",
"server_port": "3000",
"devices": [
{
"name": "Kitchen Light",
"deviceID": "36Y057",
"dimmable": "no",
"deviceType": "lightbulb"
},
{
"name": "Table Lamp",
"deviceID": "2461GF",
"dimmable": "yes",
"deviceType": "lightbulb"
},
{
"name": "Toilet",
"deviceID": "411G87",
"deviceType": "leaksensor"
},
{
"name": "Front Door",
"deviceID": "2YYY89",
"deviceType": "motionsensor"
}
- @tonesto7 's port of @pdlovelace 's Homebridge driver for Hubitat and the Homebrige plugin for Hubitat
config.js example for the Hubitat Homebridge plugin
{
  "platform": "Hubitat",
  "name": "Hubitat",
  "app_url": "http://192.168.0.25/apps/api/180/", <- This is generated by the Hubitat Hombridge driver
  "access_token": "[Generated by the Hubitat Homebridge driver]",
  "polling_seconds": 1,
  "update_method": "direct",
  "direct_ip": "192.168.0.25",
  "direct_port": 8005
}
- Either an Apple TV 4 (does not have to be the 4K version) with the latest version of tvOS or an iPad that can run the latest version of iOS. For whatever reason, an spare iPhone that can run the latest iOS isn't allowed. Has to be iPad or Apple TV 4 .
Basic setup:
a - Once you have your Insteon controllable in HomeKit, you probably will want to put all your devices into rooms to make building automations easier.
b - Create virtual switches or virtual dimmers (depending on your requirement) in Hubitat. For example, to keep the names similar for easier identification in HomeKit, I just created virtual switches with the prefix HE (e.g. HE Table Lamp, HE Kitchen, HE Floor Lamp, etc.)
c - For momentary switches, where you just need a trigger, create a Hubitat Rule Machine rule to turn the switch off after 1 second. You cannot use virtual buttons unfortunately, they won't appear in HomeKit. You have to use virtual switches.
d - Select the virtual switches or virtual dimmers in the Hubitat Homebridge driver so they will appear in HomeKit
e - Create four automations per device in HomeKit. If you want a dimmable light to turn on to a set level, use virtual dimmers and set the ON level needed when you create the two way automations. Yes, this is a painful way to do it and keep them straight in HomeKit, but you only have to do it once and you can backup your HomeKit configuration in Homebridge. Just backup the "accessories" directory and the "persist" directory. Also backup your config.js file.
e1 - When [Insteon device name] turns ON, then HE [Insteon device name] should turn ON
e2 - When [Insteon device name] turns OFF, then HE [Insteon device name] should turn OFF
e3 - When HE [Insteon device name] turns ON, then [Insteon device name] should turn ON
e4 - When HE [Insteon device name] turns OFF, then [Insteon device name] should turn OFF
Scene setup:
Although it's possible to use Insteon scenes within the insteonlocal Homebridge plugin, it's easier to use HomeKit scenes. You can simply create a momentary virtual switch in Hubitat (e.g. Turns off in 1 second with a RM rule), publish that to Homebridge, and then create a HomeKit automation to link it to a HomeKit scene. That makes it easy to tie together your Insteon devices, with your devices connected directly to Hubitat. You can then use that momentary virtual switch in a Hubitat Scene, in Alexa, with a button, in a RM rule, etc.
[EDITS]
1. I found that version 0.3.3 of "homebridge-platform-Insteonlocal" with the option to use Local Express Server, will slow everything down immensely or will cause Homebridge devices in HomeKit not to refresh. This may be because I don't have express server configured, but once I added "use_express": "no" to the config.js file, homebridge again functioned as expected.
2. I also updated my config.js example for insteonlocal to include example for a leak sensor and a motion sensor. Door/Window/Contact sensors are also now supported. I have an ioLinc, but it's not in use at the moment and so I haven't tested it.
3. Under "Basic Setup", I corrected step C to include specifically momentary virtual switches, not every virtual switch.
4. Under "Basic Setup", I added to step E to include notes about turning lights on to specific levels.
5. Added Scene Setup section, with notes about triggering scenes with virtual switches.
6. Conf.json example for Insteonlocal was updated with new suggested values
"refresh": "600",
"use_express": "false",