How to deal with two measurement of the same capability from a sensor

I have a Vishay VEML7700 sensor that generates two illuminance readings (one with "eye" response the other more broadband)

They are:
ALS (in Lux)
White (in Lux)

I know how to do one:
add the capability: capability "IlluminanceMeasurement"
Receiving the variable as "illuminace" and creating a illuminance event. To be displayed as ALS with an unit "Lux"

I can't figure out how handle the 2nd illuminance reading.

Is there a method to accomplish this?

Thanks
John

Your driver could easily create a child device that also implements the illuminance capability and would then show the other value.

1 Like

@ogiewon

Thanks, I've not used child devices before but I guess now it the time to learn.

John

1 Like

Are you writing a driver? Someone else may think of something better, but I think your three options are:

  1. Use a custom attribute (easy but limits your ability to use it in some standard apps)
  2. Hijack a similar capability that isn't being used, perhaps switch level (if the value never goes above 100) or something else numeric (very awkward but may work if it's just for yourself)
  3. Use a parent/child device model. You could create two, one for each, or just do everything in the parent but have a child for the "extra" one (I think this is the best option, but also more difficult to write).
1 Like

Thanks for the suggestions.
Yes I am writing a driver. Actually I'm adding a capability to a driver I've previously written.I think I will work on the parent-child solution. My nature I don't like to gimmick or hijack other capabilities. If I were in a hurry, perhaps but not in this case. I'll find a current driver that has parent-child capabilities and learn the structure.

John

1 Like

Staff made a recent post on how this works, or at least a new way they're writing stock parent-child drivers that is different from SmartThings. I'll see if I can find it...

3 Likes

Perhaps this is the post you were referring to.....https://community.hubitat.com/t/writing-parent-child-driver-for-a-2-gang-light-switch/22299

That's their one, thanks! And the demos in their repo. :slight_smile:

1 Like

John,

Are you using an Arduino/ESP8266 to read the LUX data via I2C from the VEML7700? If so, why not simply use my HubDuino project as a baseline and simply add a new device class which supports the VMEL7700? HubDuino will take care of all of the Parent/Child stuff for you. It is designed to allow multiple 'same capability values' from one device to be implemented as individual child devices. HubDuino already supports multiple I2C sensors, including some illuminance sensors you could use as a starting point.

Dan,

Yes, I will be using the ESP8266. The VEML7700 is so simple it doesn't need a library. I'm adding this to the SmartThings code created for me many months ago. It is already running with a BME280 sensor.

But I think the answer is.... I'm in well over my head (code wise), however that has never stopped me before.

However I don't see me getting into the code to a depth that my current task would be easy. So I guess I'll just trudge along.

I did look at your ST-Anything code and could not find my bearings so I couldn't pick out the code that I could follow.

As an aside; Reading a understanding the basic concepts of what you've done with C++ I've gained an appreciation of the capability of the language. Quite honestly, reading some of the Arduino libraries it seemed the use of C++ seemed to obfuscate the program flow and bloat the code.

John

LOL...can't argue with you there. :wink: My son is a pretty amazing programmer and he convinced me that we should use C++ to build ST_Anything many years ago. This was some of his early work. If you want to totally get lost in object oriented programming, take a look at his OmniThing code.

Be that as it may...ST_Anything really isn't as complicated as it appears.

The Arduino Sketch simply creates a Communications object that is specific to the board type that is being used. These objects are implemented via the "SmartThings..." libraries, as this whole project started on ST using the now defunct ThingShield for the Arduino UNO/MEGA boards. Once that board was no longer available, I added support for LAN connected devices using some great example SmartThings Community code from Hubitat's own @chuck.schwer!

In addition to the "SmartThings..." communications object, the sketch creates individual 'device objects' for each type of sensor or actuator you'd like to attach to the microcontroller. Each of these devices is implemented as a C++ class, inheriting reusable code from parent classes like the InterruptSensor, PolllingSensor, and Executor. These classes expose a standard interface to be used by the 'Everything' class.

Finally, all of these objects are stitched together by the 'Everything' class. It takes care of scheduling the polling sensors, calling the interrupt sensors every time through loop(), and updating the executors when data is received from Hubitat. Everything also takes care of sending status updates back to Hubitat. By using a replaceable communications object, I was able to abstract that portion of the code into the aforementioned 'SmartThings...' libraries. This means to add support for a new microcontroller, I only have to add a new 'SmartThings...' communications library. None of the other code ever needs to be changed.

This is what the C++ object oriented design brings to the table. While definitely more complex at first glance, it actually is not bloated, IMHO. You'd have to write just as much code within the sketch to do the same amount of work.

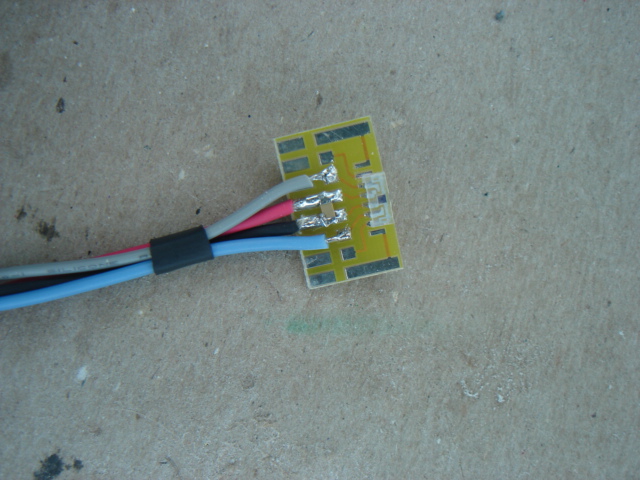
To add your VEM7700 device, I would simply start with the PS_AdafruitTSL2561_Illuminance.h and PS_AdafruitTSL2561_Illuminance.cpp files as a baseline. Then make a copy of both files, change their names to PS_AdafruitVEM7700_Illuminance.h and PS_AdafruitVEM7700_Illuminance.cpp, then modify their contents accordingly to communicate with the VEM7700 board.

I am intrigued by the VEM7700, so I ordered one from Adafruit this evening. I'll have it integrated into HubDuino within a day or two of receiving it.

I know you prefer to 'roll your own', which I completely understand. I wish you all the best on your endeavor. If you want some assistance on the groovy side, I am happy to help. Using Composite (Parent/Child) Drivers really is fairly straightforward, especially on a sensor device since communications is only one-way.

1 Like

Dan,

Thank you so much for your help.
This is what I use for the VEML7700..... really simple. It might help you with the sensor.

BTW I could not find the VEML7700 on a breakout board. I bought them from Digikey and soldered them to 1/2 of a Surfboard. (I think it was a 9161). I was even able to get the bypass cap by jumping the pads with its end terminals.

DSC07522

John

    /*
VEML7700_basic.ino

2019-09-18,  johnrob

License:
No license is required, this code is released with no restrictions (and no warranties) whatsoever.
If you wish to copy this small code and claim it as your own I pity you for arrogating such a trivial
application.

veml7700 basic application
Usage and testing was performed on a 8Mhz ProMini


This program performs the following:
 1) configures the sensor using choices selected by commenting / uncommenting lines in the VEMLConfig.h file.
 2) Prints the date (both ALS and White channels) in Lux to the serial port.

We do not fully understand the false in  "Wire.endTransmission(false)"

Published "libraries" for the VEML7700 require more than 2X the resources this program uses.  Any added
capability (like auto range) is of little use for the average user.  This configuration of the VEML7700
provides a range of 0 to 60397 Lux with a resolution of ~ 0.9 lux (see VEML7700Config.h).  Having "played" with
this sensor I feel it is unlikely tenths of Lux will be of any use to most.

One area I have not investigated is the difference between the ALS reading and the White reading.  Perhaps the difference
carries some useful information about the type of light hitting the sensor.

On Pro Mini this sketch uses 3784 bytes (12%) of program storage space. Maximum is 30720 bytes.
Global variables use 434 bytes (21%) of dynamic memory, leaving 1614 bytes for local variables. Maximum is 2048 bytes.
*/

#include <Wire.h>
#include "VEMLConfig.h"		//defines cmd00, aka configuration command


// -------------------------------------------------

#define Lux_Address 0x10

// --- function prototypes -------------------------
// -------------------------------------------------
void LuxSendData(uint8_t command, uint32_t data);
void LuxReceiveData(uint8_t command, uint32_t& data);


// --- Global Variables-----------------------------
// -------------------------------------------------
uint32_t data;
uint16_t command;


// --- Initialization ------------------------------
// -------------------------------------------------
void setup()
{
	Serial.begin(115200);
	Wire.begin();
	Wire.setClock(100000);
	LuxSendData(0x00,cmd00);
}


// --- Main ----------------------------------------
// -------------------------------------------------
void loop()
{
LuxReceiveData(0x04,data);
Serial.print("   ALS (Lux)  ");
Serial.print(data*Lux_Factor, 0);

LuxReceiveData(0x05,data);
Serial.print("   White (Lux)  ");
Serial.println(data*Lux_Factor, 0);

delay(2000);		// should be a non-blocking timer, but except this
						// code is likely to be incorporated into a larger program

}

// -------------------------------------------------
// --- functions -----------------------------------
// -------------------------------------------------

//--- send data:  ----------------------------------
void LuxSendData(uint8_t command, uint32_t data)
	{
		Wire.beginTransmission(Lux_Address);
		Wire.write(command);
		Wire.write(uint8_t(data & 0xff));
		Wire.write(uint8_t(data >> 8));
		Wire.endTransmission();
	}


//--- receive data  --------------------------------
void LuxReceiveData(uint8_t command, uint32_t& data)
	{
		Wire.beginTransmission(Lux_Address);
		Wire.write(command);
		Wire.endTransmission(false);			// need to investigate the (false) req'ment
		Wire.requestFrom(uint8_t(Lux_Address), uint8_t(2));
		data = Wire.read();
		data |= uint32_t(Wire.read()) << 8;
	}

// --- end of file ------------------------------

I put the configuration in a separate file:

    /*
2019-09-06 VEML7700 Configuration creation.

Instructions:
	- Uncomment one #define from each of the 1st groups
	- For the Gain and Integration Time (ALS_IT) find
		the factor in the table below. Assign
		Lux_Factor to the listed lux/count.

*/

// Unless edited, this configuration is for:
//  0.9216 lux / count  and a range of 16 bits.
//  0 to 65536 counts * 0.9216 lux/count = 0 to 60397 Lux
//  (for both ALS and White channels)


// --- Configuration Section -----------------------
// --- all operations are performed by the pre-processor
// --- No memory or processor resources are req'd
// -------------------------------------------------

//--- Uncomment one from this group:  
//#define ALS_GAIN 0x00	// Gain = 1
//#define ALS_GAIN 0x01	// Gain = 2
#define ALS_GAIN 0x10	// Gain = 1/8
//#define ALS_GAIN 0x11	// Gain = 1/4

// --- Uncomment one from this group:  
//#define ALS_IT 0x1100		//   25 ms
#define ALS_IT 0x1000		//   50 ms
//#define ALS_IT 0x0000		//  100 ms
//#define ALS_IT 0x0001		//  200 ms
//#define ALS_IT 0x0010		//  400 ms
//#define ALS_IT 0x0011		//  800 ms

// See datasheet for options for this group:
#define ALS_PERS 	 0x00
#define ALS_INT_EN 0x00
#define ALS_SD     0x00

#define cmd00  ( (ALS_GAIN << 11) | (ALS_IT << 6) |(ALS_PERS << 4) |(ALS_INT_EN << 1) | (ALS_SD << 0) )

#define Lux_Factor 0.9216

/*
		Gain = 2	Gain = 1	Gain = 1/4	Gain = 1/8
IT(ms)	Resolution lux/count			
800	0.0036	0.0072		0.0288		0.0576
400	0.0072	0.0144		0.0576		0.1152
200	0.0144	0.0288		0.1152		0.2304
100	0.0288	0.0576		0.2304		0.4608
 50	0.0576	0.1152		0.4608	  >0.9216<
 25	0.1152	0.2304		0.9216		1.8432

*/
// -- end of file -----------
1 Like

Adafruit seems to have it stocked for $4.95 on a small PCB with a voltage regulator. Looks like it was added just earlier this year.

1 Like

That's great. These devices really seem stable and they have crazy measurement ranges. For my use I use only one config (G = 1/8, IT = 50ms) This gave me a range of 0 to 60k lux. Perfect for measuring outdoor brightness. I'm using it integrated with the BME280 so I don't have to rely on some weather service to control my lighting..

1 Like

John,

I believe I may have found a small bug in your code. Not 100% sure, but I thought you'd like to take a look.

In the spec sheet for the VEML7700, I believe the values for the Gain and Integration Time shown in the table below are in BINARY. However, in your code, you appear to be using these values as hexadecimal.

The Adafruit VEML7700 Library shows them defined as:

#define VEML7700_GAIN_1             0x00  ///< ALS gain 1x
#define VEML7700_GAIN_2             0x01  ///< ALS gain 2x
#define VEML7700_GAIN_1_8           0x02  ///< ALS gain 1/8x
#define VEML7700_GAIN_1_4           0x03  ///< ALS gain 1/4x

#define VEML7700_IT_100MS           0x00  ///< ALS intetgration time 100ms
#define VEML7700_IT_200MS           0x01  ///< ALS intetgration time 200ms
#define VEML7700_IT_400MS           0x02  ///< ALS intetgration time 400ms
#define VEML7700_IT_800MS           0x03  ///< ALS intetgration time 800ms
#define VEML7700_IT_50MS            0x08  ///< ALS intetgration time 50ms
#define VEML7700_IT_25MS            0x0C  ///< ALS intetgration time 25ms

I have pushed the new VEML7700 ST_Anything/HubDuino files up to my GitHub repository in case you have any interest. I included the required Adafruit libraries as well.

Neat little sensor. Thanks for the tip!

Dan,

You are too kind. It was a sloppy mistake on my part. Thanks for finding it .

John