Let me start by saying that I just got my Hubitat today and have never done any home automation beyond installing a couple of Kasa plugs and switches and connecting them to my Alexa so please forgive my complete ignorance as I try to figure this stuff out. I just decided to get a Hubitat and move to this type of automation after watching some videos on YouTube. I had already purchased some products that I had not opened and am now sending back to Amazon to replace with Zigbee/Z Wave products and one of them was a MyQ hub for my garage door.
After reading the limitations with using the MyQ, I have decided to instead use a Zen16 or Zen17 with a Garadget Security+ 2.0 Wired Dry Contact Adapter and a tilt sensor. I've read every post here and on Reddit as well as the guide on the Zooz site, but I honestly can't figure out how I will go about wiring this up. I want to install the devices on the ceiling next to the GDO, but I'm not sure how any of this wires together even after reading the documentation and looking at some of the pictures here. Would someone please be willing to help me with a step-by-step on how I would go about wiring these? I can't even figure out if I should use the Zen16 or Zen17 because I don't understand the concepts well enough yet.
Also, I don't want to worry about batteries in the tilt sensor so I would like to use a wired sensor, but cannot seem to find one online, probably because I don't really know what I'm looking for. Could someone recommend one or point me to the correct source to find them as well as let me know where this would plug into the Zen device?
I was supposed to have this done for my wife, but have been delayed as I've been deciding what solution to use so I would really appreciate some help for the dumb new guy. Thanks in advance!!
It's always easier to understand your situation if you post some pics.
You might need to go to Hub owners - Hubitat , join the group and then you'll be able to post lots of them.
If you have good Wi-Fi in your garage consider using a Shelly relay to control your garage door opener, especially if you don't have any ZigBee or Z-Wave mesh out there ATM.
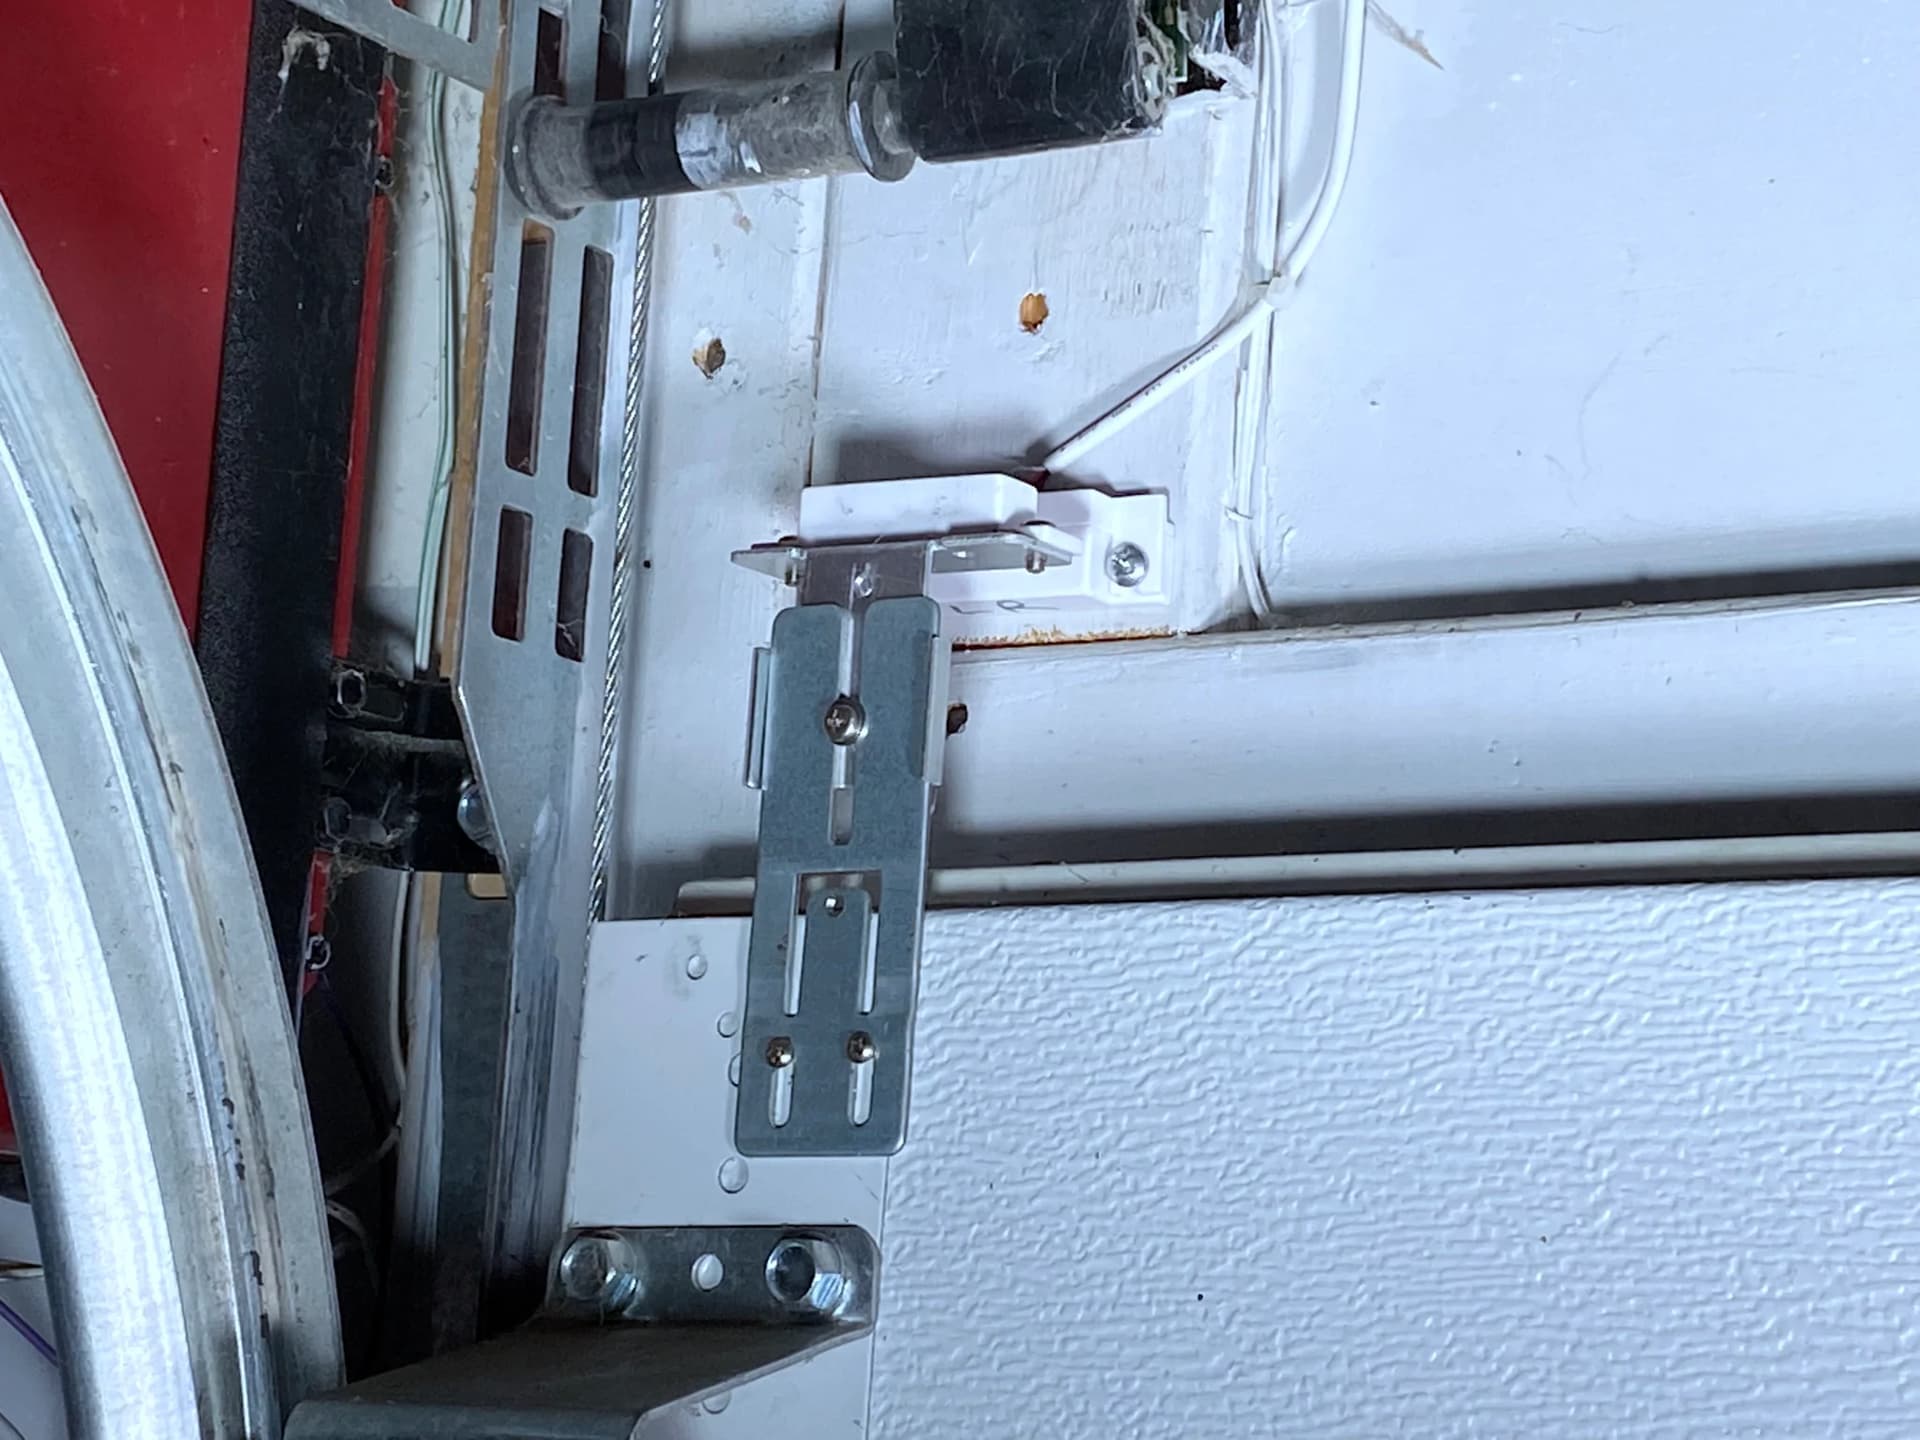
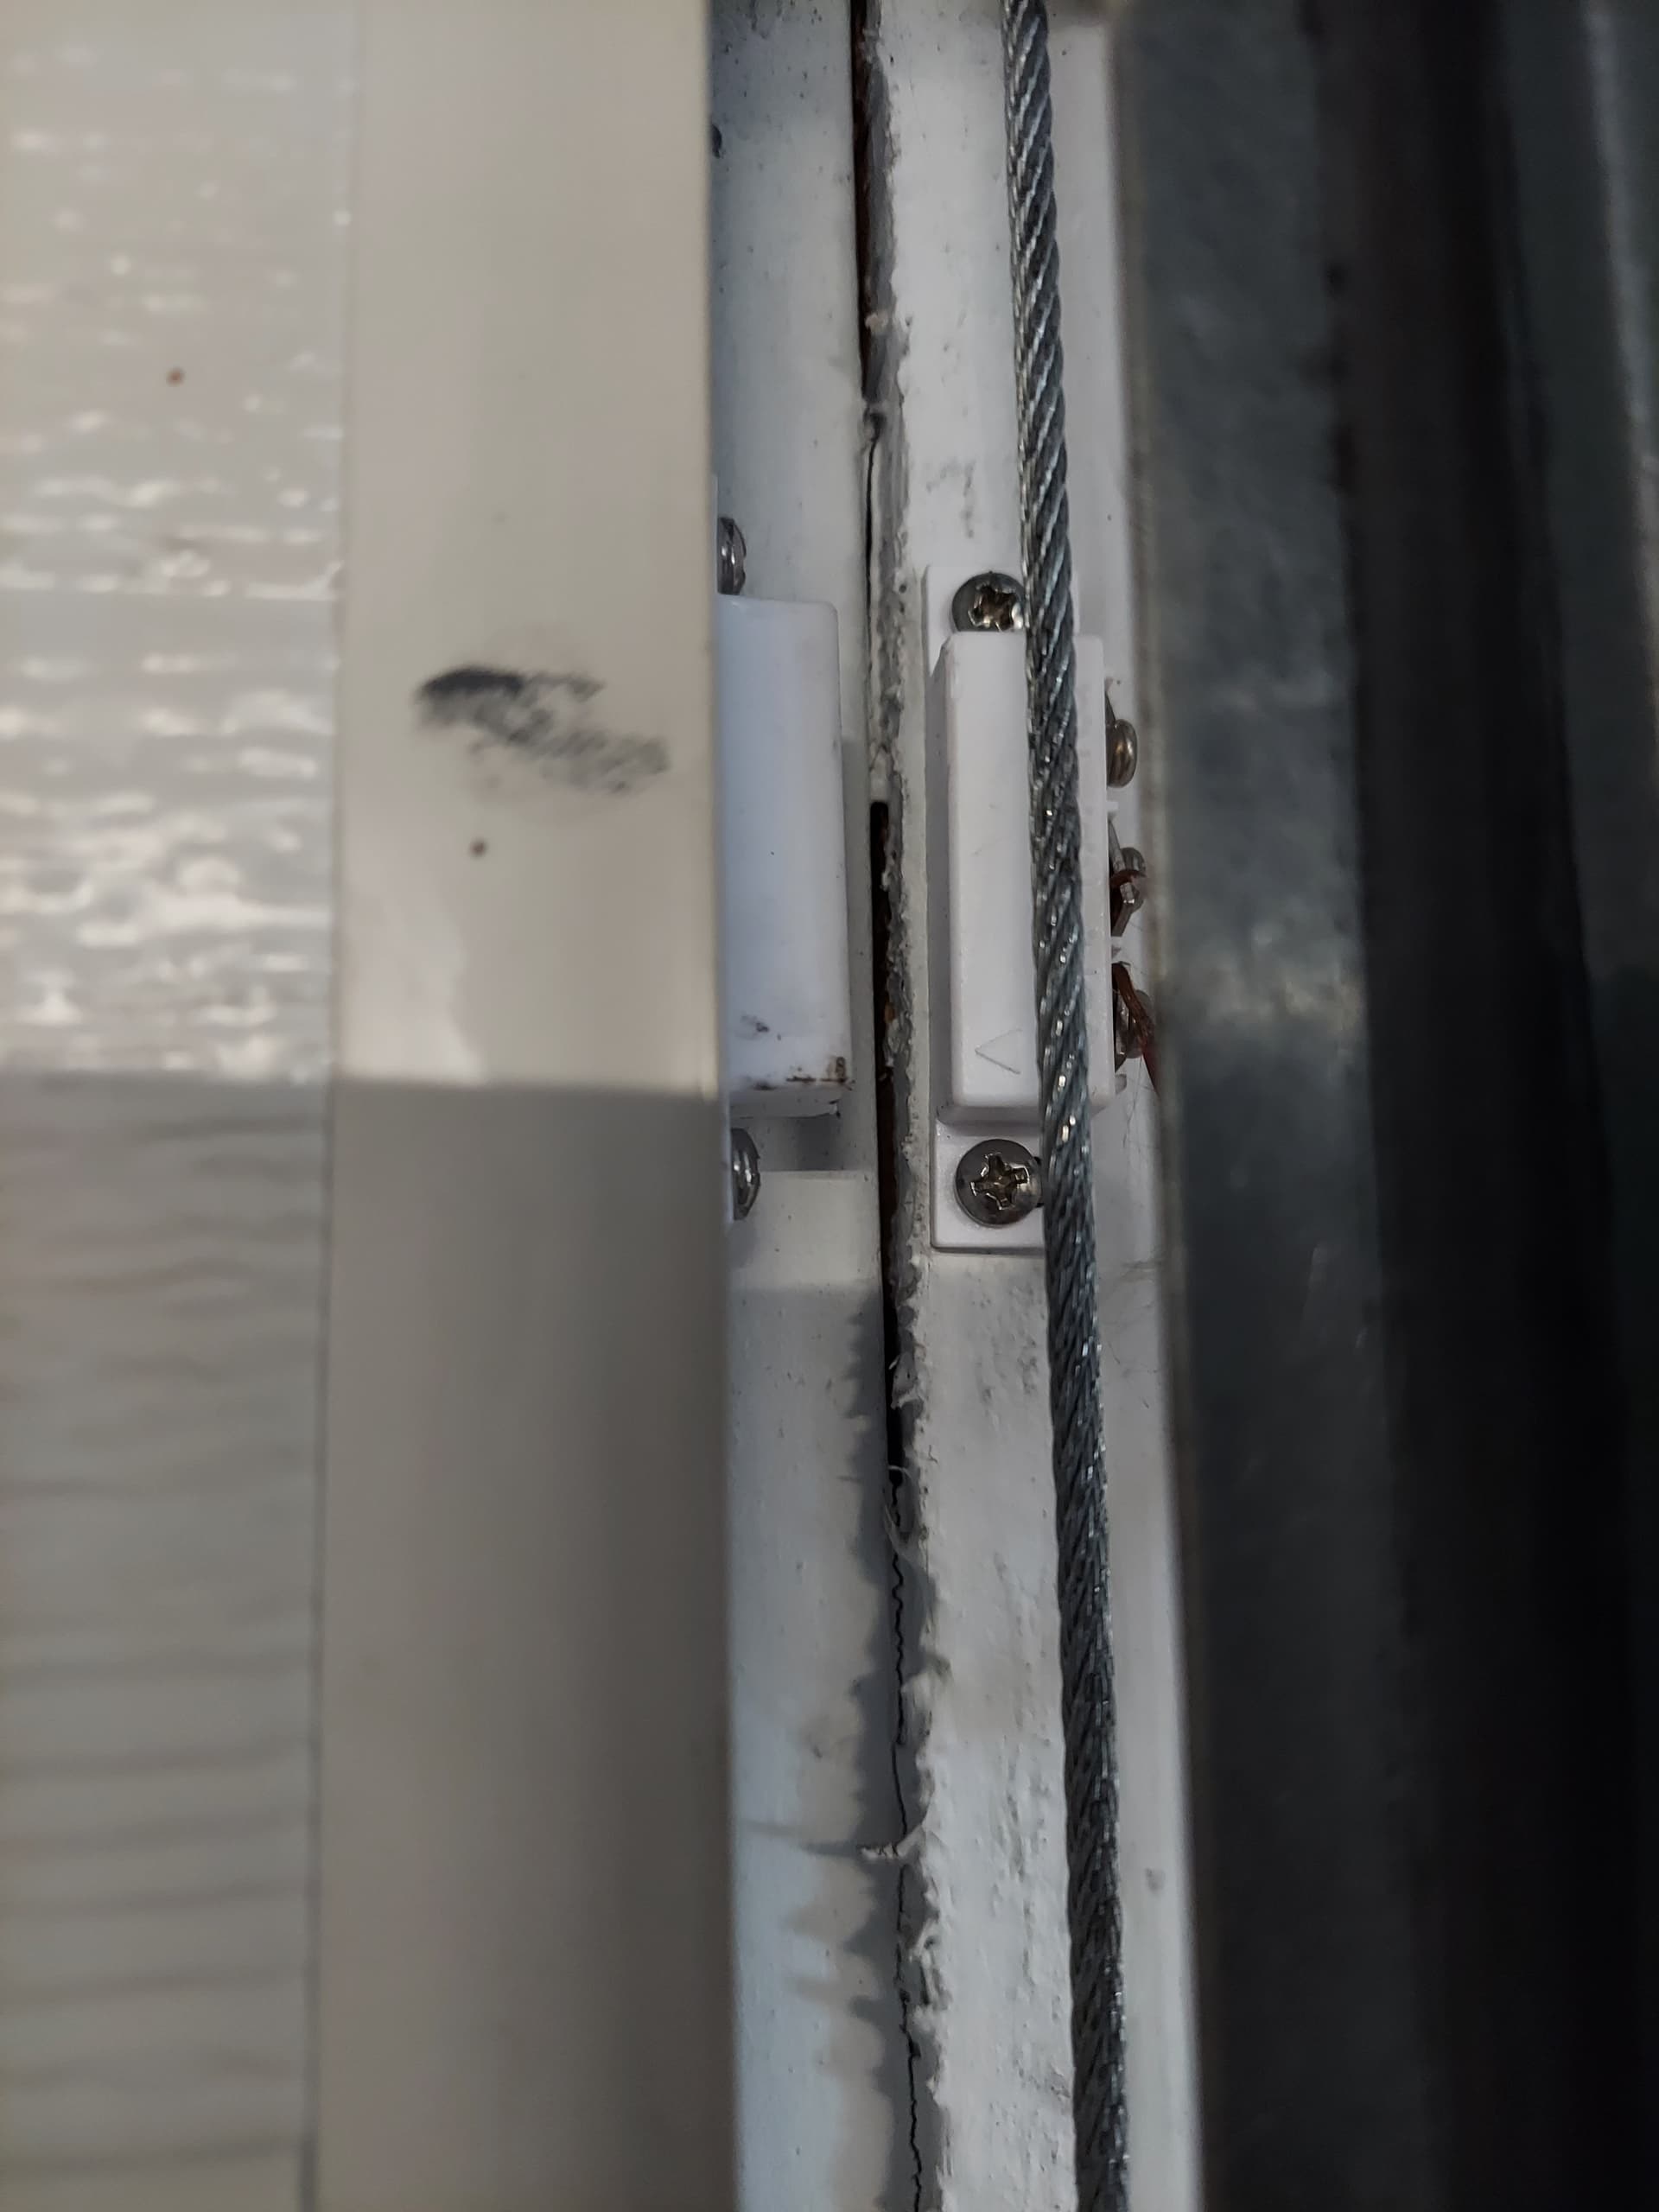
If you mean you'd rather use a Magnetic Reed Switch, then pretty much anything will work. Mounting will be the tricky part, just try and put it on the top of your door if you can, most top sections of garage doors move more initially (extra horizontal) than the rest of the door giving it better response.
I'm in the MyQ camp (we only open/close our door remotely occasionally and only when safe) but for a magnetic/reed switch and bracket, the accessories from Tailwind are great. They mount up perfectly.
If you want to wire up (dumb) reed sensors, you need a Zen17 specifically. It has the option to separate the relay and sensor inputs, but the Zen16 cannot do that.
I use plain-jane reed sensors to avoid having battery-dependent stuff in my (detached unconditioned) garage -- it sees very wide seasonal temperature swings that are tough on batteries.
The Zen17 and reed-sensor setup has worked really well - I've it out there for a couple years now, and no issues.
I actually just wired one of these up for my bother in law yesterday. Here are the instructions I made for myself so I didn't skip/miss a step.
Add and configure ZEN17. Don't use the ZEN17's "Garage Door Mode" configuration. It assumes a specific installation type that isn't optimal, in my opinion.
Pair the ZEN17. Once paired, look at the settings for the "Parent" device and make the following changes.
a. Power Fail State Restore: All Off
b. Input Types: Contact Sensor
c. Input Triggers: Disabled
d. DC Motor Mode: Disabled
You should then see 4 "child" devices for the ZEN17 in the Hubitat devices list...two relays and two sensors.
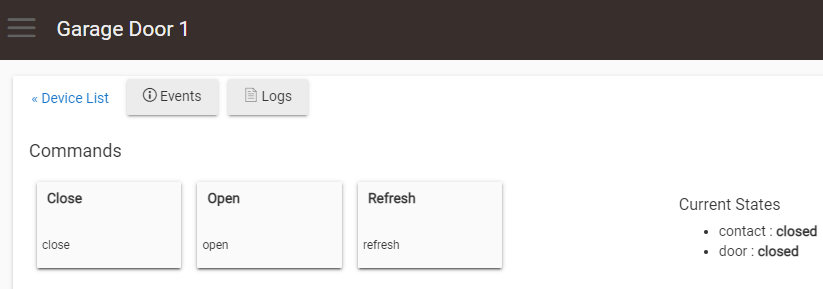
Add the Zooz Apps/Driver necessary to create a "virtual" garage door device. a. There are two apps to install and one driver. Follow the steps listed under "3. Program the Multirelay on Hubitat." Please ignore steps 1 and 2. https://www.support.getzooz.com/kb/article/370-how-to-use-the-zen16-multirelay-as-a-garage-door-opener-on-hubitat/ b. When you get to step 6, Choose the Zen17's Relay 1 child device for the relay and Sensor 1 for the Open/Close sensor. Most of the other default options are fine. c. When done, you should see a new "Garage Door" device listed in Hubitat's device list.
Wire the lead wires (the ones soldered to the circuit board) from the Garadget to the C and N.O. terminals of the ZEN17's Relay one. N.O. means "normally open" and tells you that the switch will "normally" be in the open (ie. OFF) state unless activated by the controller. Mount the ZEN17 where you wish and plug it in. Now connect the Garadget to the opener using the screw terminals on the back. These will normally connect to the red and white terminals at the opener. At this point, you should be able to control the opening and closing of the door using the controls from Hubitat's device page for your virtual garage door. You won't see any status of the OPEN or CLOSED state of the door just yet.
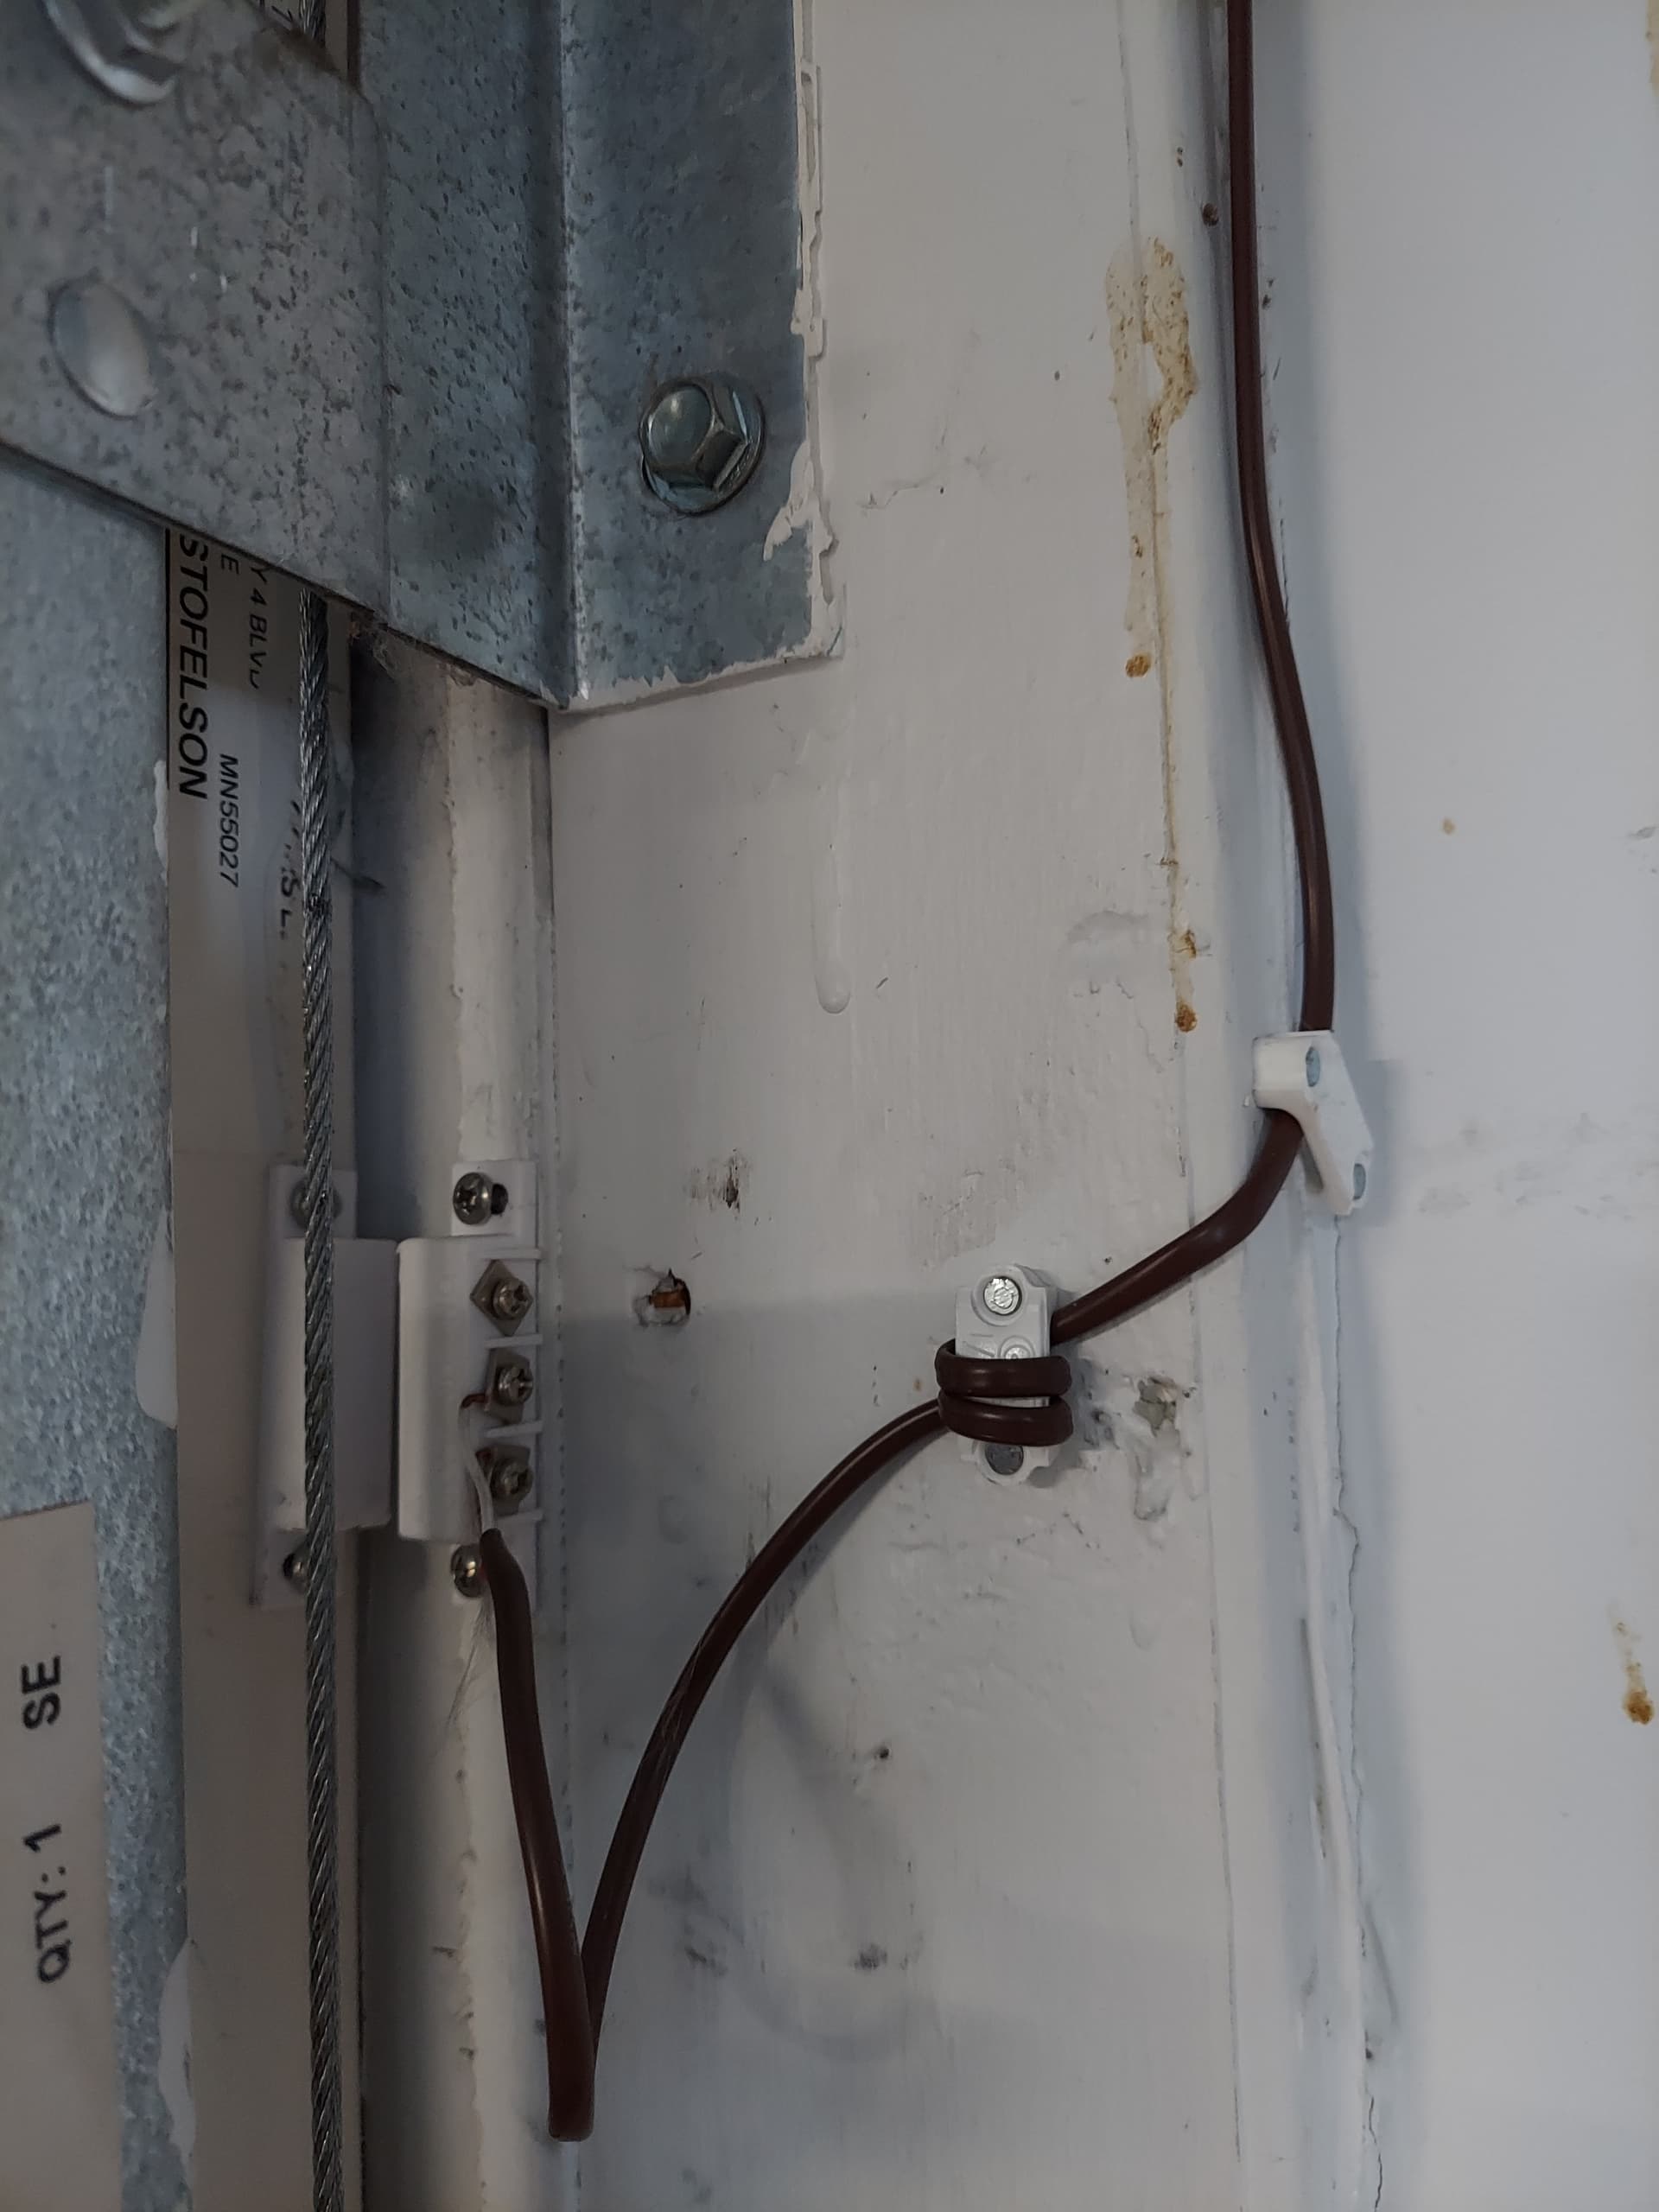
Wire the contacts from your switch to the S1 and C terminals of the ZEN17. If you use a magnetic reed switch like I posted above, you will also want to use the C and N.O. terminals. On the cheap ones that I have been getting, the terminals are labeled wrong and the N.O. and N.C. are reversed. When properly wired, the sensor state should show "closed" when the magnet and the switch are next to each other. When you remove the magnet, the sensor state should show "open." I used "bell wire" for wiring, but in hindsight I could've used the spools of CAT5 I've got laying around. Just make sure you use the same pair of wires on each end. You'd be surprised how similar orange and brown can look in a dim garage... .
Bonus Tip: The ZEN17 is capable of controlling a second door, if you have two. Otherwise use the spare sensor input on the ZEN17 and a second reed switch to check the status of a side door, or the door into the home. Voila! Instant security system!
Technically the ZEN16 could work, but you would need to use two different "channels" on the device. For example, Relay 1 with Sensor 2. There really is no reason to do it this way, though, unless you happen to have a ZEN16 laying around with no other use. The ZEN17 is the better option.
This is the first time I've seen the Tailwind option. It does look pretty clean and probably would've saved me a few broken sensors as I worked through my 3 garage doors. I ended up breaking a couple in trial-and-error placement options. Next to the top panel has been working for me.
Those Tailwind versions do look pretty slick -- if I had to do it over again, I'd consider them. I used these, and have no complaints. They are pretty forgiving with placement tolerances.
You really just need one sensor to confirm closed position, but I wired up two -- one for fully closed and one for fully open.
I like using 18-2 thermostat wire for this kind of stuff -- it's a wee bit burlier than plain bell wire, but still easy enough to work with. And it's readily available in any big-box or local hardware store (often even by-the-foot).

 .
.
