I need to work around some non-standard wiring. Is there a device that is similar to the functionality of an Enbrighten in-wall Zwave smart dimmer without the physical interface. I want to put this in a wall box and control it through the hub. I also need a battery powered switch/controller something like a Zooz ZEN34 that would also be able to talk to that device. I'm new to home automation so any information would be very valuable.
You are going to need a deep wall box.
You could, additionally, use a Lutron Caseta Pico switch, paired directly to Hubitat, to control this device.
1 Like
In addition to the module linked to by @672southmain, there are several other in-box dimmers available from RGBGenie (zigbee), and Fibaro/Qubino.
There's even some available on Amazon ...
1 Like
Since it seems that using an Aeotec Nano Dimmer with the Lutron Caseta Pico switch will do exactly what I need, I'll go with that. I'll report back with results or pleas for help.
2 Likes
FYI, you will need a Lutron Caséta Smartbridge Pro (L-BDGPRO2-WH) to use Pico remotes with Hubitat. There are other button controllers, like the Zooz ZEN34 that will also work for your needs.
1 Like
Along with @aaiyar recommendation, it must be said that the Lutron Pico answer is the superior answer, IF the cost of the Lutron Smartbridge PRO is ignored or you already have one. For ONE Pico, it's not the right solution but once you get one, you'll be hooked, like so many before you.
1 Like
I now have an Aeotec Nano. However I'm having difficulties understanding the wiring diagrams supplied by Aeon. I don't want to wire this device to an existing switch. I want to put it in a wall box in between the 120 V mains and lights that I want under dimmer control. I want to control the switching/dimming function in the Nano through the hub with a Zooz ZEN34. Can anyone help me with this or explain why it can't be done?
The device supports a switch, it's true. Simply ignore that portion of the wiring diagram 
Wire Neutral to the N screw post, Wire Hot to both the L screw and the IN screw. Wire the Load up to the Out screw. All done.
I wire the Hot to IN and then add a small jumper between IN and L. All the current is flowing along the IN to OUT path while the Nano itself takes a very small current.

1 Like
Hi csteele,
The posts on my device are different, namely
L N OUT COM S1 S2
I could make a guess but I thought I'd better ask.
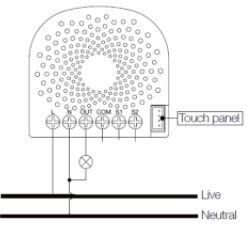
Hot wire to L screw.
Neutral wire to N screw.
Load to Out screw.
1 Like
I have successfully installed my Nano dimmer on my C7 hub. I am able to make the lights dim through the Hubitat devices interface. I have also installed a ZEN34 switch. I have read another post ' Zooz Zen34 and association' which describes a successful association of a Nano dimmer to the control of a Zen34 switch. Since I am a newbie, I don't know how to load an advanced Zen34 driver nor how to add the Nano to group 2 only. I'm making progress but need some tips.
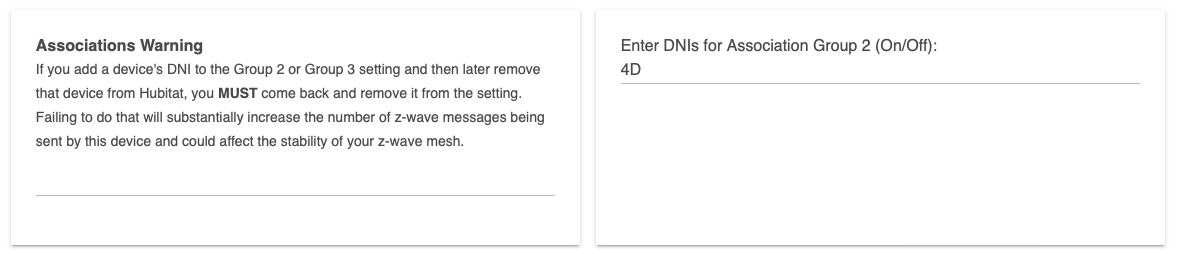
For the Advanced Driver you can find instructions here: How to Access Advanced Settings for My ZEN34 Remote Switch on Hubitat - Zooz Support Center. Once you have that done, setting the association should be simple. It looks like this:
1 Like
Thanks zacs. Also I discovered the documentation on how to set up a button controller which I will need to do for the ZEN34-Nano association. I'll do the driver work first.
If all you want to do is use the ZEN34 to control the Nano as normal (eg. as an on/off or a dimmer), then you shouldn't need the Button Controller at all. The association will do it for you.
Hi zacs,
I updated the driver according to the link and your recommendation to put the Nano DNI in the group 2 box only. I initially made a mistake by creating a virtual device but deleted it and made the change to the existing ZEN34 device. I saved it and then tested it. The Nano is not responding. The Nano is responding to commands from the device GUI.
Does your ZEN34 show any of the association info in its states? And did you use a decimal or hex value when entering the parameter value? It should be the hex value.
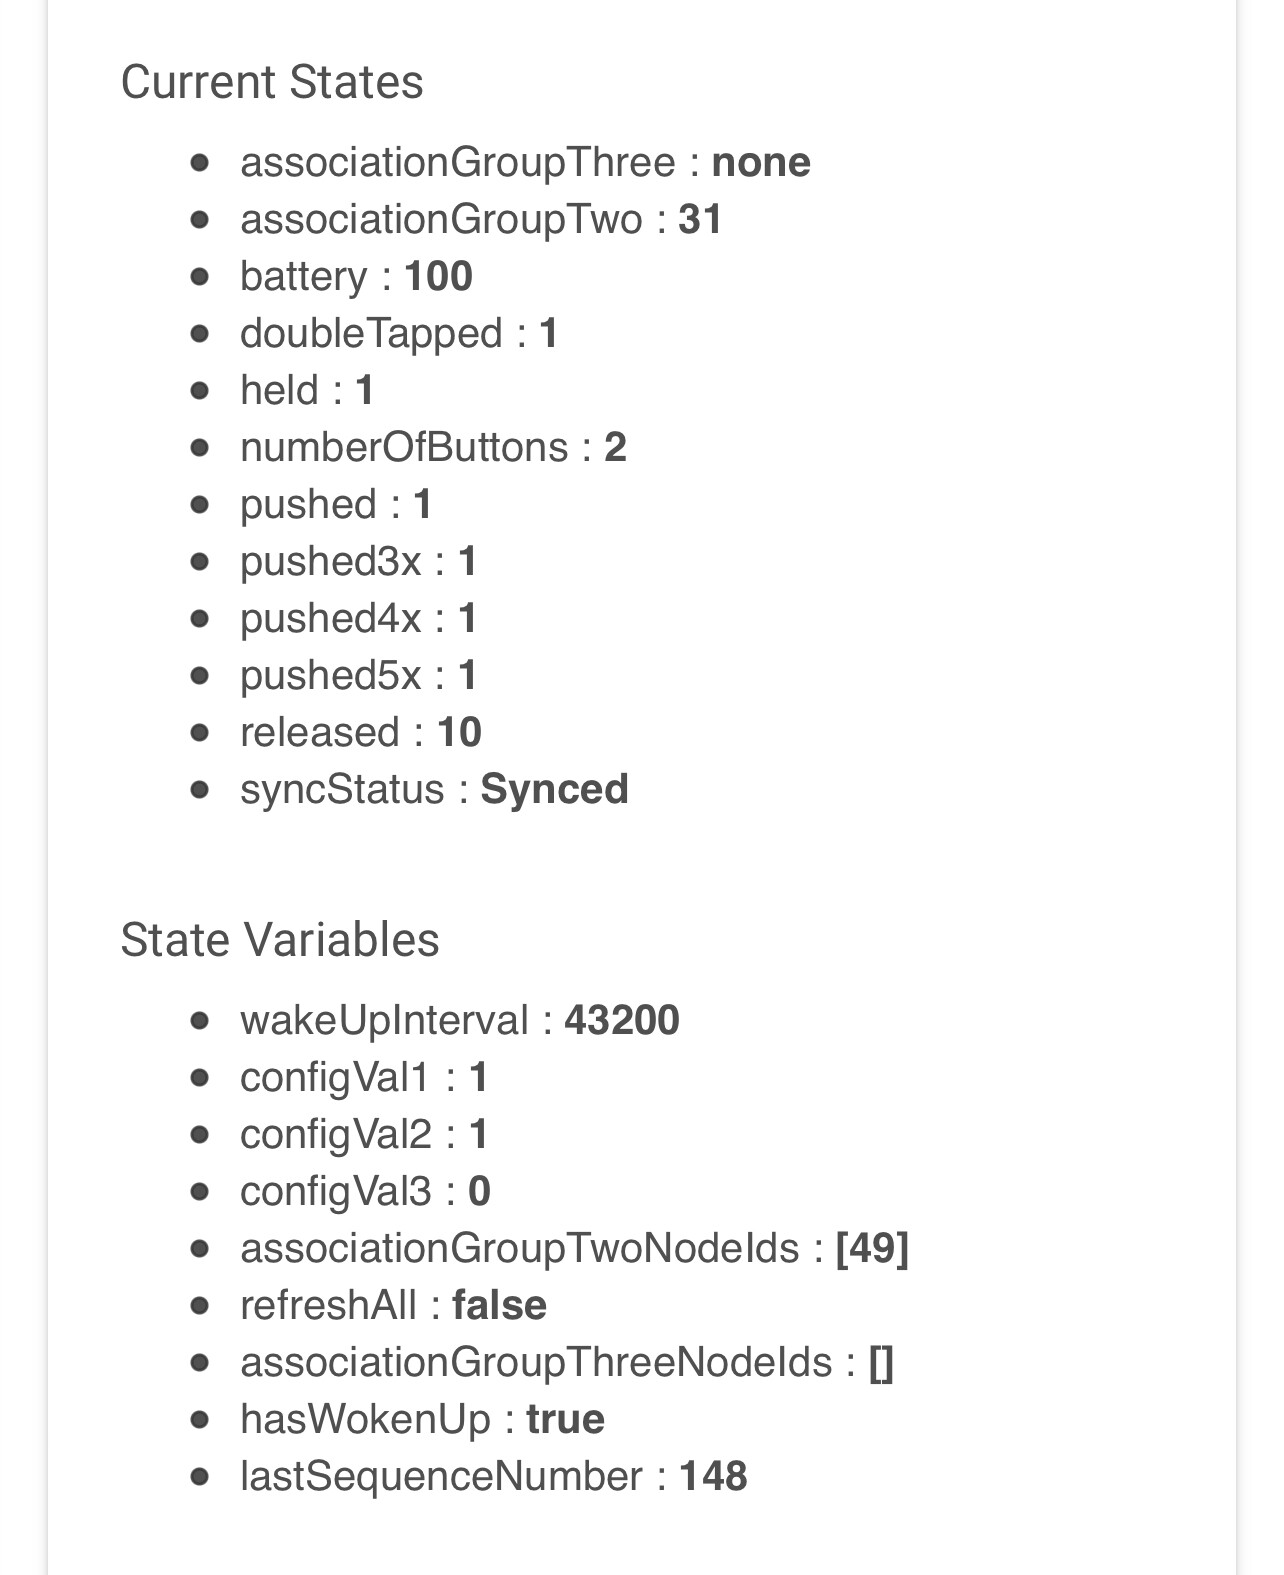
I used a hex value. My states display is slightly different.
Current States
- associationGroupTwo : 0B, 0C
- battery : 100
- doubleTapped : 2
- held : 2
- numberOfButtons : 2
- pushed : 2
- released : 2
- syncStatus : 1 Pending Change(s)
Tap Up x 7
State Variables
- wakeUpInterval : 43200
- configVal1 : 1
- configVal2 : 1
- configVal3 : 0
- associationGroupTwoNodeIds : [11, 12]
- refreshAll : false
- initialized : true
- hasWokenUp : true
- lastSequenceNumber : 56
- wakeInterval : 43200
- getDeviceData : true
Here are the more current states for the ZEN 34
Current States
- associationGroupTwo : 0C
- battery : 100
- doubleTapped : 2
- held : 2
- numberOfButtons : 2
- pushed : 1
- released : 2
- syncStatus : Synced
- pushed4x : 1
State Variables
- wakeUpInterval : 43200
- configVal1 : 1
- configVal2 : 1
- configVal3 : 0
- associationGroupTwoNodeIds : [12]
- refreshAll : false
- initialized : true
- hasWokenUp : true
- lastSequenceNumber : 57
- wakeInterval : 43200
- getDeviceData : true
Since I wasn't able to get the ZEN34 to associate with the Nano dimmer through the advanced driver for the ZEN34, I solved the problem with a couple of button controller apps. I am now able to turn the Nano on and off with the ZEN34 as well as adjust the dimming level. Thanks to everyone for the help!

