Connect Global Variables to Dashboards

New Feature for Rule Machine Global Variables

With Release 2.1.4 there is a new feature in Rule Machine that allows Global Variables to be displayed and set from Dashboards. It also allows them to be used to link with other apps, where previously one would create a Virtual Switch device to cause the connection.

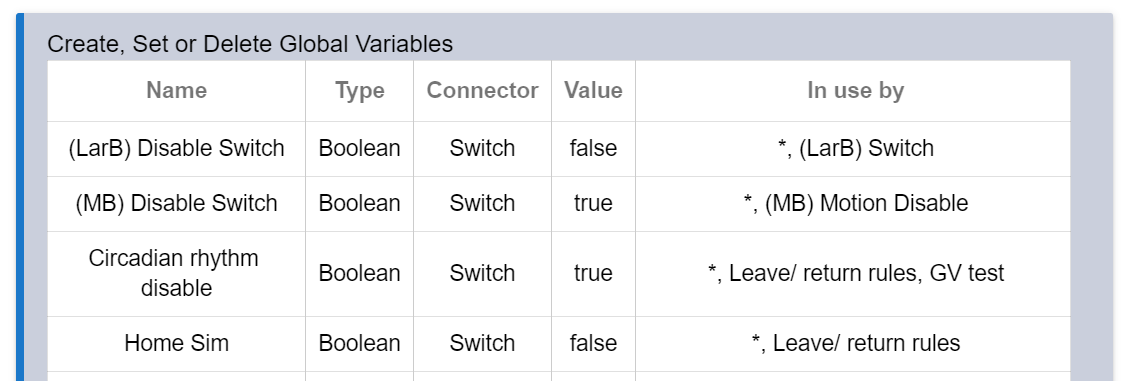
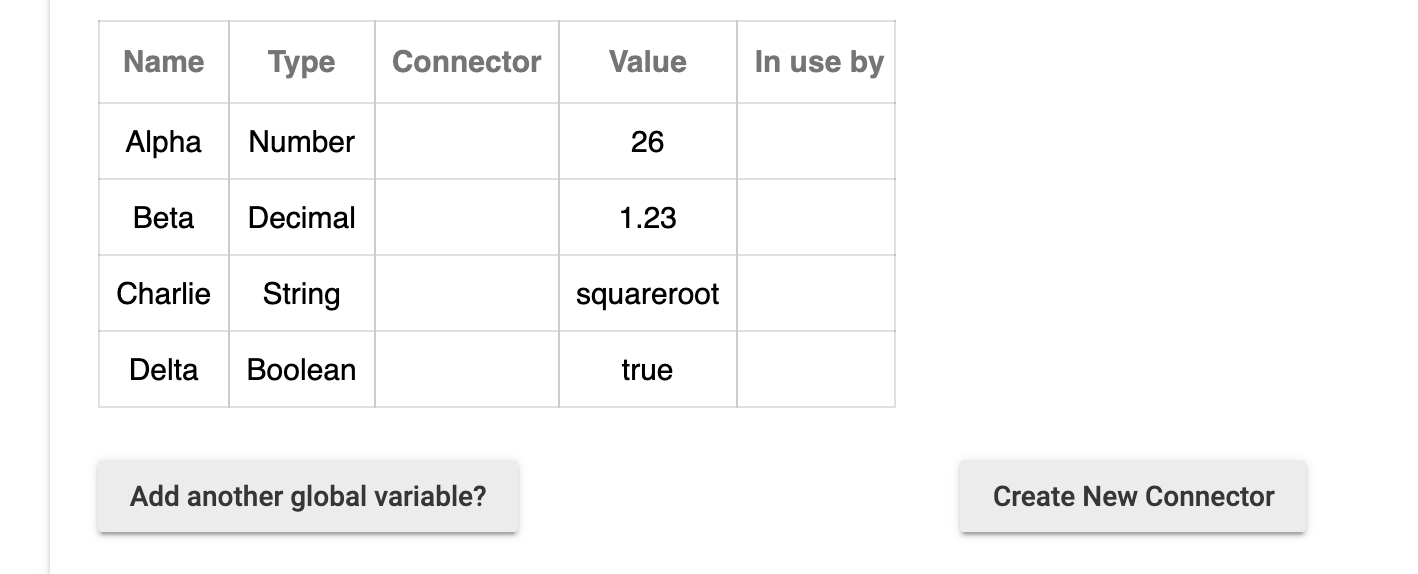
In the Global Variables setup section of Rule Machine, you will find a new column of information, Connector, and a new button, Create New Connector:

When you click Create New Connector, you will have a choice of which Global Variable to use, and a connector type to choose:

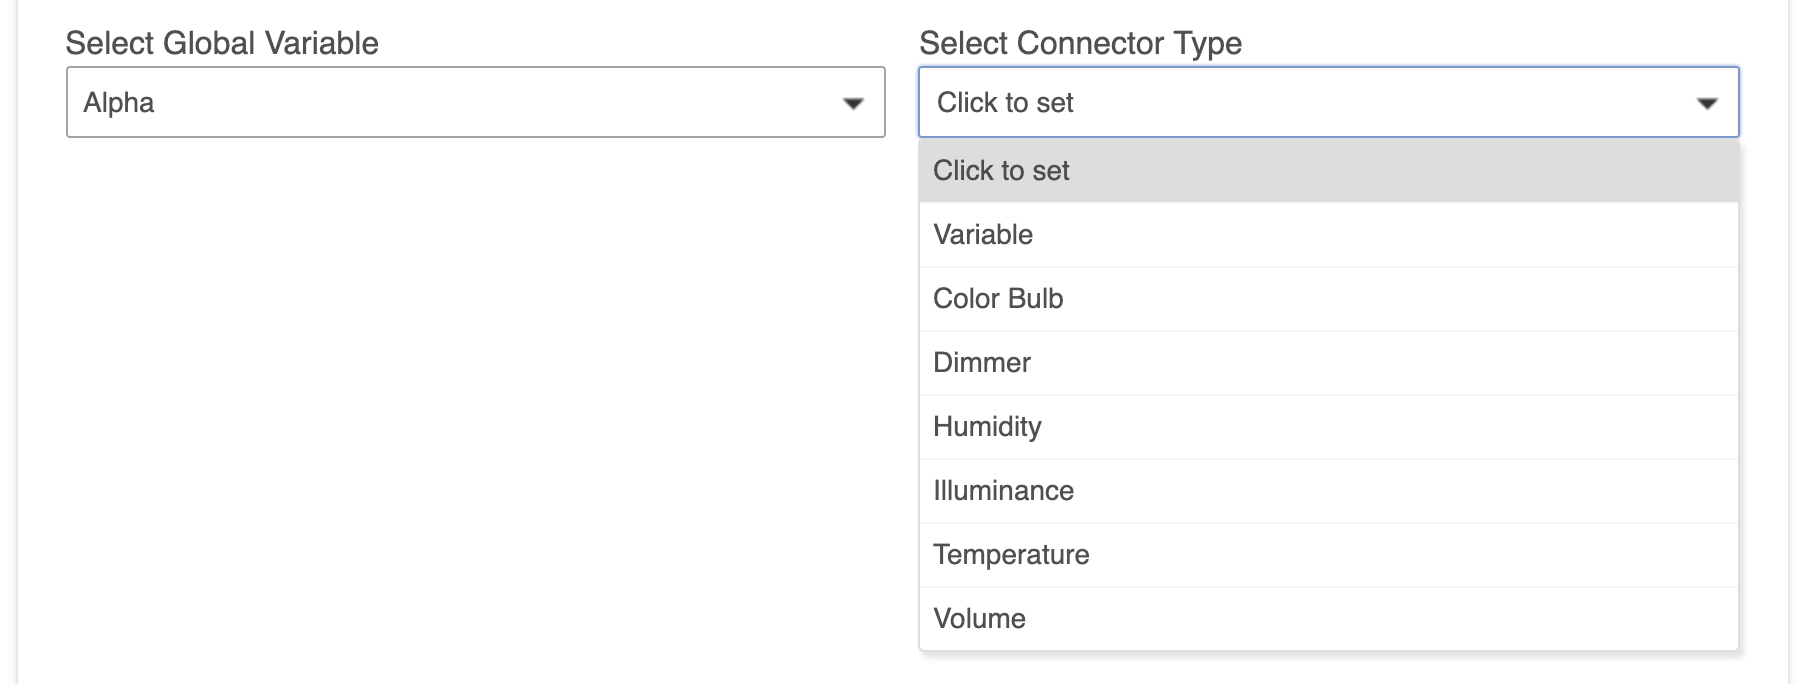
The available connector types vary by the type of the Global Variable. You can see above the choices for a Number GV.

For Decimal GV, the choices are Variable and Temperature. For a Boolean GV, the choices are Variable and a list of devices with two states, e.g., a switch is on or off, a lock is locked or unlocked. For a String GV, just Variable is available.

What happens when you make this selection is that Rule Machine creates a Virtual Device with the same label as the Global Variable. For the example above with Alpha, there will be a new device showing up in the Devices list called Alpha. All of these created virtual devices are components of a parent device called Rule Machine Connectors, so look for that in the Devices list. Each Global Variable with a connector selected will show an asterisk in the "In use by" column.

Here's where it get's fun: For each type of GV the first choice offered is Variable. If you choose that, it creates a virtual device that has an attribute called 'variable'. That attribute will be set to the value of the Global Variable. There are four new tiles for Dashboard called Variable Boolean, Variable Decimal, Variable Number, and Variable String. Using these tiles you can both display and set the value of the corresponding Global Variable.

Another option for a Number GV is to use connector type Dimmer. For this choice a Virtual Dimmer will be created, and using the Dimmer tile in a Dashboard the slider can be used to set the value of the Global Variable between 0 and 100. The same is true using Volume. Play around with different choices to see what is possible. These choices allow different tiles to be used depending on the meaning the Global Variable has in your rules.

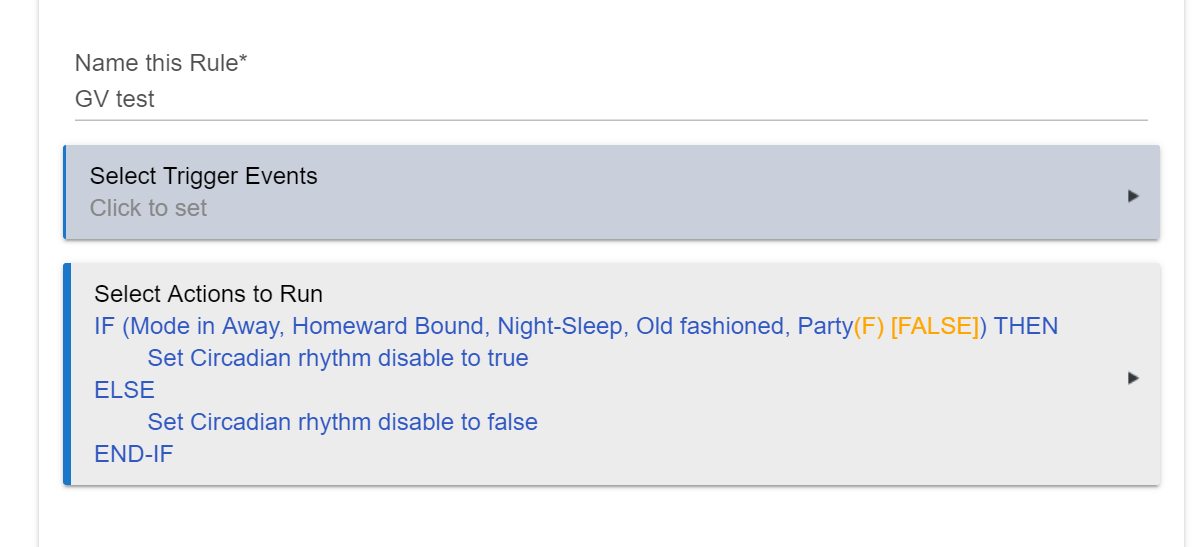
By creating a Virtual Switch for a Boolean GV, one can use that Global Variable to control the virtual switch. This means that another app that uses a switch to enable or disable could use that virtual switch. Thus, a rule could enable or disable the other app by setting the GV to true and false.

Finally, you can also delete connectors.

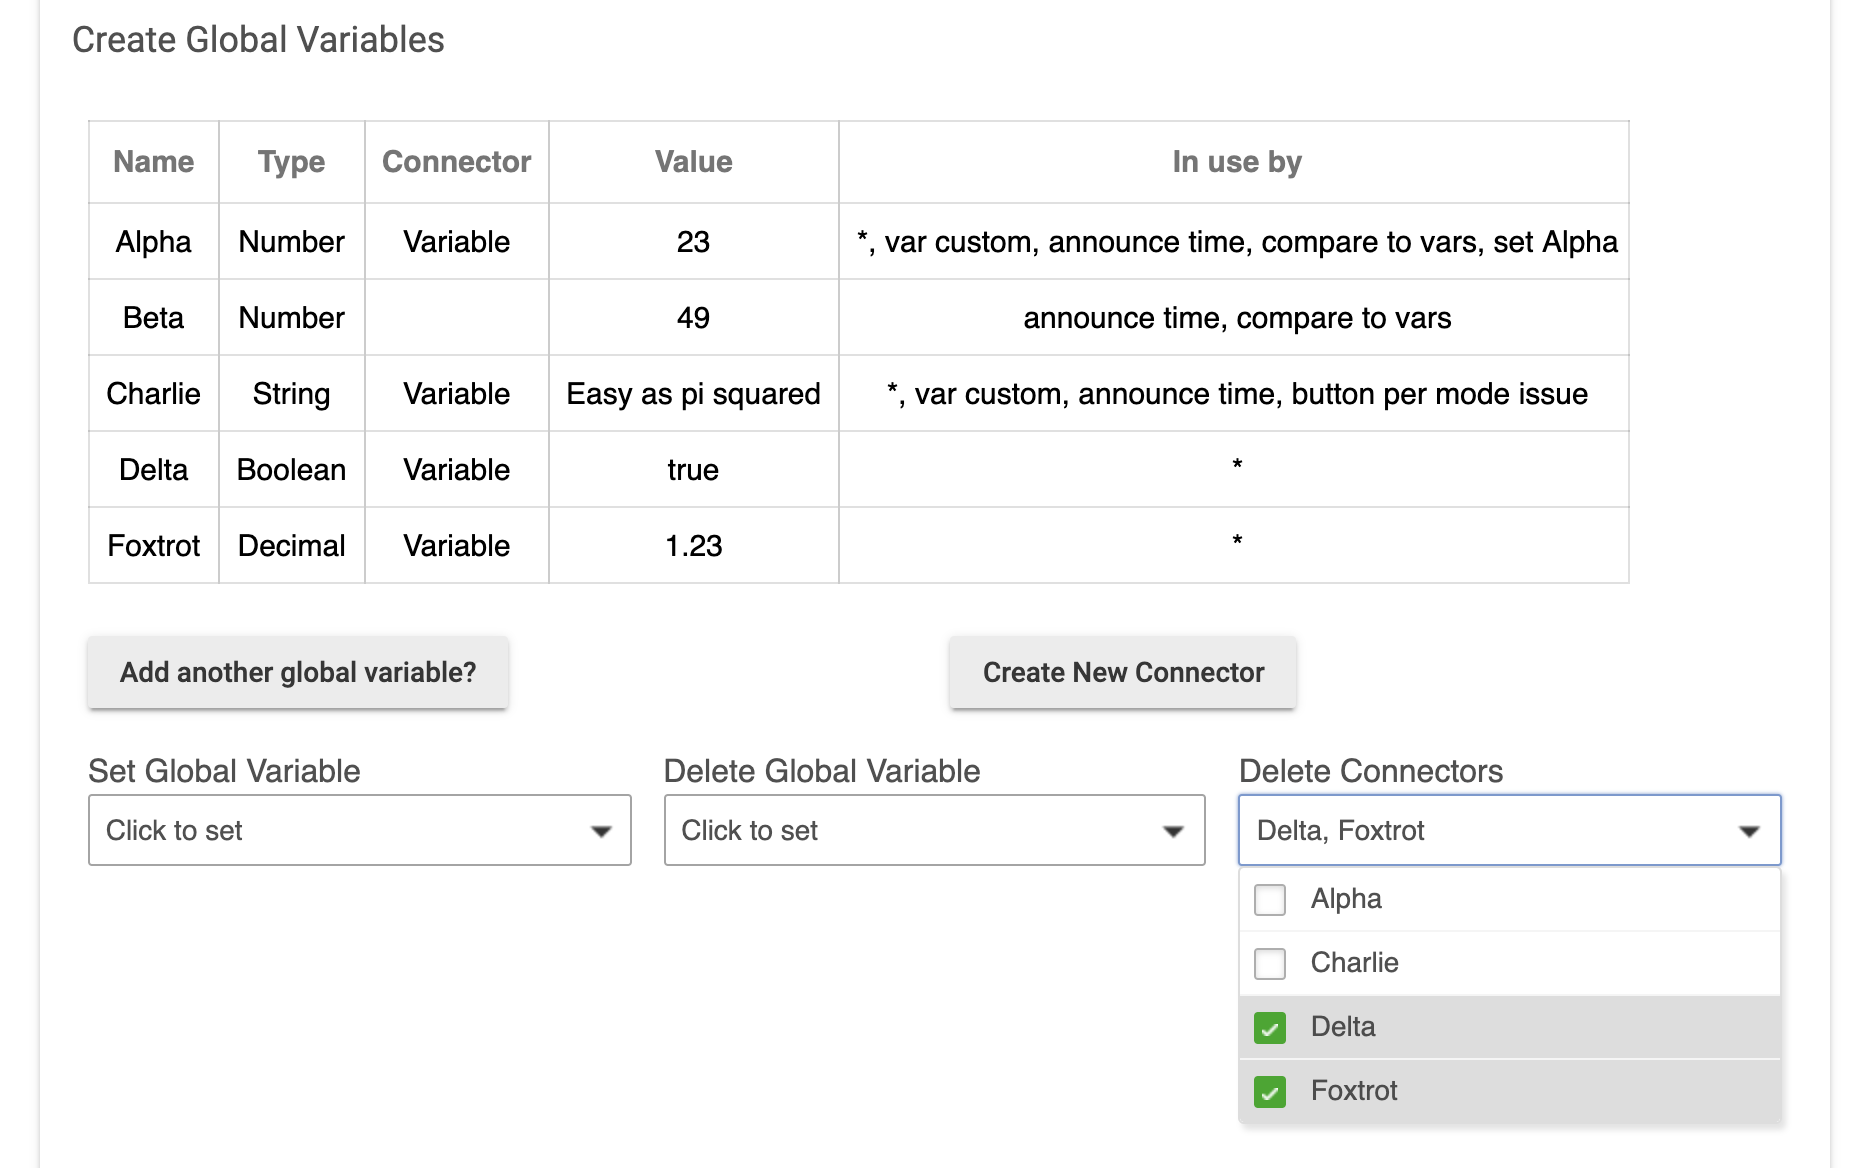
Be cautious doing this, as doing so will delete the virtual device associated with that connector. There won't be any warning about apps that might be using that virtual device before it is removed.

Displaying Global Variables in Dashboard

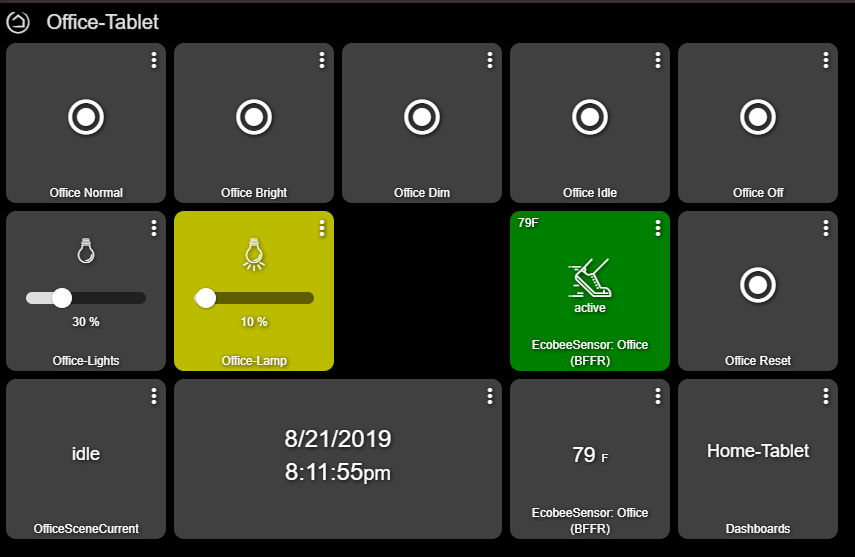
For a Number GV the value can be displayed with these tiles: Color Bulb (as Color Temperature), Dimmer, Humidity, Illuminance, Temperature, Volume or Variable Number.

For a Decimal GV the value can be displayed with these tiles: Temperature or Variable Decimal.

For a Boolean GV the value can be displayed with these tiles: Acceleration, Contact Sensor, Lock, Motion, Presence, Switch, Water and Variable Boolean.

For a String GV the value can be displayed with a Variable String tile.

For the desired tile, choose the corresponding Connector Type when creating the connector.

Setting Global Variables from Dashboard

For a Number GV the value can be set with these tiles: Color Bulb (using Color Temperature slider 1500 - 8000), Dimmer (using the slider 0 - 100), Volume (using the slider 0 - 100), or Variable Number (any value).

For a Decimal GV the value can be set with the Variable Decimal tile.

For a Boolean GV the value can be set with these tiles: Lock, Switch and Variable Boolean.

For a String GV the value can be set with the Variable String tile.

Example: Manage lock code from Dashboard

Suppose you want to create a lock code for a workman who needs access to your house while you can't be there, assuming you trust this person. By having a GV Connector setup in advance with a Variable String tile on a dashboard (called TempCode below), this rule would enable that:

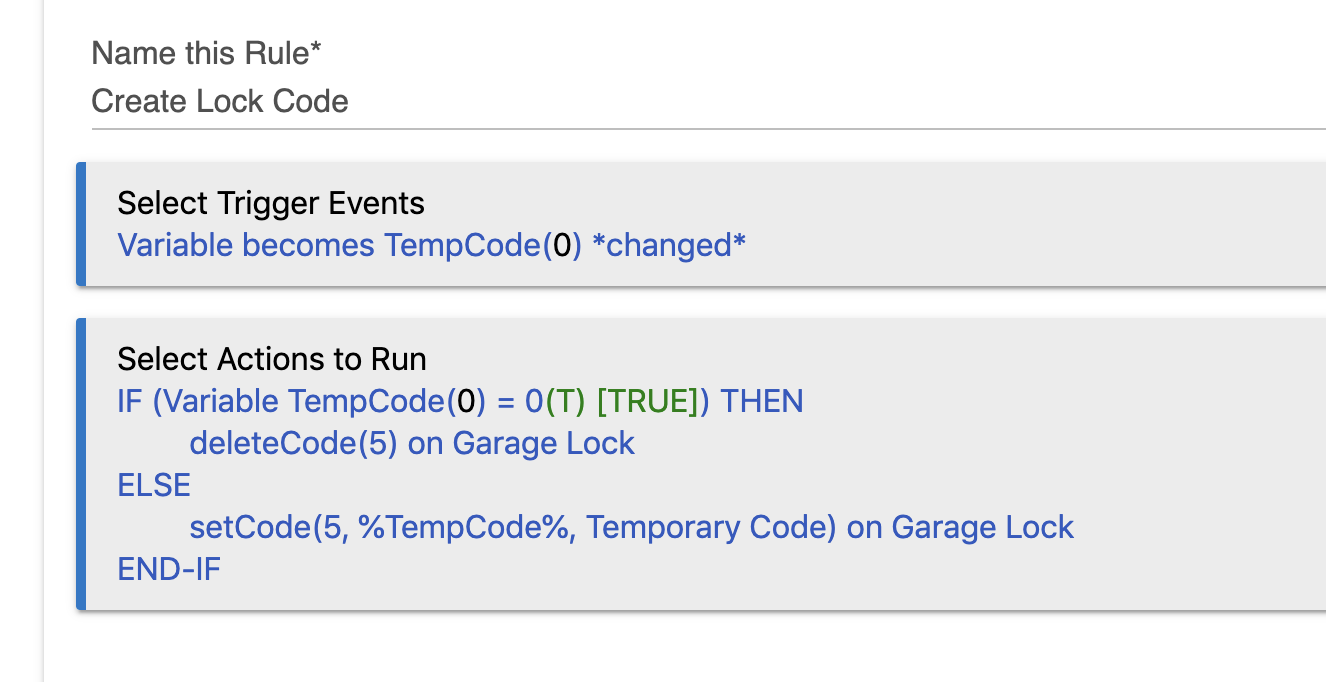
Both deleteCode and setCode are Custom Actions, where 5 is the position number of the lock code called "Temporary Code" (both arbitrary for this example). By setting the TempCode tile to a new lock code, that lock code would be enabled on the lock. To remove the lock code later, set TempCode tile to 0. TempCode must be a String GV.

10 Likes

Great feature just added the string to my room scenes to show what the current scene is. Much better than trying to create a mutually exclusive button "on" row. I'll have this working better than a Crestron controller that we have in our conference rooms at work :slight_smile:

3 Likes

AMAZING!!! Love it!!!

But you know how I show my love Bruce. :slight_smile:

When creating a switch connector to a boolean variable that was false, the switch was created with it's state as on. Toggling it off did not change the variable to true, it stayed false and they were now in sync, changing either the variable or the switch resulted in the expected behavior from its counterpart. Teeny tiny thing, but I know you're a perfectionist, like me, so I thought I'd point it out.
This is really going to open up some possibilities, especially when you link this with the maker API. You've given Rule Machine a cloud capable variable management system. Thank you!!! :+1:

Update: Any idea why adding a GV to a connector would cause RM to always evaluate the boolean variable as false in RM 3.0. Totally broke 5 rules by adding a connector to a boolean GV. I guess I either need to rewrite them in 4.0 or assign a new GV to them.

This is really cool and has a lot of applications. Thanks for pushing this out.

Thanks for pointing this out. As usual, I will see what's going on. It is supposed to put the switch into the correct state after it creates it.

No, I was not aware of this issue. Will investigate.

2 Likes

@bravenel not sure why this is happening but if i use the change GV it sets the conector correctly so true to on and false to OFF. But when i use it in a rule i get this

it always sets it to ON even if it fires false

set up a simple test

I reported the same thing to support last Saturday.

Interesting. What does it look like in the RM main page after you run that (be sure to refresh page).

also goes true :thinking:

Please help me out. Is the way it is shown in Rule Machine right or wrong?

https://community.hubitat.com/uploads/default/original/3X/6/b/6b9c2487a5128588b8dbd06d1172421e5ac44dc5.png

fires false and goes true so wrong.

Finally tracked this bug down. Boolean connectors were broken. All fixed now; will be in the next release.

2 Likes

When I create a number global variable Connector, the device type is automatically listed as "Virtual Omni Sensor." I'm unable to change it to any other type. Is this correct?

Yes, it must be that driver. No other driver will work. And, yes, you can't change it.

Is there a way to allow rules or enumerations for the String (or number) editor with this Variable functionality @bravenel ?

My use case is the need to define a Dashboard control that allows the user to select from a custom set of modes. In this case, its the operating mode for a pool heater and the enumerations are dynamic based on the configuration fo a given installation.

I have these defined in an Attribute on the device and have code to limit what options are available, but there does not seem to be a way to allow the user to change this attribute directly from a Dashboard - those displays are all read only.

Absolutely Awesome!!! I am finally able to (in essence) create a password protected tile to disarm my alarm. It works great. I did not like the HSM tile that is built into Hubitat. Pressing it opened up a busy menu that was very hard to close because the [x] is so small. Now I have a simple tile where you enter the code and the alarm disarms. Awesome.

As you can see, 15 seconds after entering the alarm code the tile changes back to read: "Enter # - "
I did it in two rules cause I am no expert in RM and sometimes the logic is hard for me to work out. If anyone knows how to do this in one rule that would be great. Awesome, thank-you for this feature!!!
I just changed my first rule to deal with incorrect code entries, was worried that it would start an infinite loop but my logs look like everything is o.k.

All you need to do in your main rule is add cancel delayed actions to the 1st line under the IF then
Then before the else add the disarm to 'enter # with the delay but click the slider labelled cancel. Is the press to disarm doing anything else or is it linking the rules?

Dude, that is awesome.

What did you do to get the "Temp & Battery" multi-lines tile? :thinking:

I used a user created app called: "Supertile", the user that created it is called Cobra. He has removed access to his github repository, don't know if he will be bringing it back or where you could now find it. I think some other app developers were not respecting his work and possibly stealing his code.

I would try: TileMaster another user created app that I imagine could do the same thing.